
*** THIS POST CONTAINS INFORMATION ON BUILDING A MAINS RF FILTER – IT IS NOT AN INSTRUCTION. IF YOU BUILD THIS IT IS AT YOUR OWN RISK ***
So I never knew just how much can be done to reduce QRM and where it comes from ! Having bought some ferrite rings and having mixed results, I found this excellent site from M0NWK who thanks to his equipment and setup can really demonstrate how the chokes work, heres the site which also includes a link to the video here
My build was slightly different, as I cant wire in a main tripper, I can wire in an extension in from an existing outlet, I was pleased to see that someone had already asked this question on M0NWK’s page.
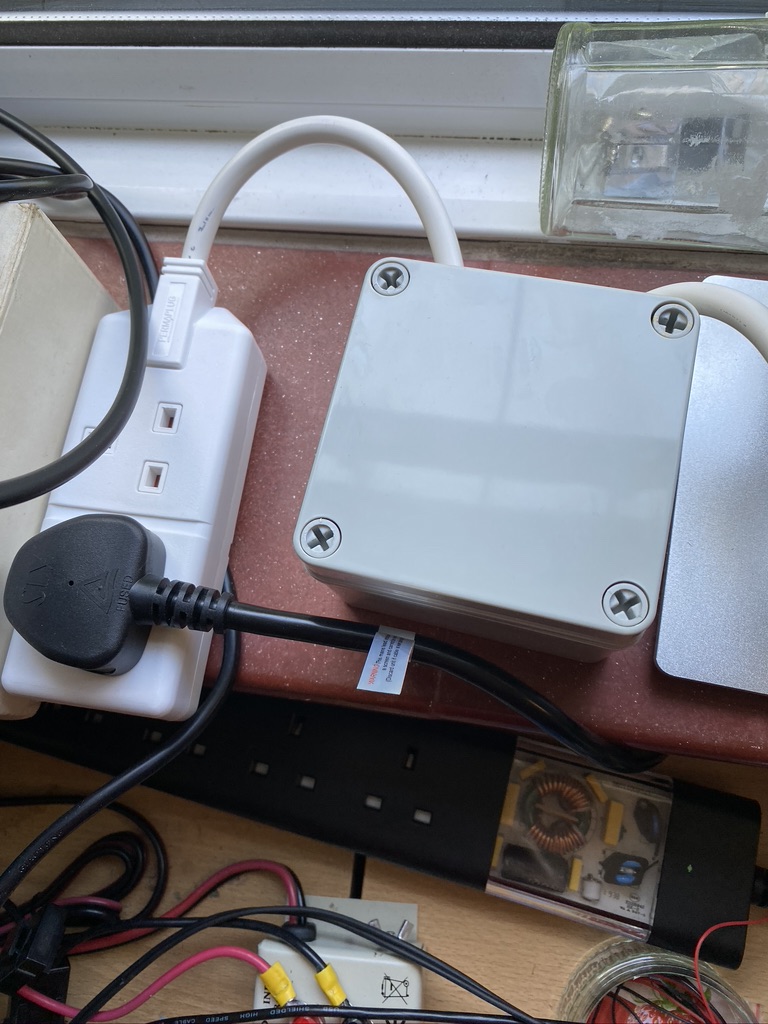
I kept the same ferrites as M0NWK but a smaller box and bought a mains filter to which the ferrite-wound would attached.
Heres my part ilst, I use Amazon Prime alot because things arrive quickly and via decent couriers, if I wanted to get this done in less time I could of sourced cheaper, for example the 6 Way Mains Connector can be bought from Richer Sounds cheaper, but I dont know how quick they deliver or who they use.
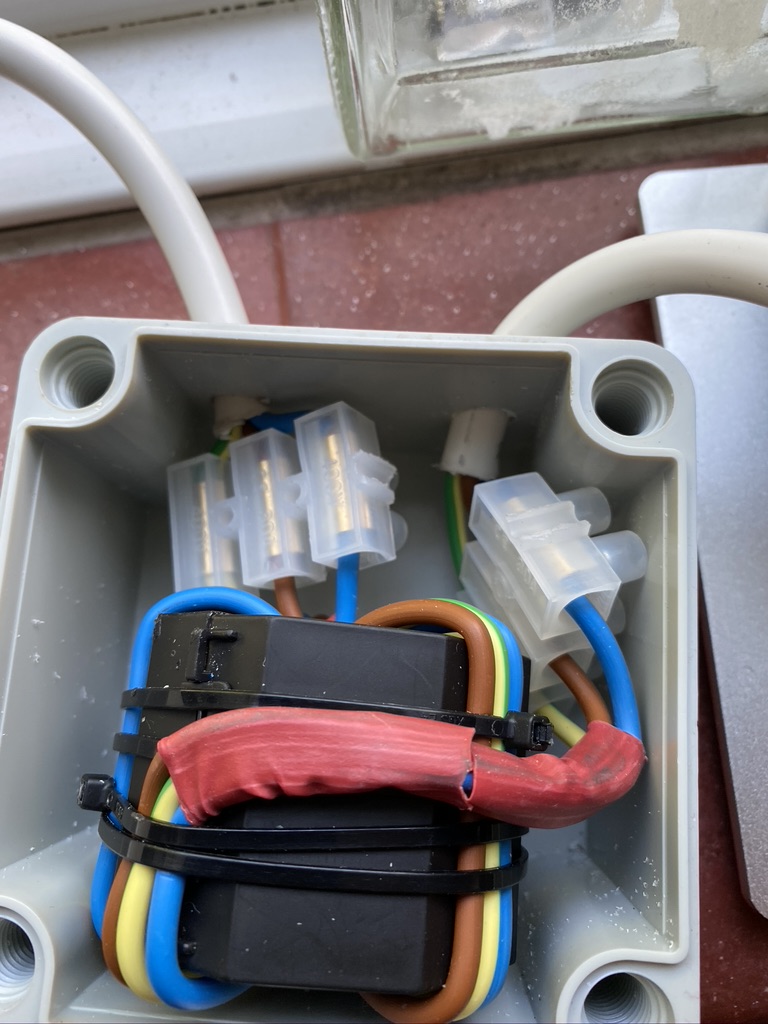
I started with stripping back some of the 3183Y Flex to bare out the live, netural and earth wires to wind around the ferrite. The heavy gauge of the wire made this quite a challenge, certianly being able to open the ferrite made a big different in creating a well fitting wire to the ferrite. I used cable ties to keep the ferrite and the wires stable.
The Terminal block comes in a massive pack, but its really good quality and will undoubtedly have many uses in the future, so worth having around. I attached these to the ferrite and wires, but not before attaching heatshrink to the wire going into the terminal. This not only looked good but kept the cable tidy.
I then set about measuring the thickness of the coax to make suitable sized holes into the box. I went in thru one side and so the mains feed and outward to the filter strip plug, nicely gapped so the terminal connectors in the box had a good seperation from them.
When drilling the holes I used a regular drill, but fettled the holes with a small round file to get the edges smooth and remove all the excess produced from the drilling.
Before plugging into expensive radio equipment i tested on a B&Q light to ensure it would turn on and off/and light. (The lid is back on at this point) As this was my first time using this I kept one hand in my trouser(probably short) pockets, but the lights came on and no problems. I then set about putting it into the mains outlet and to connect the additonal filter
You will see the parts list contains 2 ferrites, the 2nd one went onto the back of the radio power supply feed directly
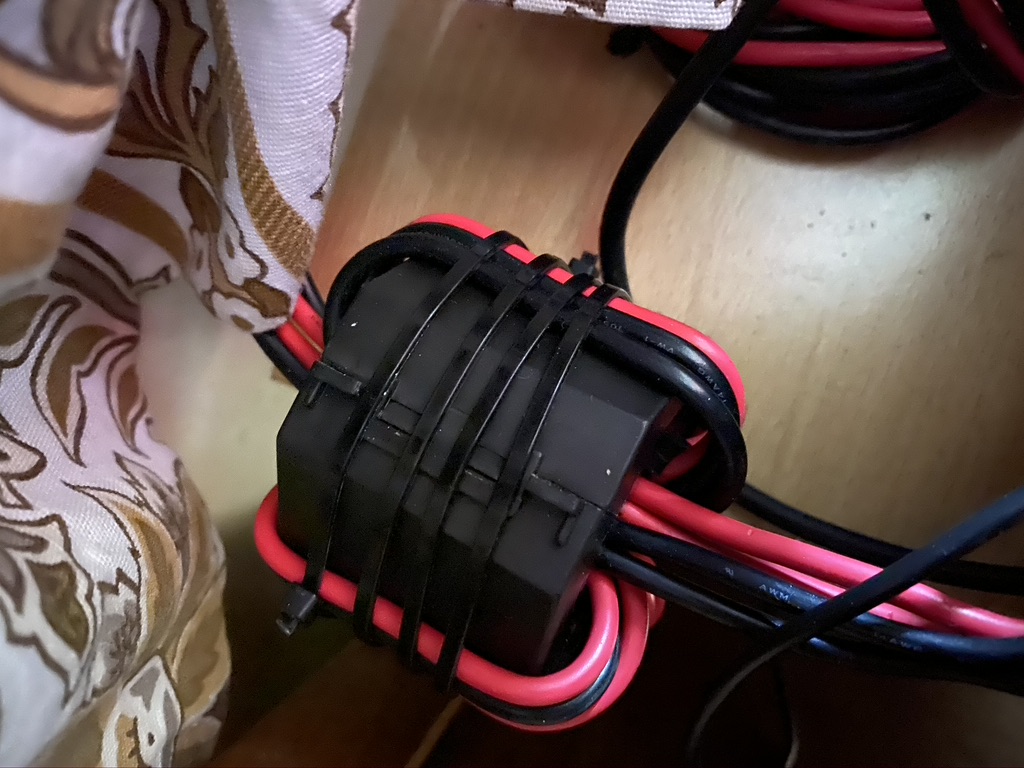
As this is 12V DC and whilst can give a nasty poke, a box isnt necessary here.
I went back to the LW frequencies that had previously been plauged by a ‘buzz’ that had now completely gone ! I went onto 80m and 40m and weak stations were getting thru and loud stations were BOOMING.
Whilst this was a fair amount of work, I’m satisfied it has helped reduce my QRM further.