
feed coax to get center point 
assessing the area for safety 
measure the lengths for guy rope peg locations 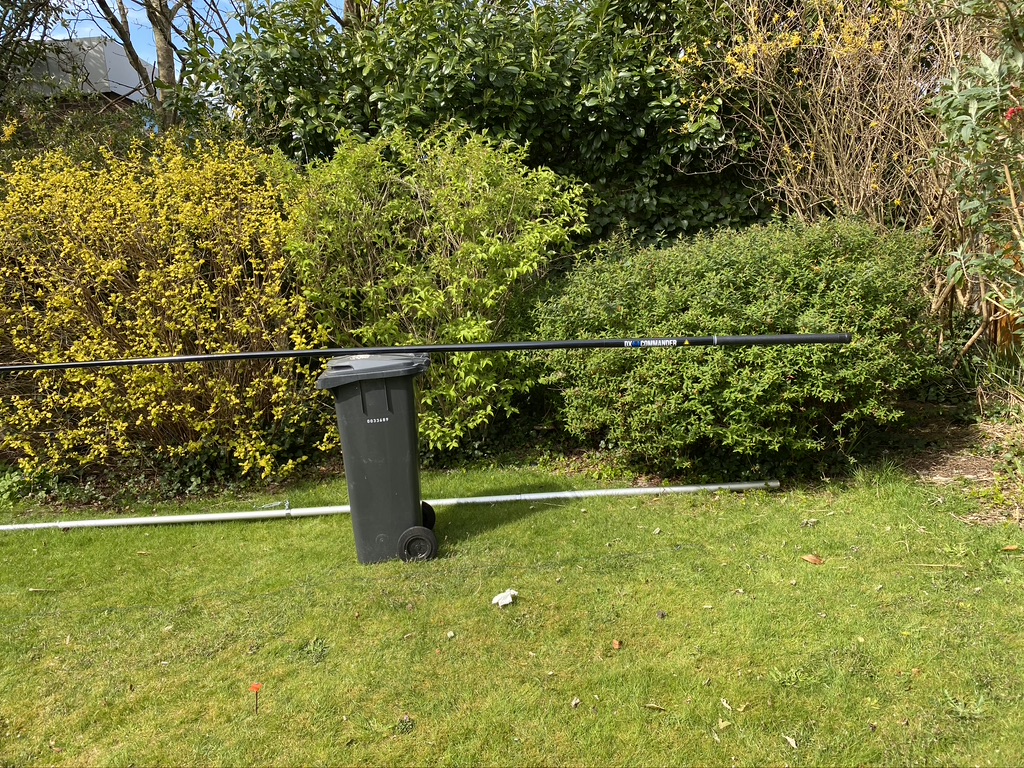
dx commander – ready to start
So day two of the DX Commander started with a few more things to build/cut indoors (radials & pipe clamp aqua tubing) then it was off outside to the garden. It is a really glorious day outside, and Covid 19 is still with us. I feel very lucky to have a nice garden to work in and do my amateur radio pursits !
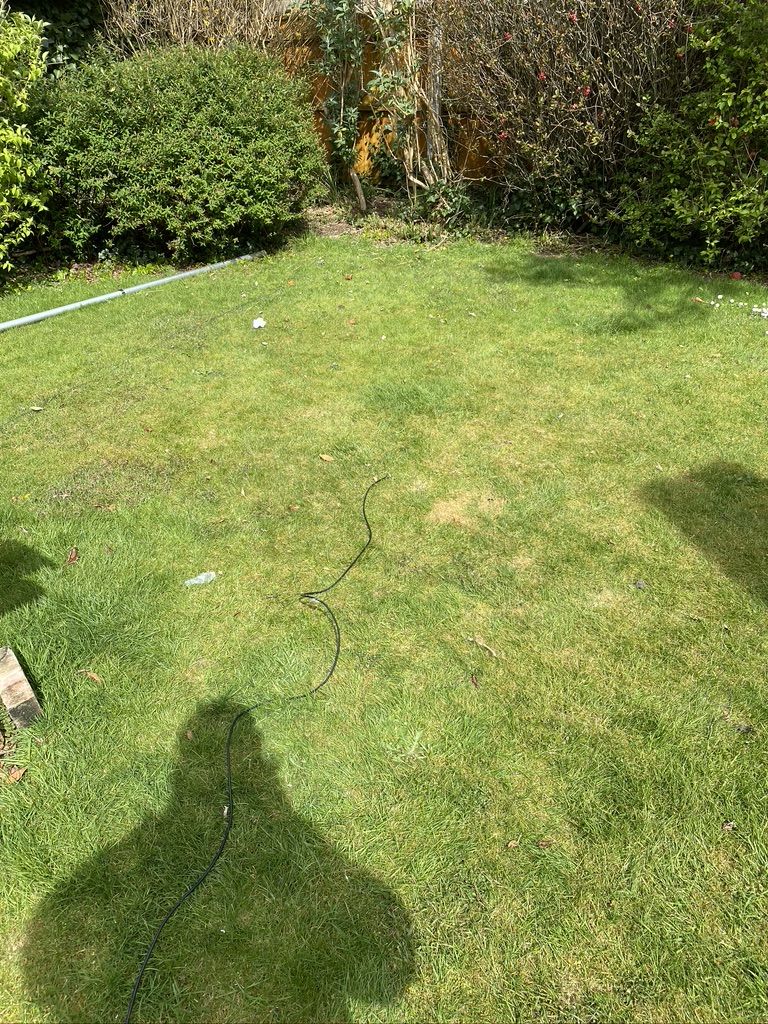
I started off with taking the coax from the ‘shack’ to rougly the area I wanted to install the mast. At 30 meters long, there distance from the shack on ground was good, and once roughly in place could do a saftey assement before going further (overhead cables, what-if scenarios, area is clear/tidy already, aware of other mast/guy ropes).
Once I was happy that I could work safely, i then set about putting the guy rope stakes into the ground, in this case some heavy duty tent pegs that I have used both on my buddipole and rather large 6 men tent (this should be going up this week to help with us going outside safely). It was time to unfurl the full length of the dx commander !
ground 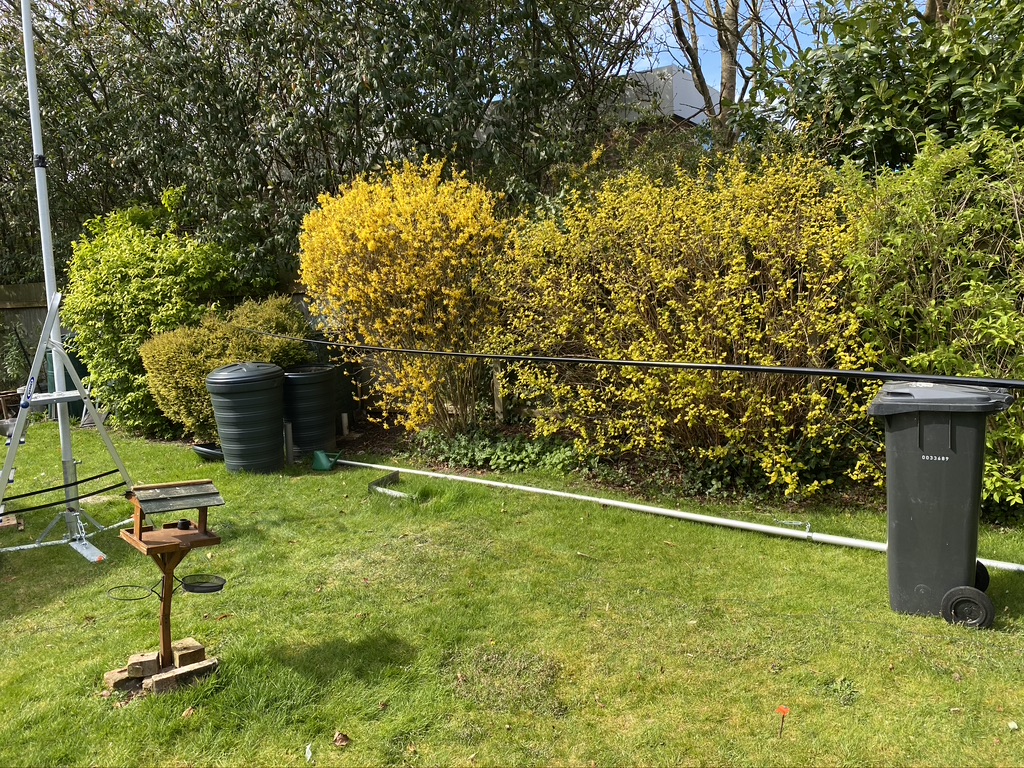
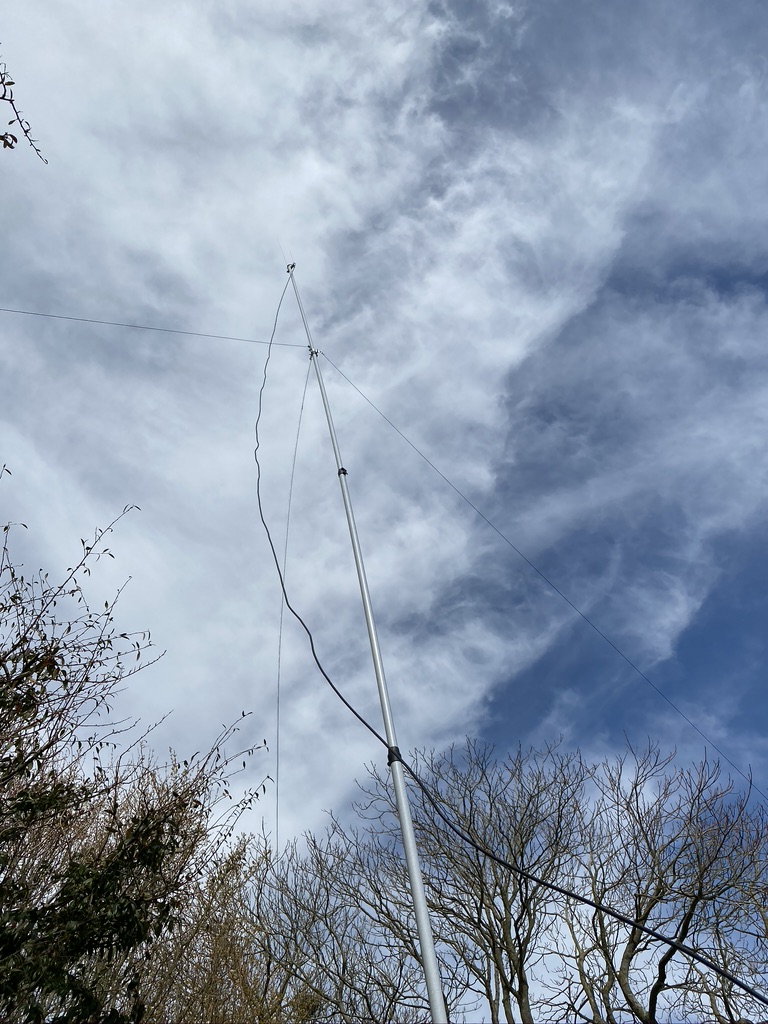
full length – 10 meters of pole 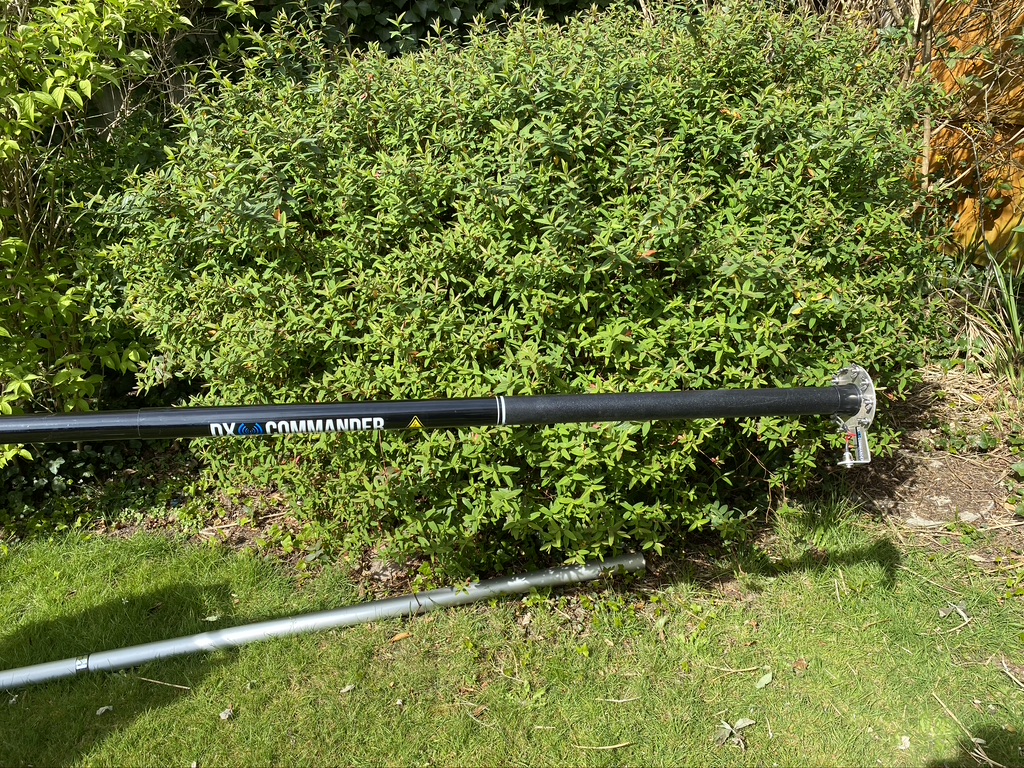
a very nice base and good saftey sticker 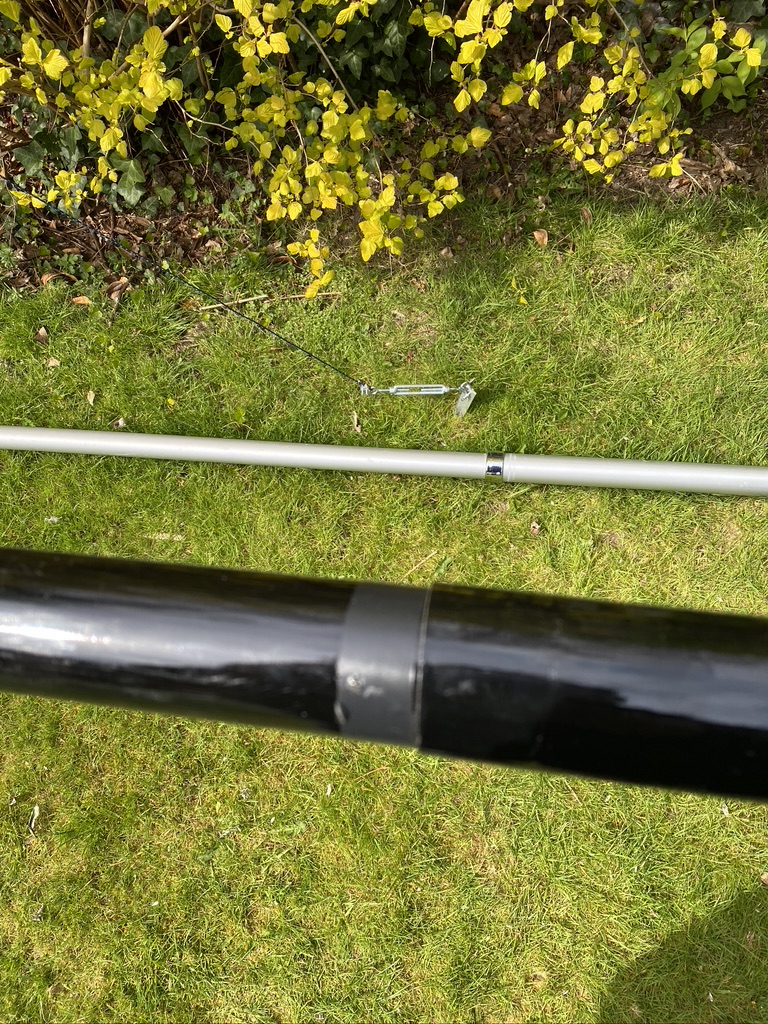
applying tape to stop water ingress
Once the dx-commander was extended and lock, and it is a very good lock action with a sturdy ‘twist’ on each section, i put electrical tape on each join just above the lock. I think this has two functions 1) stop rain water from getting into the lower section 2) protect the fibreglass pipe from the clamps.
I used a wheelie bin and water vat to support during the build – to start with just putting it on was good enough, later i put some bricks loosely around the tail end (base) to help.
Installing the ground and feeder pipe 
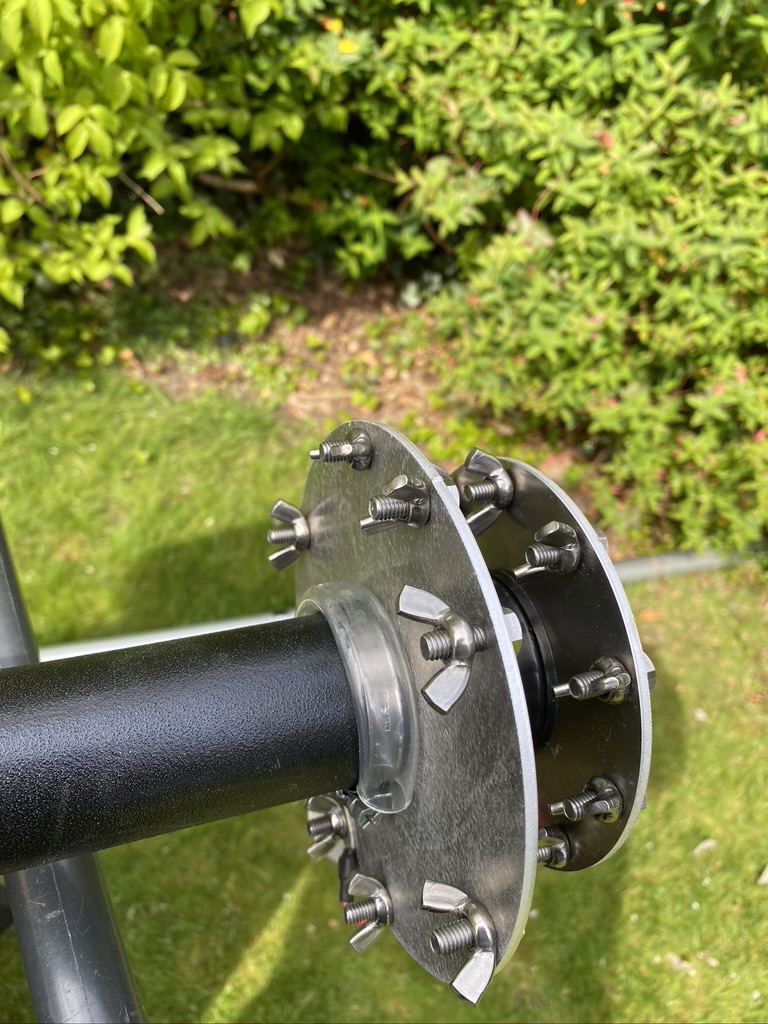
The guying plate 
jubilee clip in position 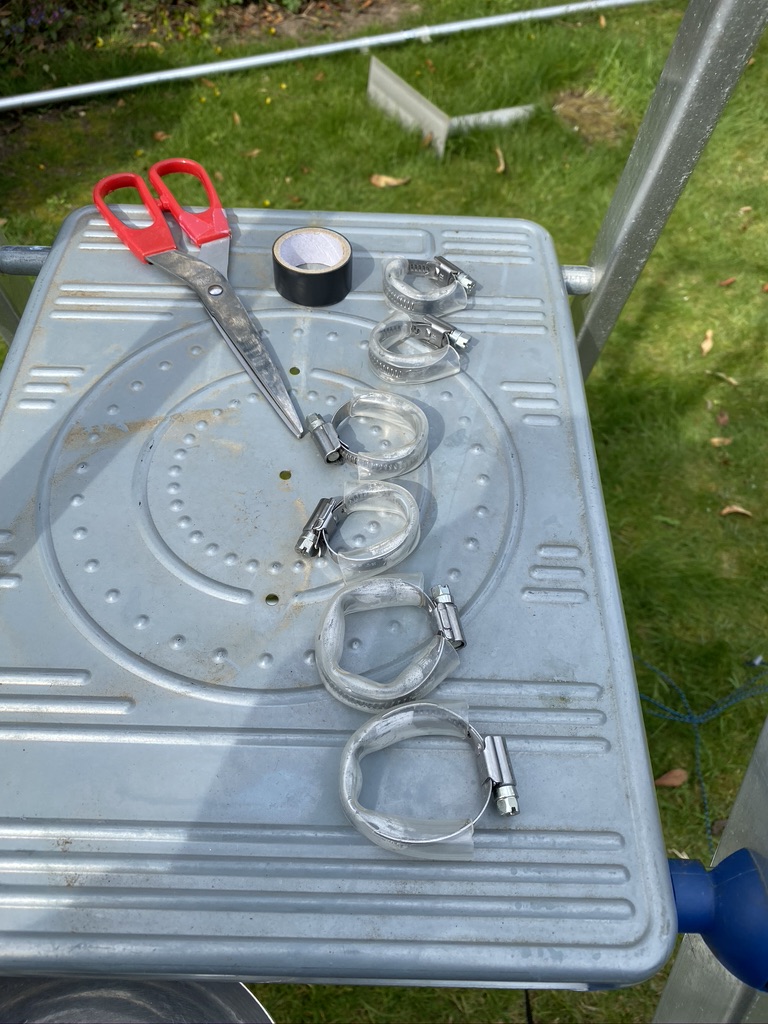
various jubilee clips 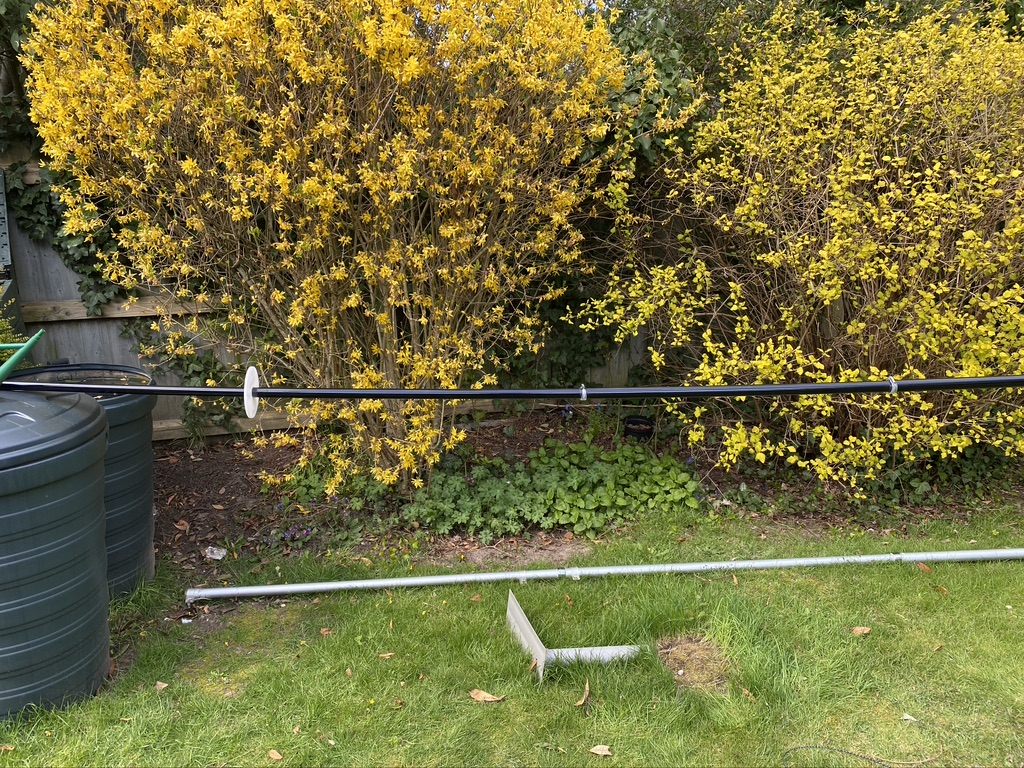
clips in place 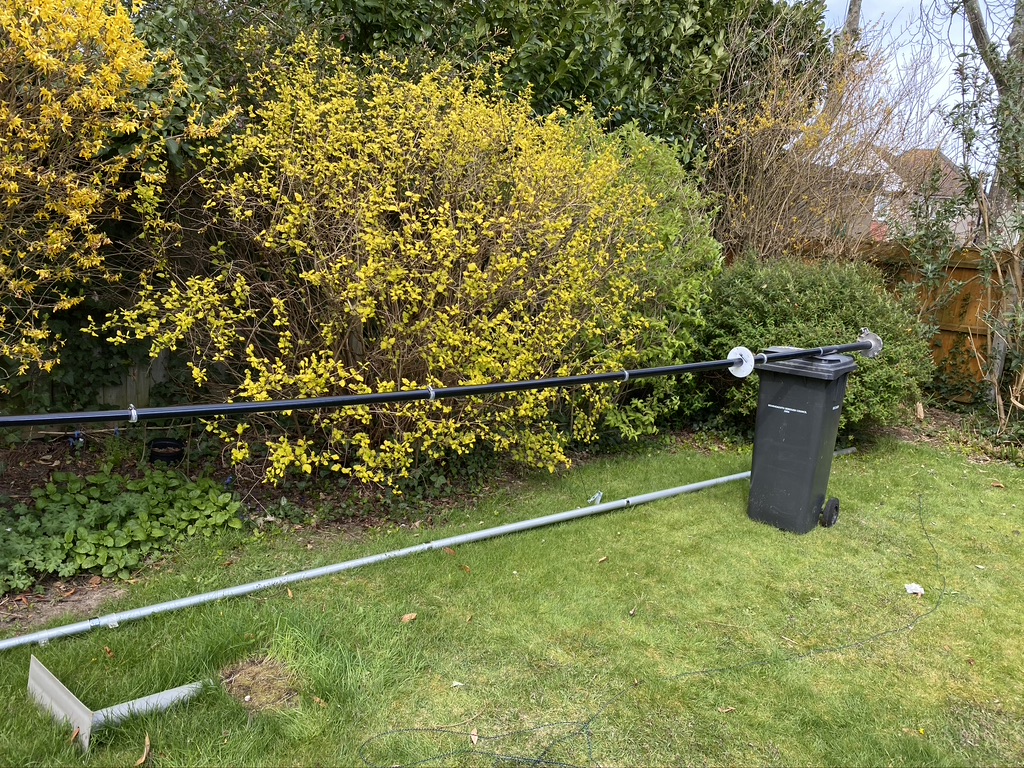
observing 2m/70cm with a gust 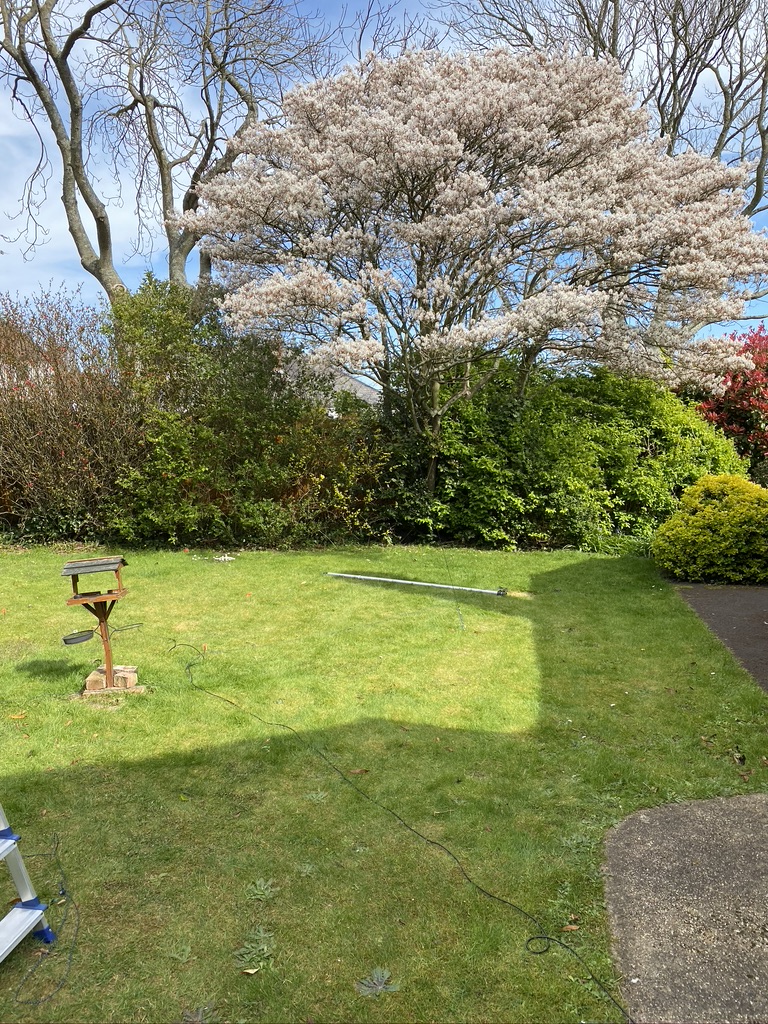
loving the garden
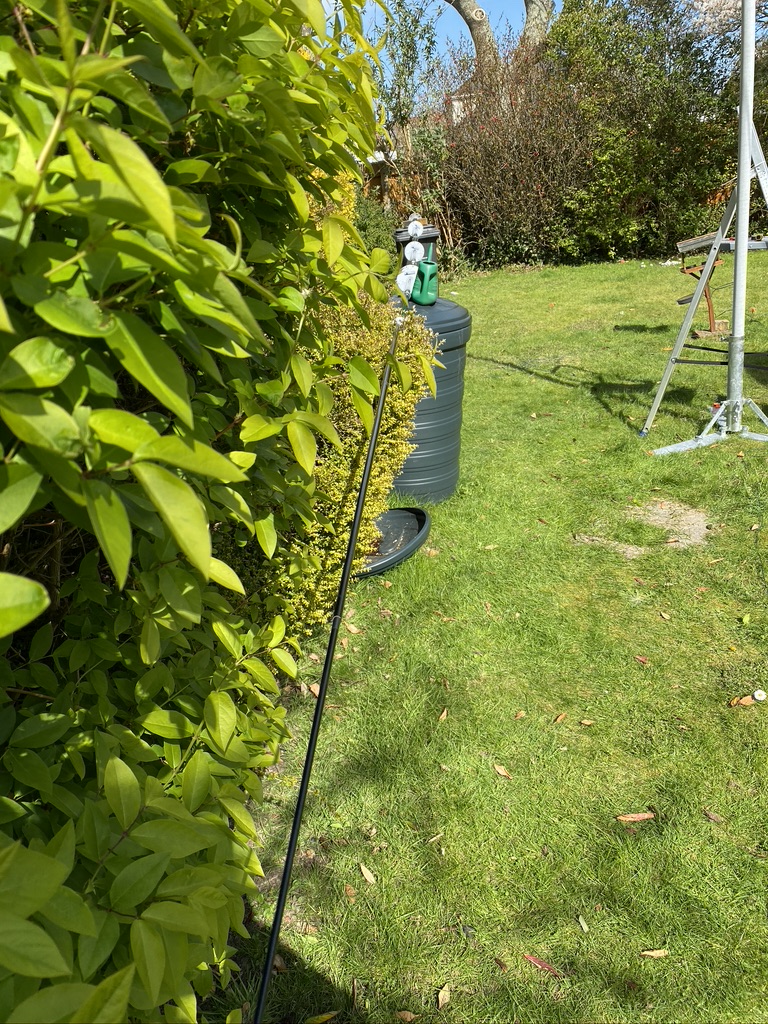
I then set about attaching the plates for connecting the radials and verticals. This simply screws onto the bottom. In hind sight I should of labelled the initial feed points for the verticals as well, maybe something I will do post-install when i start tweeking and get basic operating working.
I had pre-made the jubilee clips and soaked them in warm water. Whislt the lengths are given in the instructions, i just went for broke and made them so they fitted, i was happy with the results ! On a personal note, i really dislike jubilee clips, they are fiddly and usually try to find alternatives, in this case tho they do look to be the right part for the job, with the tape and aqua tubing (good idea Cal!) and careful tightening would be ok.
With the pole extended and it starting to take shape, i had a break and enjoyed my surroundings, including the breeze and how well the 2m/70cm mast was doing, it really is a great mast (still need to write the write up of that…) The garden is starting to come alive with srping and the warm weather, it really is a lovely place to relax.
installing the guiderplates 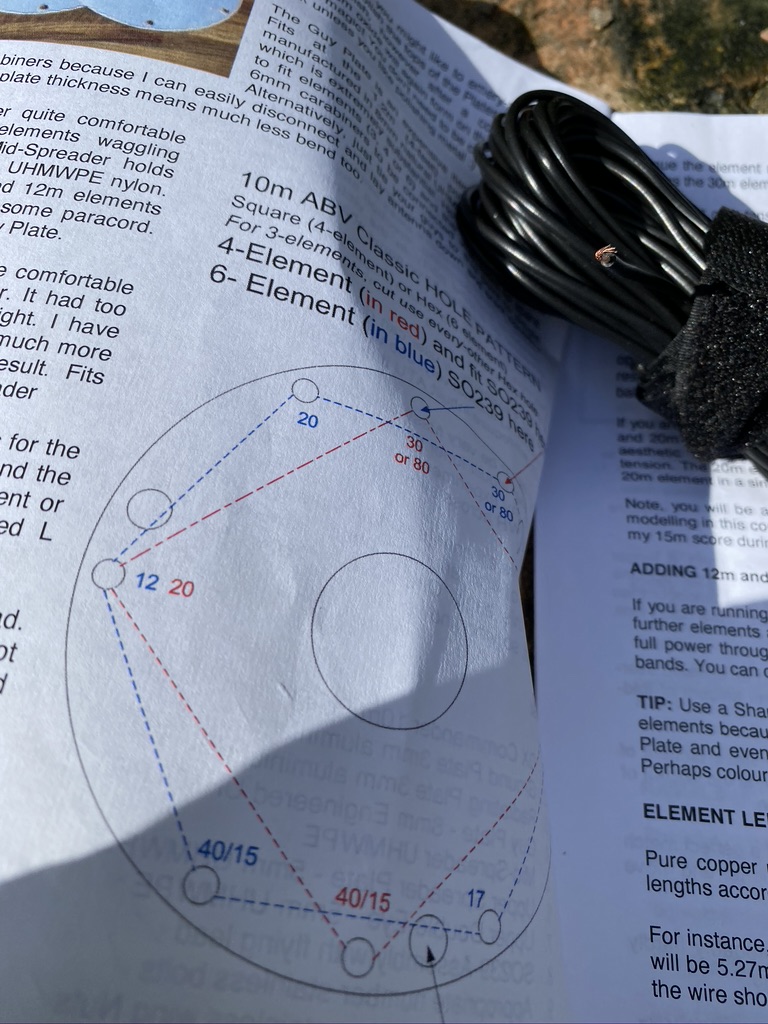
verifying the locations 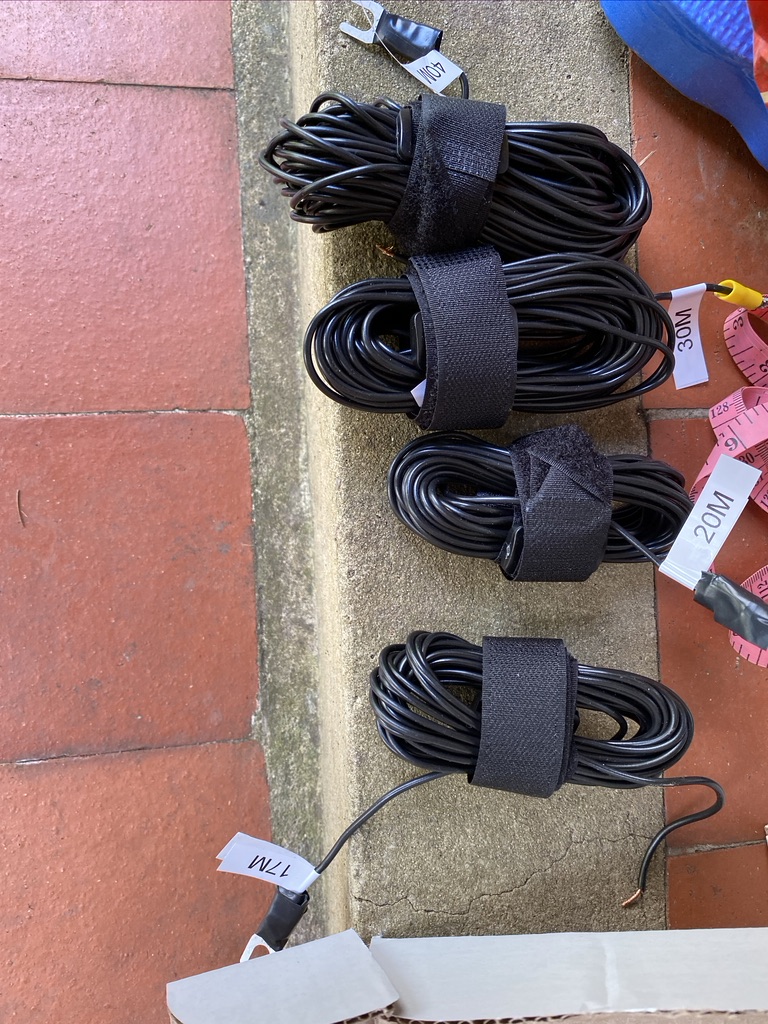
pre-cut lengths 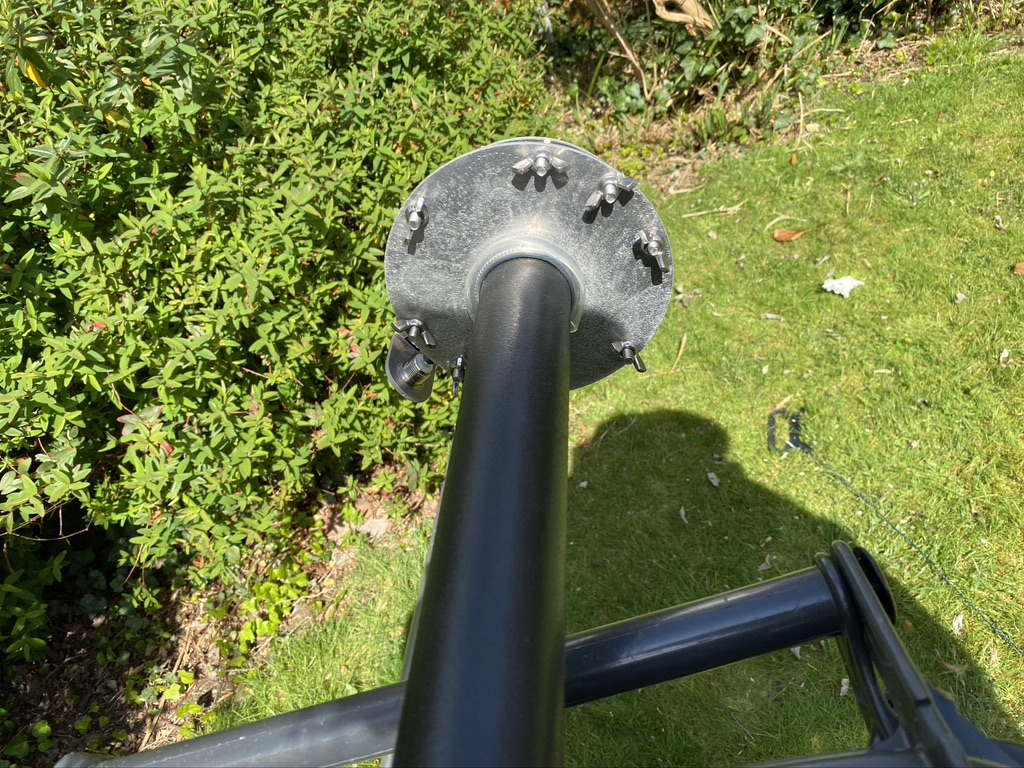
really should of labelled… 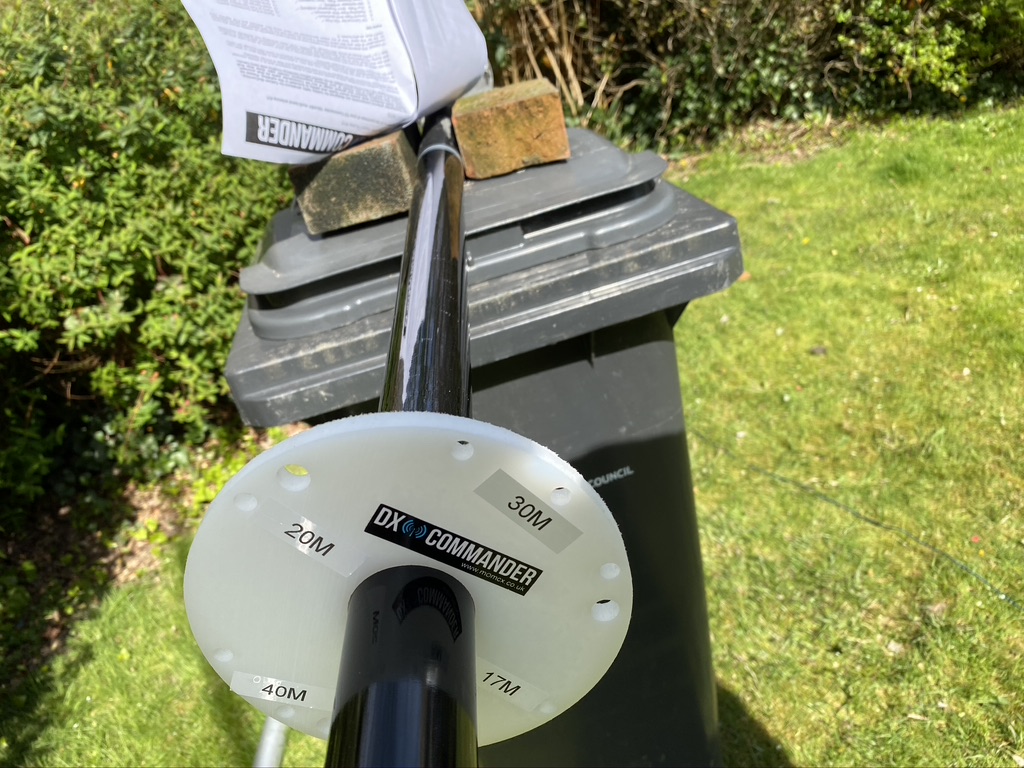
guying disc 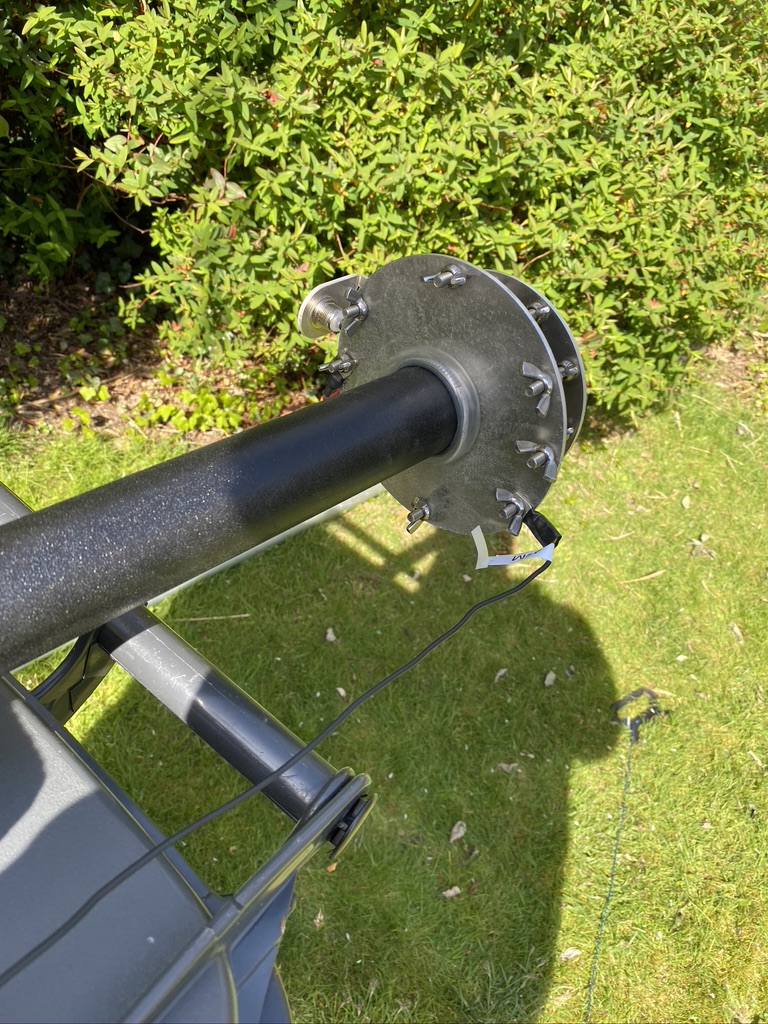
the first vertical! 
more verticals! 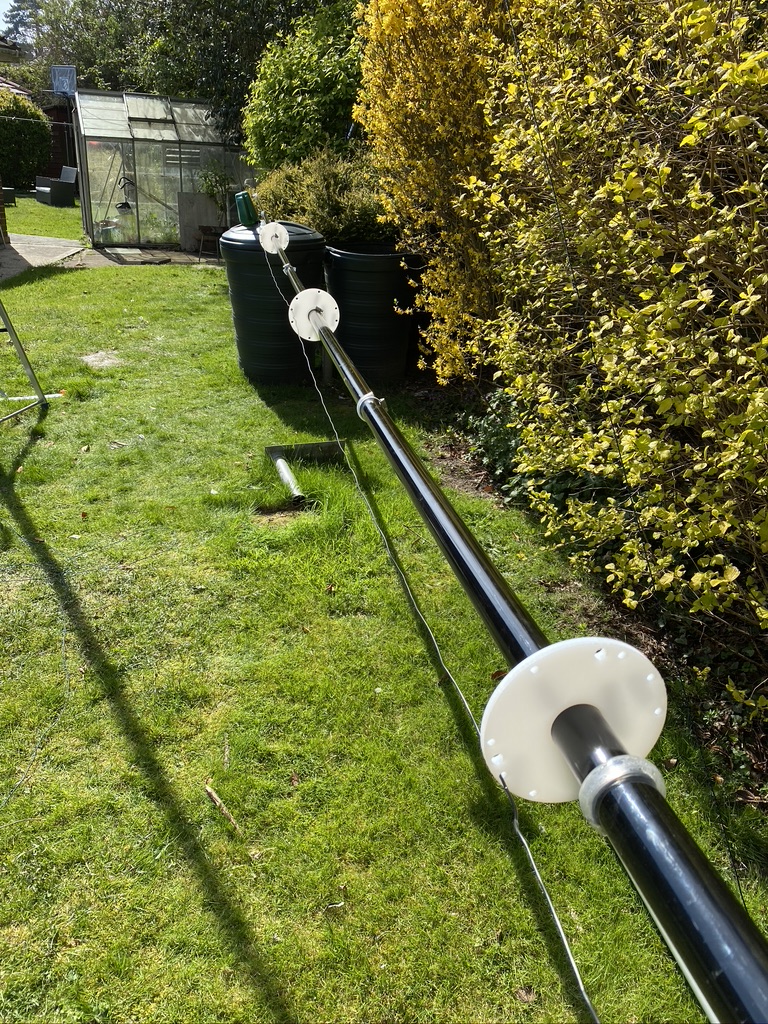
we are getting there! 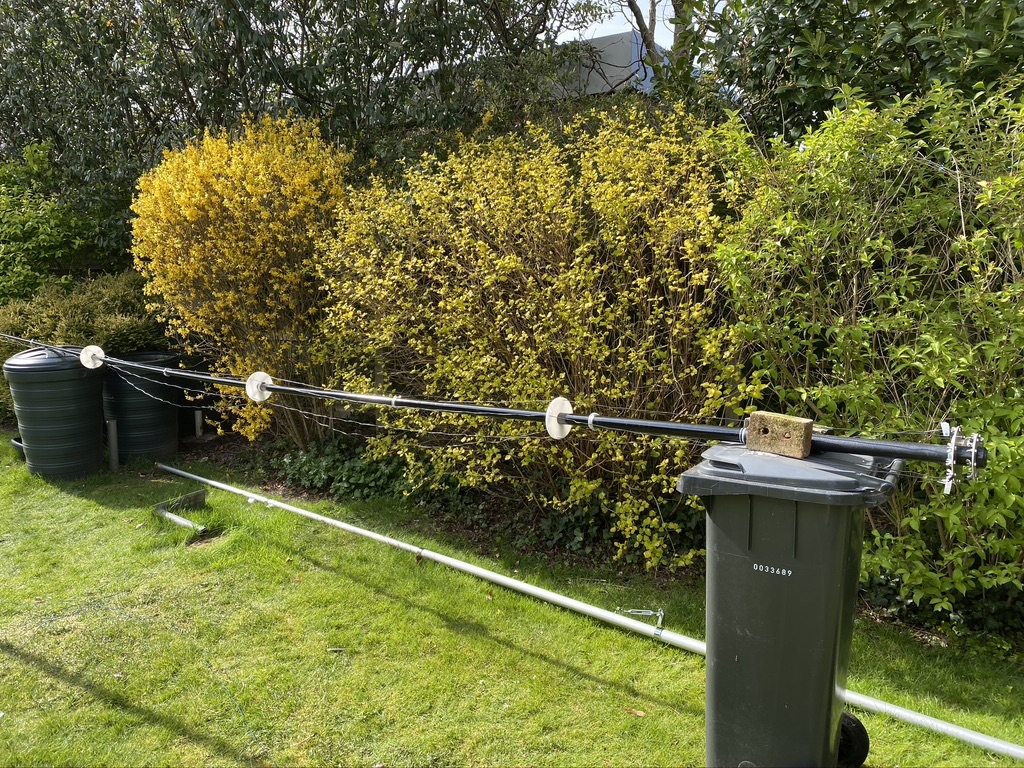
now with added brick
It was now time to start installing the verticals – whilst I had taken the time to label the guide, i hadnt done the plate, but the documentation is very good, so i refereed one more time to my print out. I had the lengths already pre-cut and labelled, although I would find out later on the ‘M7ALU wire cutting factory’ QA processes needed some review !
I feed 40m and 30m thru first being the longest and using electrical tape as needed to keep it in place ‘just for now’. I did have to undo the jubilee clips and put the guiding plates on correctly once more, but no big problem there ! I added some bricks for support to (try) stop the mast rolling off the bin.
scribblings 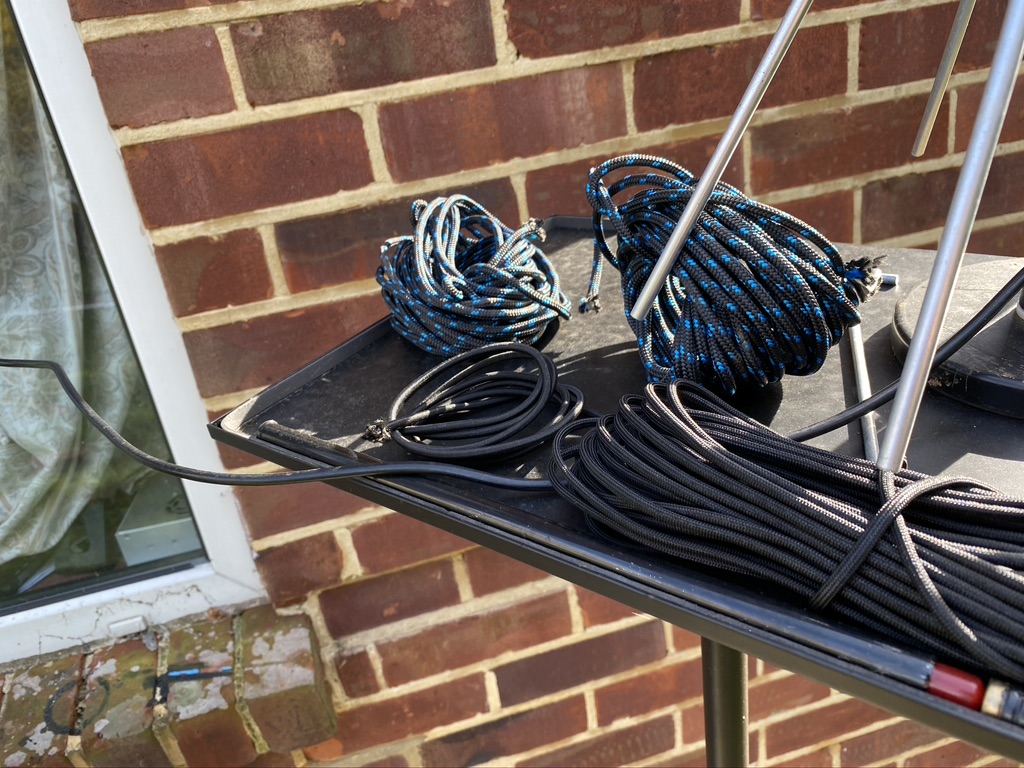
Looking for missing cable 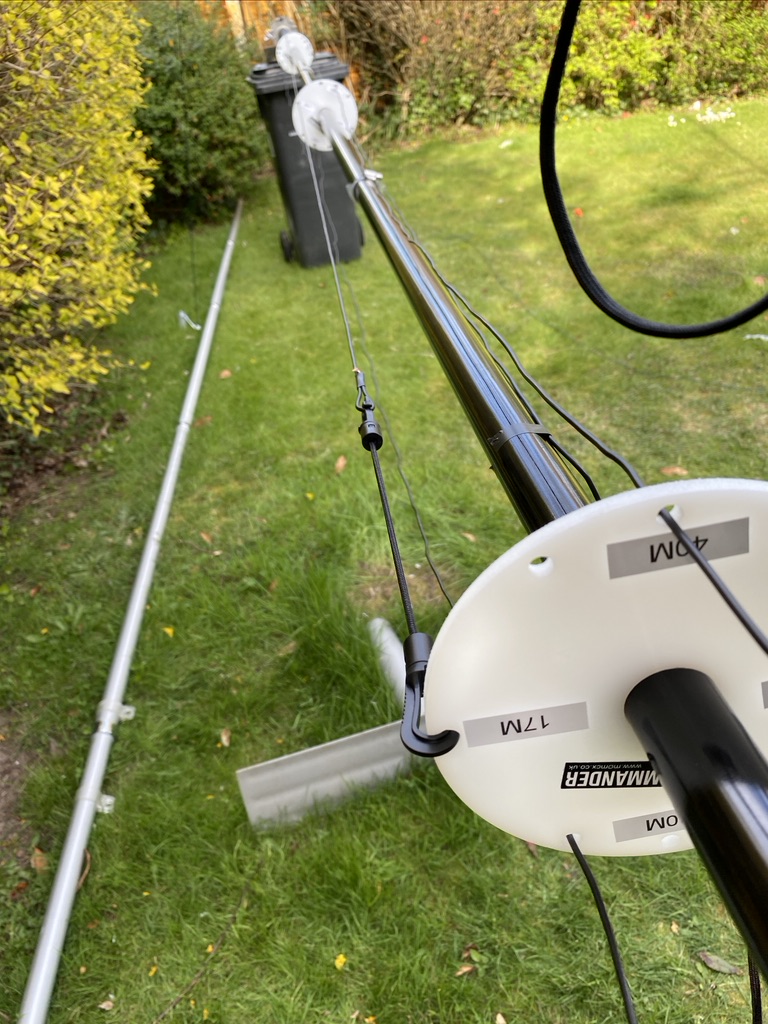
cor 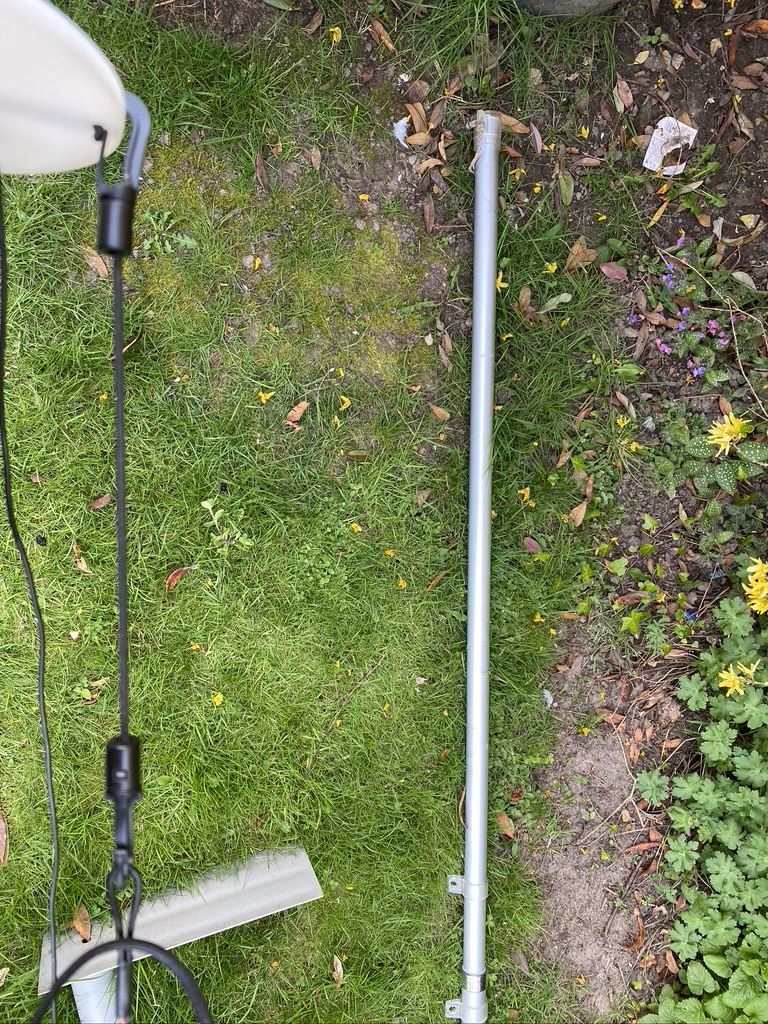
hmmmm 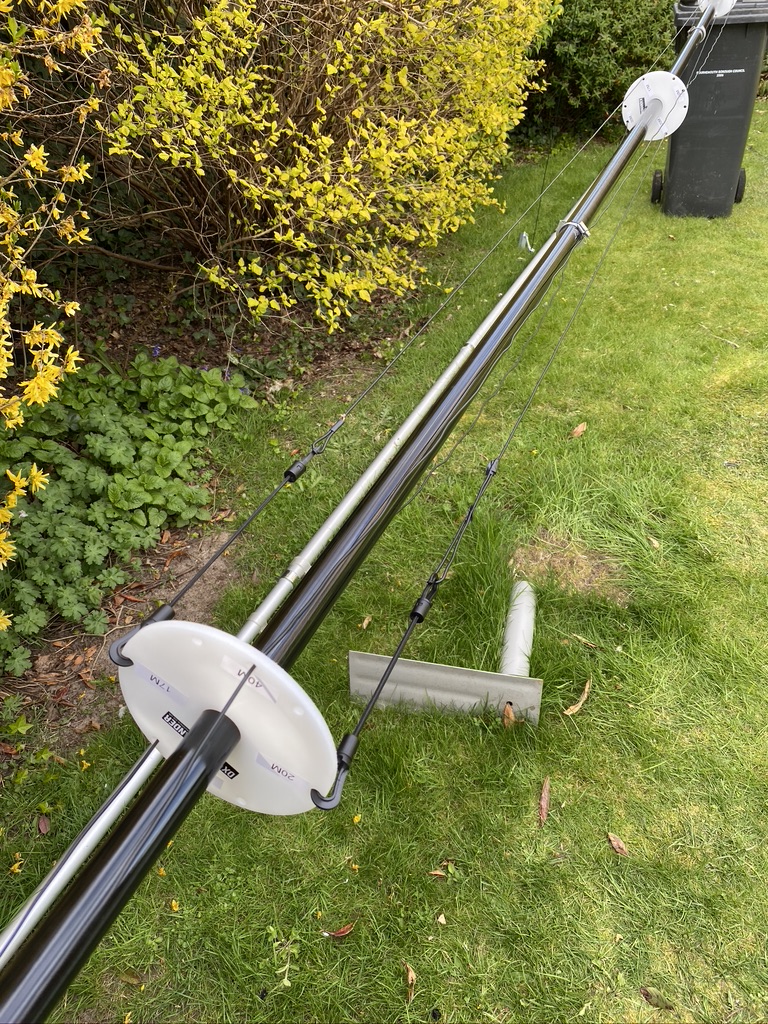
somethings not right…
So with the verticals fed thru it was time to mount them. I read the instructions a couple of times but was still struggling with getting the penny to drop, so headed indoors. I watched this excellent video to get some help
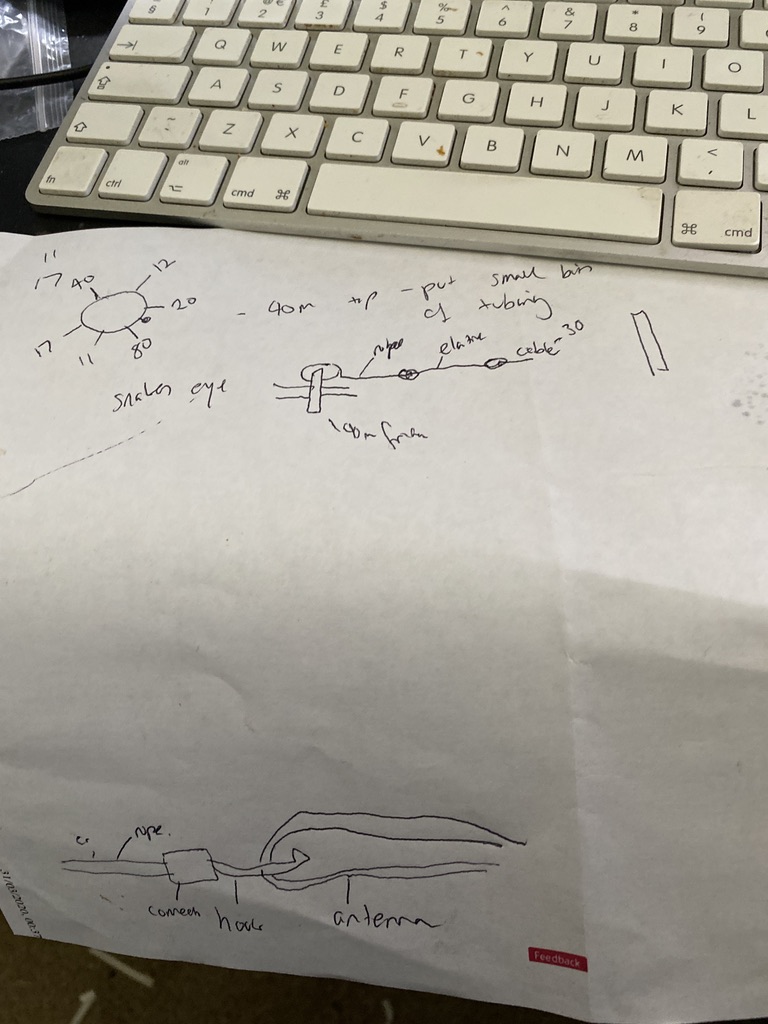
With that I made some scribblings and had a better idea of how to use the supplied clips, rope and elasticcord. But where was the elasticcord.. I checked the list, yep I had checked it off, but I could find it no where, several times of going in and out I couldnt locate it ! I then thought, well, where did I last see it, then went back to my photo album on my iphone, there it was, i knew what i was looking for at least now ! So.. one of the things that happens is that I look for stuff, and cant find it and its actually right there in front of me – this was the case here ! After going in and out 3 times, i found it, unfurled, but exactly where I had left it ! Hidden in plain site, or just stupid.. lol.
I set about cutting lengths and using some of what i had learned from the video, it then struck me that the lengths of the lower verticals were almost identical.. .hmm, thats not right ! So i set about remeasuring with them taught and in place. Yep, sure enough I had added 1 meter to many to 17m ! I measured several times, then cut once more – perfect (he thought..) and attached the cord again, now that looked better. Suprisingly 20m was cut perfectly, even with the fold over !
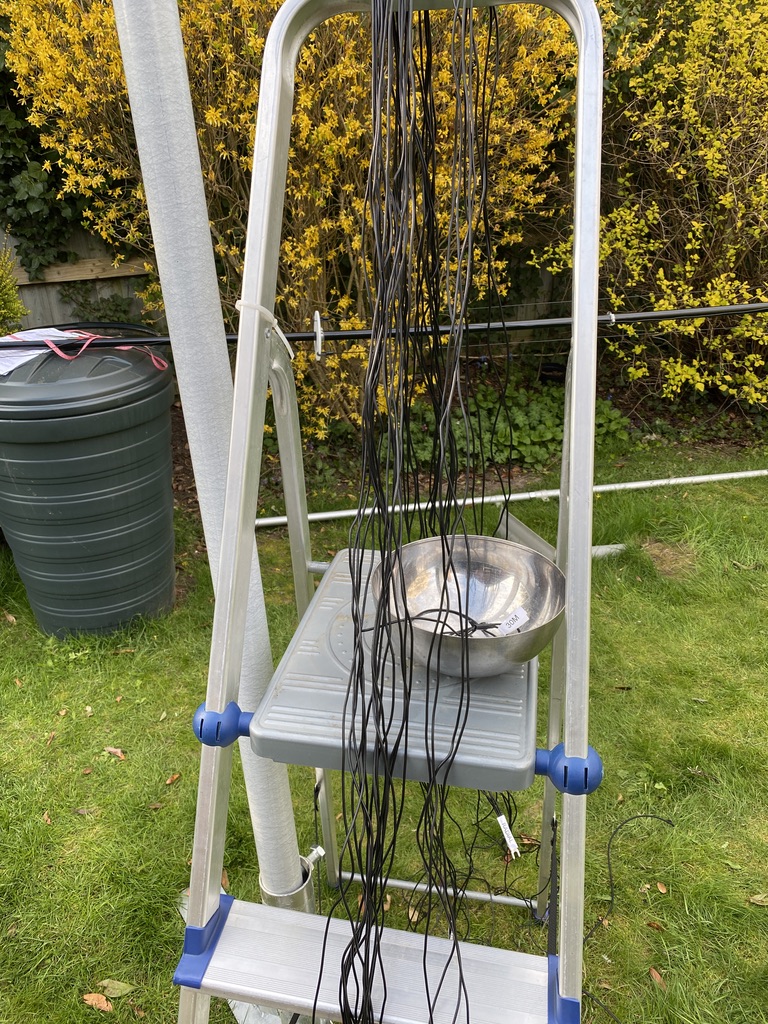
radial rat nest 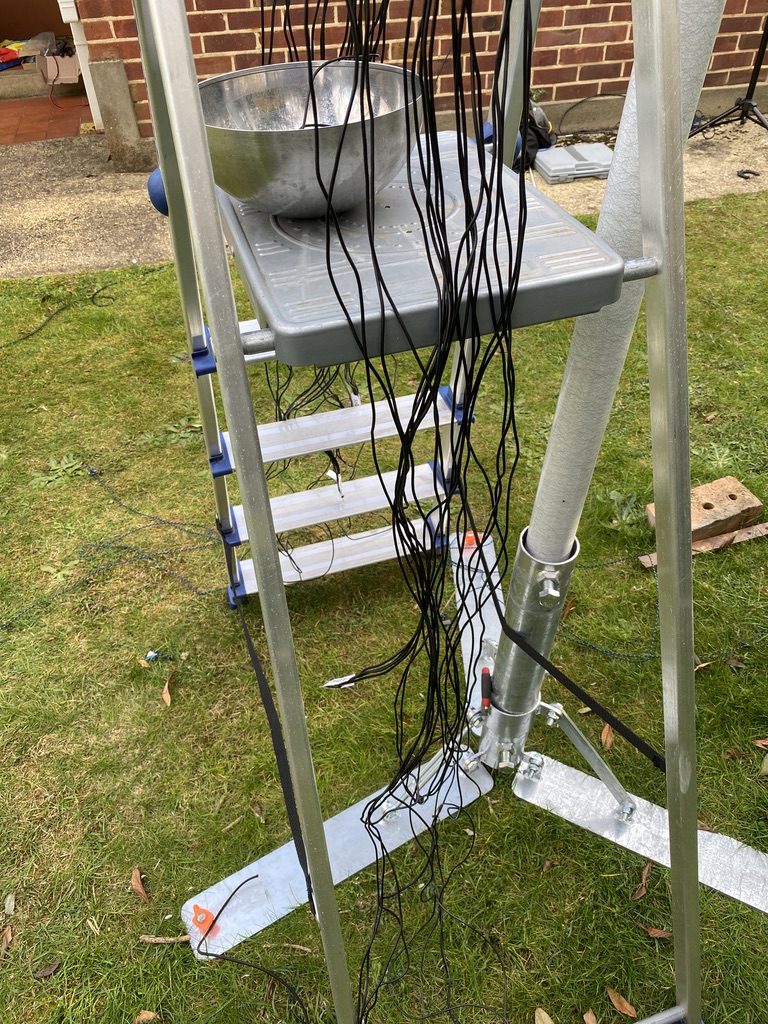
radials on a stair way to heaven 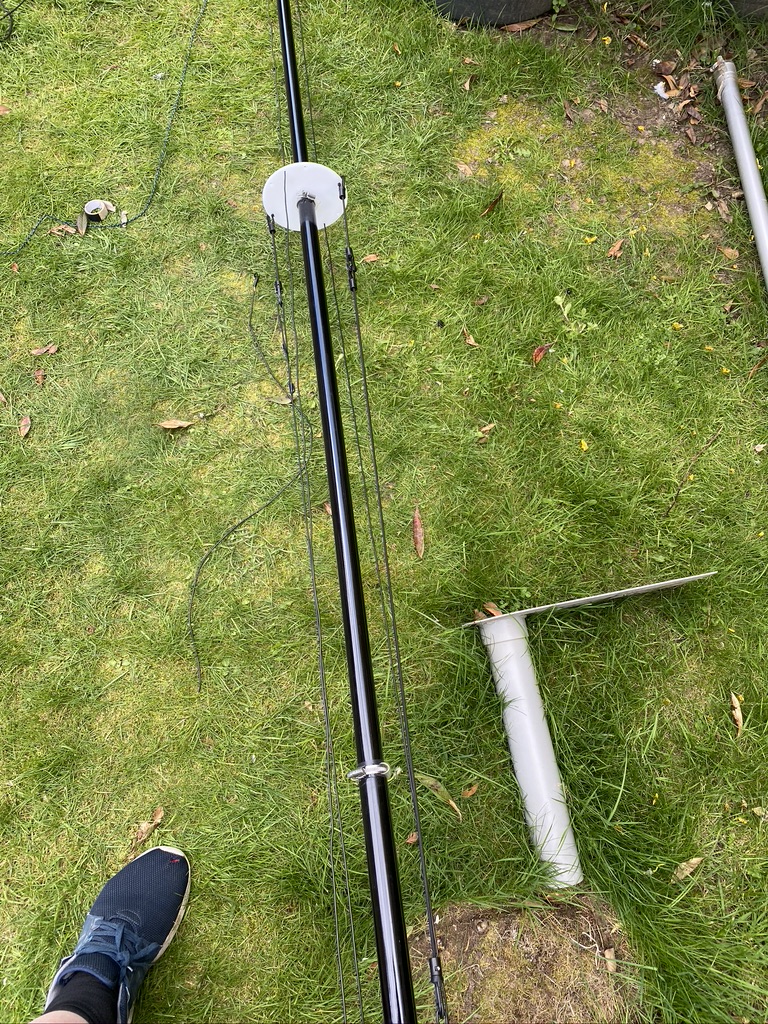
time to test ?
I remeasured 40 and 30m, 30m was way off by another meter, so cut that to length again, then made tight with the paracord and rope. Once understood this is a really great system and keeps the verticals very tidy on the mast (he said…).
With that I brought the radials out and got them kind of tidy on the stairs, ready for attaching once the mast was about to go up.
UHF/VHF and HF masts 
The DX Commander! 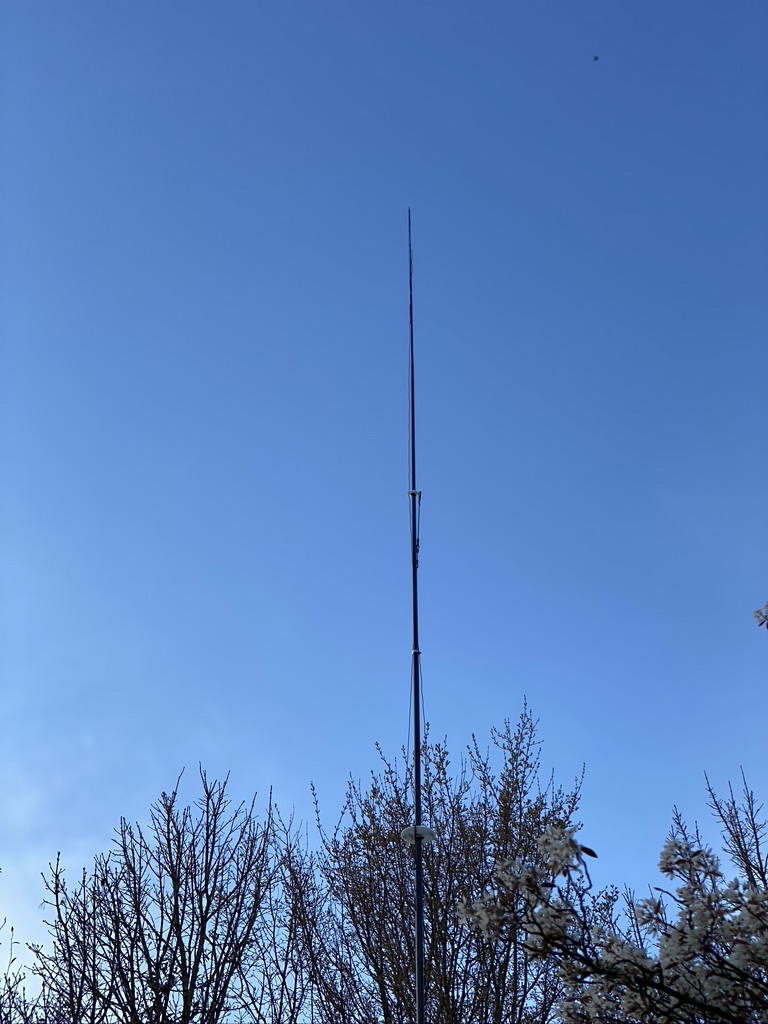
An impressive erection 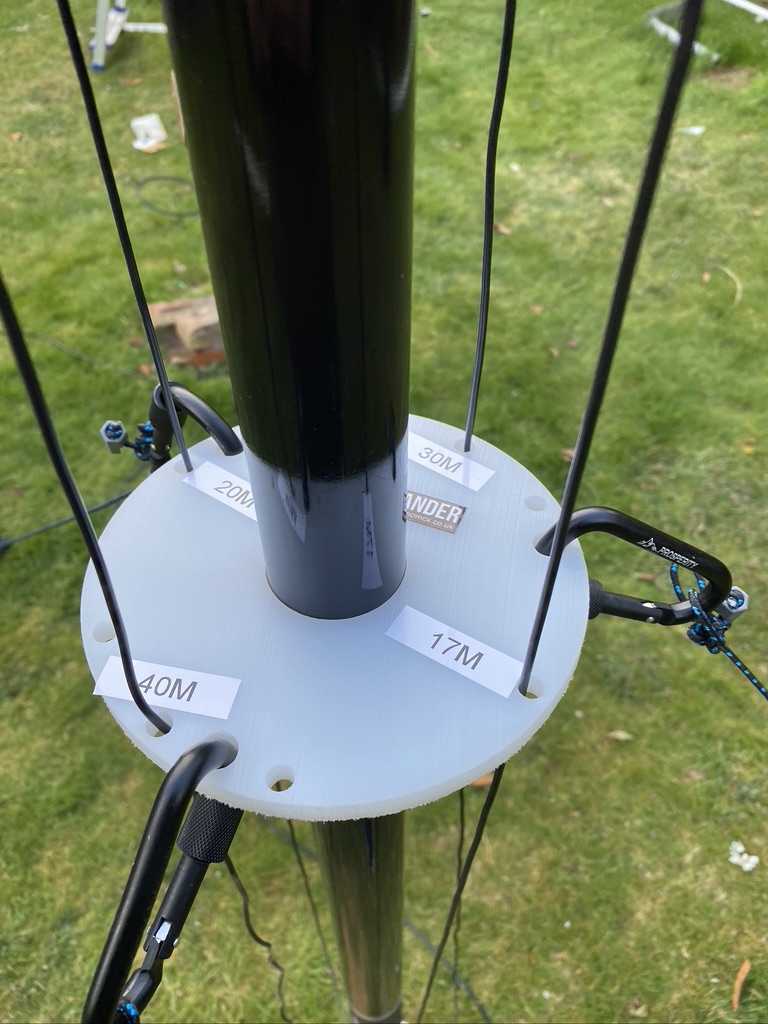
Guying attachments are tight, super easy bearly an inconvieance 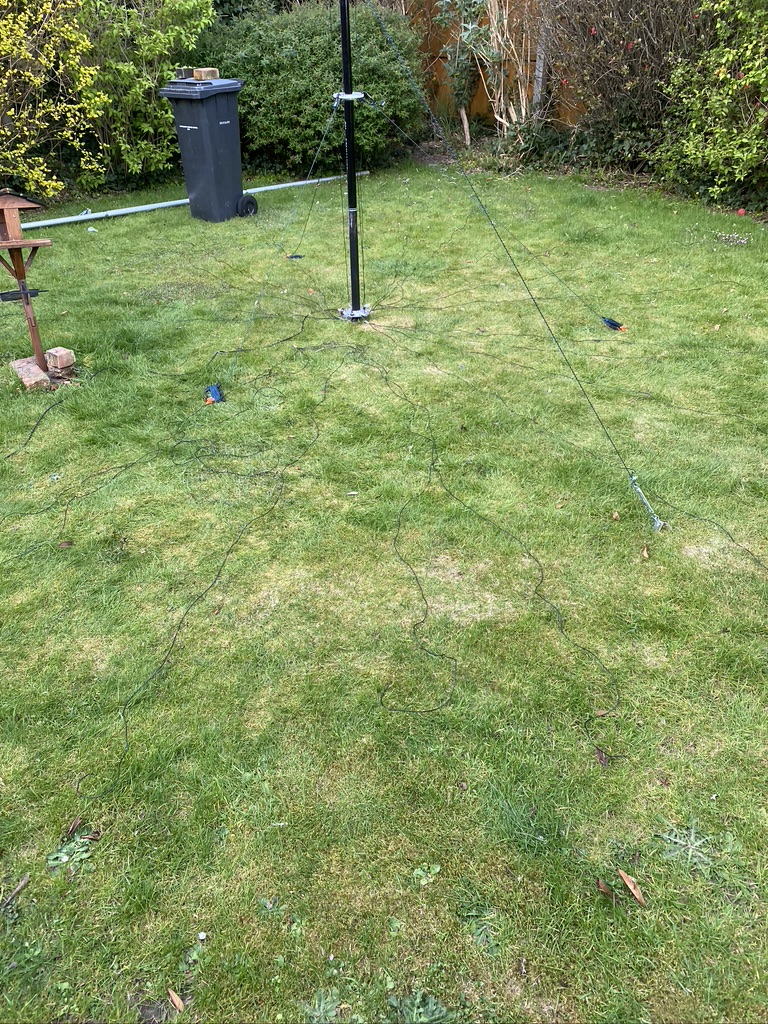
radials are a pain in the a…
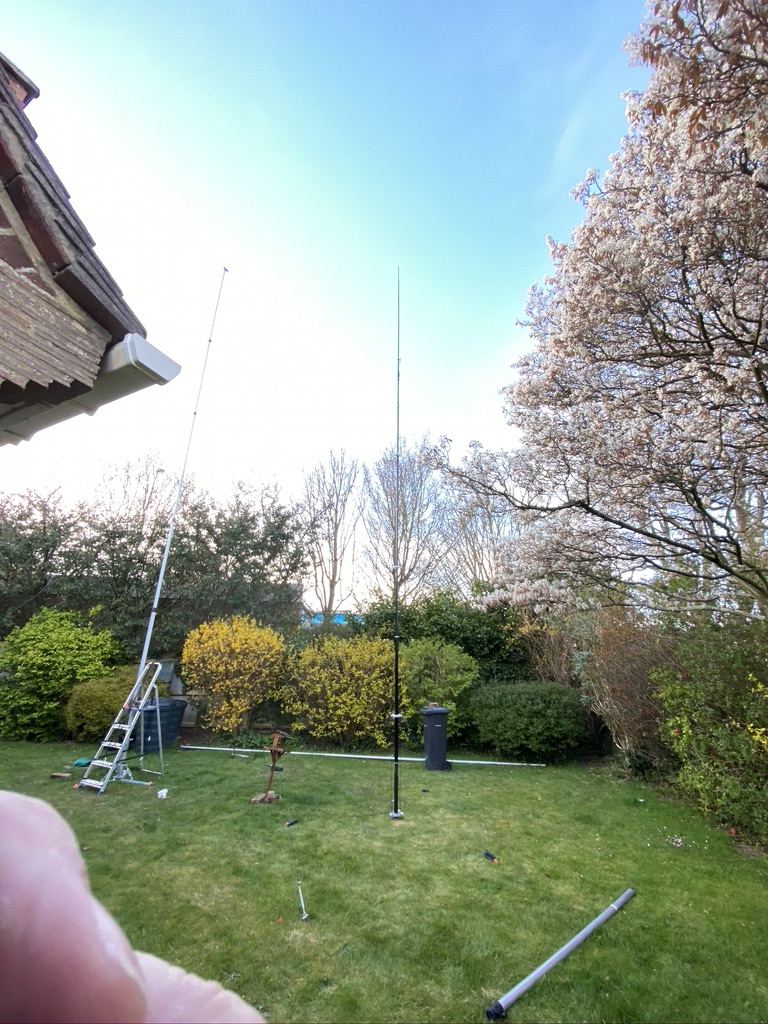
With the assitance of my son Paul (who was playing some lovely tunes, not too loud, and heavy enough to enjoy) we go the mast up. The mast is very light, even with everything on it, but having two peole very much helps with health and safety aspect of the installation until the mast is guy’ed up nicely.
So with the mast up, it was really great to see it looking so good. Paul and I admired the view of the mast, whilst I was observing the effect of the wind and ensuring the guy ropes were doing their job correctly ! Everythign in physical construction worked really well, and don’t mind saying felt quiet proud of getting to this stage ! I attached all the radials, having dodgy knees and a hip these were phyiscally quiet a pain to install, but nethertheless, was easy enough. I can see why more permenant installations have these underground though.
With everyting in place it wsa time to start the analysis ! I did say to Paul before hand, if this works, it will be like the oscillisope, a minor miracle – as there are so many components that could make it not work..
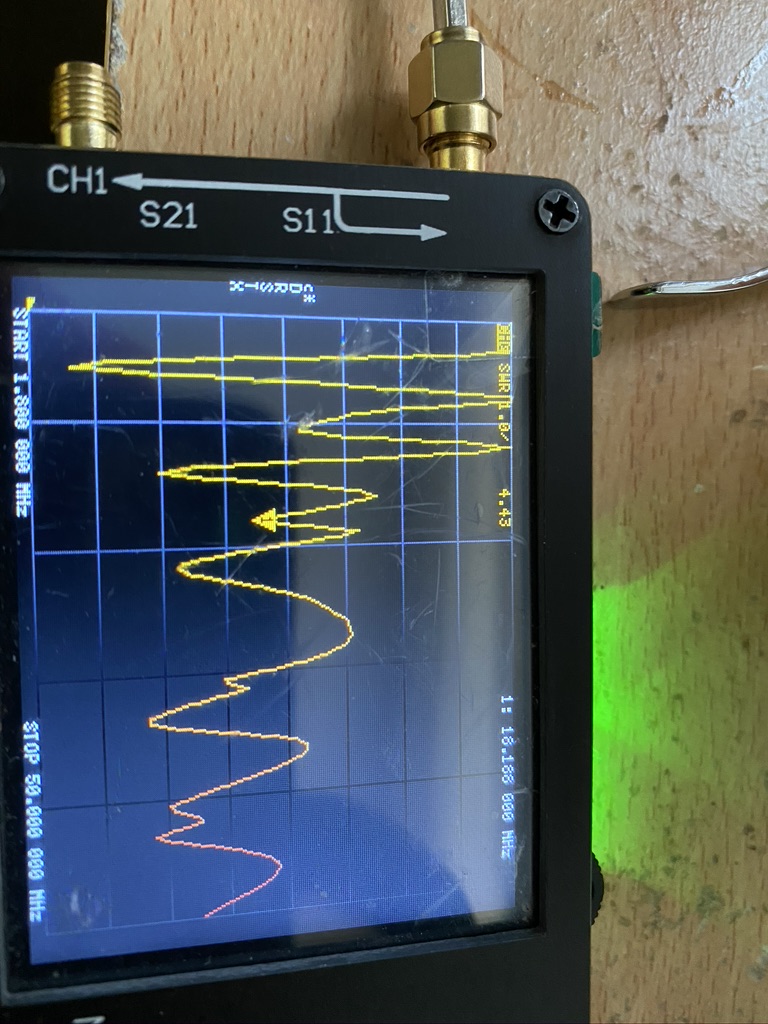
full range scan
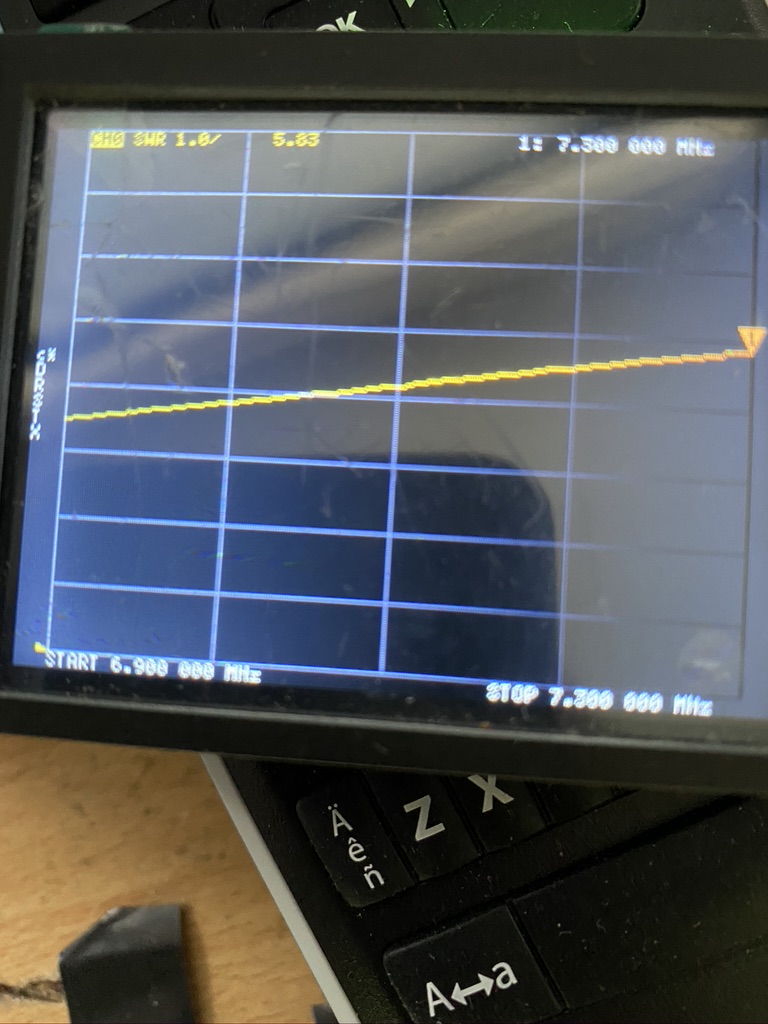
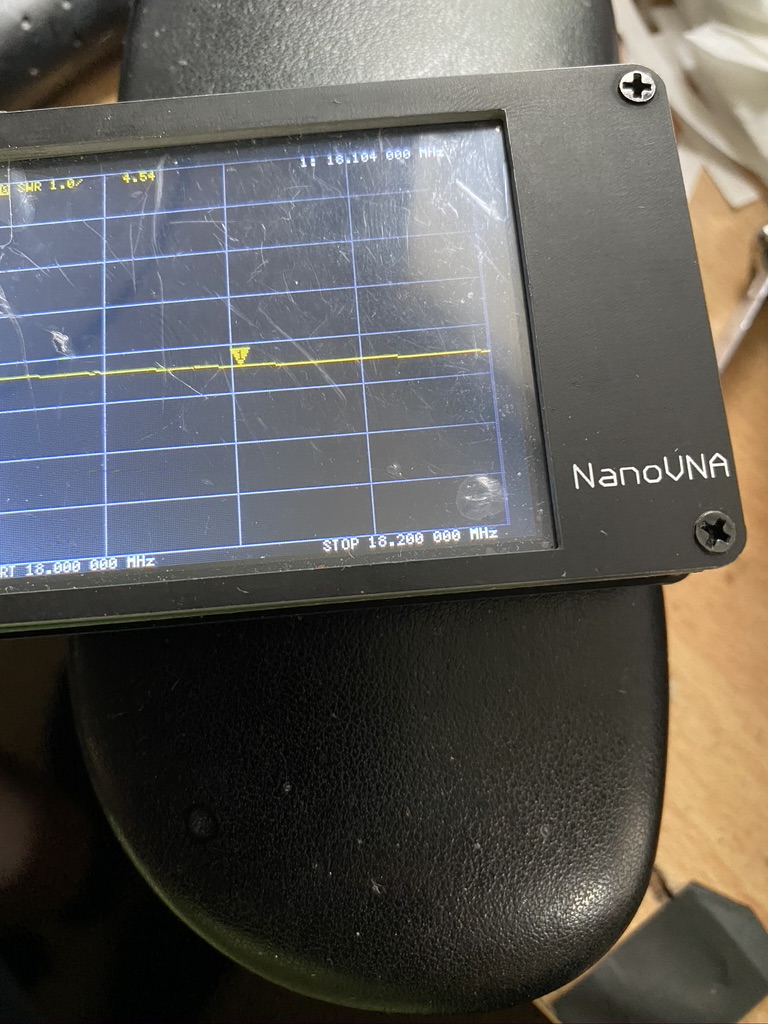
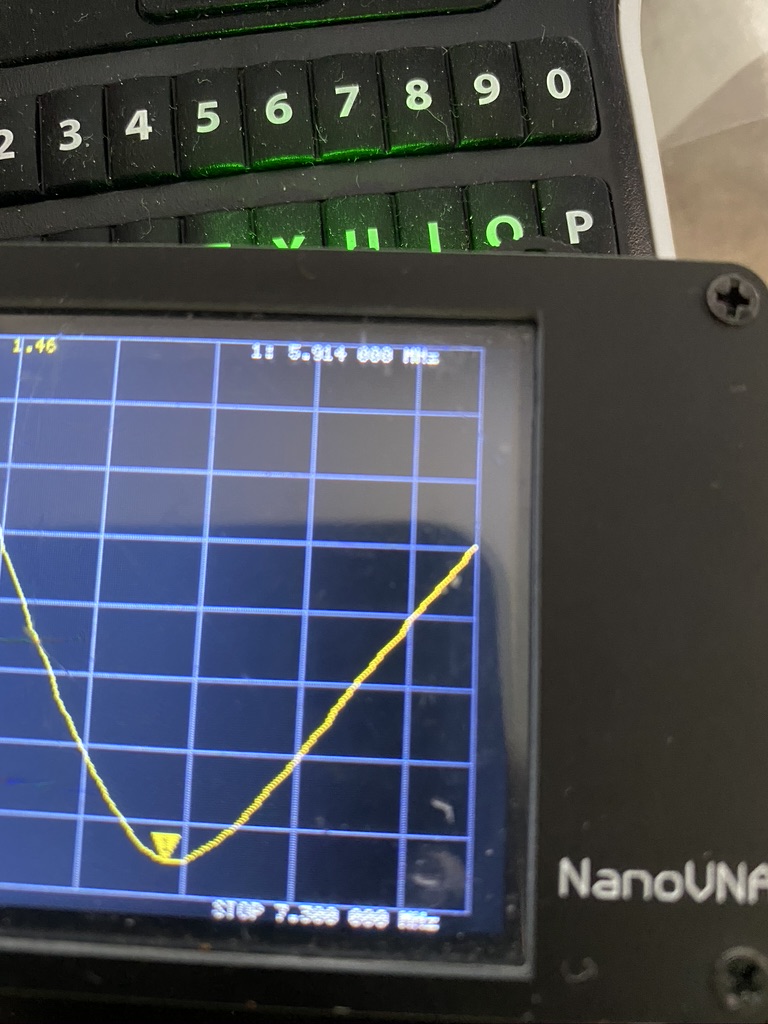
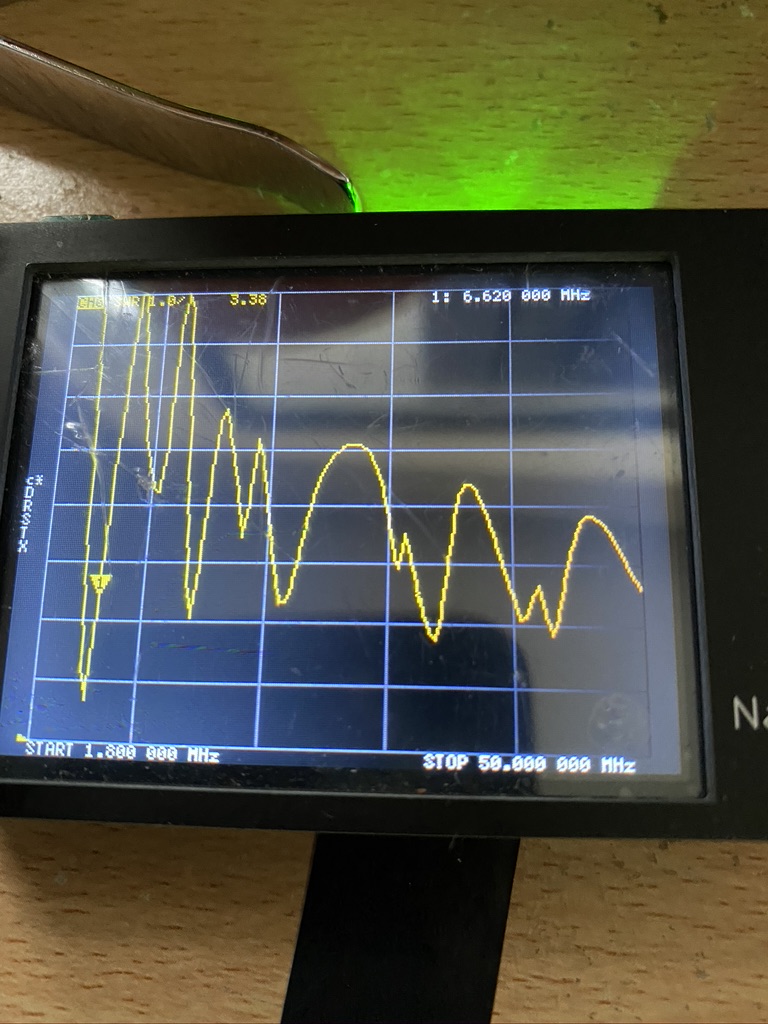
So i connected the NanoNVA to the feed wire in the ‘shack’ and as half to be expected the results on the amateur frequncies were quite some bit off. I also noted down the frequency of where the lowest S.W.R reading was, as this can guide in where the issues are.
| Frequency (Mhz) | S.W.R Result |
| 5.656 | 2.17 |
| 10.476 | 5.14 |
| 14.332 | 2.95 |
| 18.186 | 4.42 |
| 21.562 | 3.17 |
| 33.612 | 2.85 |
| 43.252 | 2.46 |
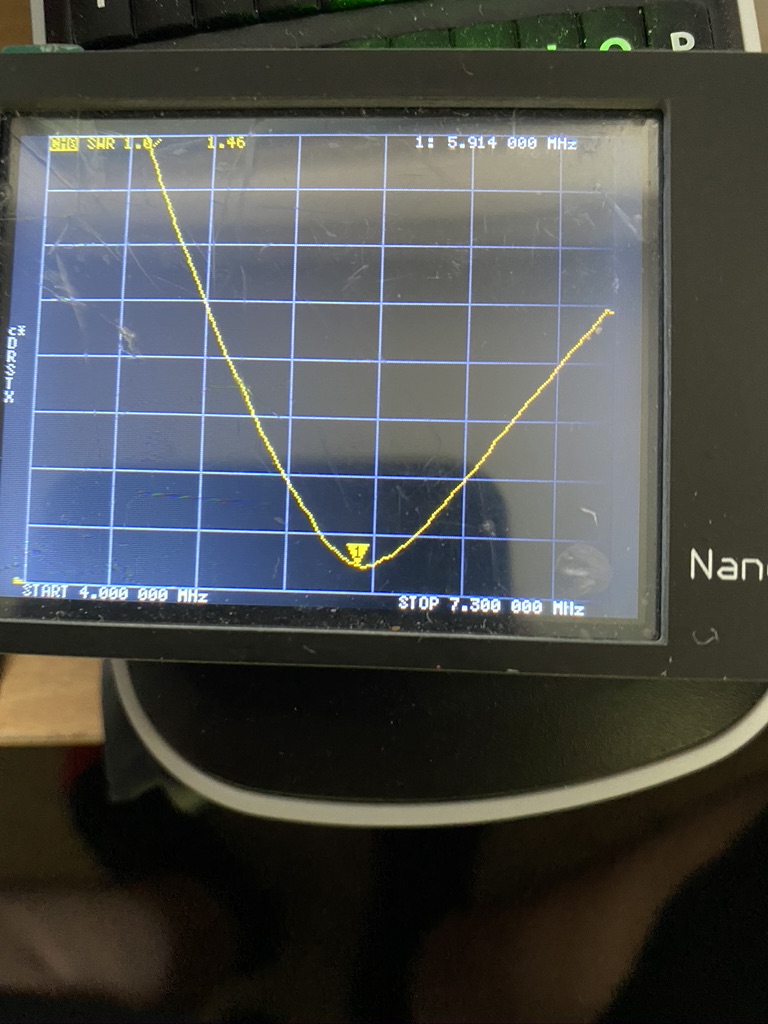
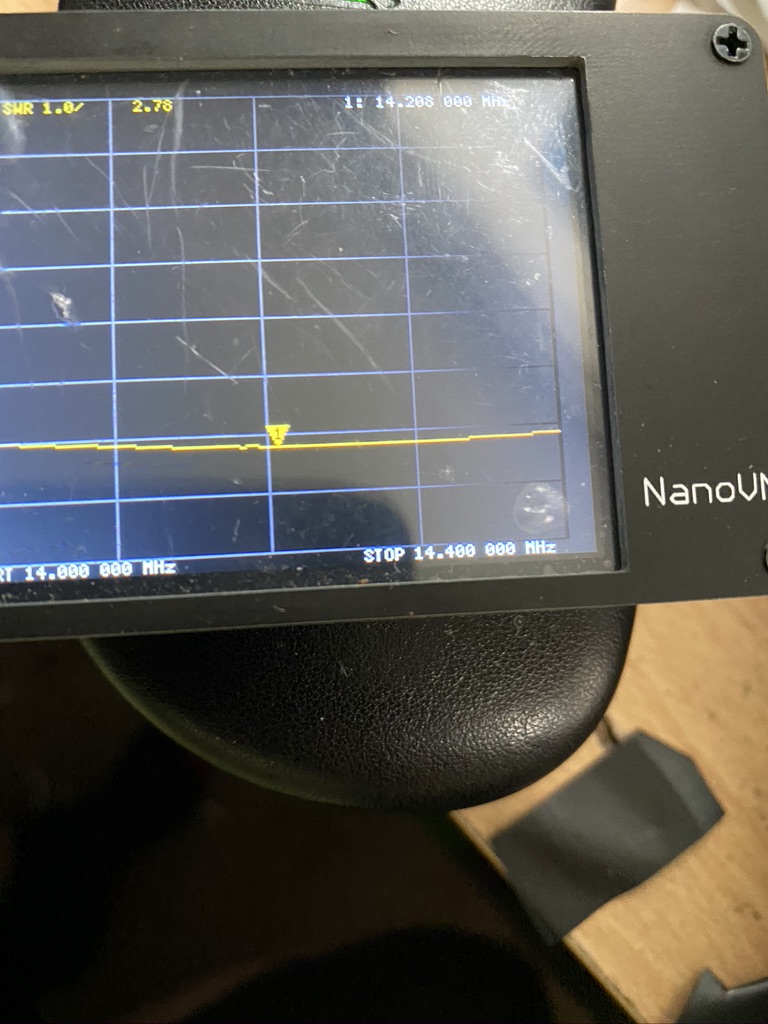
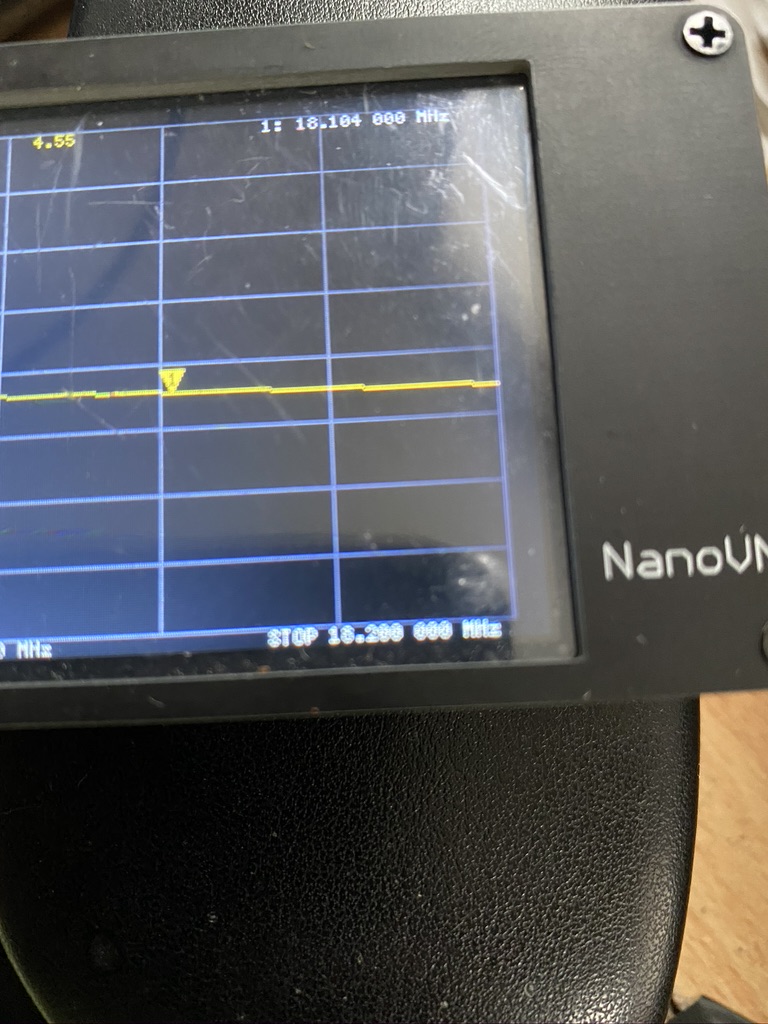
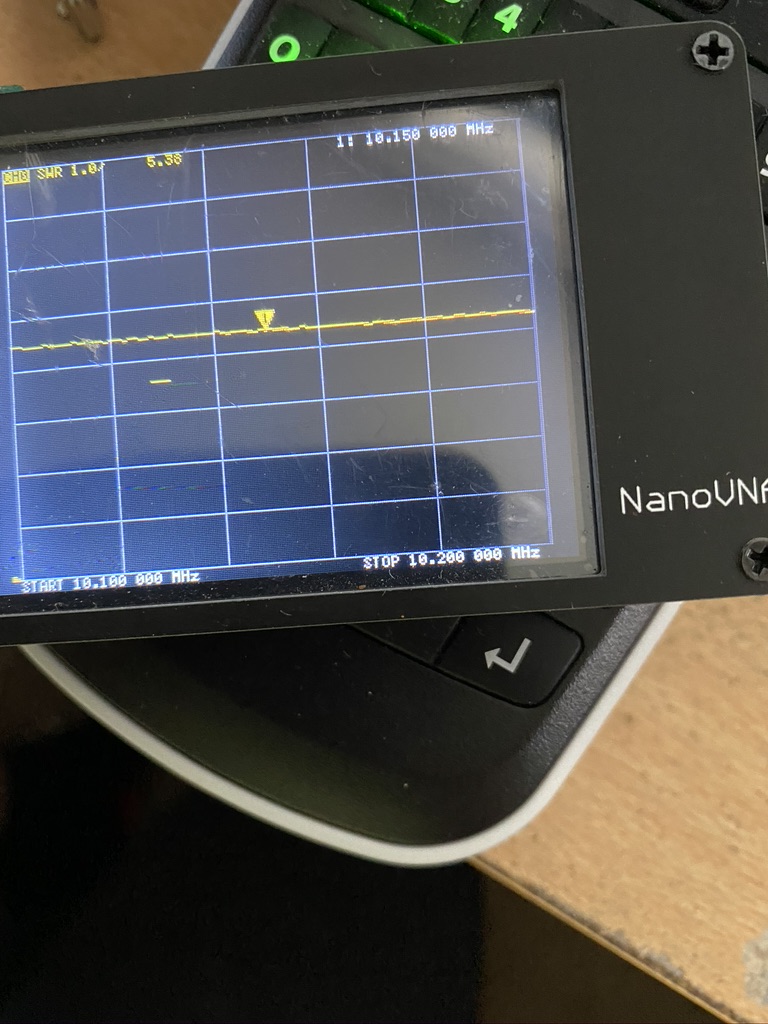
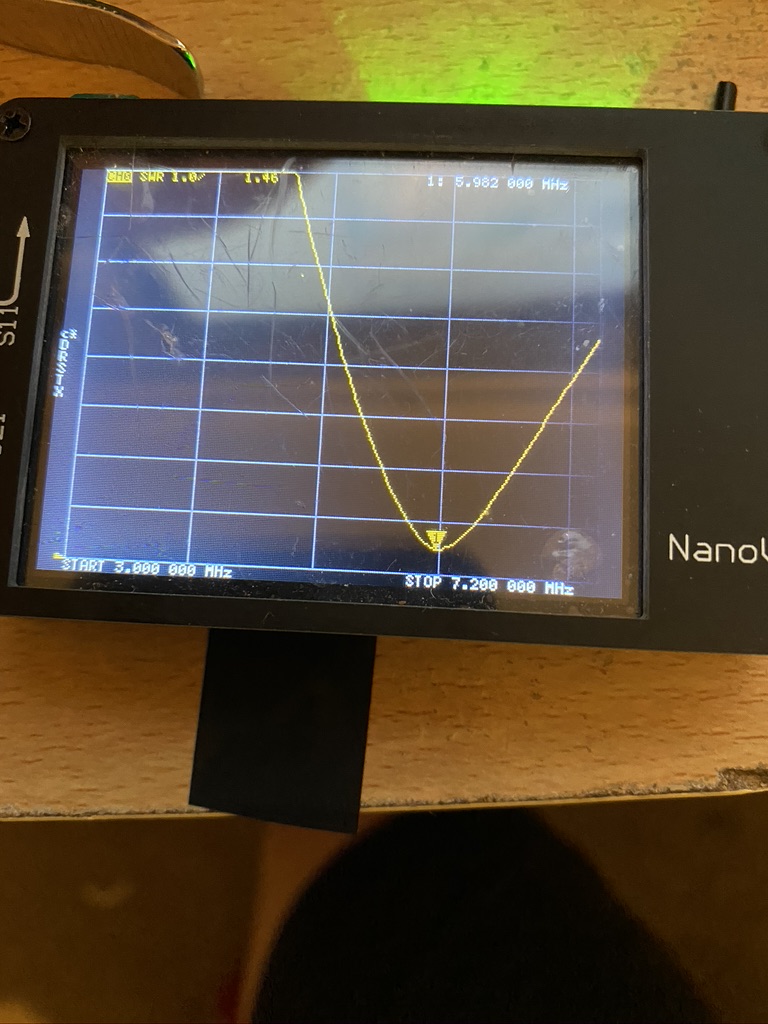
I then tuned the VNA to the amateur frequncies and recorded the midway S.W.R. reading, 20m could be useable for putting RF up, but 40, 30 and 17 were a long way off being safe to use. I like the SWR to be below 3, but for me 1.5 is my target. Even with 10W I would probably damage something and probably wouldnt get out very well as most of the RF power wouldnt be going into the elements.
| Meters | Mid Frequency (Mhz) | S.W.R |
| 40m | 7.1 | 5.4 |
| 30m | 10.15 | 5.6 |
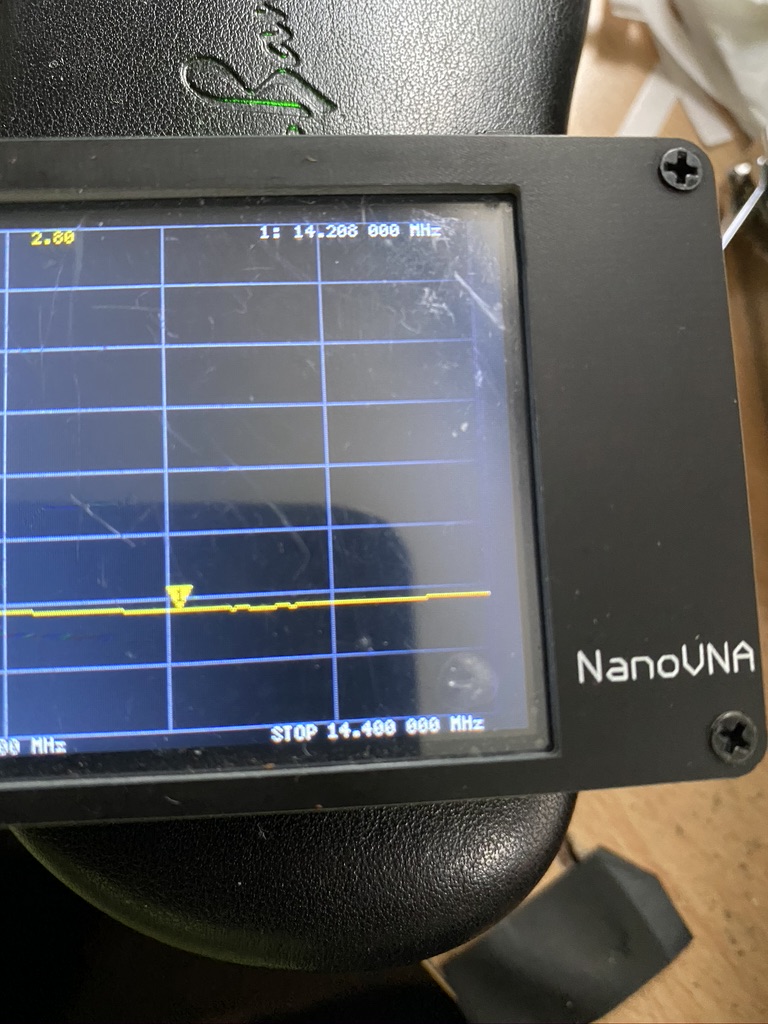
| 20m | 14.2 | 3.01 |
| 17m | 18.11 | 4.52 |
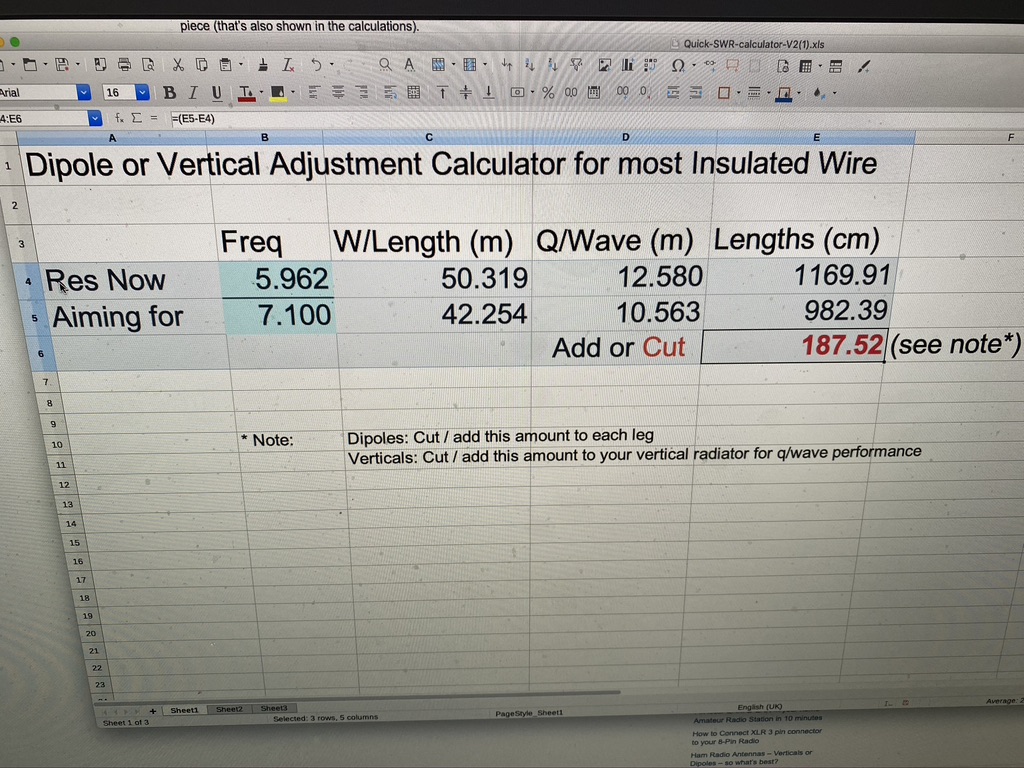
With the data in hand, i went to use the excellent DX Commander S.W.R. calculator to either cut or add. Unsuprisingly it was clear that I had too much cable on the mast. This spreadsheet really did make it simple when armed with all the correct data though, so thanks Cal!
I have noticed that the top 40m and 30m elements have become twisted around the top of the mast, so I will first untangle those before cutting to see what the results are like.
Not to be discouraged, i could still use my mast for listening and I could set about setting up my little Windows laptop to control the Kenwood via CAT control.
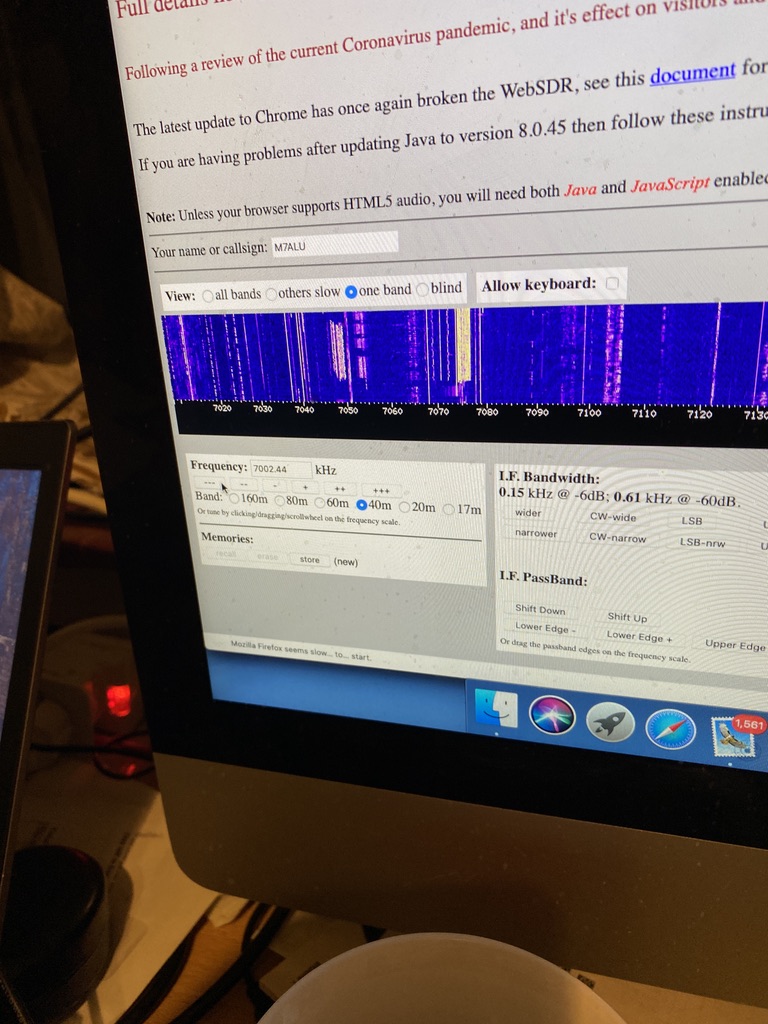
Compare to Hack-green WebSDR 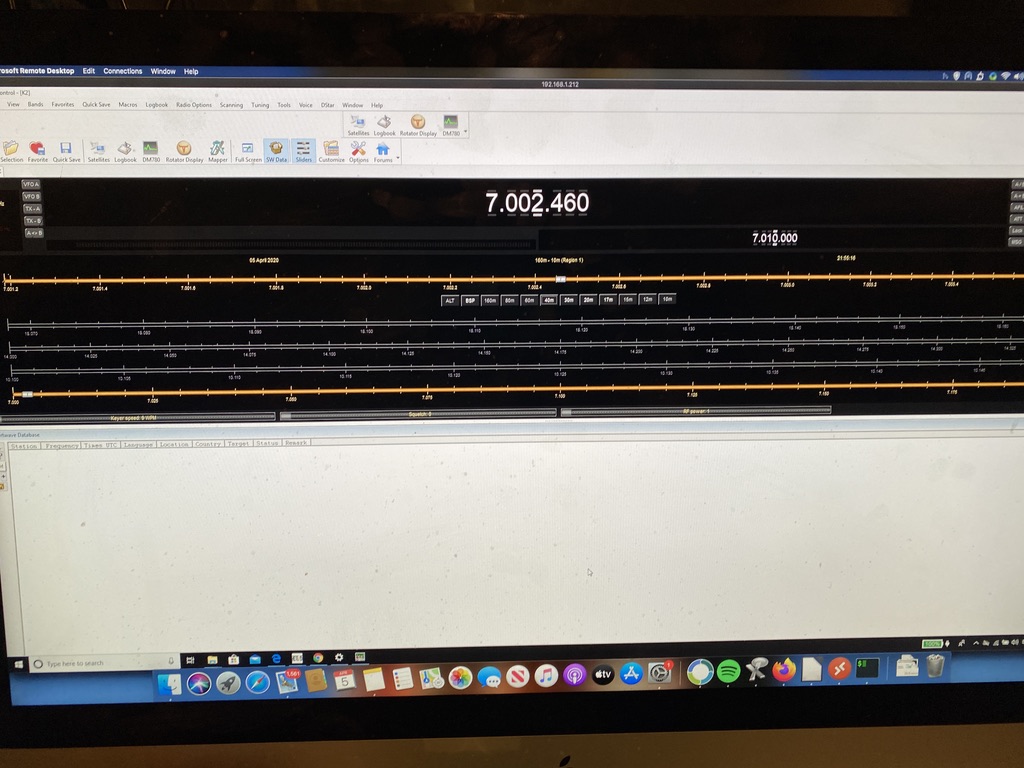
Ham Radio Deluxe
So there will be another day of tweaking and fiddling to get the SWR right down and there are a few more ‘final’ fittings to put on the DX Commander, but overall I’m really satisfied with the progress and just how good the DX Commander is.
More coming soon !