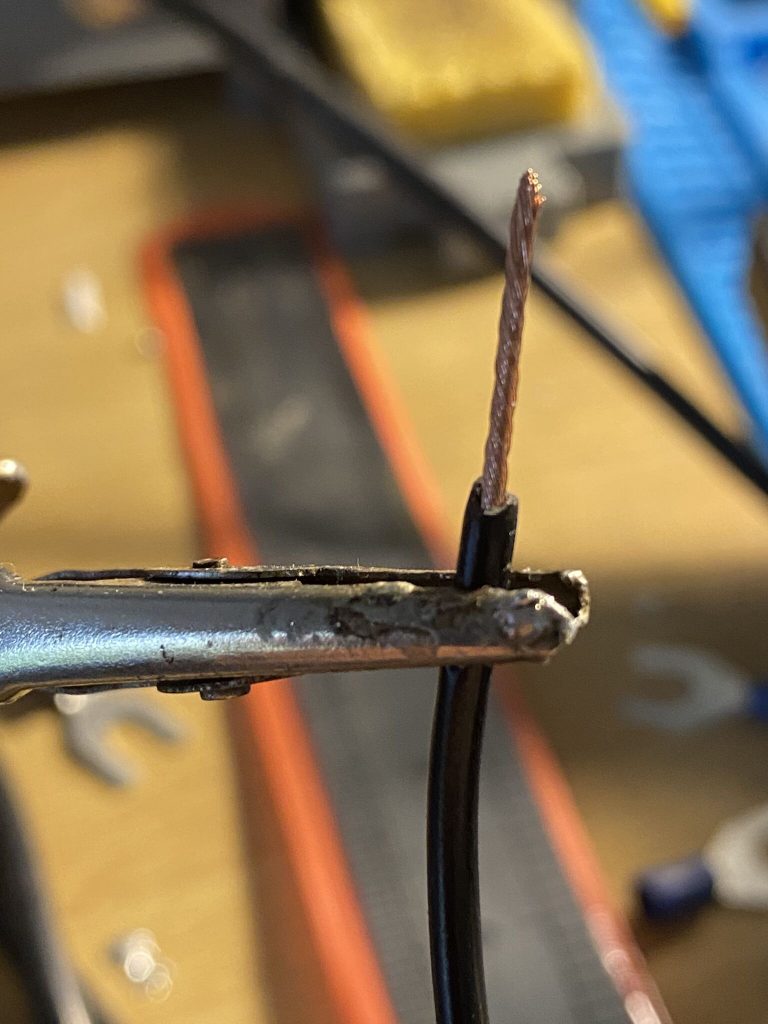
Wow, what WX (weather) we have been having lately – thankfully thunderstorms/lightining have missed me, but the wind and rain had a rather adverse effect on EFHW setup.
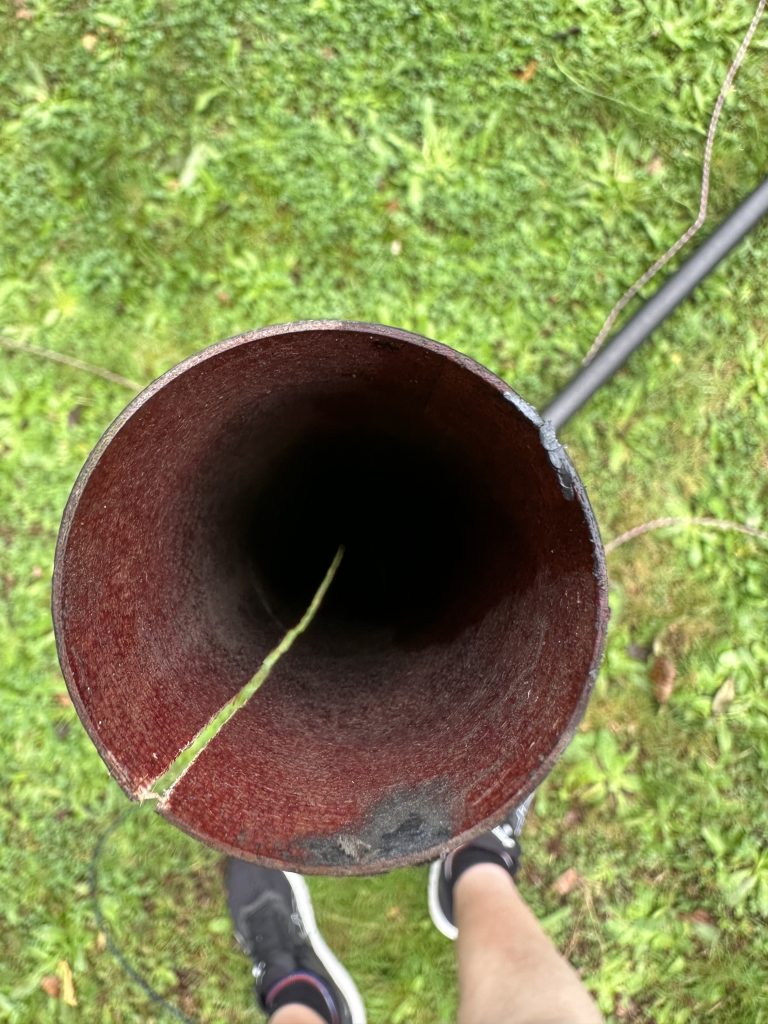
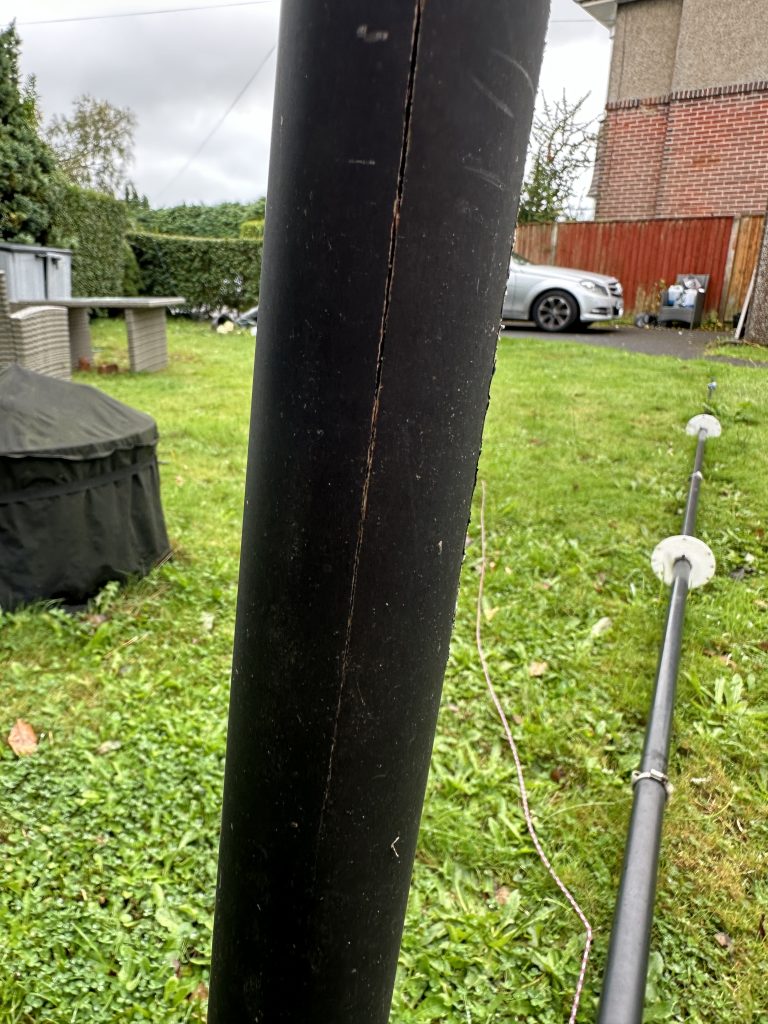
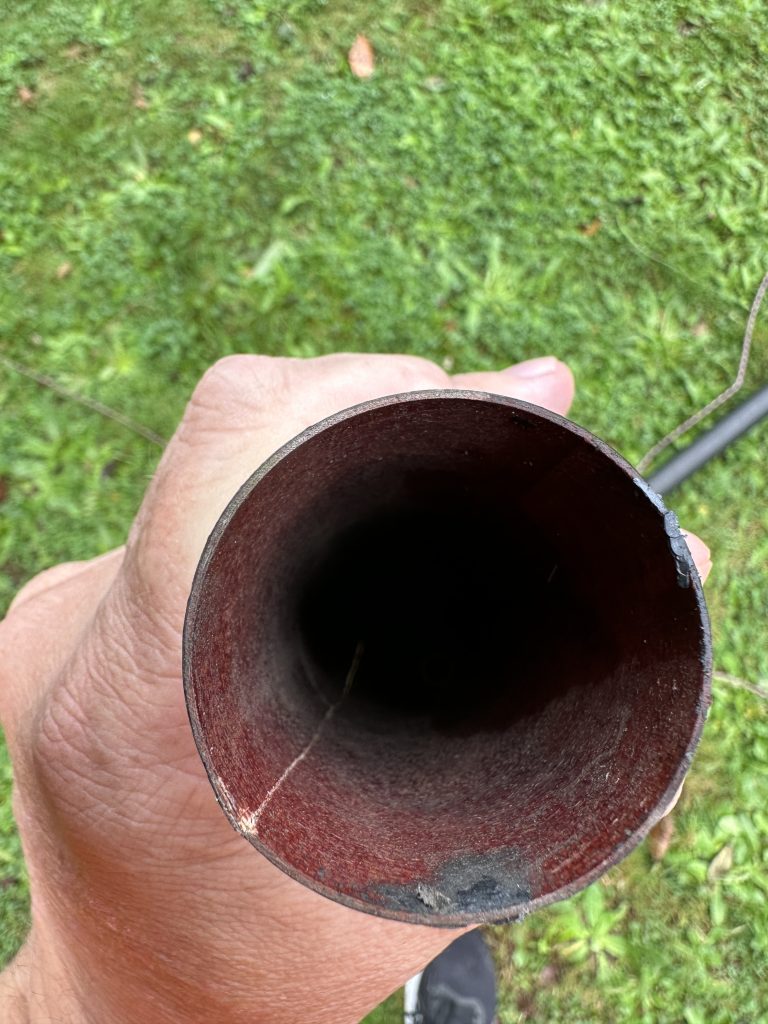
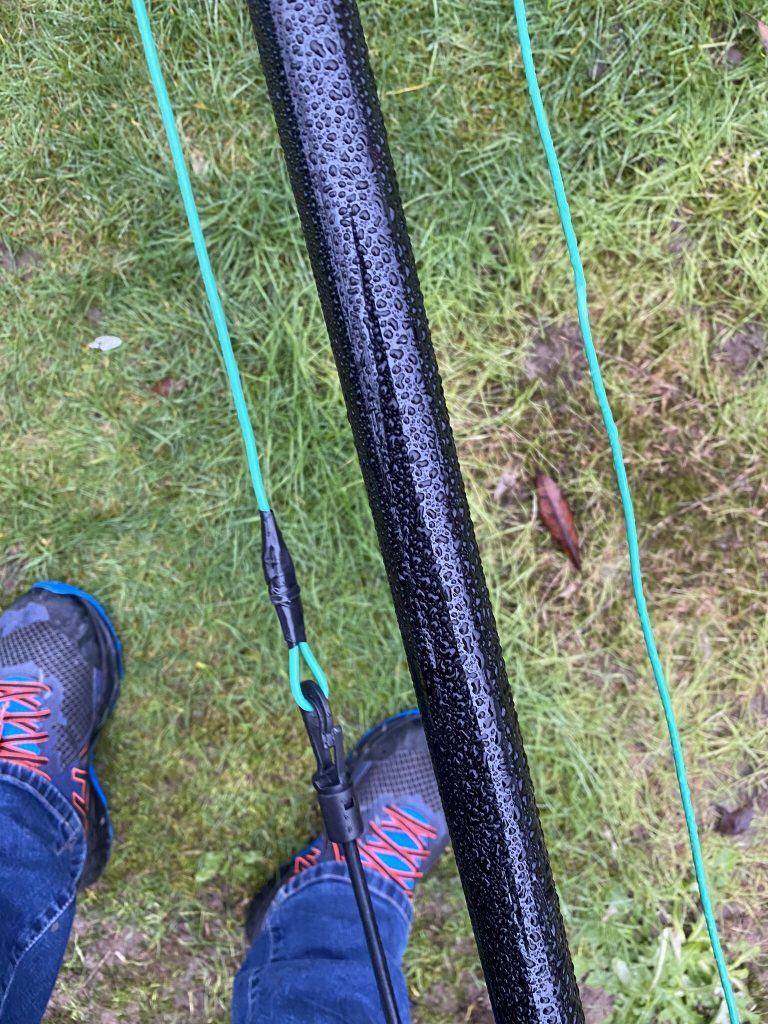
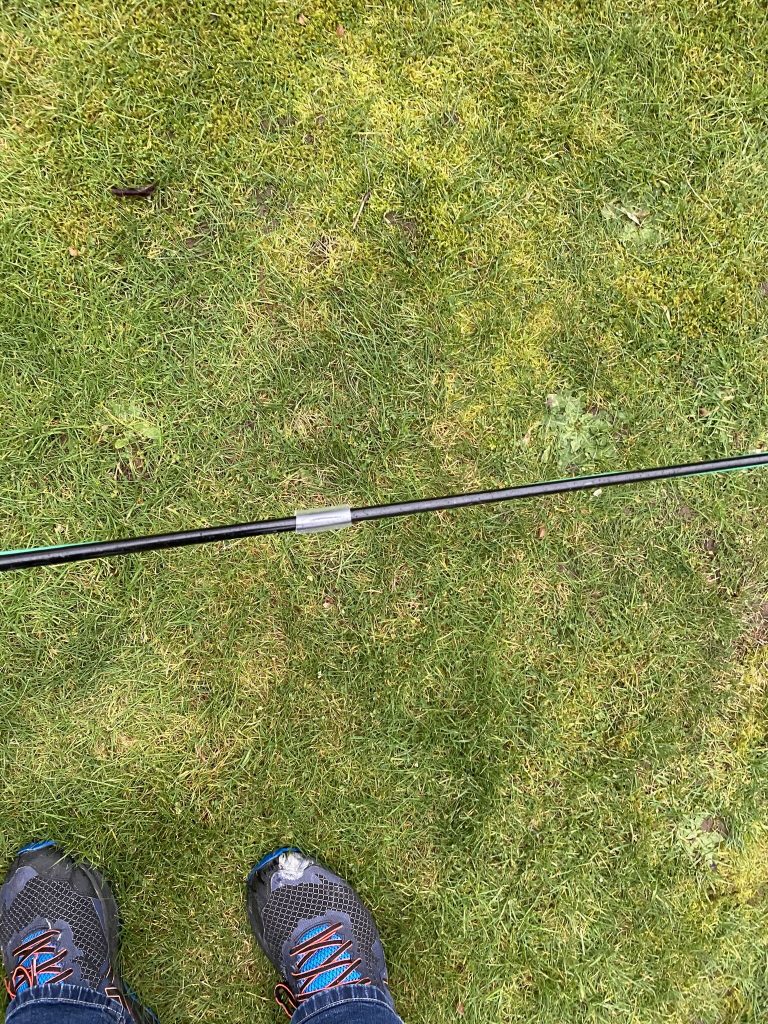
*crack*thats a biggieabout 1mm gap when held close
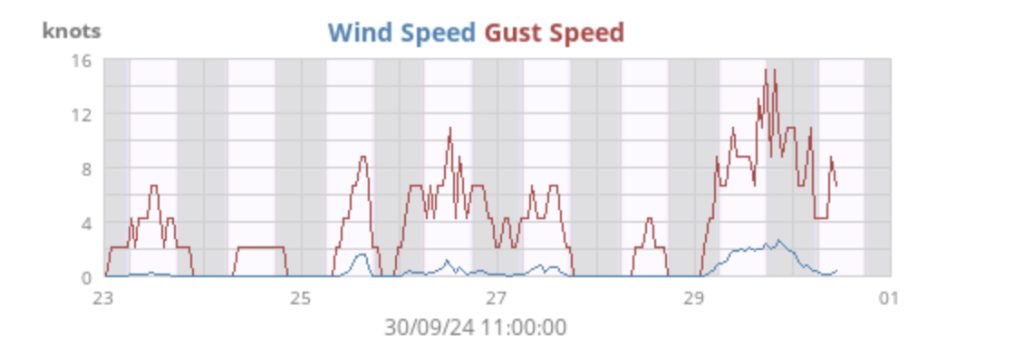
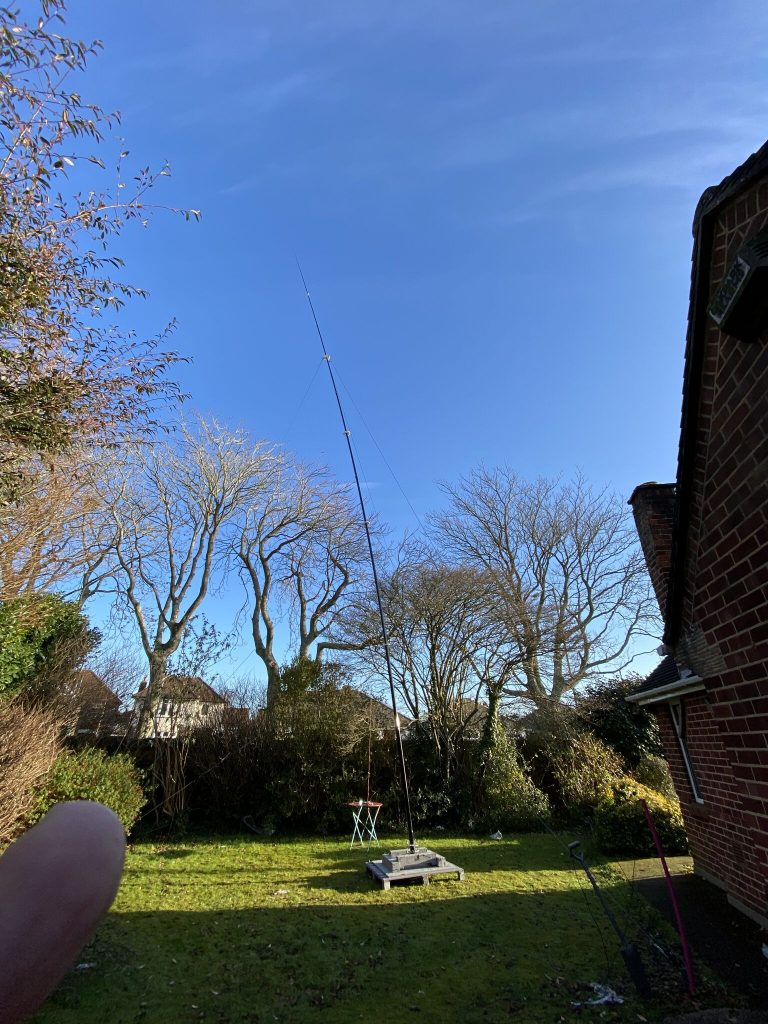
The mighty DX Commander classic mast that I used as far end of my 80m UK Antenna EFHW took the full brunt of the winds over the weekend, my weather recorder stating upto 16 knots – and that is at ground level surrounded by bushes/trees!
Ground level wind speeds
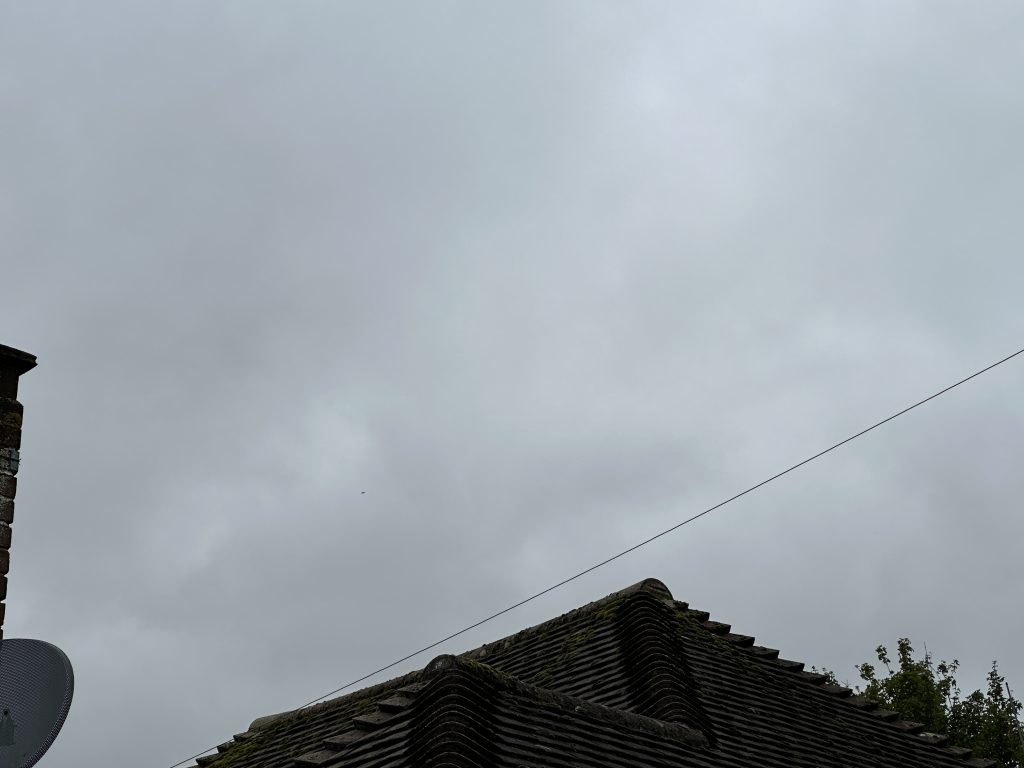
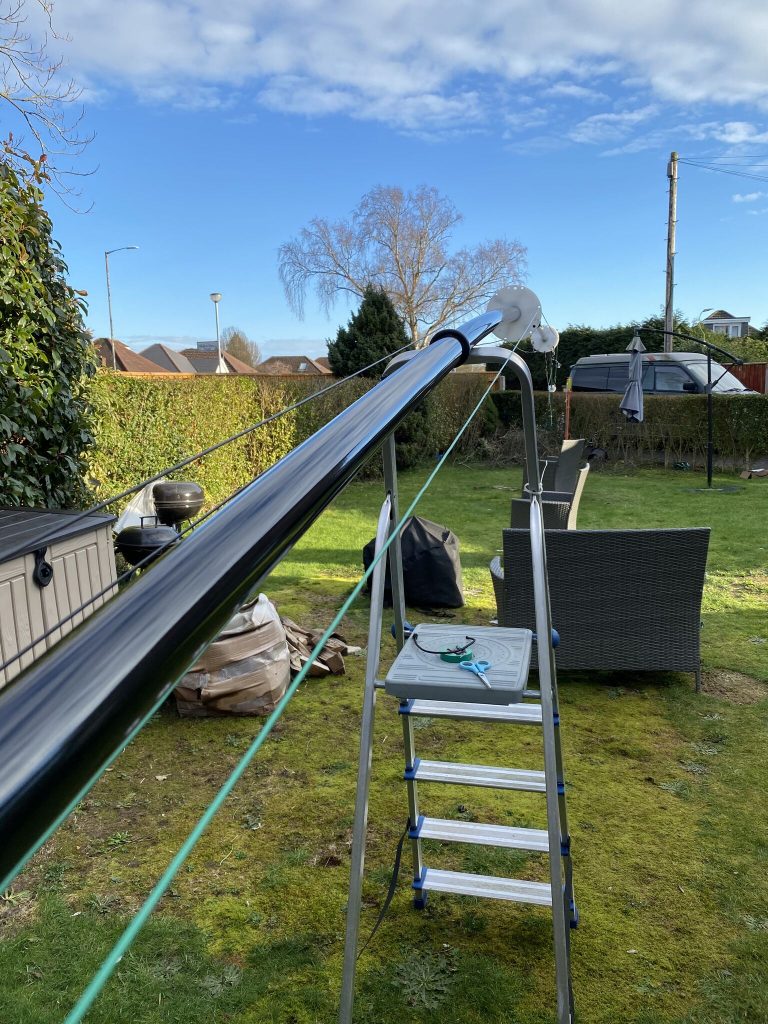
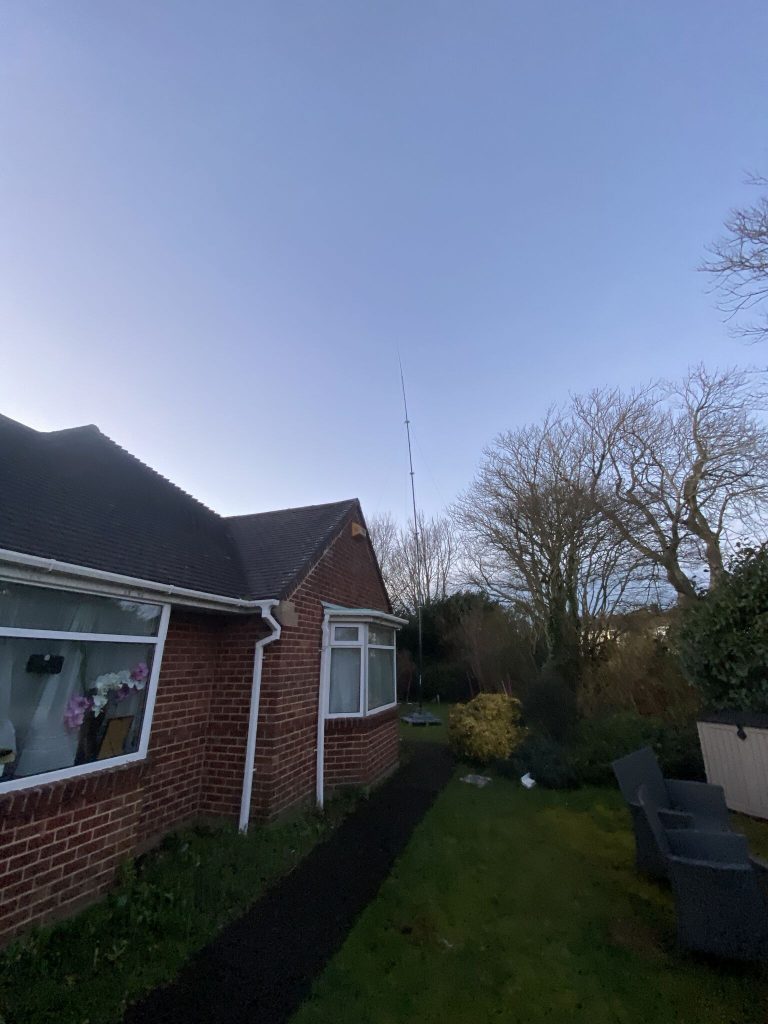
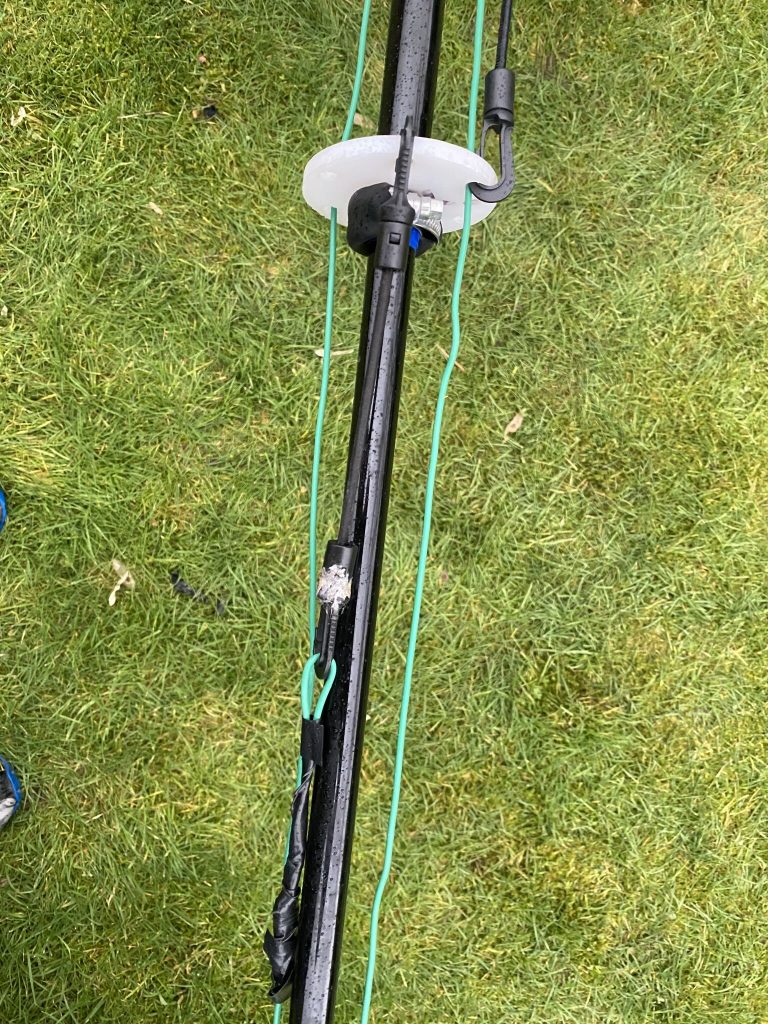
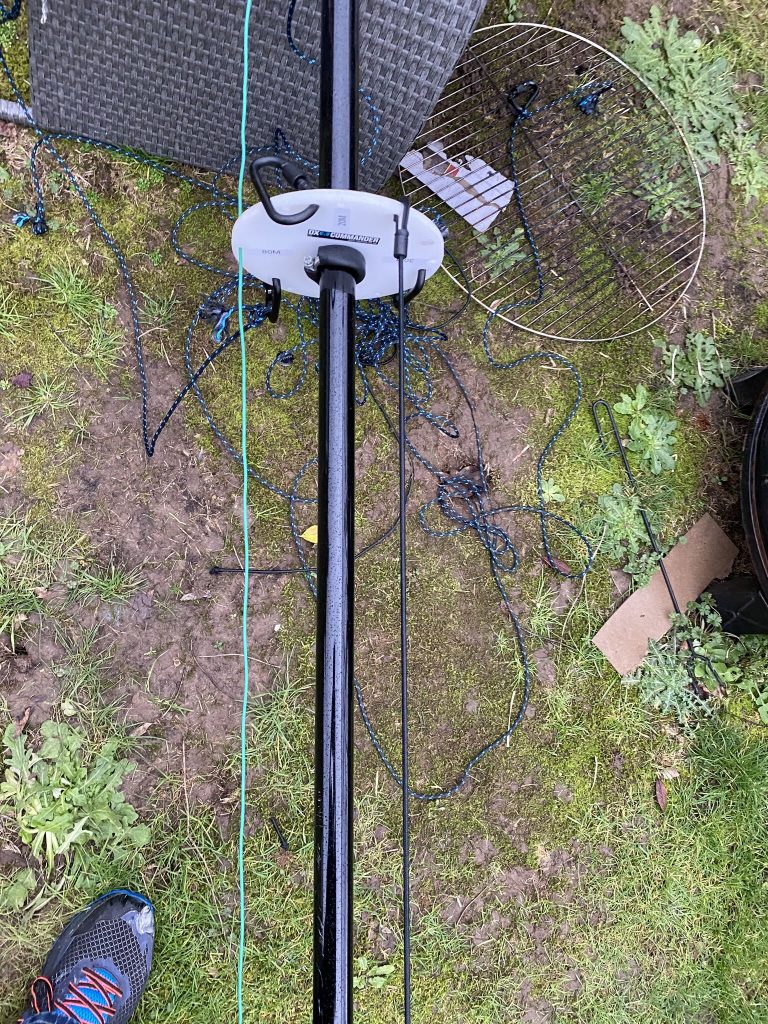
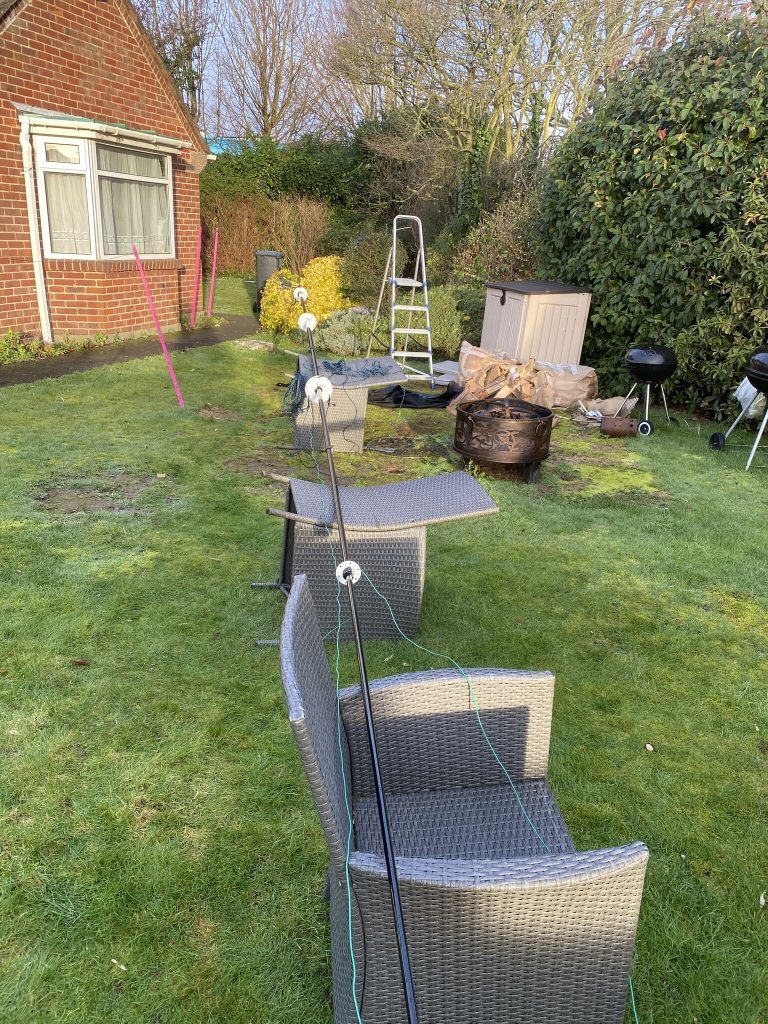
I looked around for spares and was glad to see I had a spare base-pipe for the mast, but that would mean stripping it down and then feeding the pipe through, so I’d though id see if I can just move the mast a little bit, lose a little height but still clear the bungalows roof.
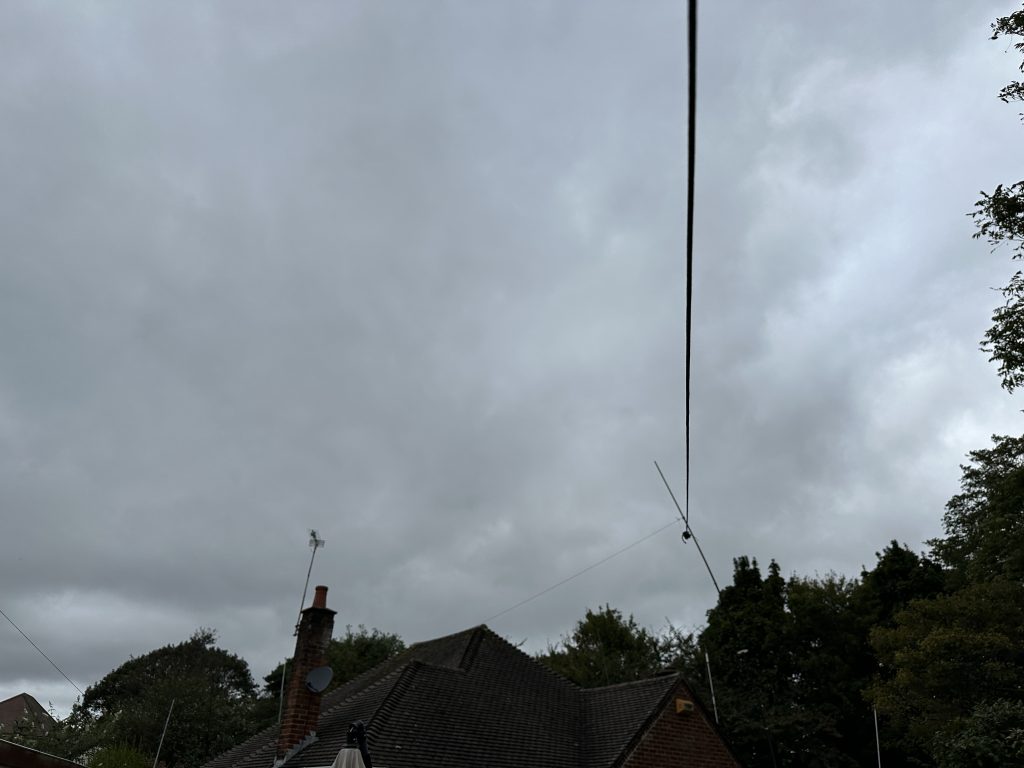
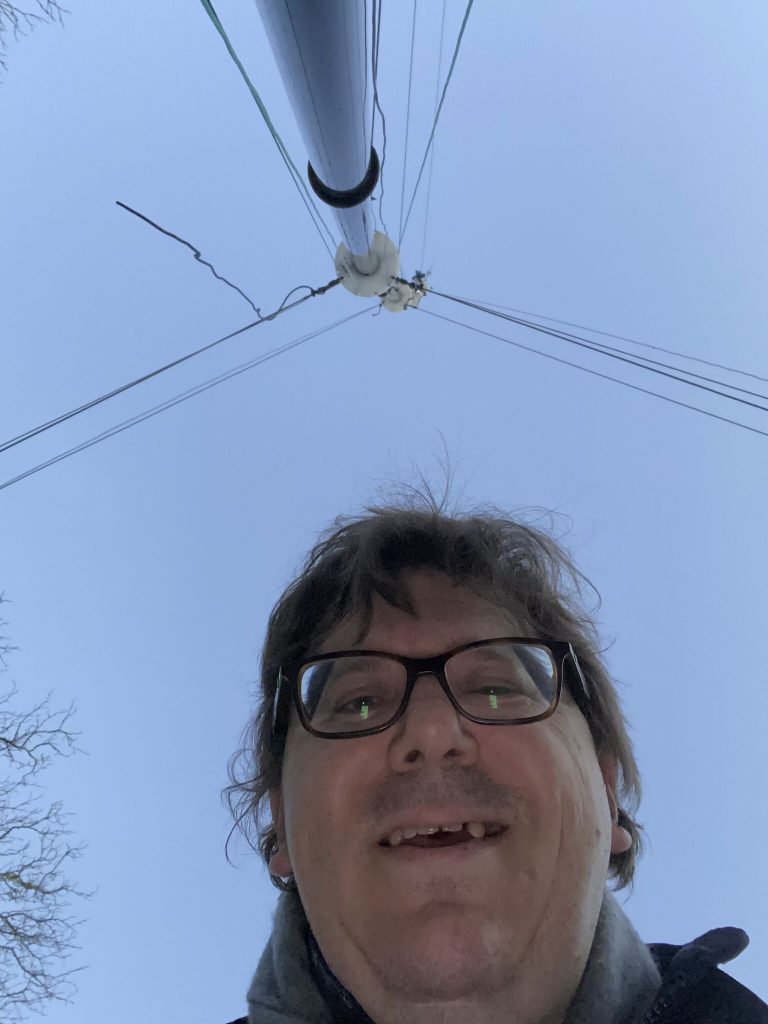
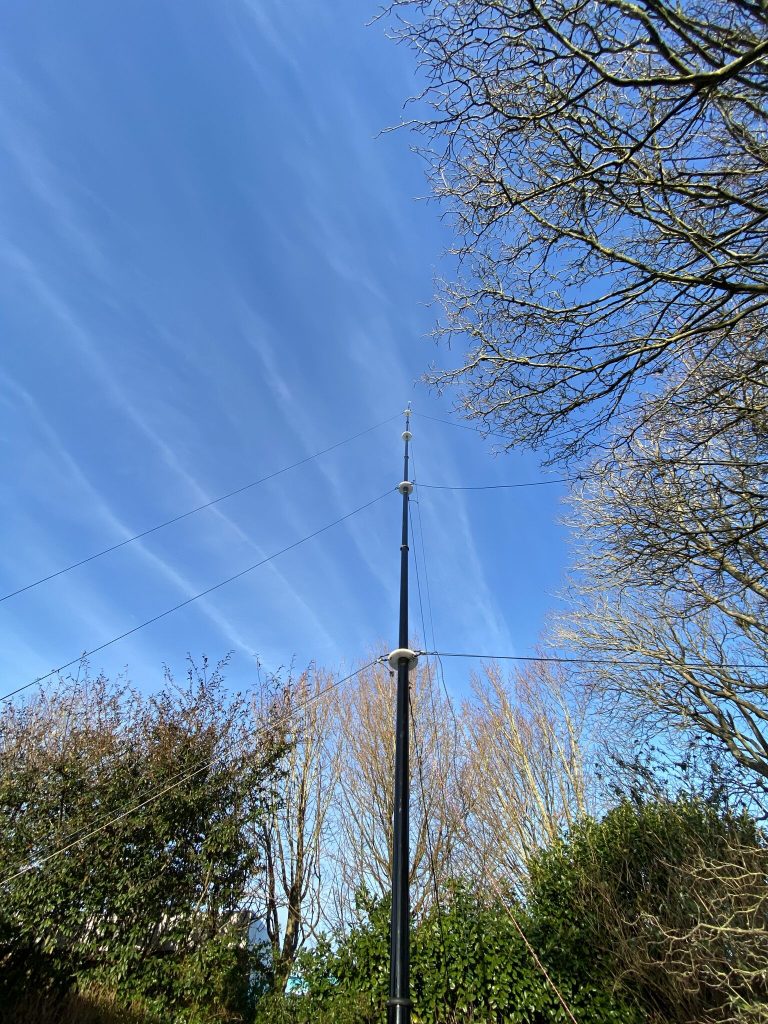
just above the roofgoing strongwell rigged
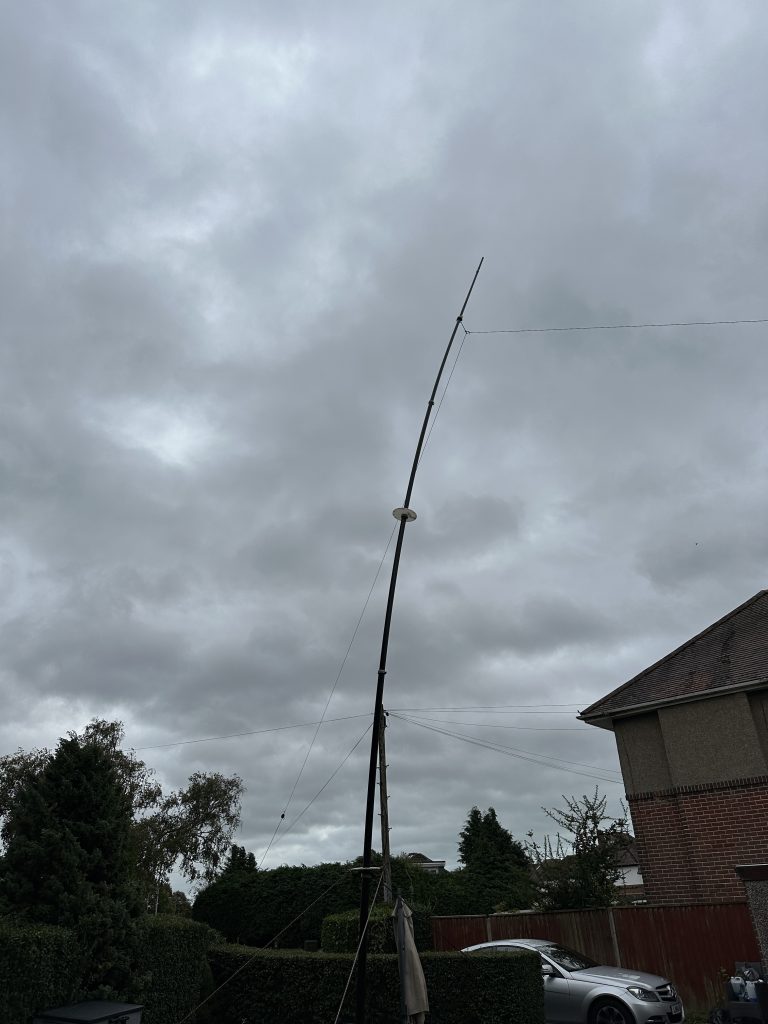
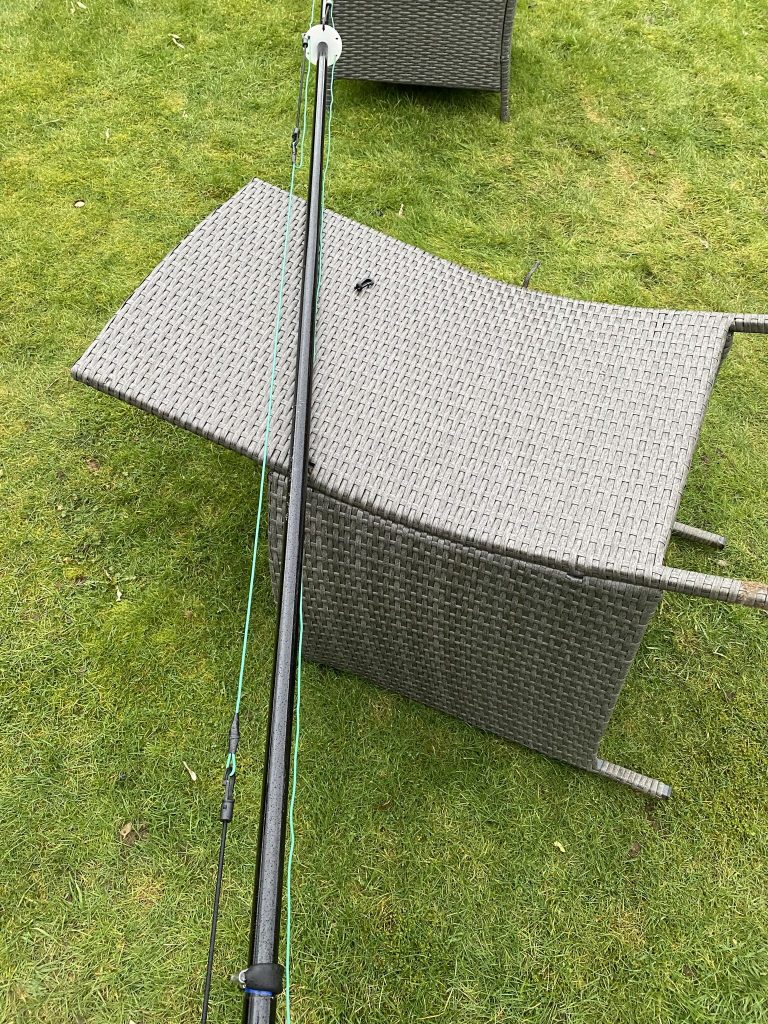
I was really happy that the mast would continue to function, i rigged it back up with 4 ropes to ensure it should stay up right, no further storms are forecast currently!
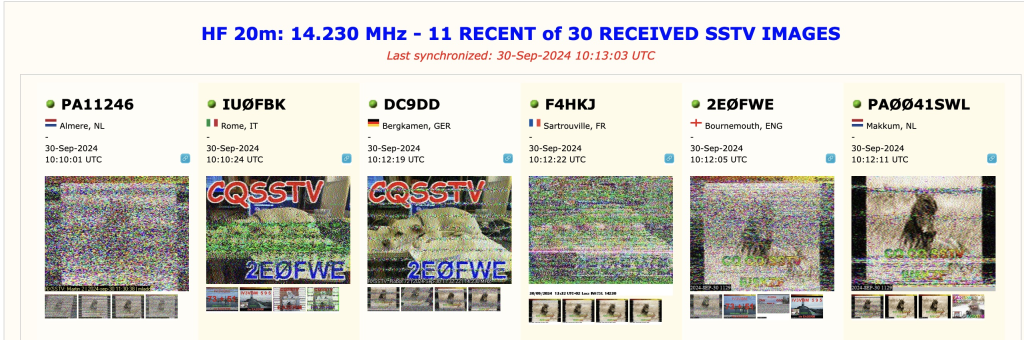
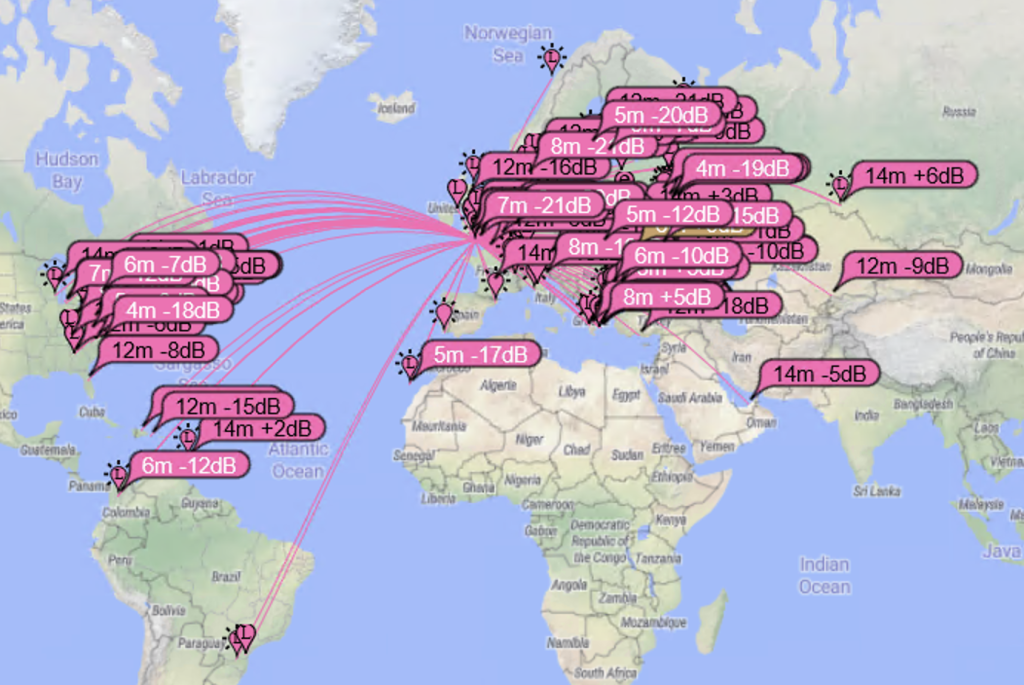
I went back to the shack and tested out SSTV on 20M – 1:1 SWR with 100W and my pic using Robot 72 was well received across Europe !
My other antennas and the bullet proof 6BTV was totally uneffected by the weather, but the 2m/70cm mast needs a bit of a push up, but I’m getting older and that antenna is getting heavier… 😉
I was very happy to have a QSO via the ISS Digipeater and received an excellent QSO card from EA2BW.
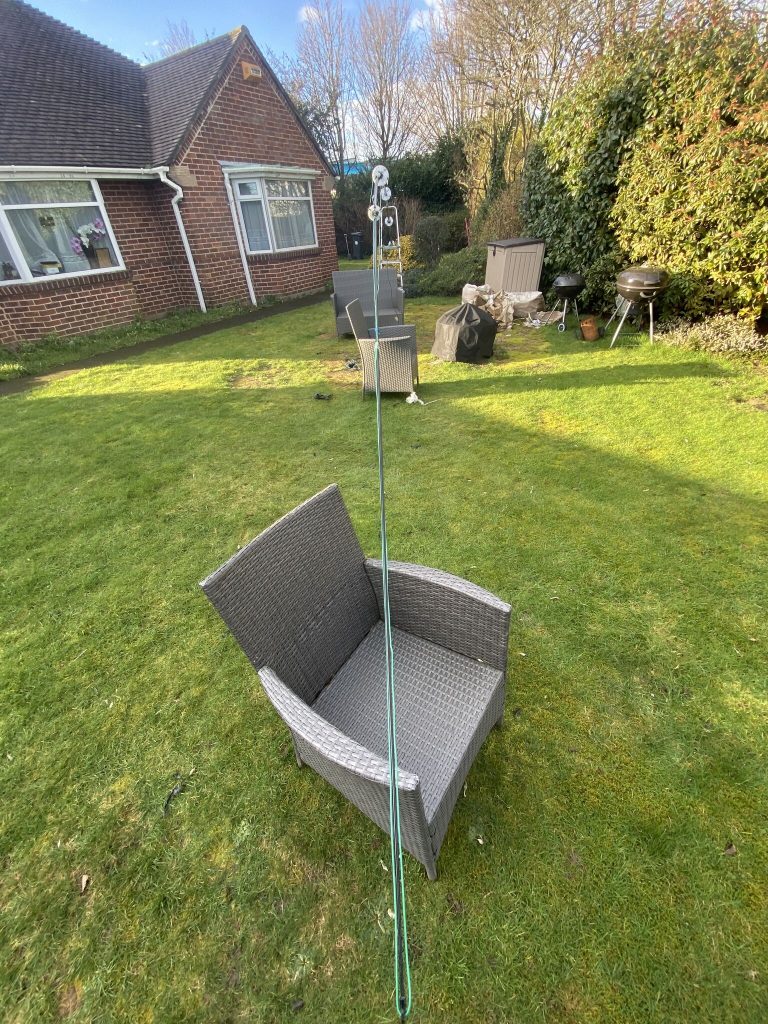
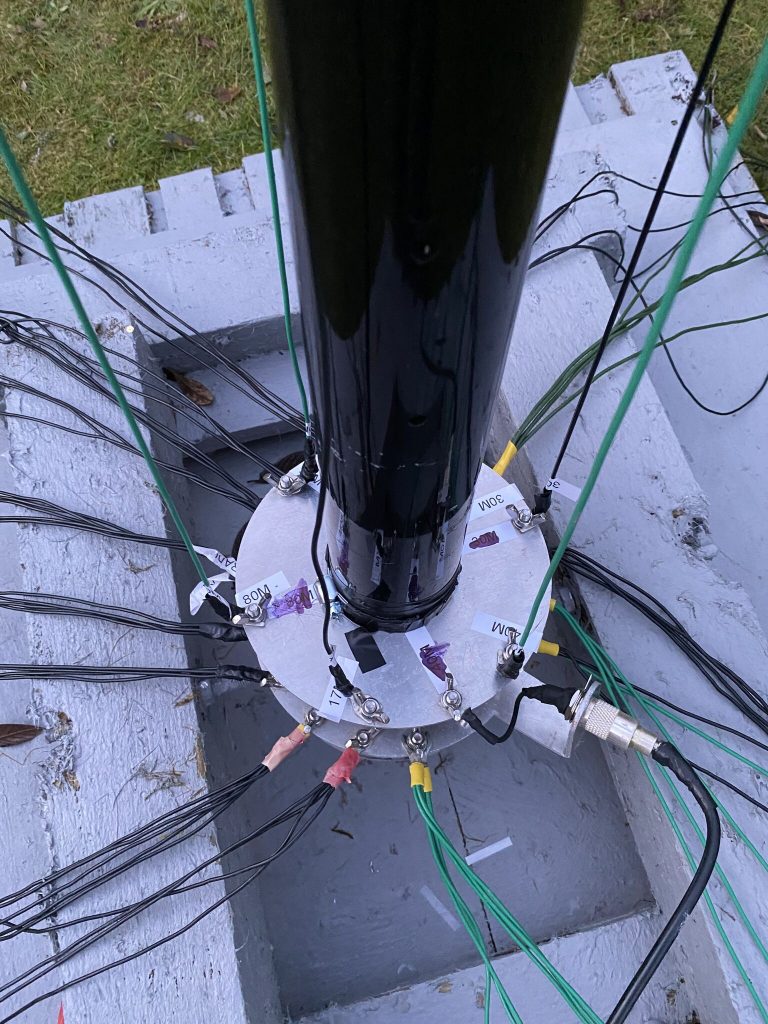
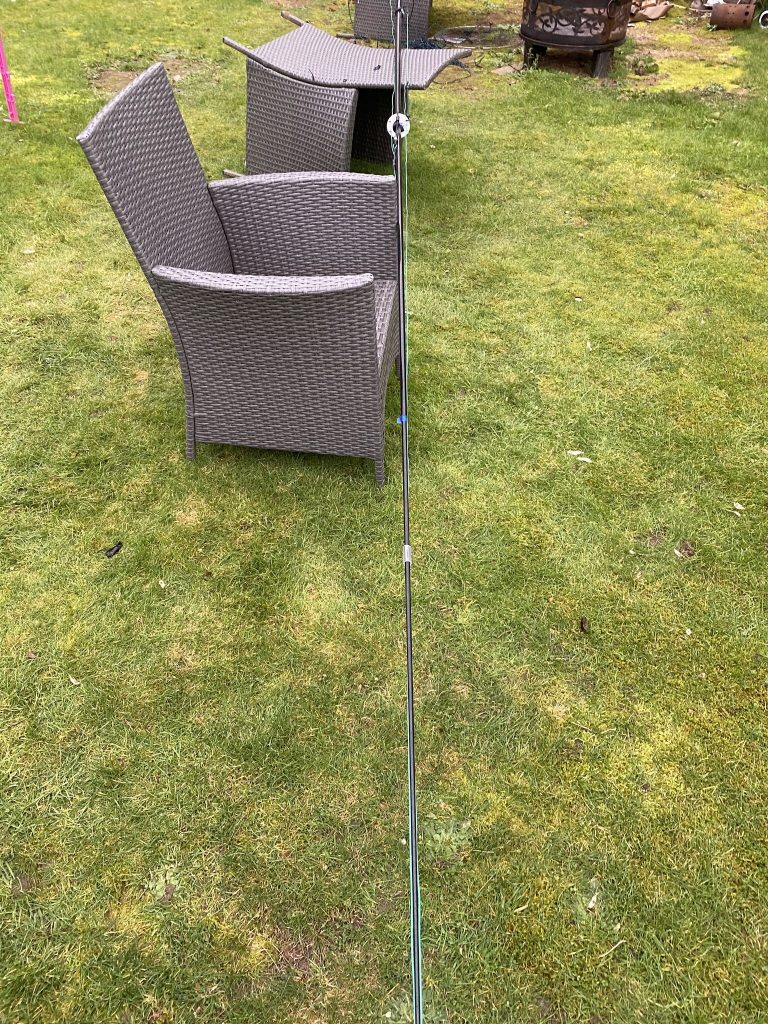
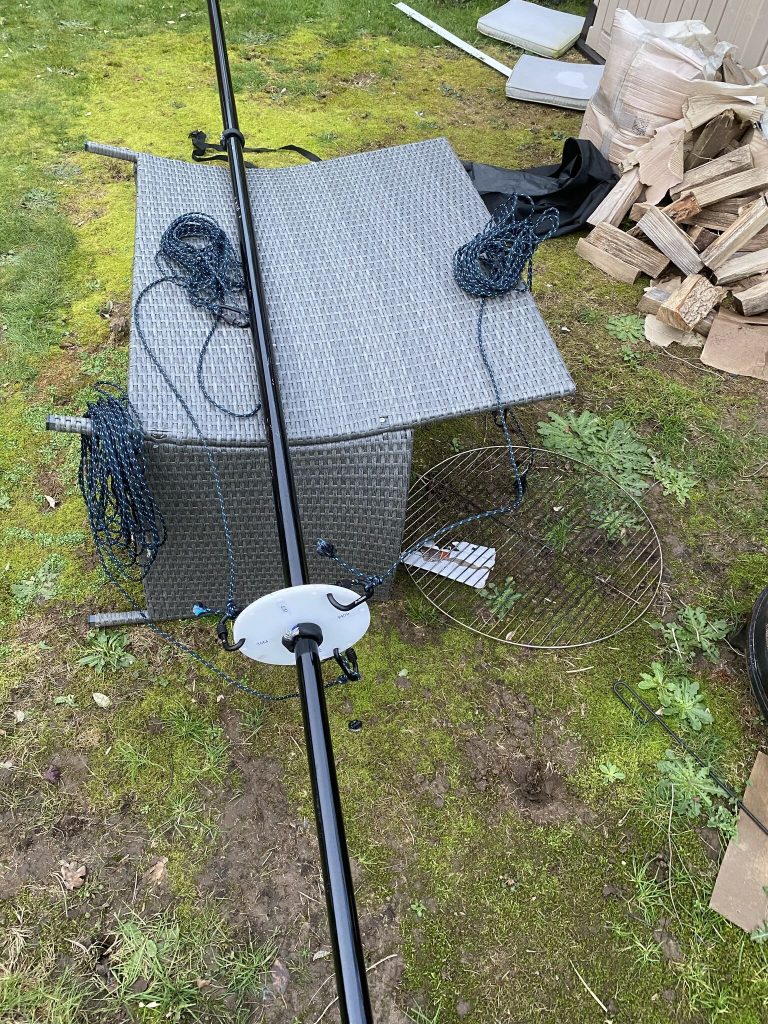
With some rather nice weather and available time, I was able to get to work on putting up the SOTABeams Travel Mast as a repacement of the DX Commander classic mast which has done me so well for serveral years, and one of the guying rings finally sucumbbing to the storms we had at the start of the month.
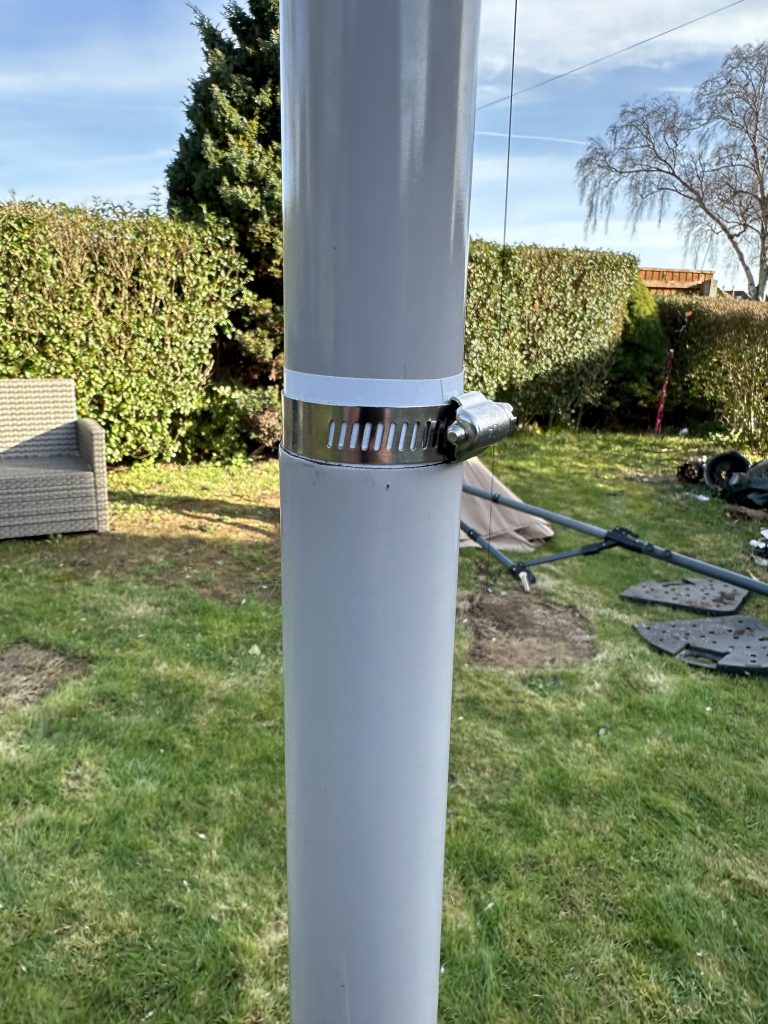
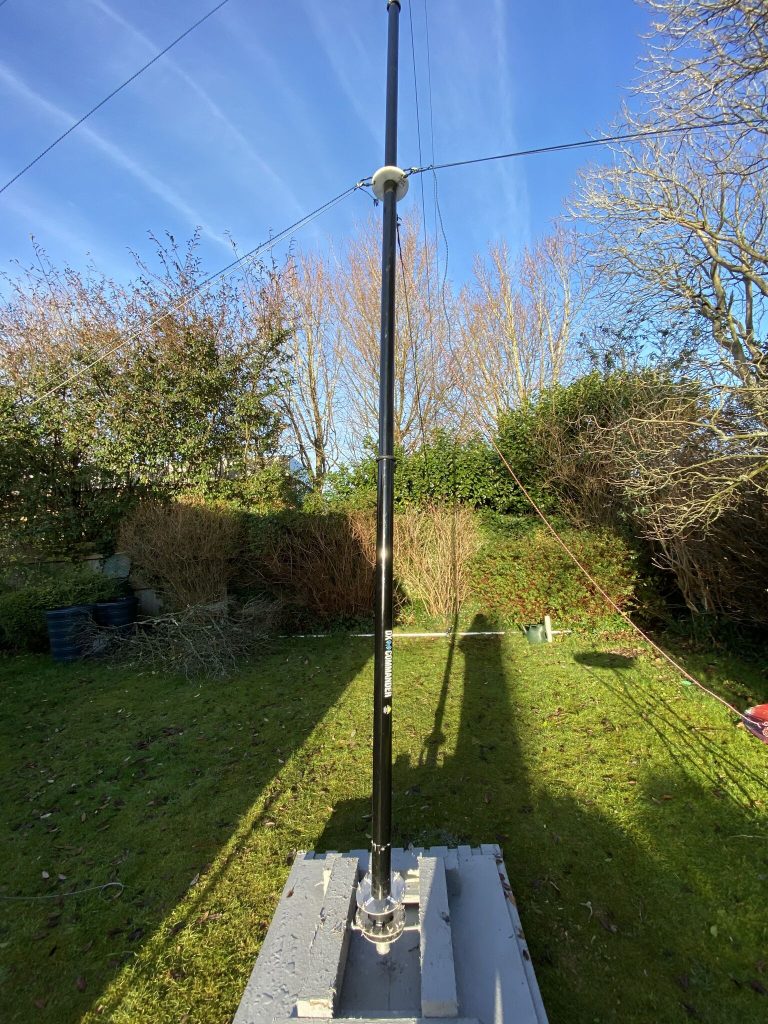
Use of electrical tape and jubilee clip to secure mast sections vertically
I put electrical tape and a jubiliee clip on each section to secure and make vertical slipping less of a possiblity. The same method worked very well for the DX Commander in keeping the sections up and those had to take a considerable strain when used in the way to use the split-dipole that the DX Commander is.
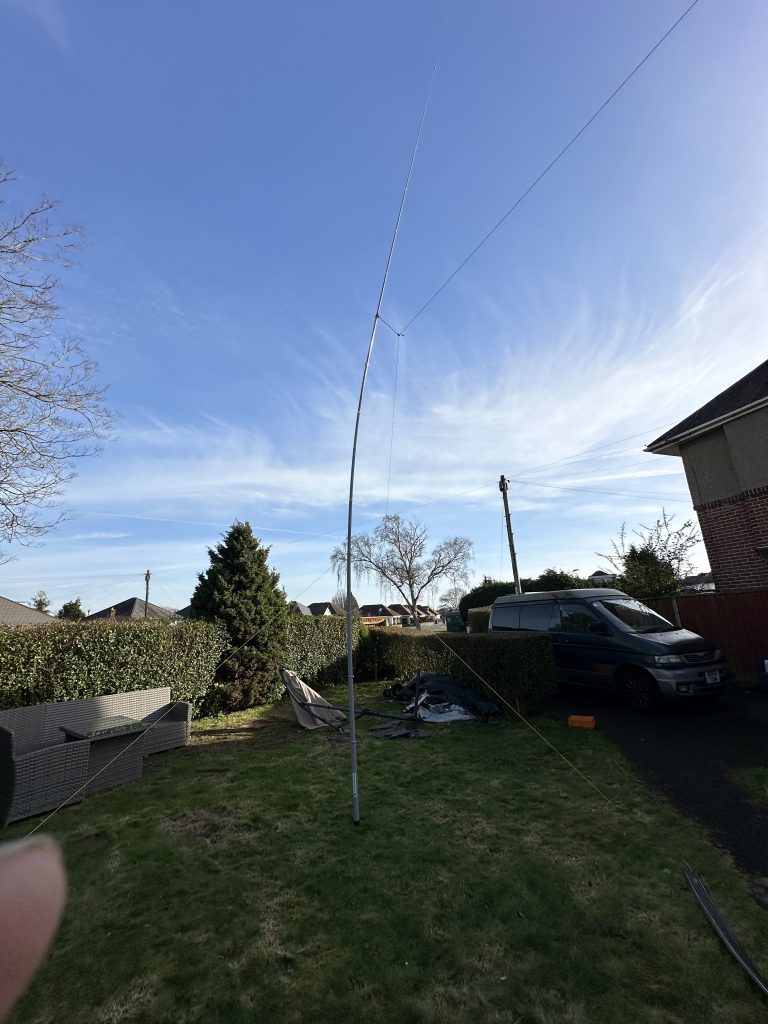
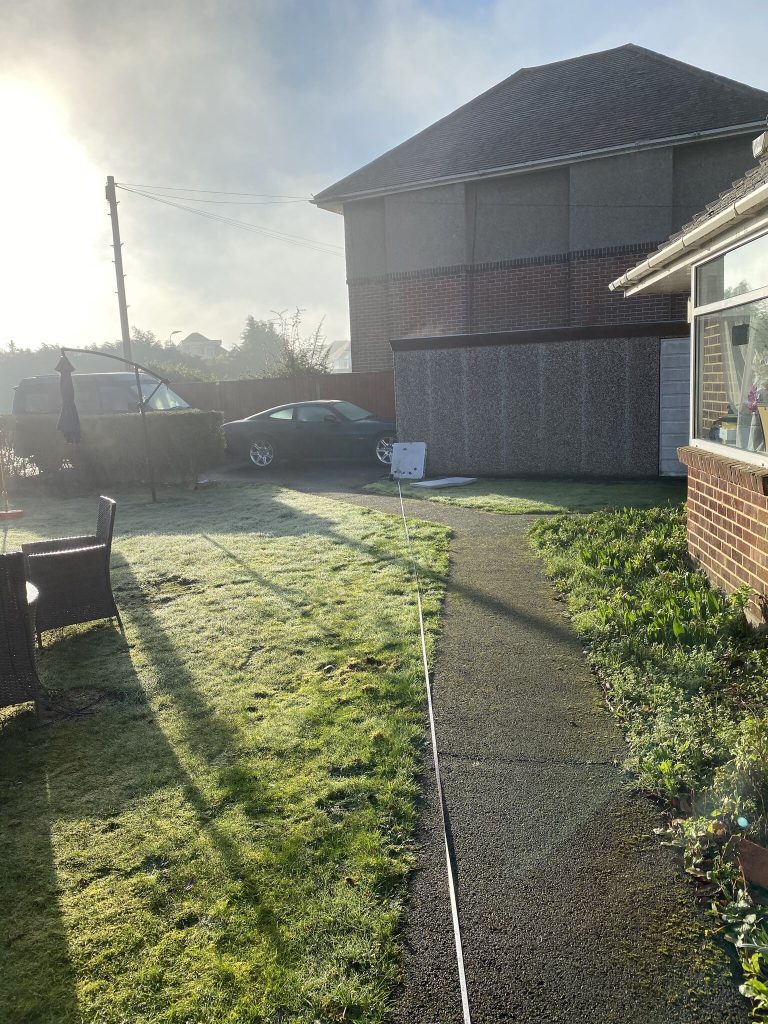
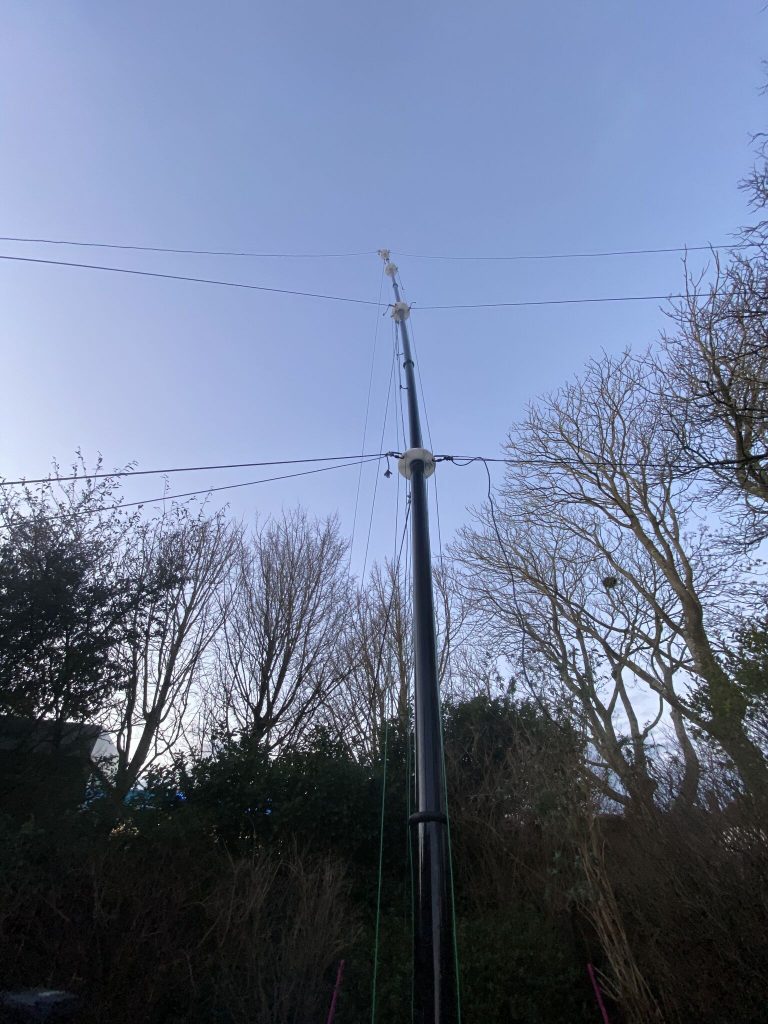
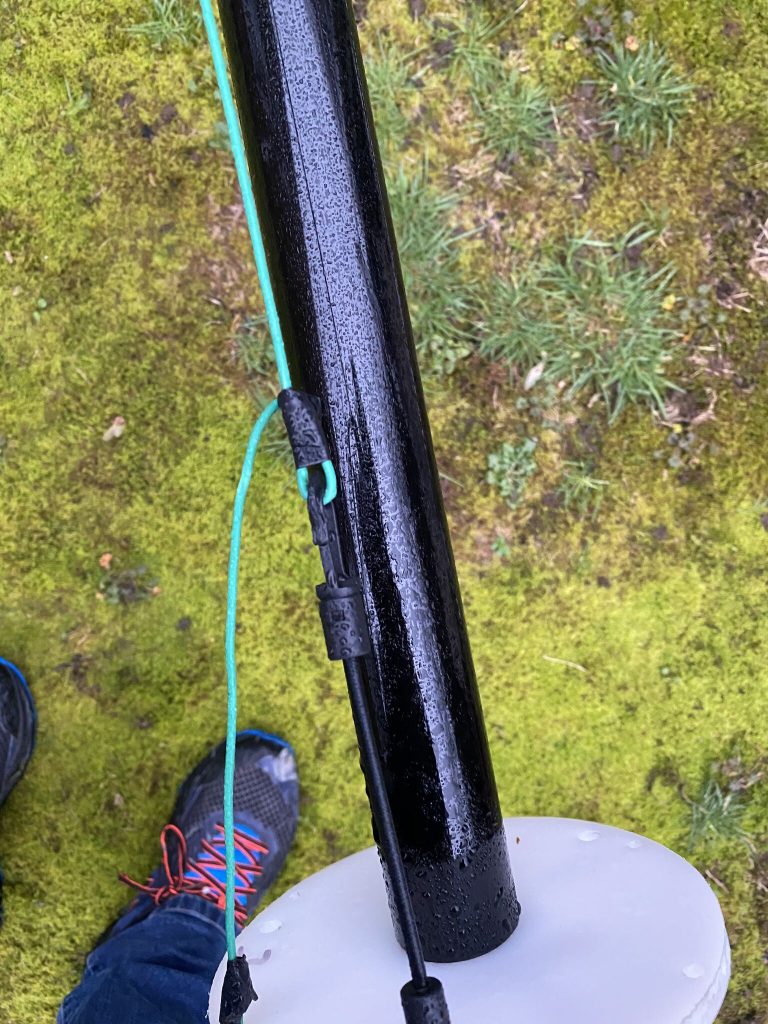
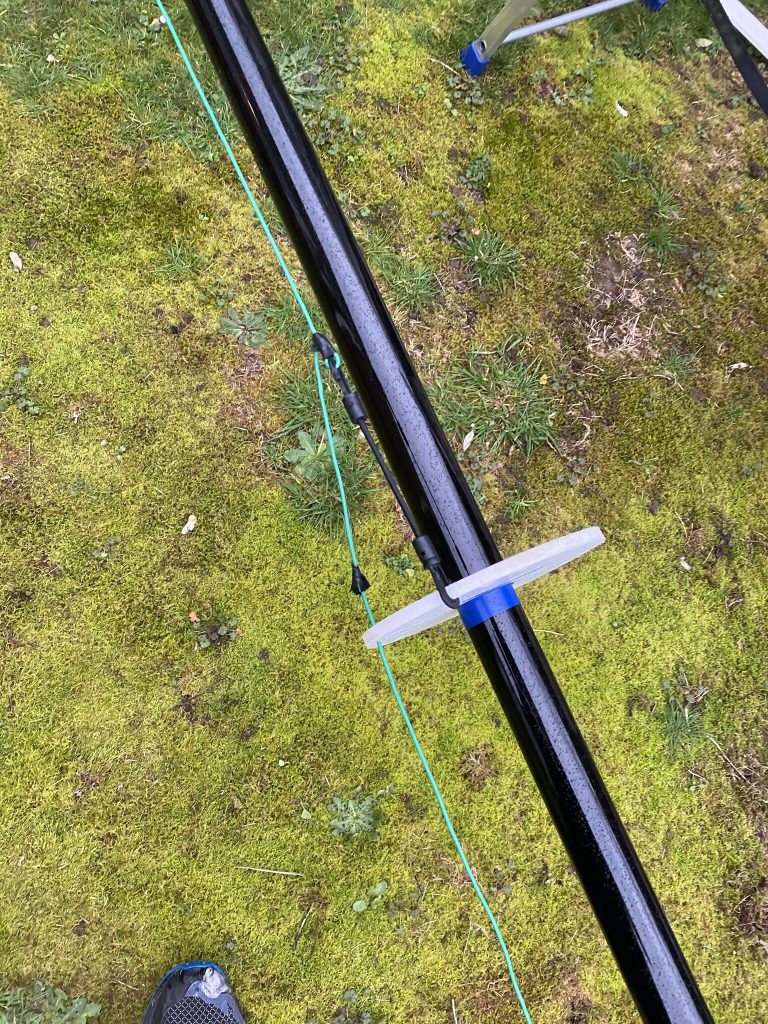
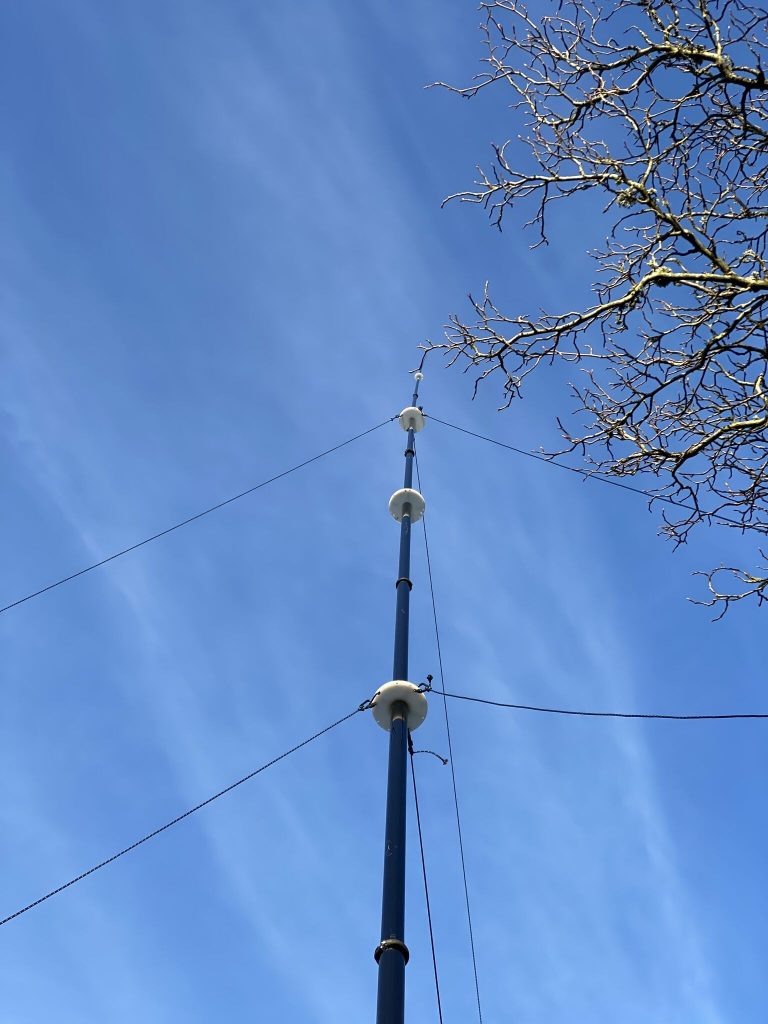
Wire up about 2/3s of the full mast height
I attached the wire to the mast via a piece of guying rope about 2/3’s up the mast. I may make this higher the next time I move the antenna, but as is, it clears the house nicely and is a good distance from the ground, I think more height will allow a full half-wave on 20m so something I want to do very much, given I enjoy SSTV on the 20M band alot.
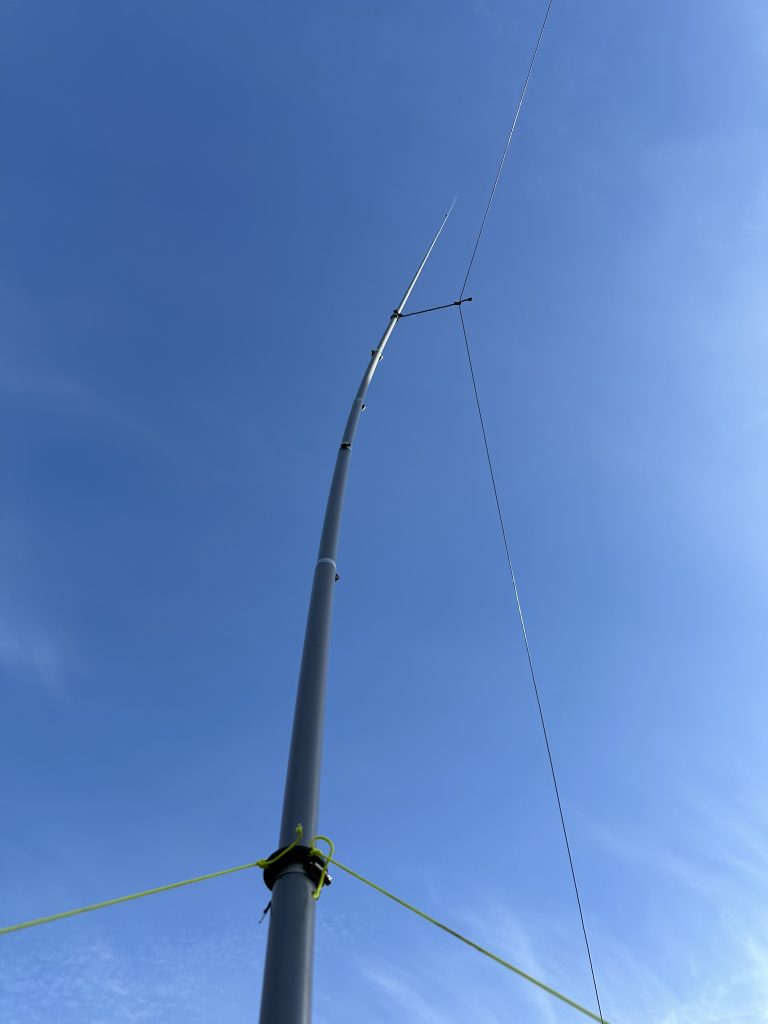
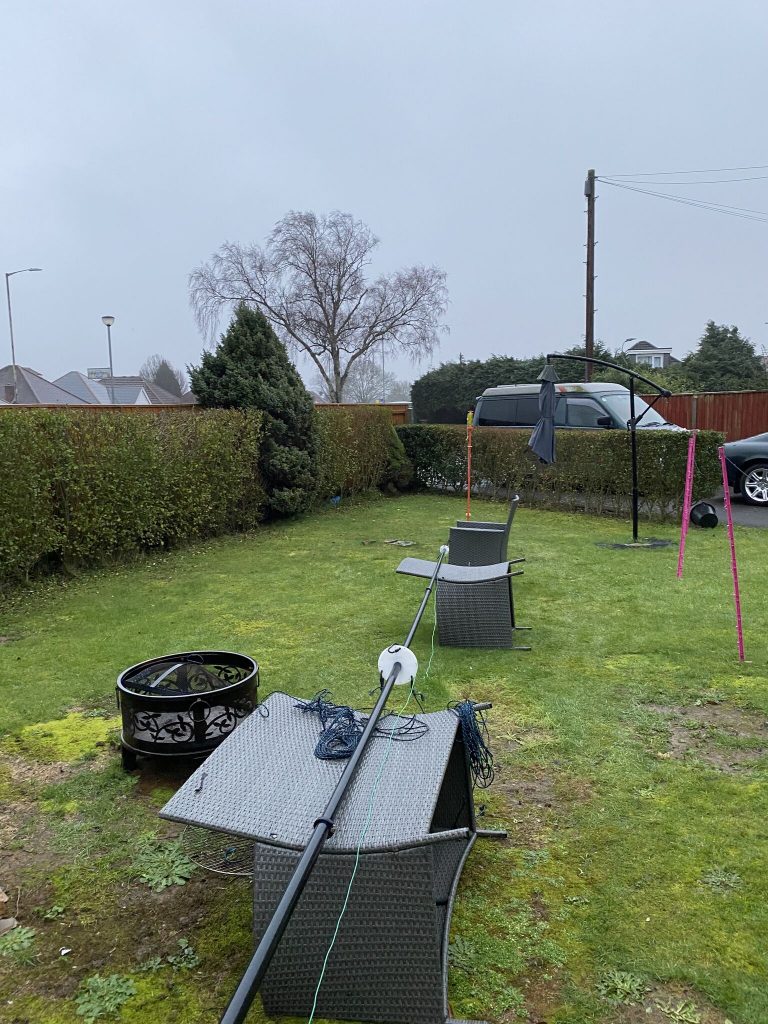
guying and little strain
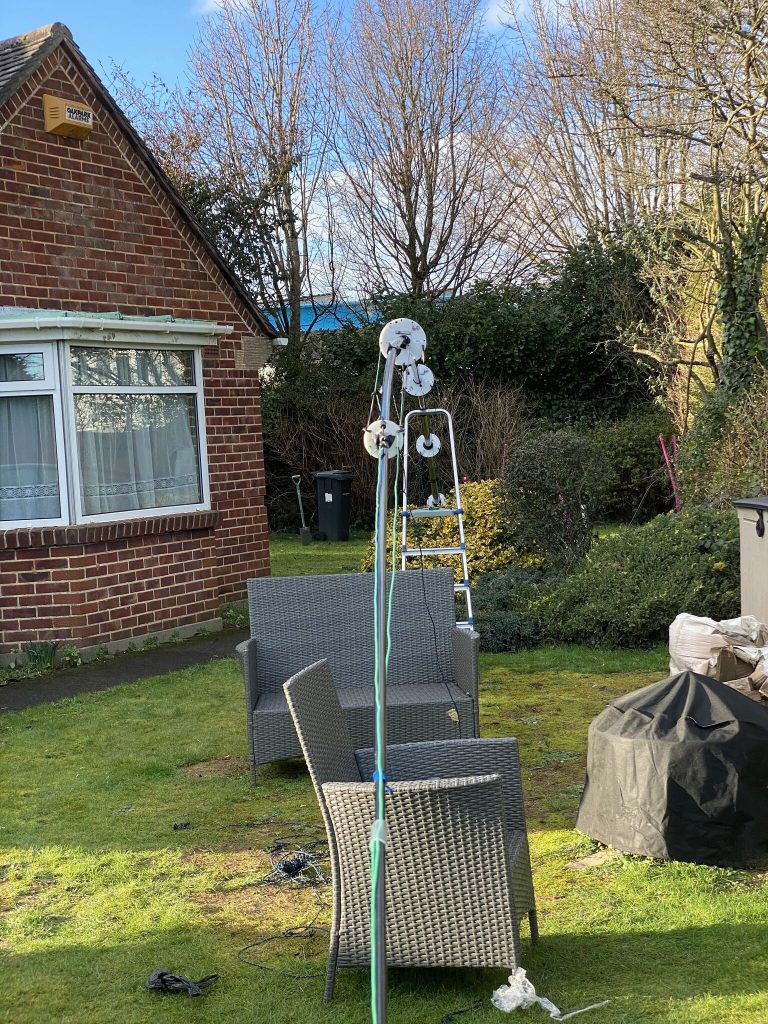
There is very little strain on the mast and a good level of taughtness to keep the wire from drooping and touching the house, the one set of guying wires are holding the mast very well, combined with some decent ground stakes.
I went into test the mast, 20M SSTV was simply flooded with QSOs – unable to get a QSO in as the band was so buys, but I guess thats a good thing showing that the reception was doing well. I jumped on FT4 on 10M as the band was well open.
FT4 on 10M doing very well on the EFHW antenna
I was very please to test the antenna and have a FT4 contact with JS9DS in St Lucia over 4000 miles away !
I’m very pleased with the mast and will improve upon it as the weather and mast moves to allow us to use the front garden more. Looking forward to catching you on the airwaves !
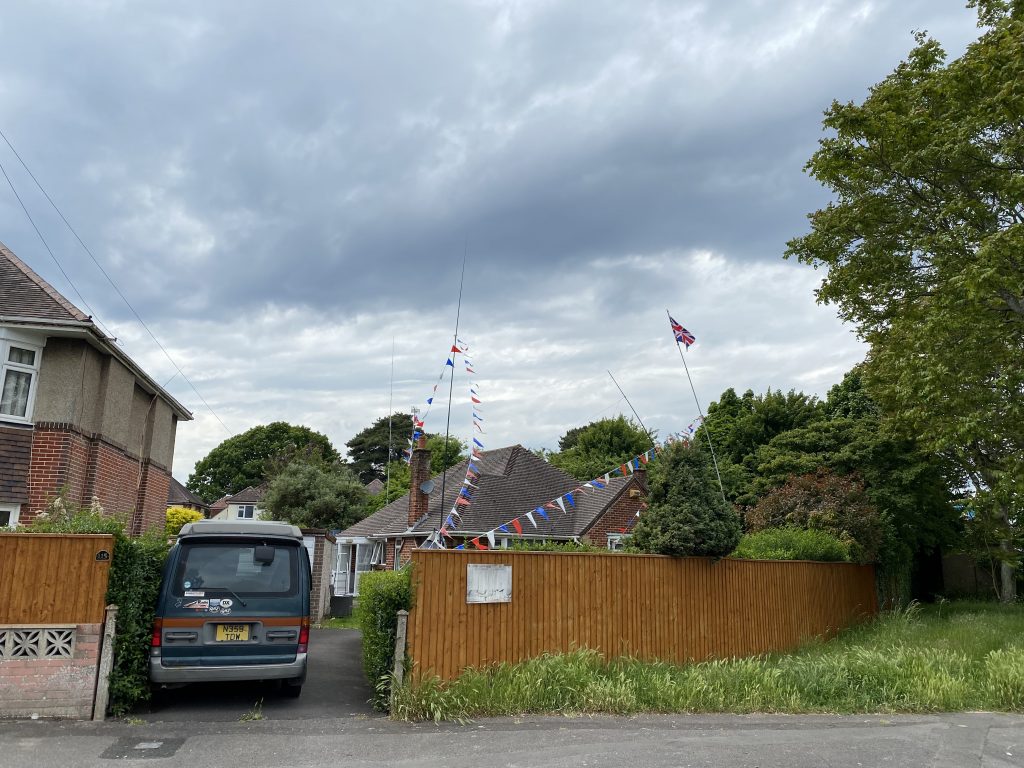
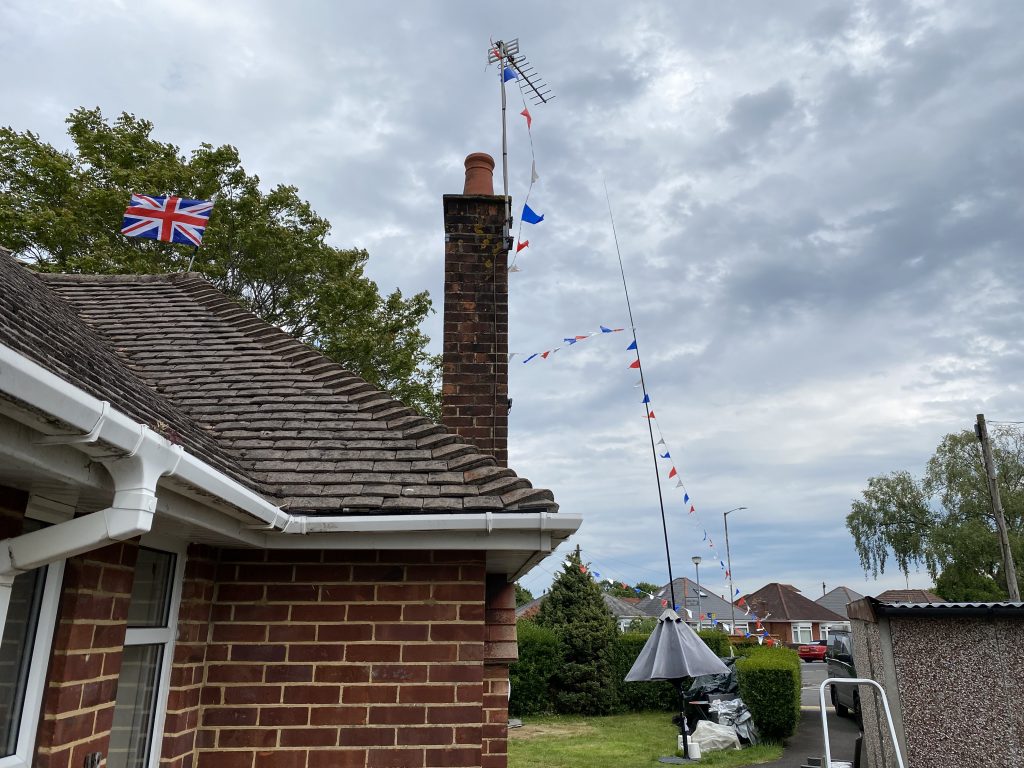
With a long bank holiday weekend for the Queens Platinum Jubilee I set about decoration the QTH. Whats the ham radio connection ? Well I mostly re-used antenna masts for the bunting and flags.
QTH Bunting and Flags
After an hour or so I got the bunting and flags up. One line of bunting accidentaly on purpose got caught up in the defunct TV antenna. As it was providing a good support to the bunting, I left it there !
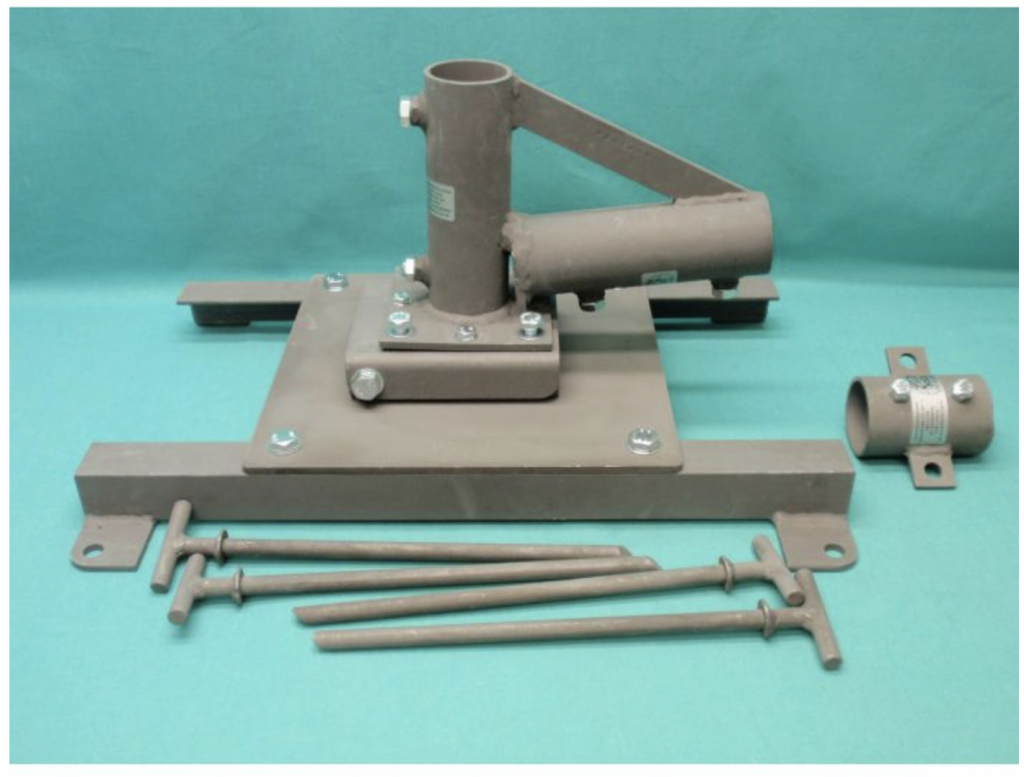
For the Union Jack flag pole I took down the defunct NOAA antenna which is supported by a awesome Barenco tilt base, this makes getting masts up really easy.
Barenco Tilt base
I guyed up the mast it does get it bit blustry in that corner of the garden as its not shielded by any trees/houses.
For the bunting I lowered the 80m end fed antenna on the DX Command mast and hooked it onto one of the guying plates, it went up really easily, that mast is pretty bullet proof and the guying plates are extra strong, allowing the bunting to go over it, with plenty of distance between both (I dare say a few watts in the wire could effect the plastic bunting !)
Dx Commander holding the 80m end-fed wire and bunting !
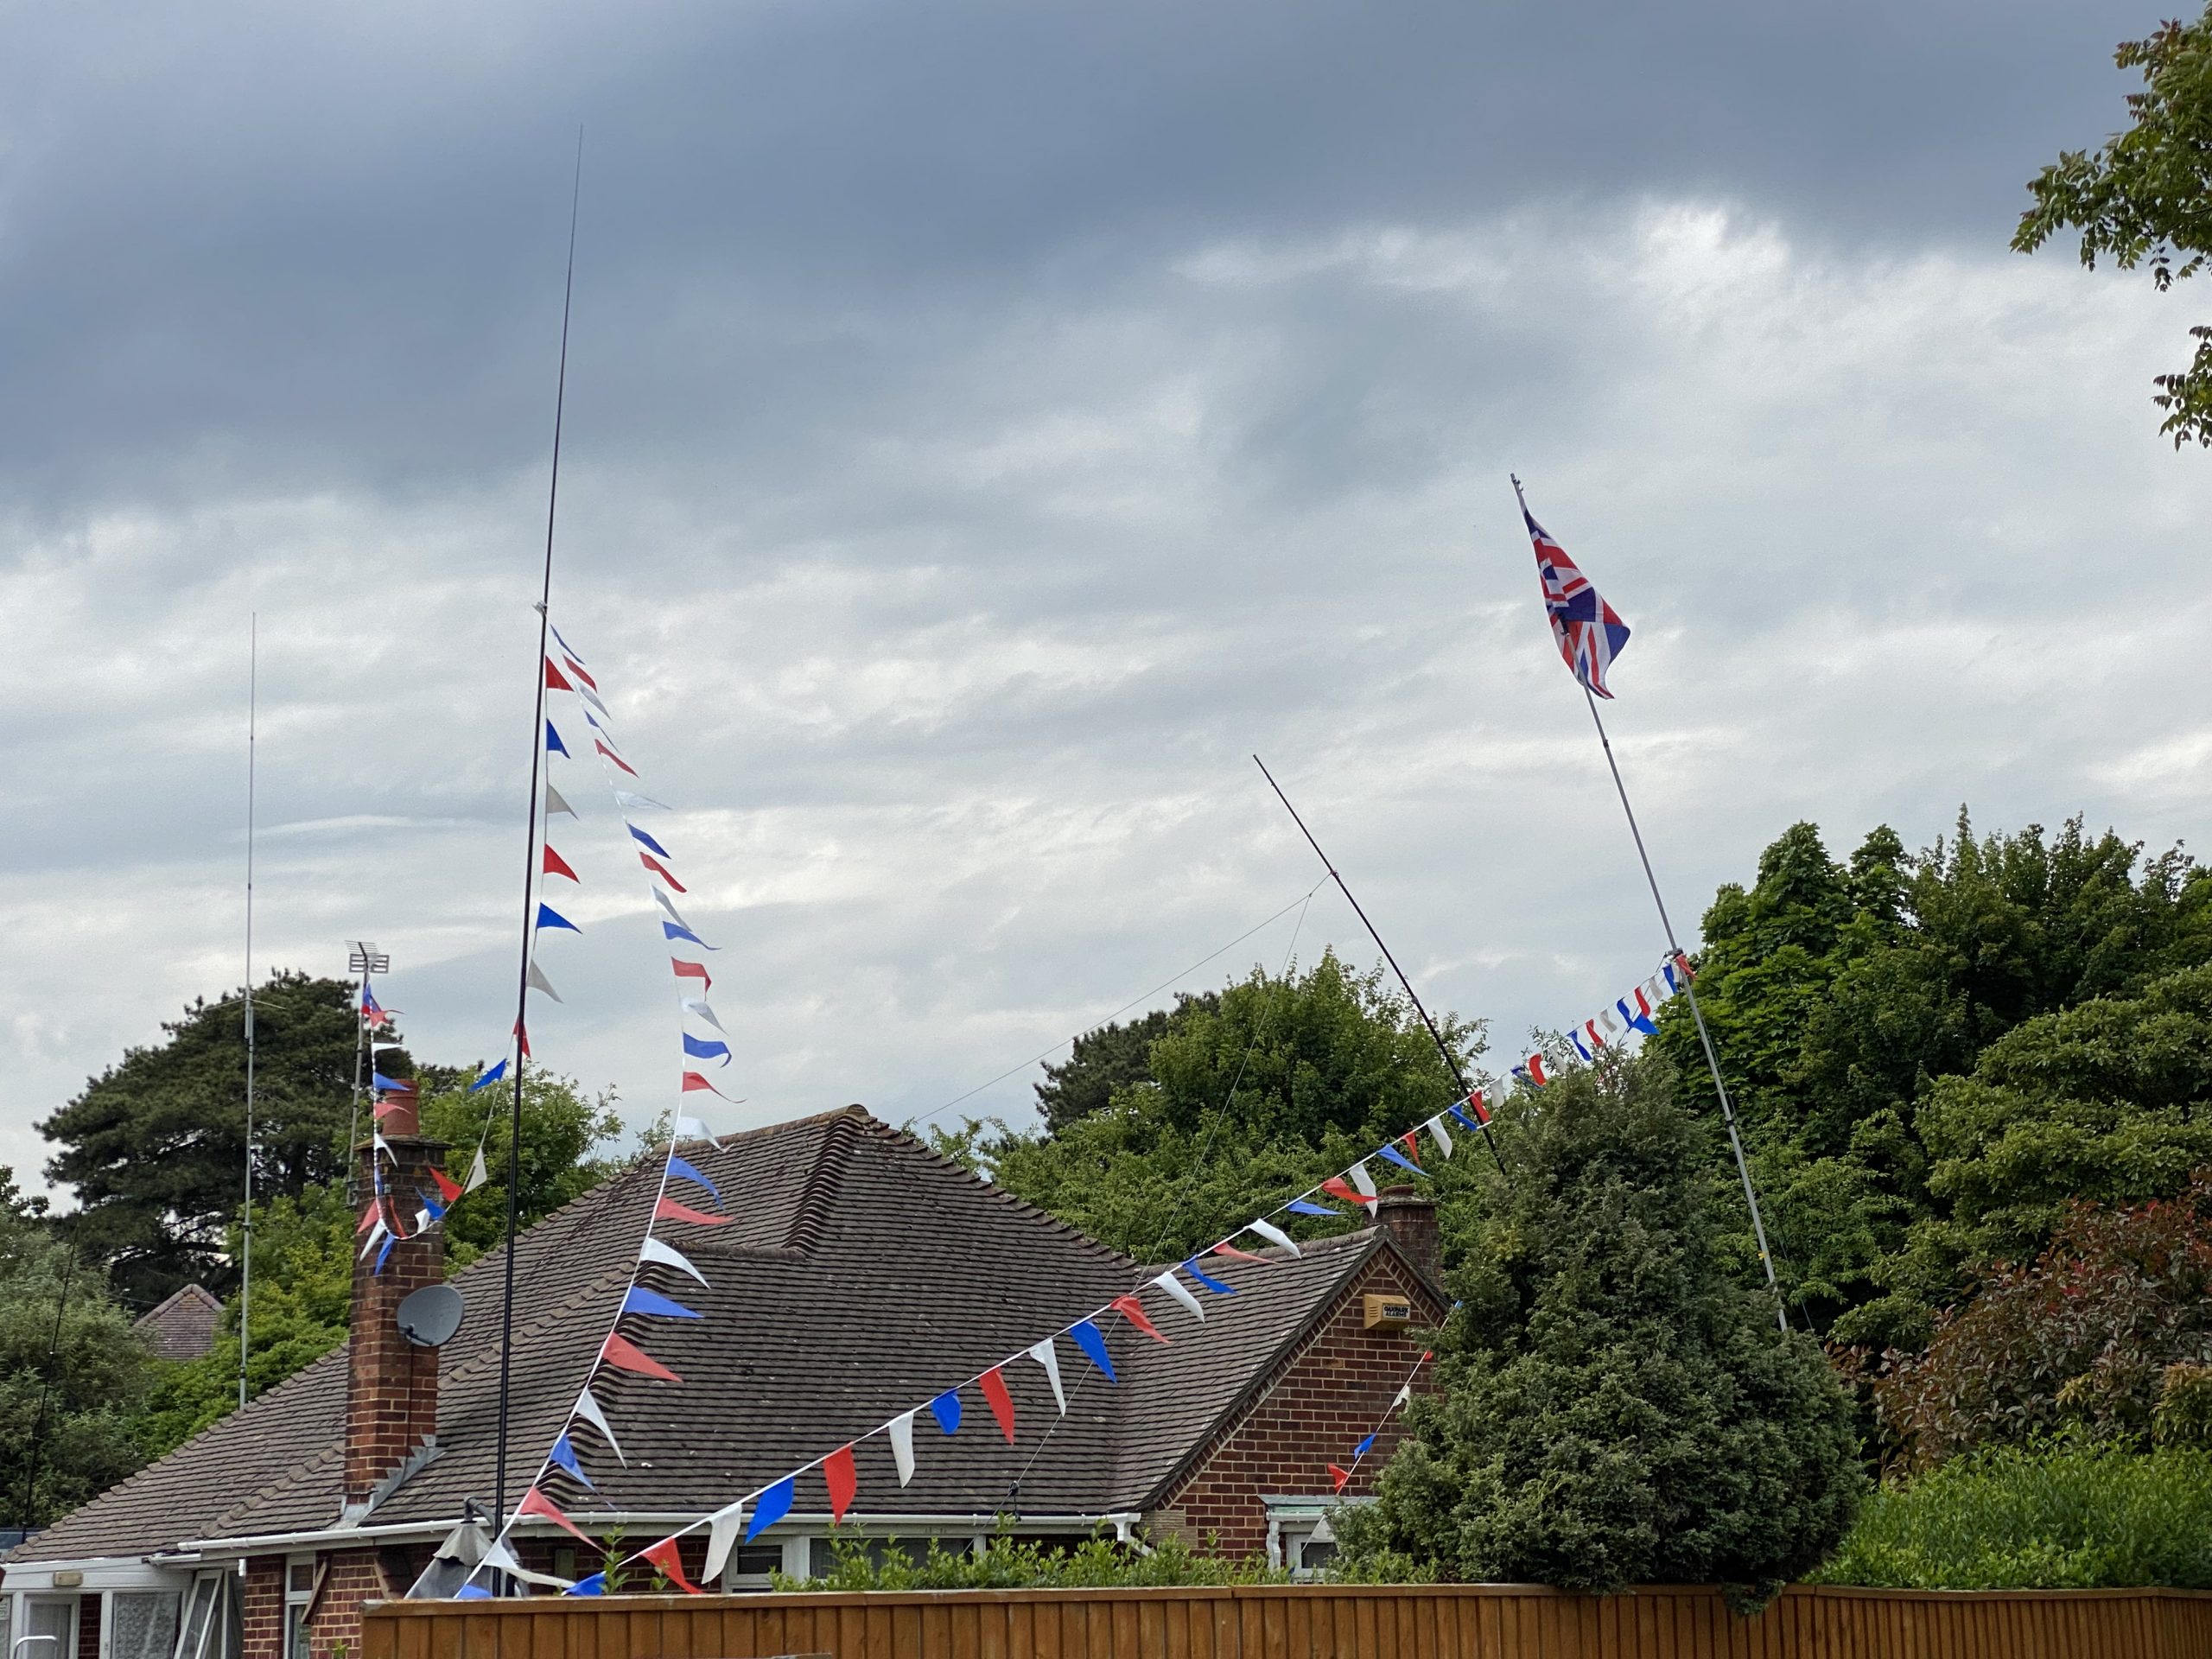
For the other bunting I used a Sotabeams mast attached to our garden umbrella. It has a fair bit of ‘lash-bonding’ and then sizeable weights on the base to keep it vertical. During raising the bunting flapped around somewhat and got caught in the TV-Antenna ! I did attempt to get it down with another Sotabeams mast, but it is pretty tangle around the base of the TV Antenna ! So I’ve left it there for now.
A happy Jubilee QTH
I was happy to get all the bunting and flag up, I vividly remember the jubilee from 1977 and the street party then and what a happy occasion it was. Thankfully there is a street party tomorrow and am hoping the good weather holds out, its been plenty of fun putting the flag and bunting up and I hope it sets the jolly atmosphere on the street off (although the lower half of the road at the QTH).
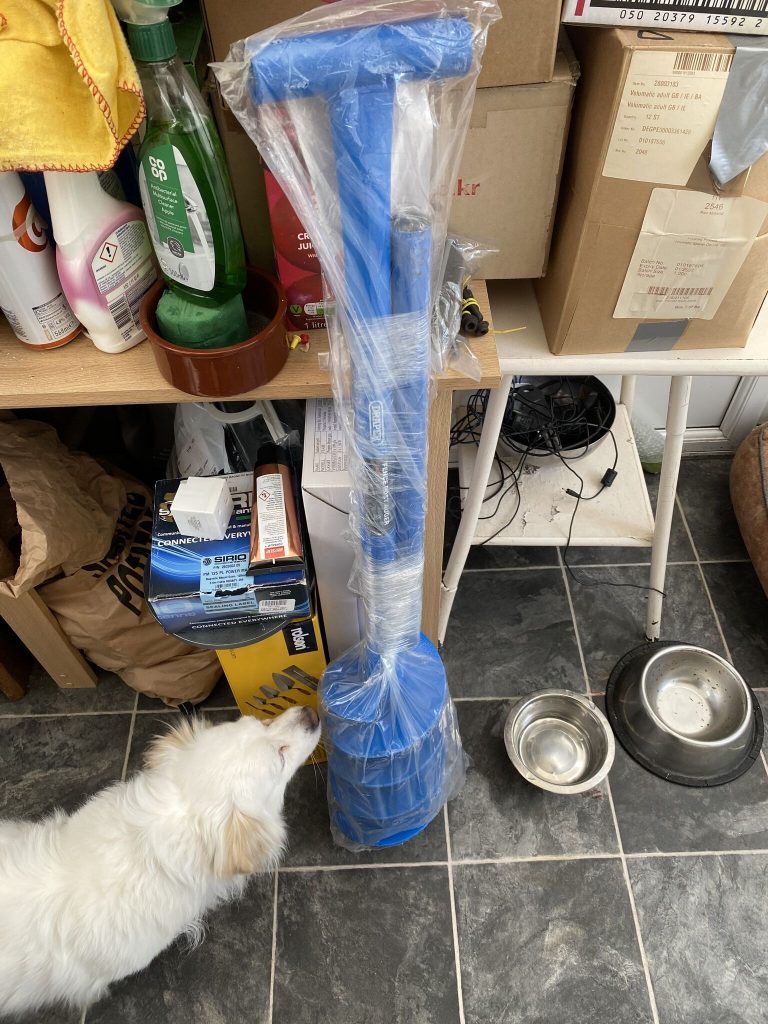
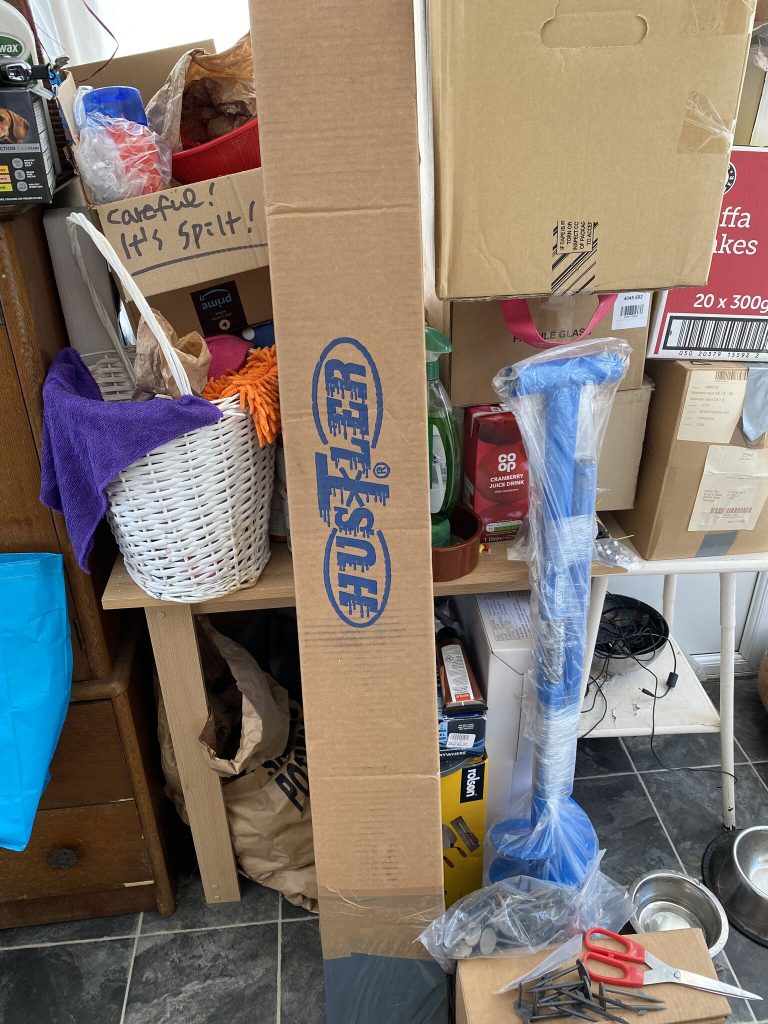
So having looked at reviews for a multi band vertical, the Hustler 6BTV looked the right model for me. The hustler came from Radio World, and the accessories from ML&S, as they didn’t stock the 6BTV at this time. Needless to say both arrived very promptly.
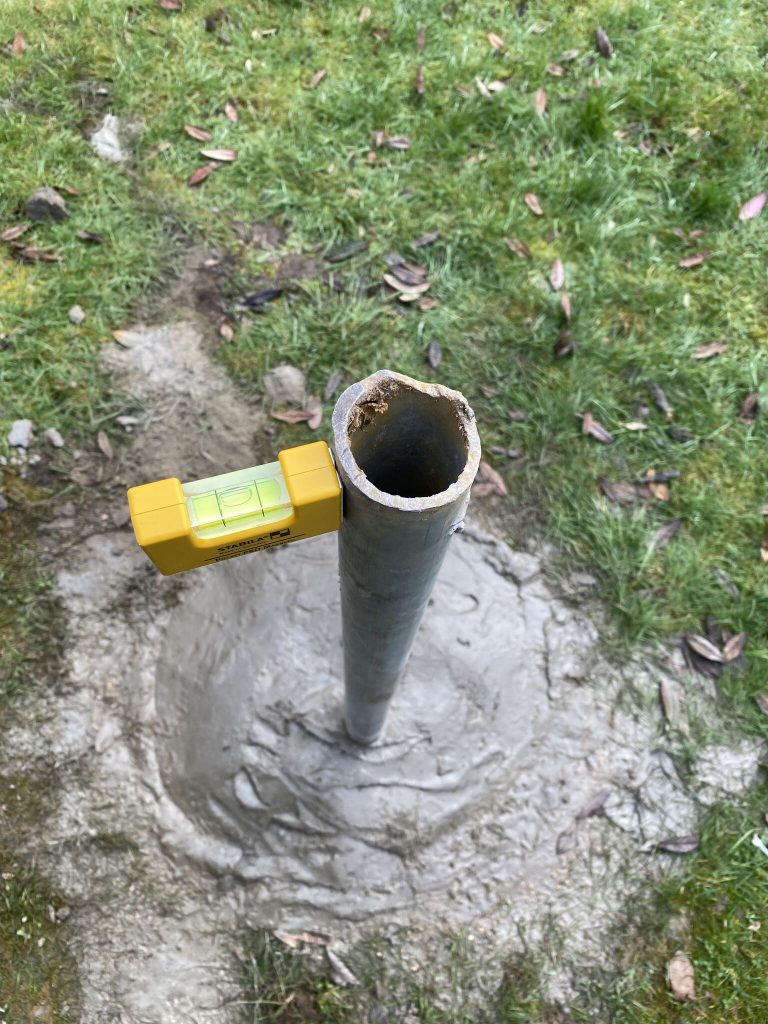
I dug a hole to recommended depths and sunk a decent bit of scaffold pole I had into it. Having never done anything like this before, i was happy with the outcome in that the pipe came out level and the concrete set well. At the moment, it looks like what it is, a post in th eground, but it will look much nicer once the installation is complete.
dig it
6tbv in the box
new toys
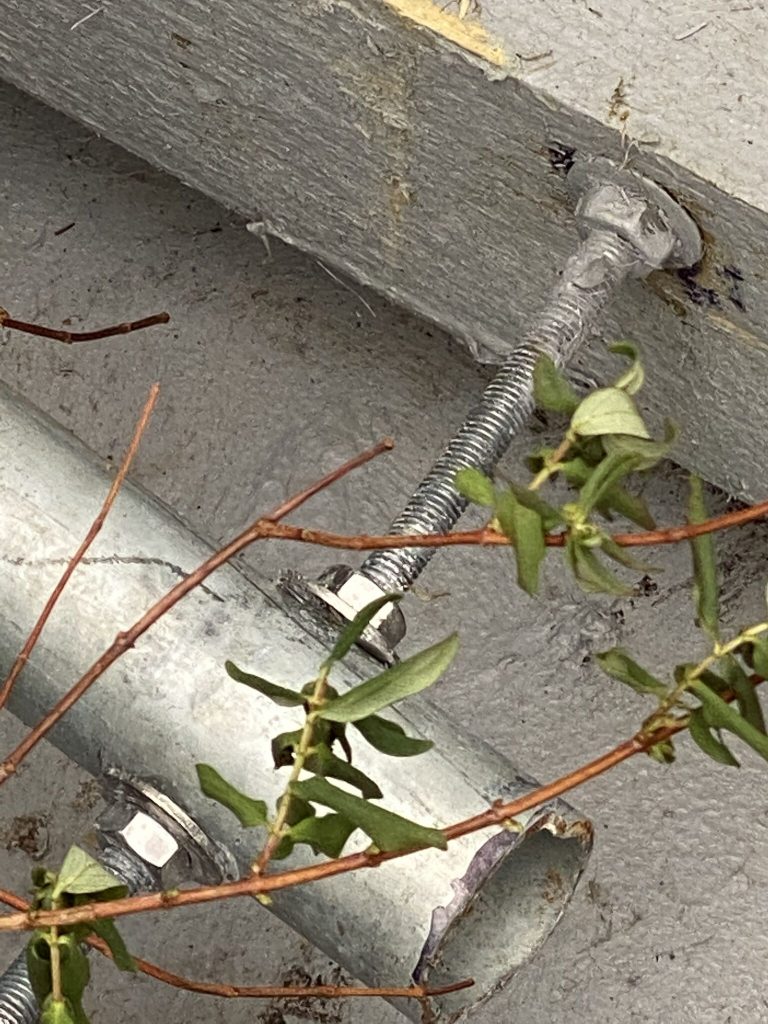
It should be noted the reason to try out a new antenna is that the tilt-base on the Nebula had a defect and would require a new bolt and drilling the base again. I also wanted something that was easier to take up and down as even with the tilt base the Nebula is quite a weight, and the guy ropes tended to get tangled quite frequently.
nebula tilt base – bent/twisted M10 bolt
It has set a very high standard in band coverage and reach, so it will be interesting to do a comparison on the same transceiver.
support post level
tunnel for coax
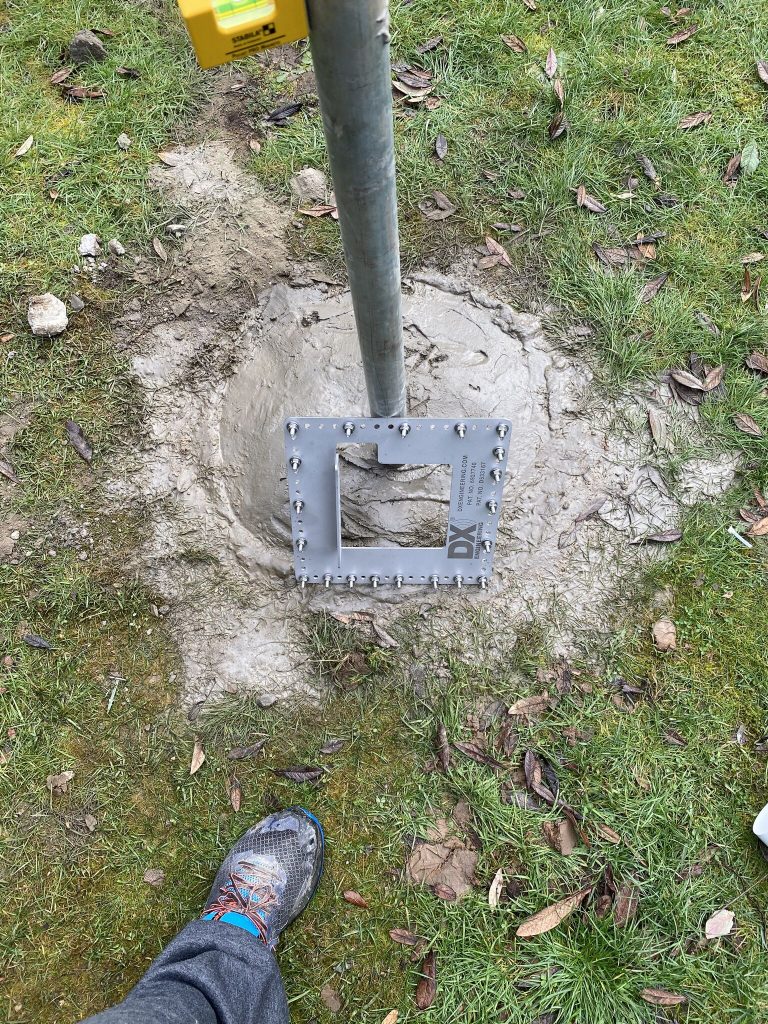
radial plate
construction so far
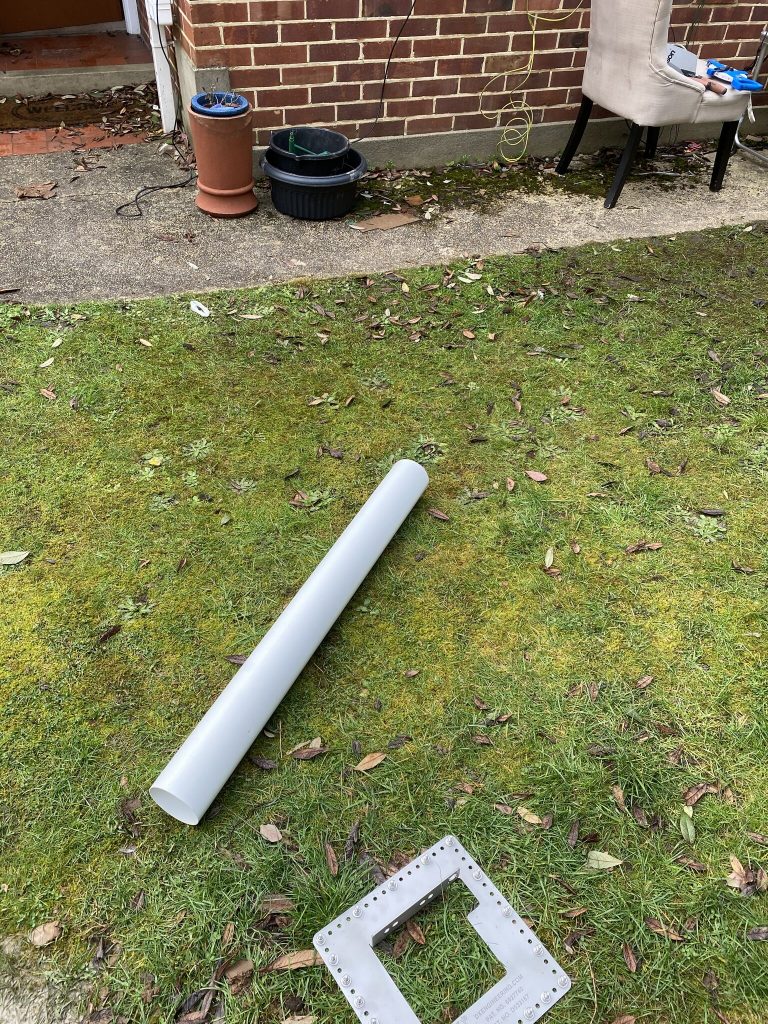
The post to attach the DX Engineering and Tilt base has gone in really well, and very level. I had one section of PVC piping already in the shed, and have ordered one more and some vent-like structures to feed the coax thru under the radials will obviously check the coax for connectivity before burying it !
I’m waiting on some more radial plate bolts, so far it has 20 on there, but i want the full 60, as I’m limited in space in some directions, I want to get as many as I can down in a very radial/spoke fashion as described in the documentation.
So far I’m really encouraged by how well the instal is going and the documentation supplied with the antenna and components is top notch, but the proof will be in the performance of the antenna, which I hope wont be too long in happening !
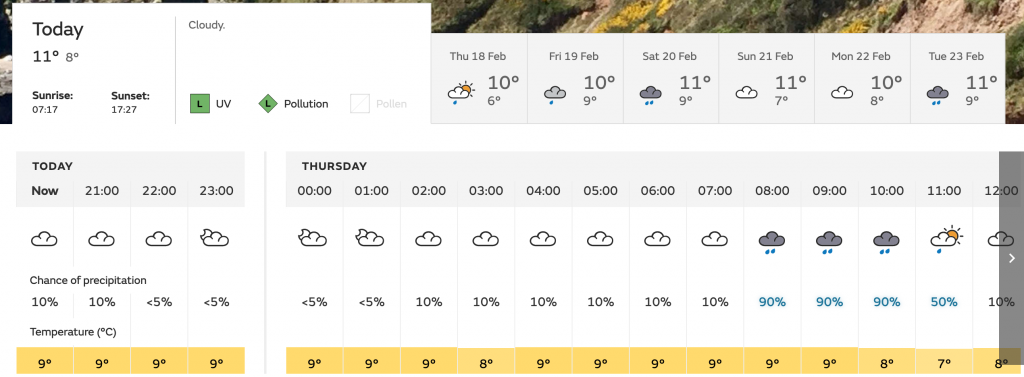
So its already ‘hump’ day (aka Wednesday) – i’ve had very little time to even go outdoors and the weather is being typically English.
English weather for an English Seaside town in Winter
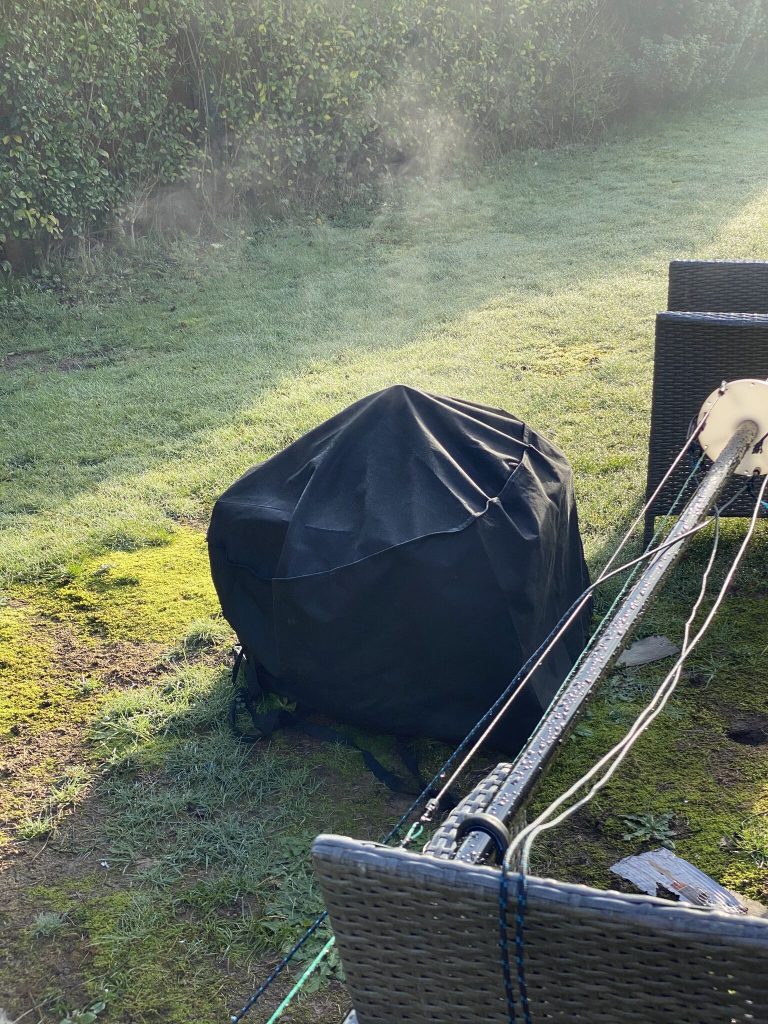
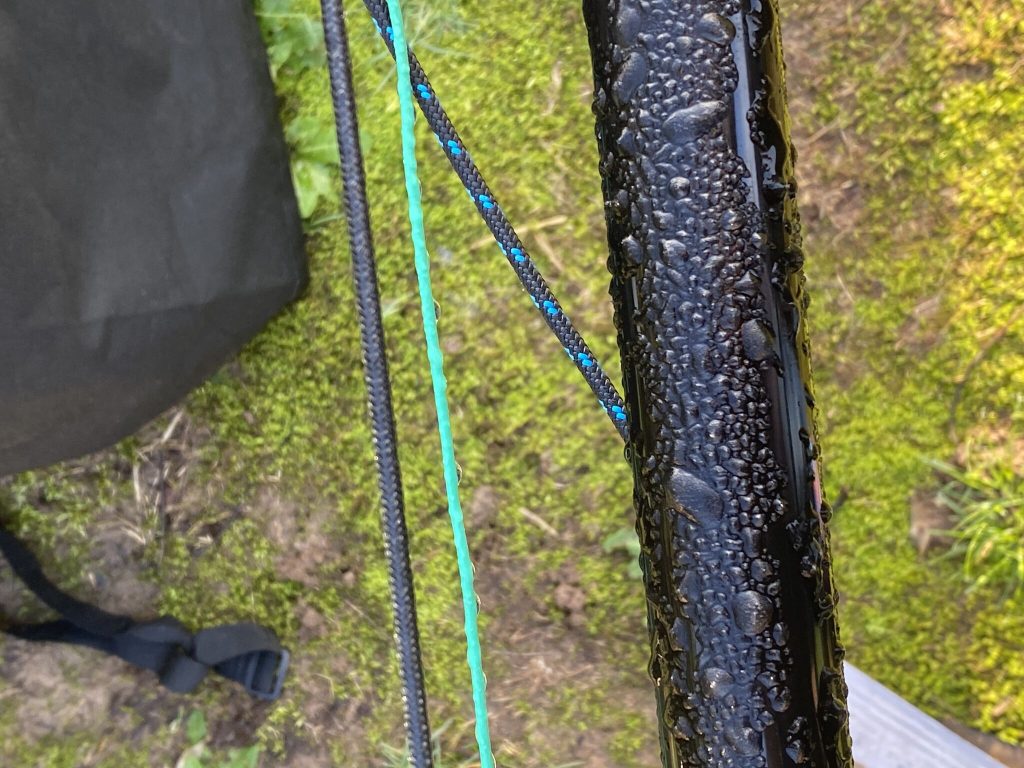
I did get a chance to survey the Nebula as to what work can be undertaken this weekend, well looking like Sunday is my best hope !
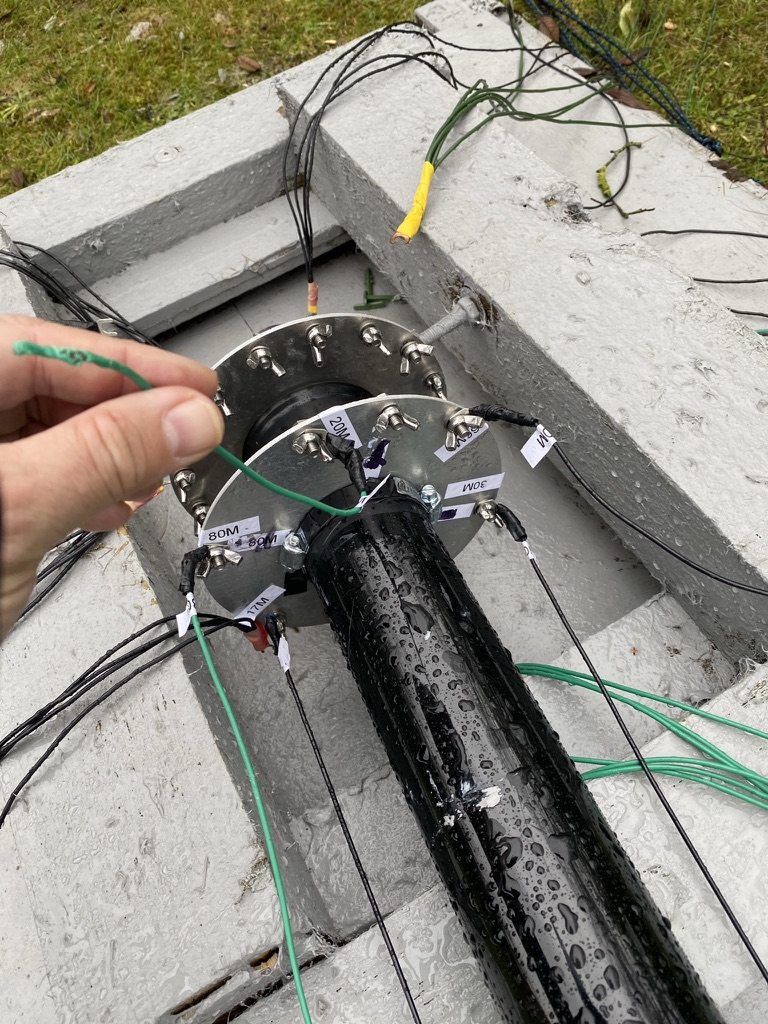
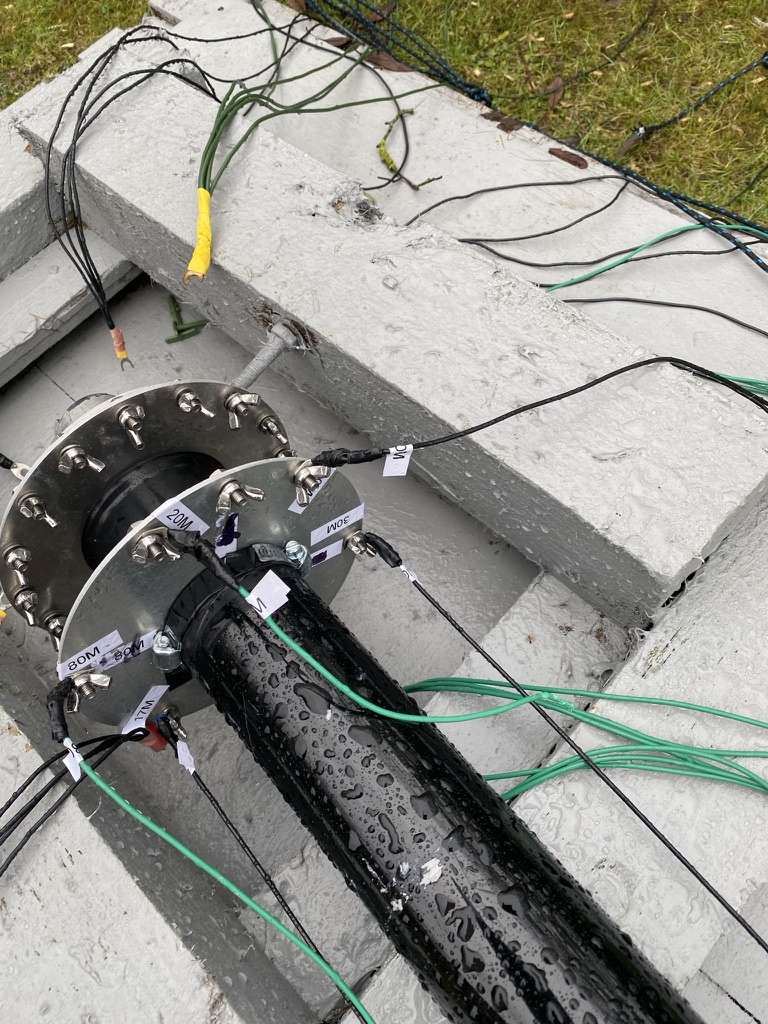
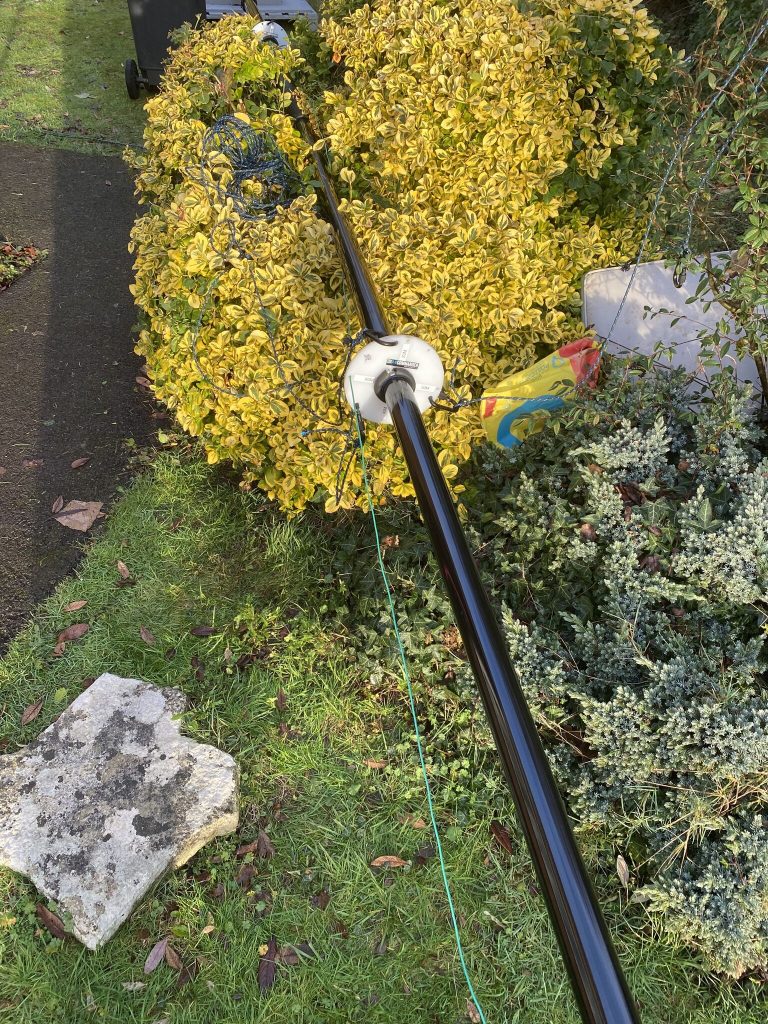
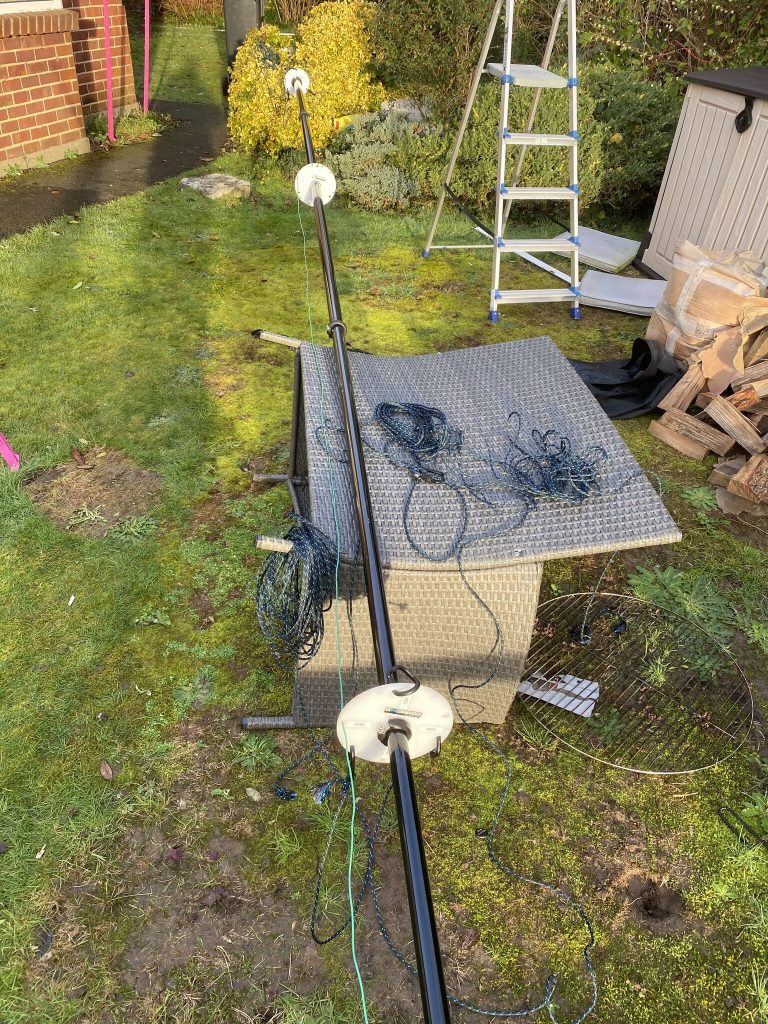
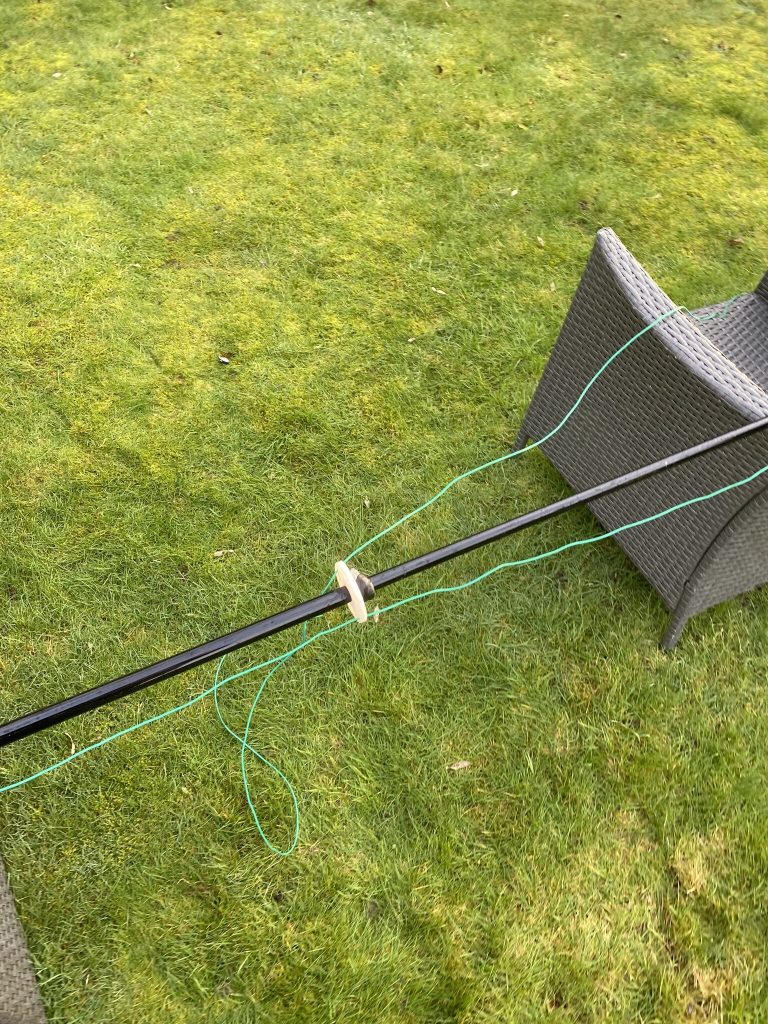
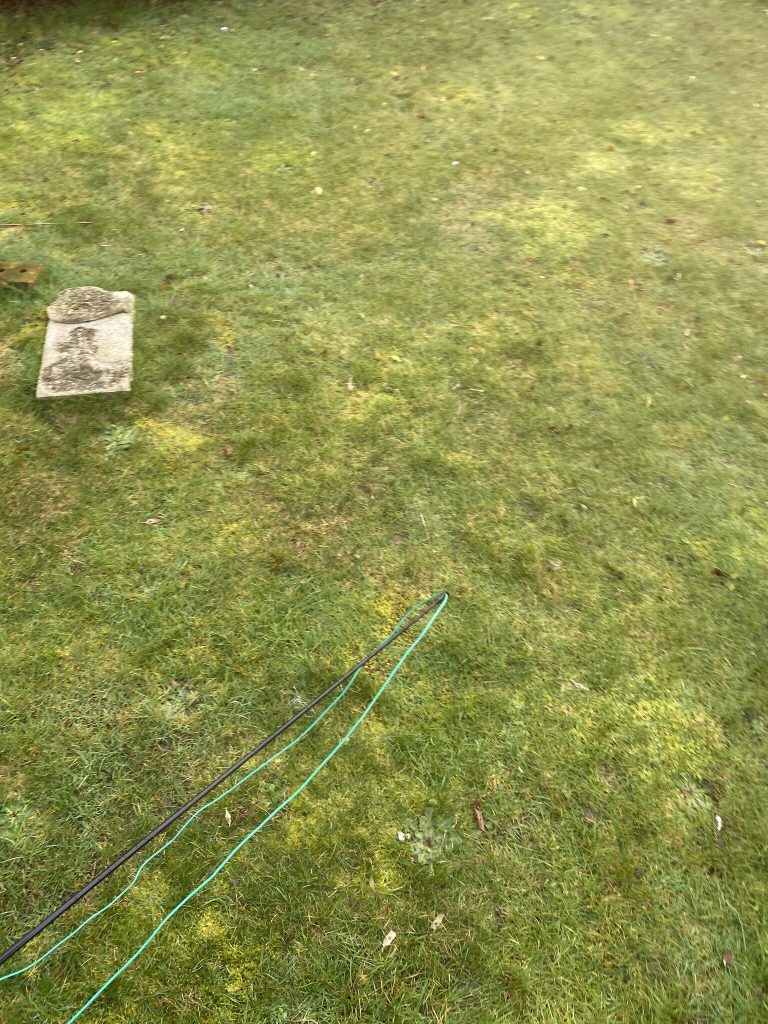
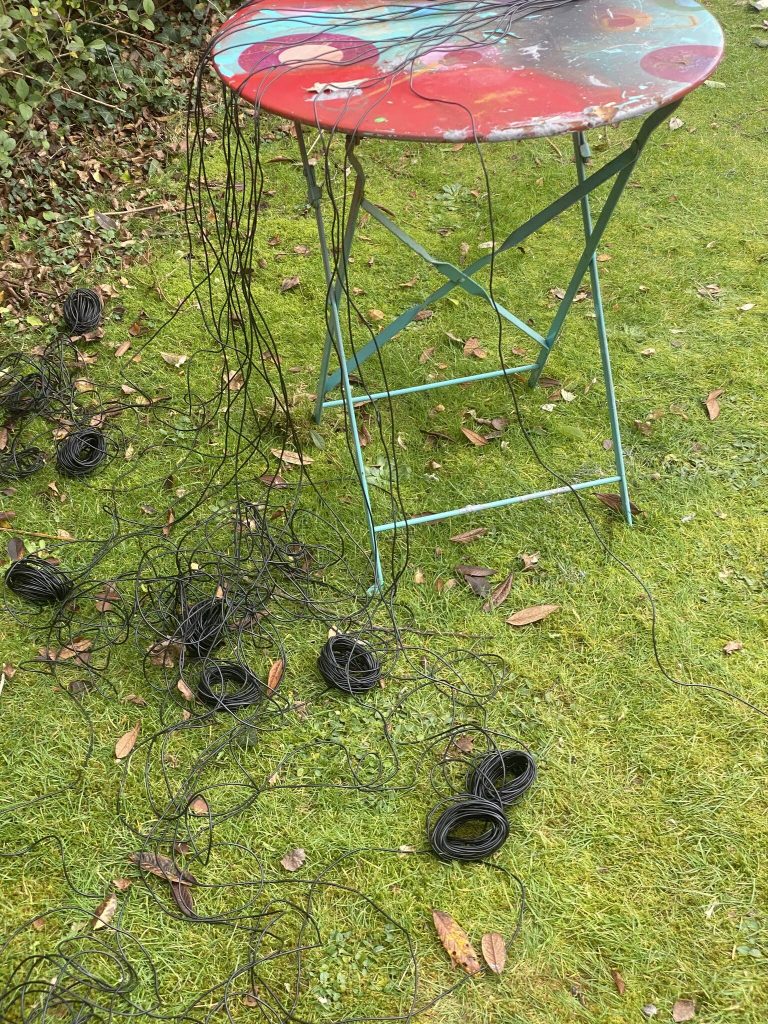
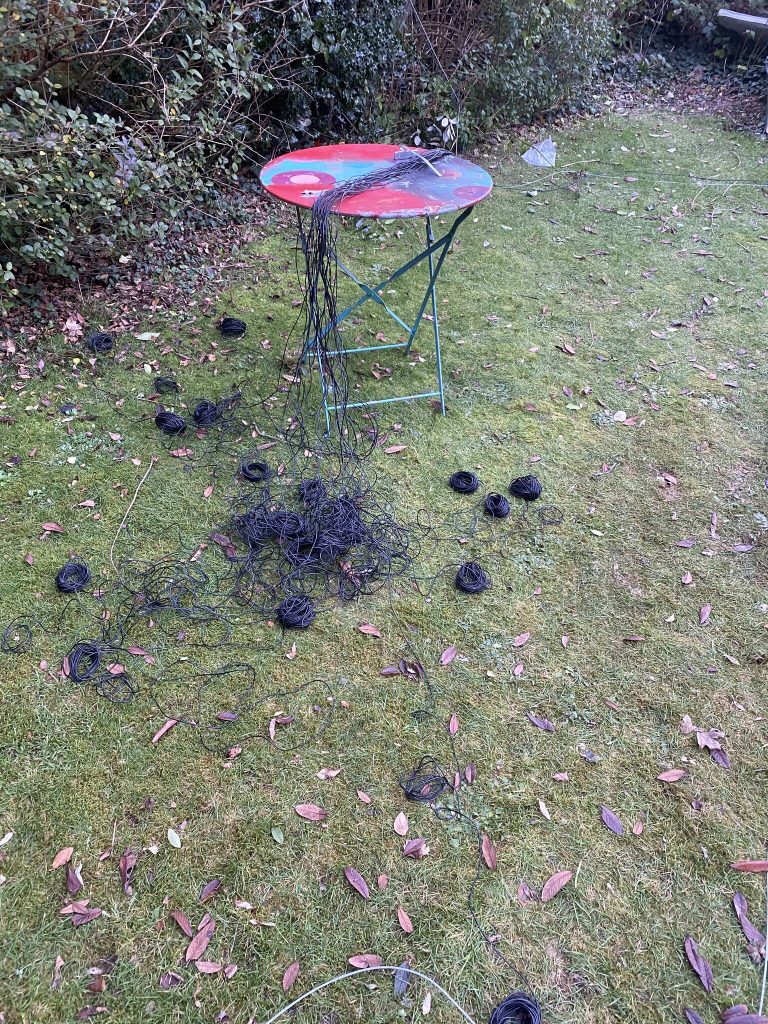
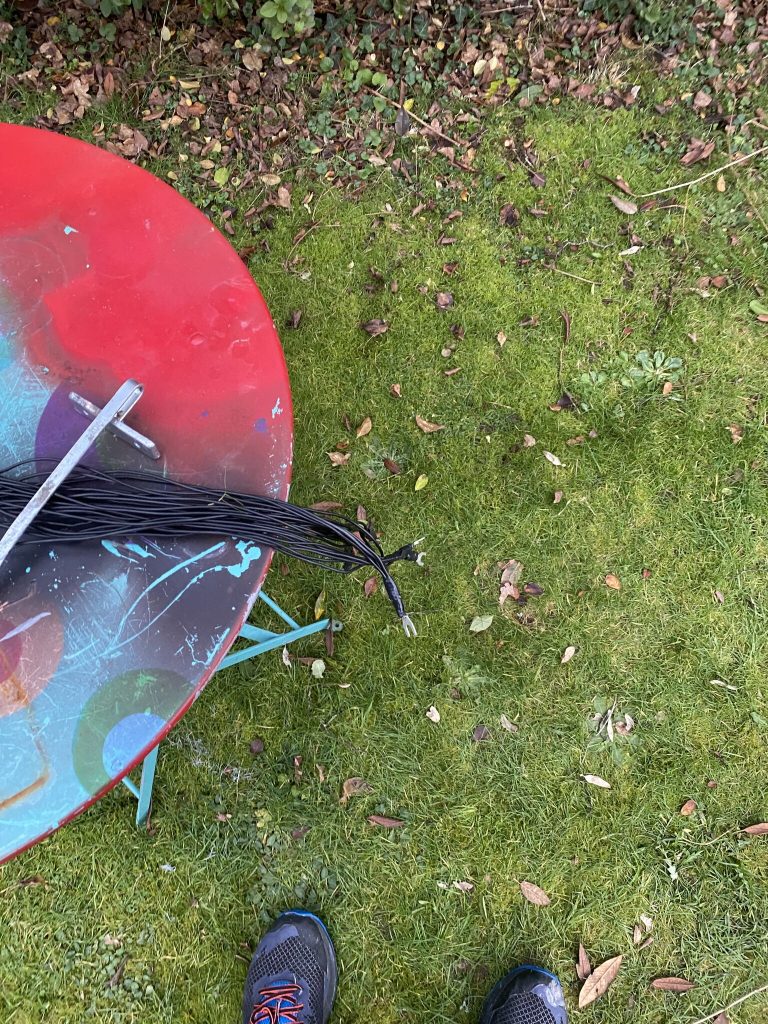
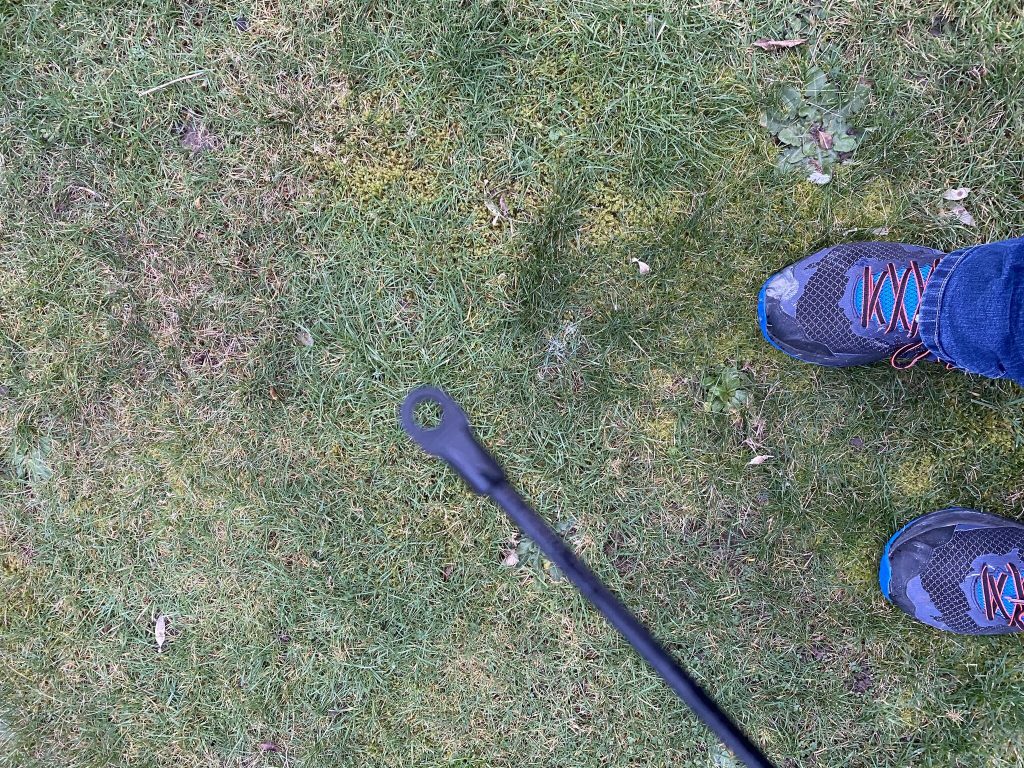
eek snap 20m
loose 60m
uggh
what has happened
more uggh!
A battle of Ugggh
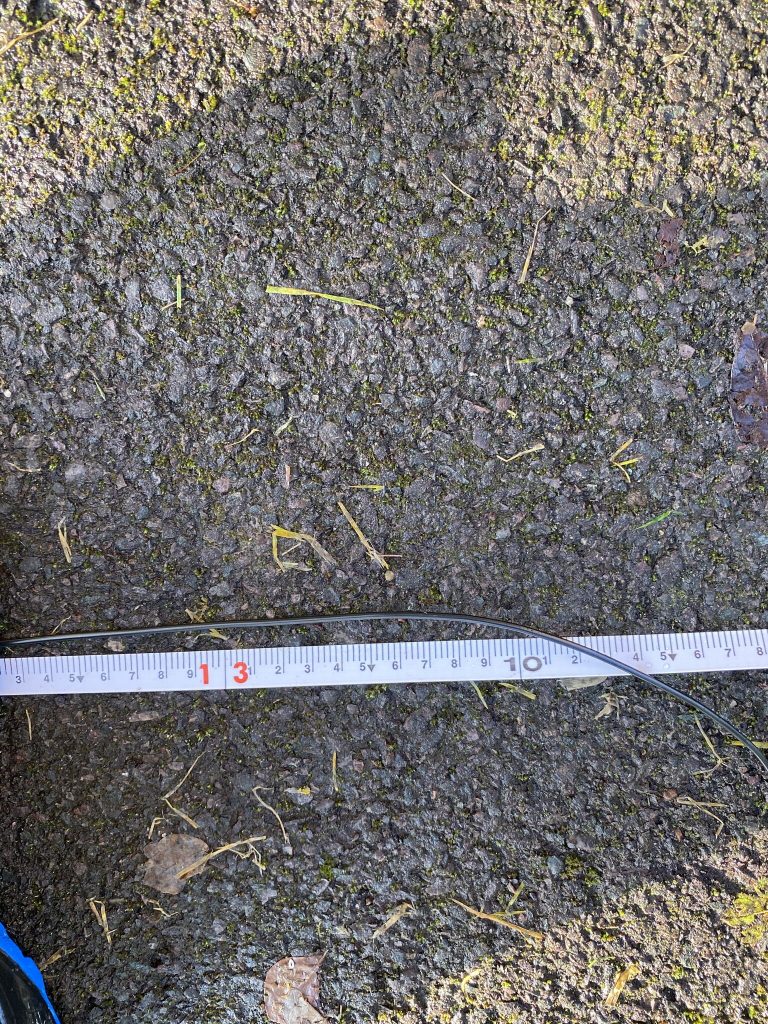
So i think i will replace several elements with fresh wire from the Nebula kit. I will measure the wire in place. I think its physically stretched hence why it has become so slack. There was quite a gale blowing last week, so maybe it got stretched then ? I will take measurements and replace either way. I will also be taking more time with the guying and guying the mast where ever i can to ensure the wires cannot stretch again (if thats the case).
So list of work for the Nebula this week
Remake 80, 60 and 20m elements
Guy/Tether spreader plates at 1,2,3, 4 and 5 if carabinas fit
get vertical/straight
So I’m looking forward to hopefully some sun/dry weather. I’ve got another project going on with the bongo, but not all the parts are here yet, but it will be nice to have a cross over between bongo and hamradio blogs !
The weather in the QTH has been particularly bad for the past week and the opptunity to do any amateur radio activties overtaken by university assignments. Thankfully today though, both the weather and a bit of respite in the amount of course work to do meant i could focus on the nebula.
Having operated 80, 40 and 20 the next step was to multiband the nebula. I’ve done various configs on the DX Commander Classic before (adding 80 as L, different band makeups) but this was my first time with the Nebula in moving elements and adding new ones. As ever my first port of call was the instructions to review what was ahead to get from 3 to 6 bands.
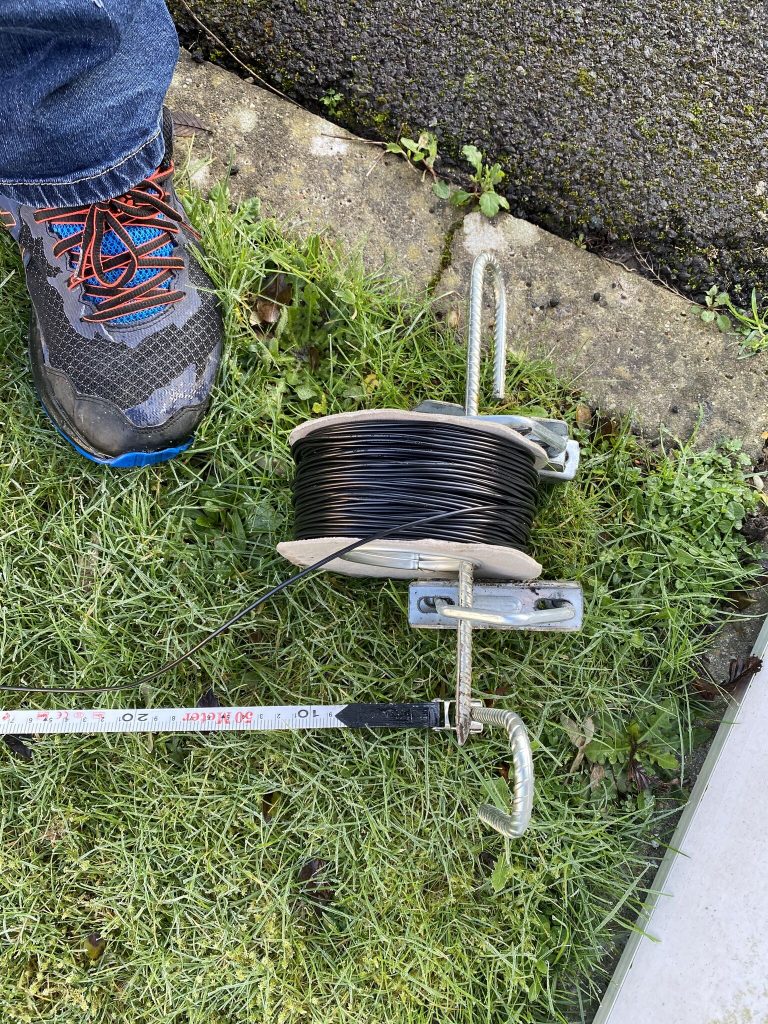
surveyor tape measure
dx10 and spool
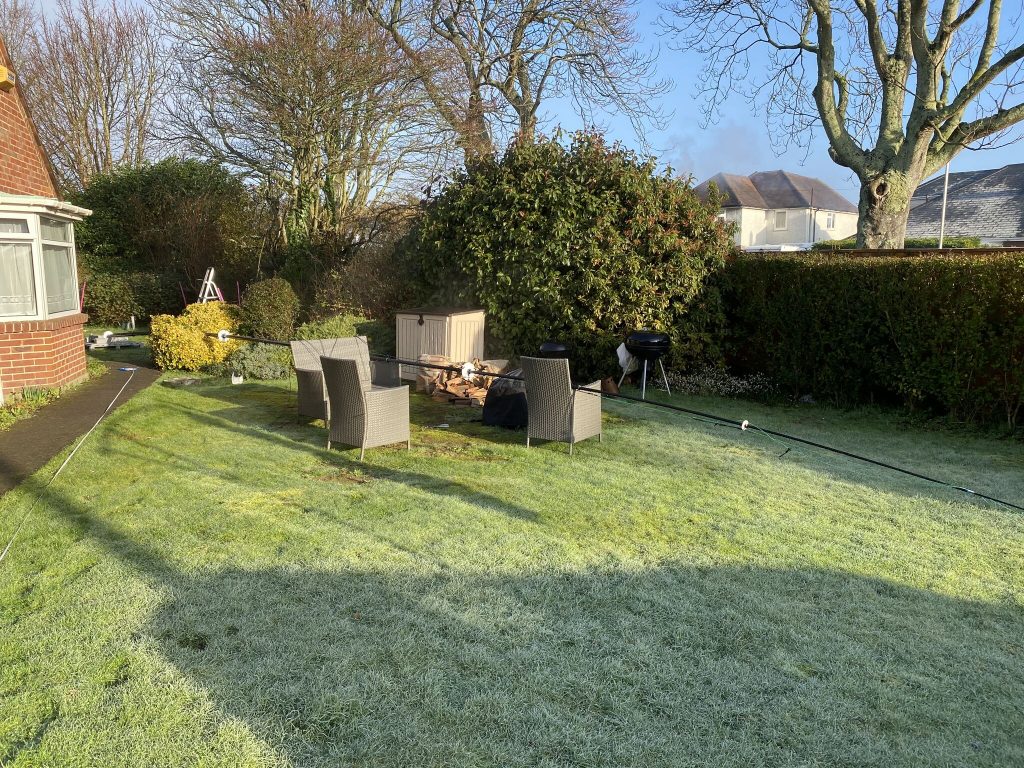
nebula with 3 elements
making the elements
I set out first thing in the morning, probably around 8, to start measuring the elements. The surveyor’s tape measure really is great for these long pieces of wire and getting the lengths right. My ad-hoc spool shystem formed from some mast brackets and securing pin done the job in being able to pull the wire off easily. Note the nebula still had its existing 80, 40 and 20 meter elements. These would be taken off with all the tape/elastic as well as they would need repositioning.
cut a bit longer a trim
melting the ice
icey mast
it was still cold!
Cutting in the cold
I set about cutting the longest element first, being for 60m. I cut longer and trim, based on experience this allows to get it close to the lengths required. As you can see the sun was coming up and thats not smoke from the fire, thats the ice evaporating ! As you can see the Nebula had a good amount of ice on it from how cold it had been overnight, and was still quite chilly in the morning !
Tinning
Tinning the elements
With the lengths of wire cut for the new elements, i returned to the ‘shack’ and stripped the wire to fit into the connectors. I stip/tin, then crimp to ensure electical connectivity and mechanical strength.
80m
useful ladder
good tension
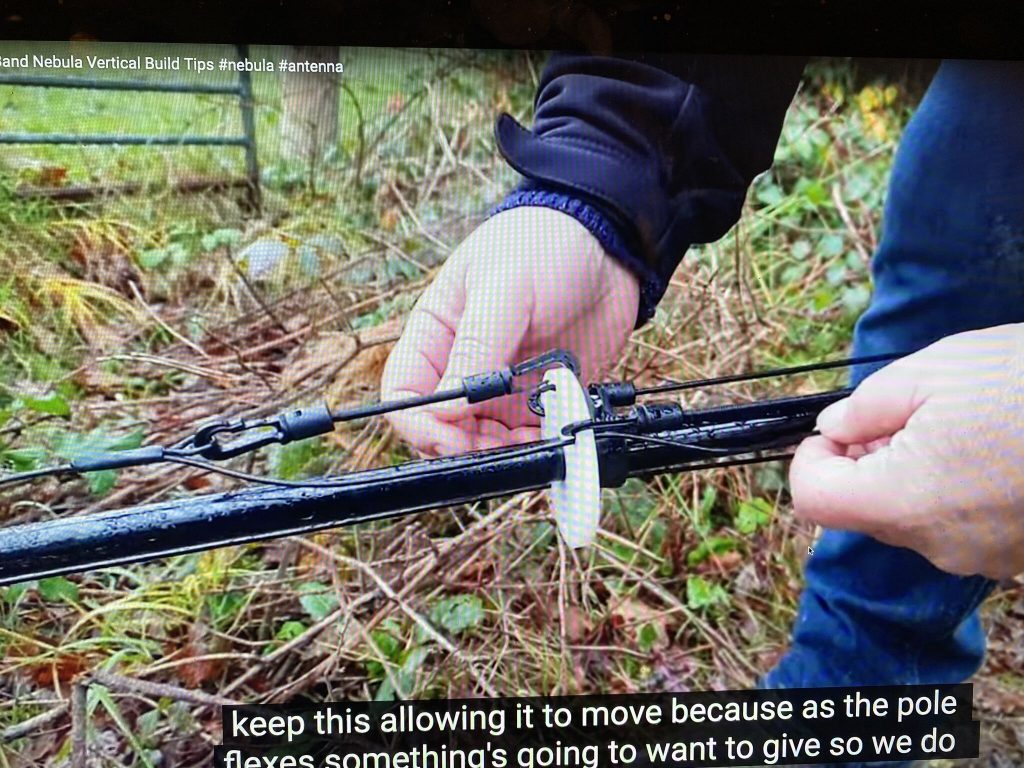
flexing the mast
80 meter to stat
I started with the 80 meter element, by far the longest, and most complex to get right. I do not like ‘floppy’ wires for elements, so I have a good amount of tension. Getting enough ‘slack’ into the top takes a bit of time and install fettling to get right, but taking time and getting the right lengths of elasticcord makes a big difference. I was able to get good tension on my 80m elements and even should the wind blow hard causing the mast to ‘flex’ it will enough ‘give’ to not snap/come off.
I repeated this for all the other elements. The process I used was to first to re-markup the vertical plate at the base of the mast, then rotate the spreaders, using the ‘dx commander; stickers as visual line up, I was able to install all elements quite easily, even 60 was ok to install despite its length. I had run out of paracord, but getting the tenion in the rope has done the trick for 17m and 20m verticals.
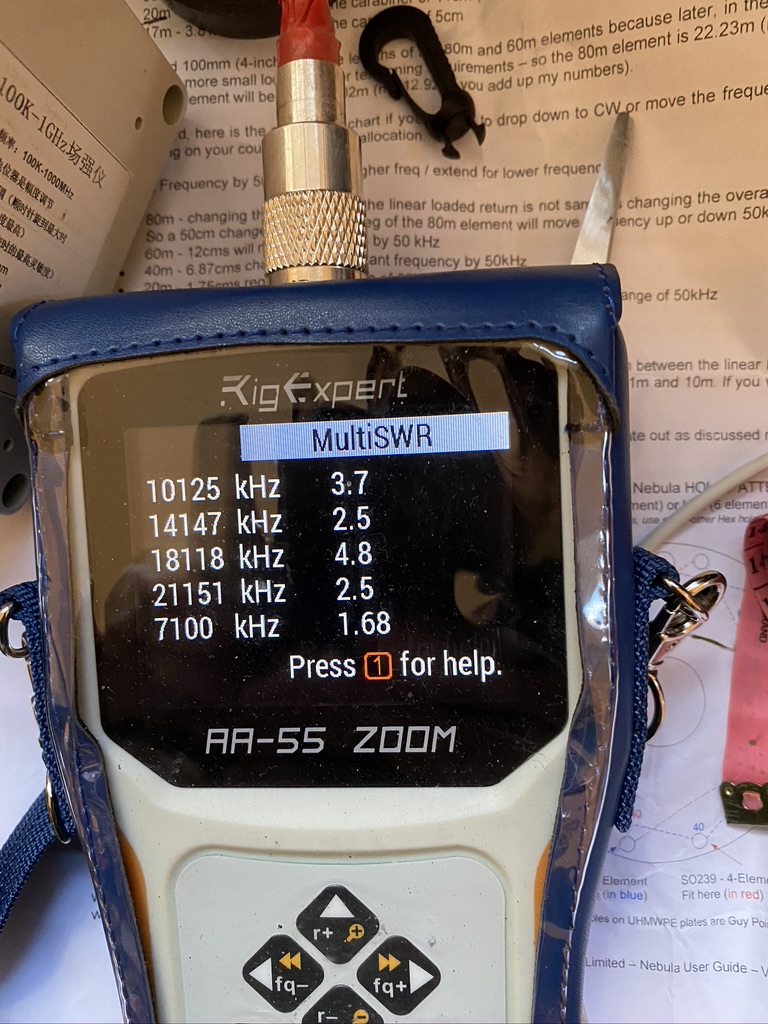
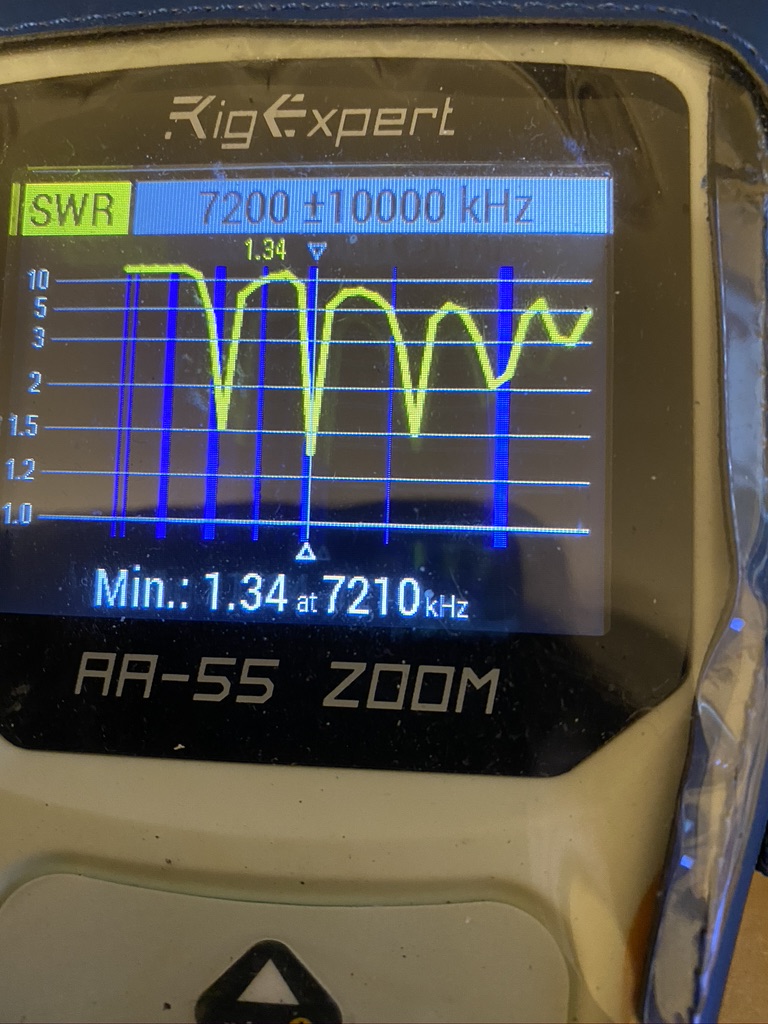
MutliSWR
80m
60m
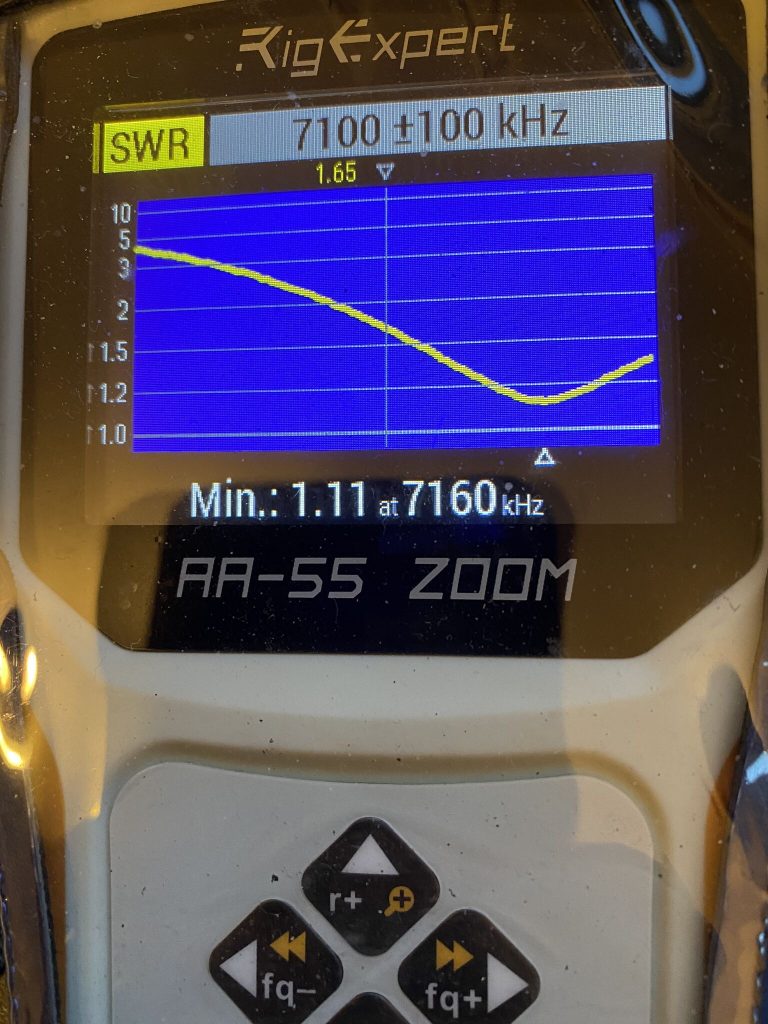
40m
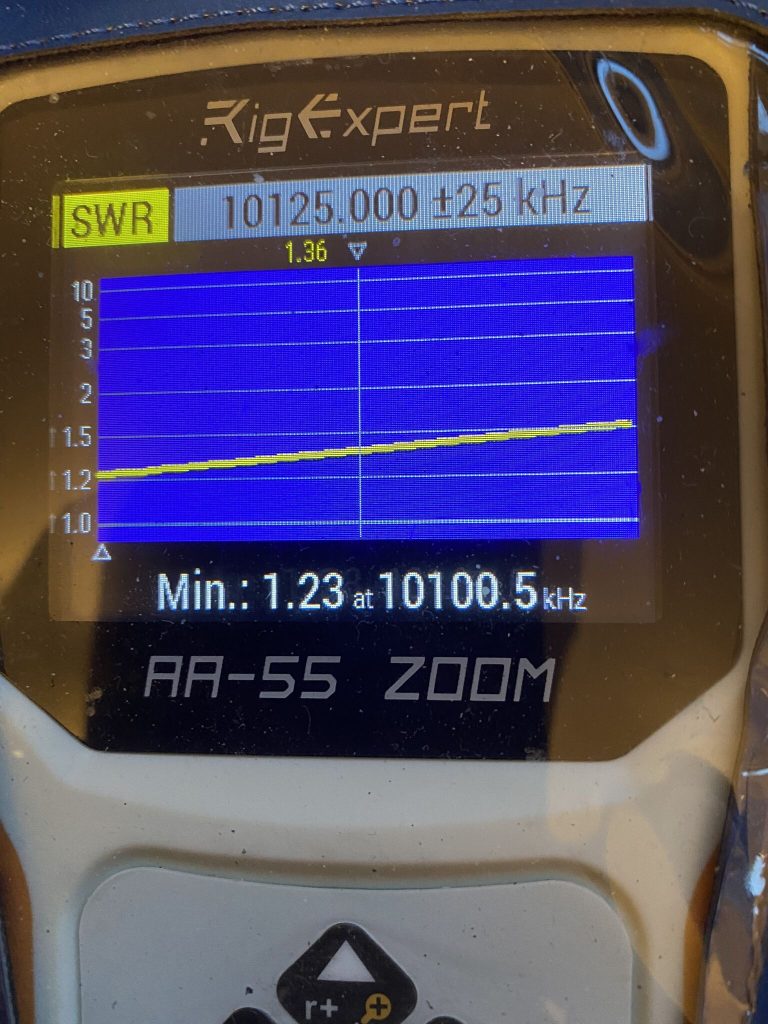
30m
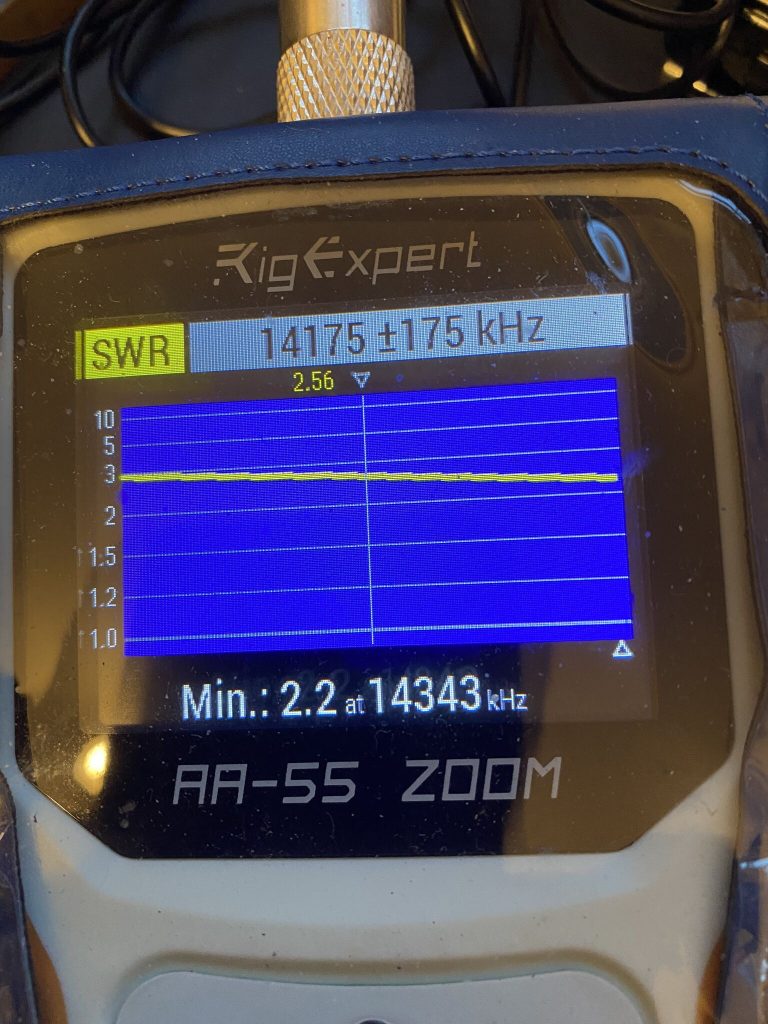
20m
17m
15m
10m
6m
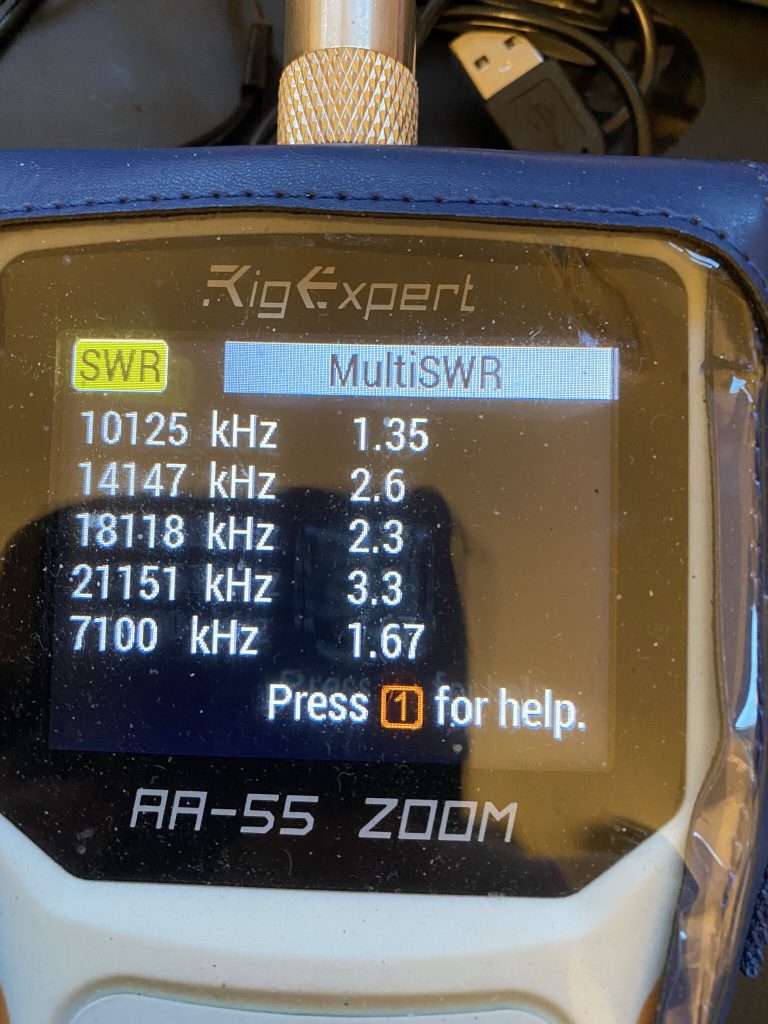
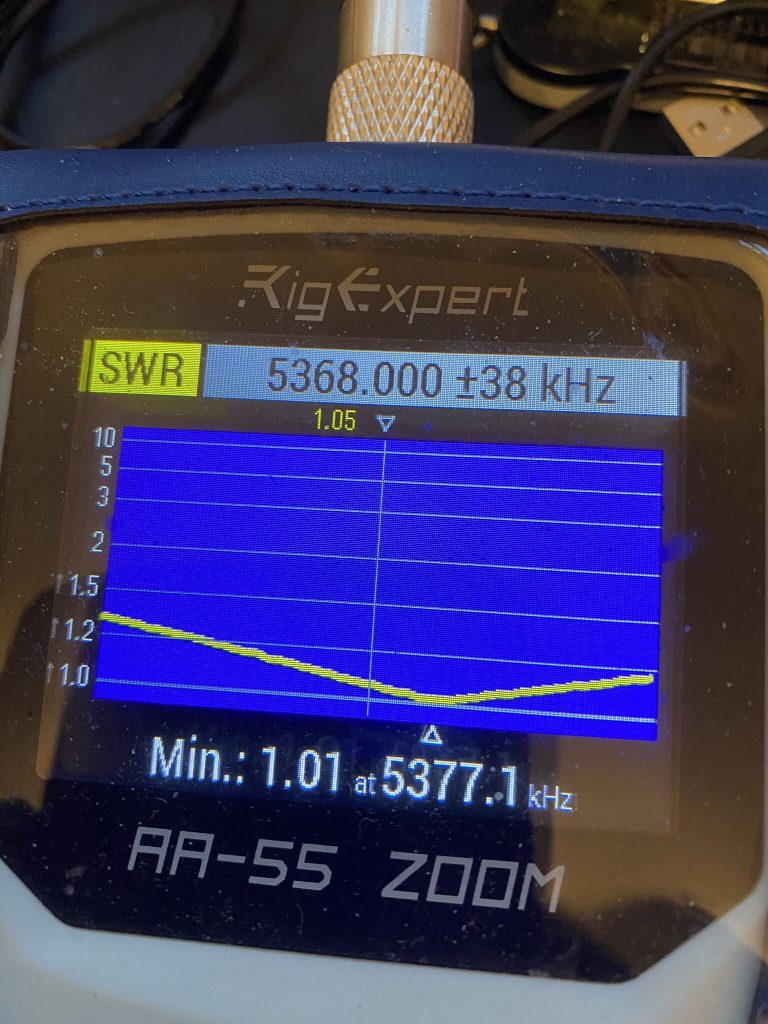
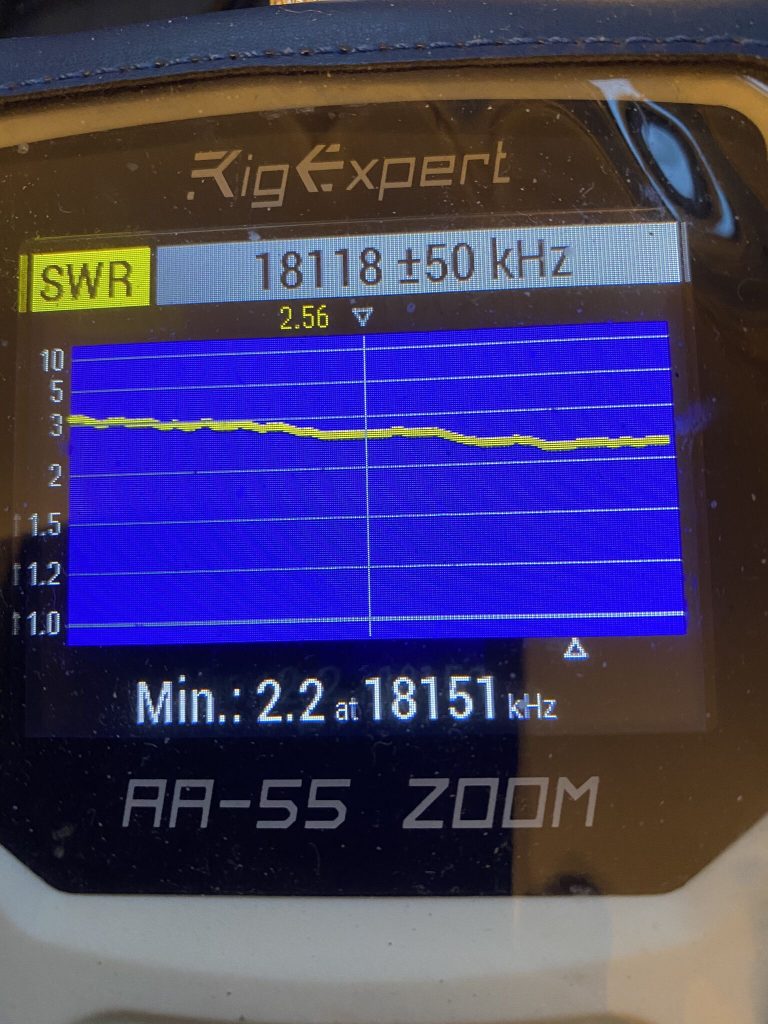
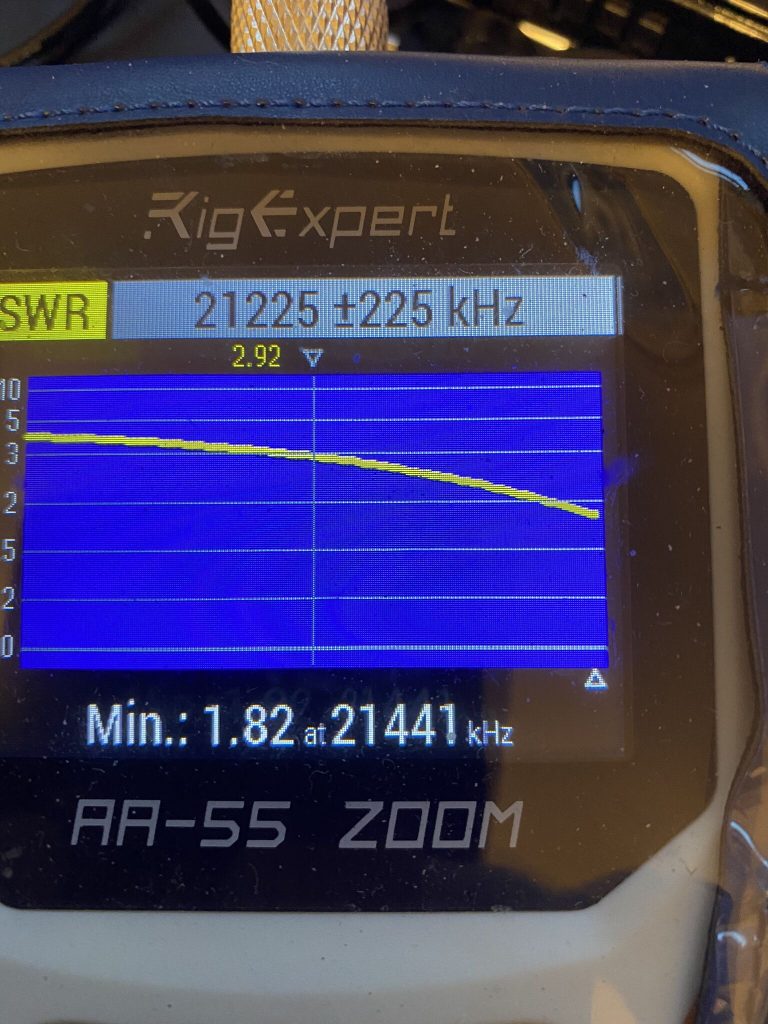
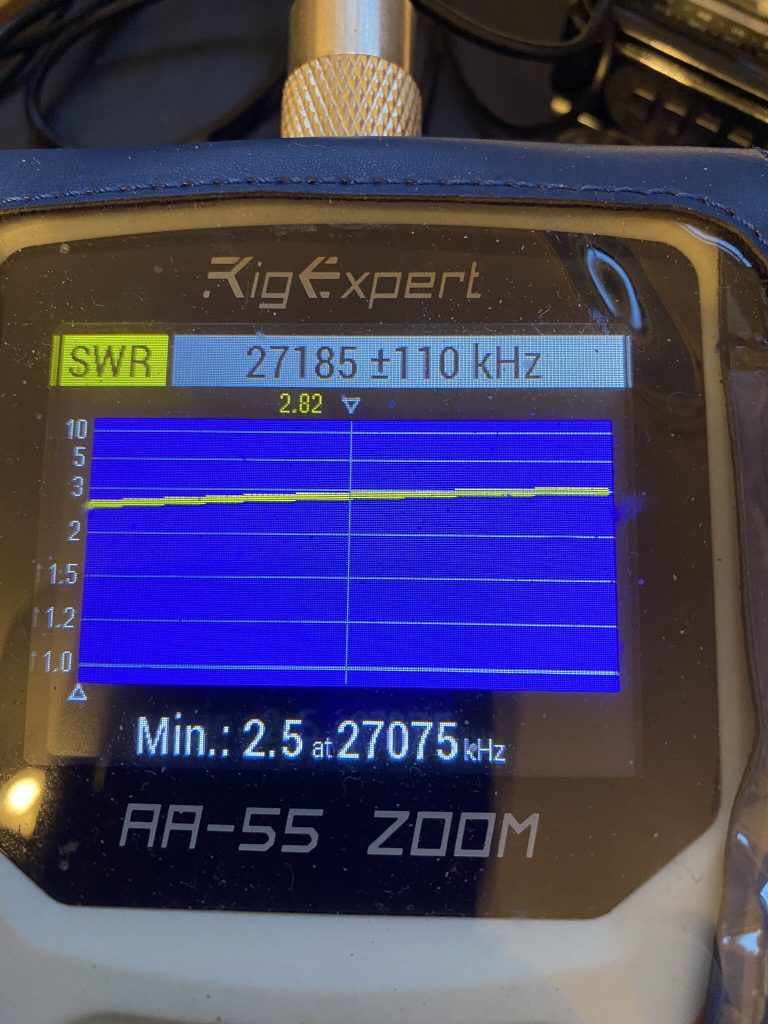
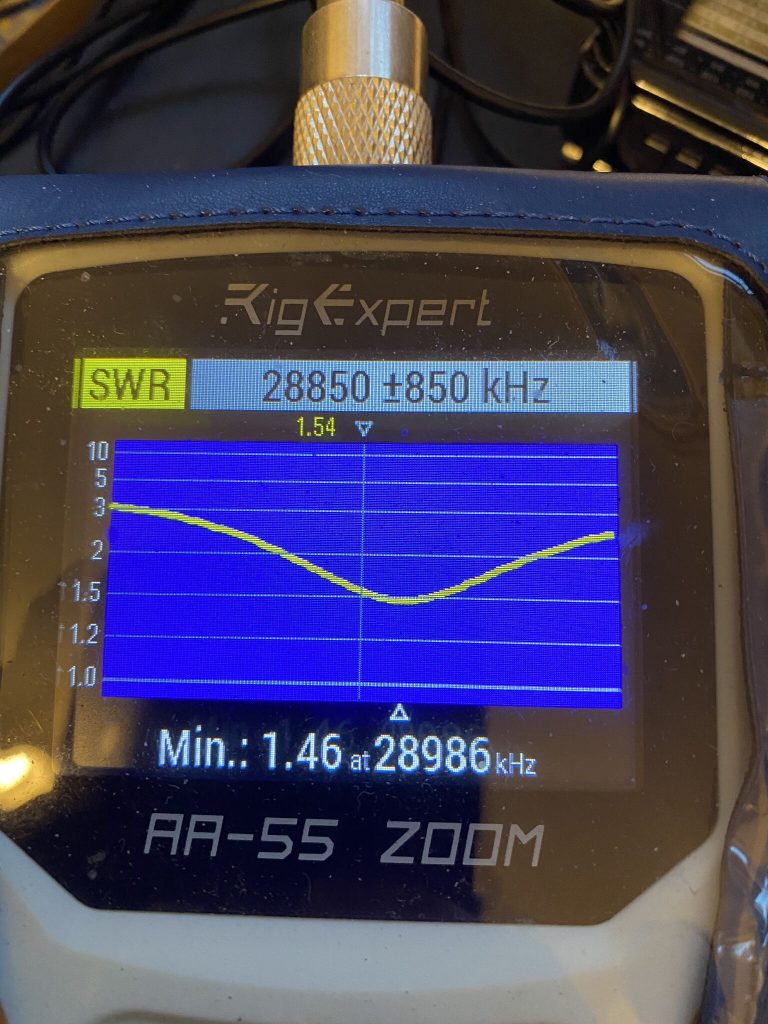
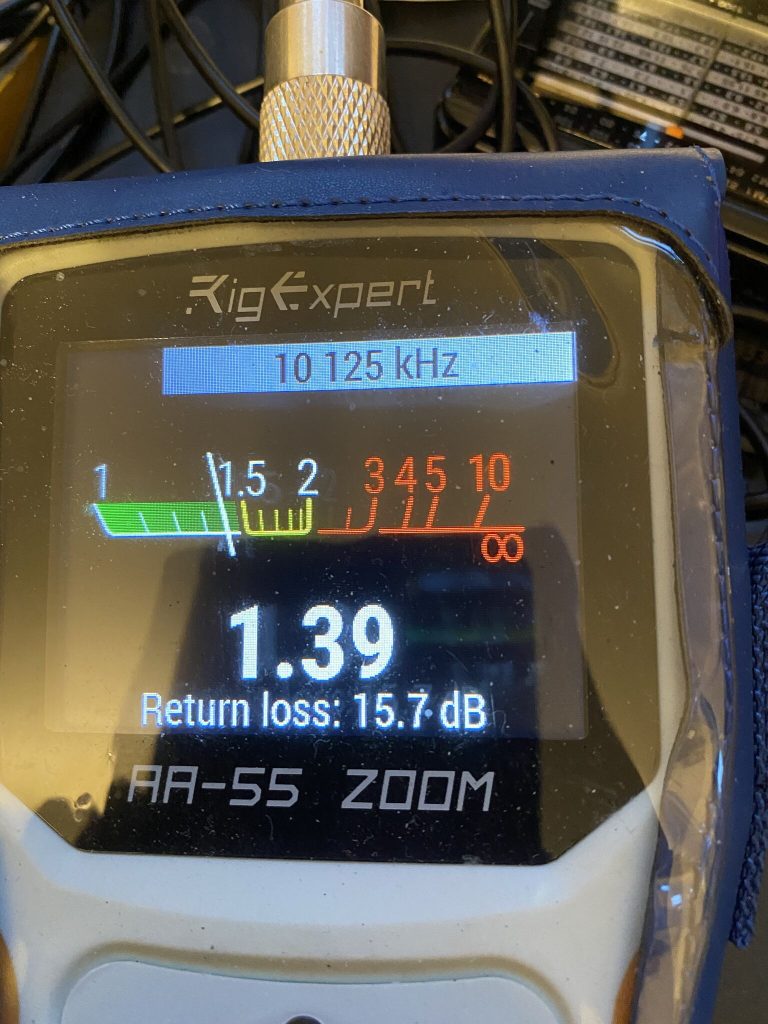
SWR Results with elements for 80,60,40,30,20,17m
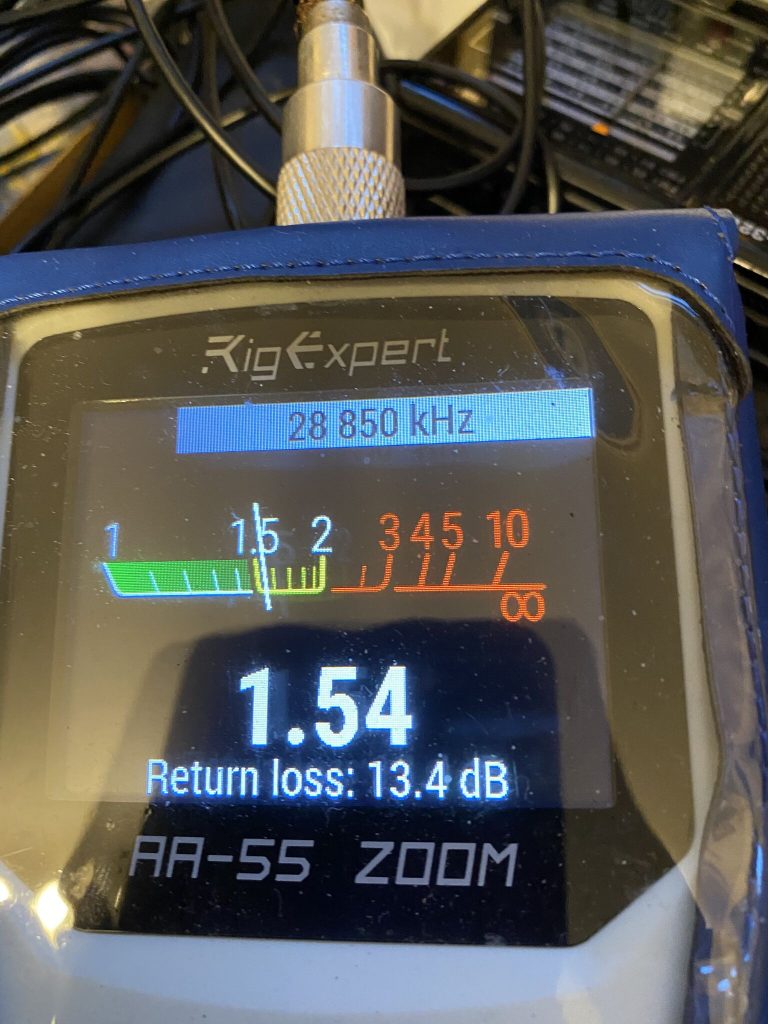
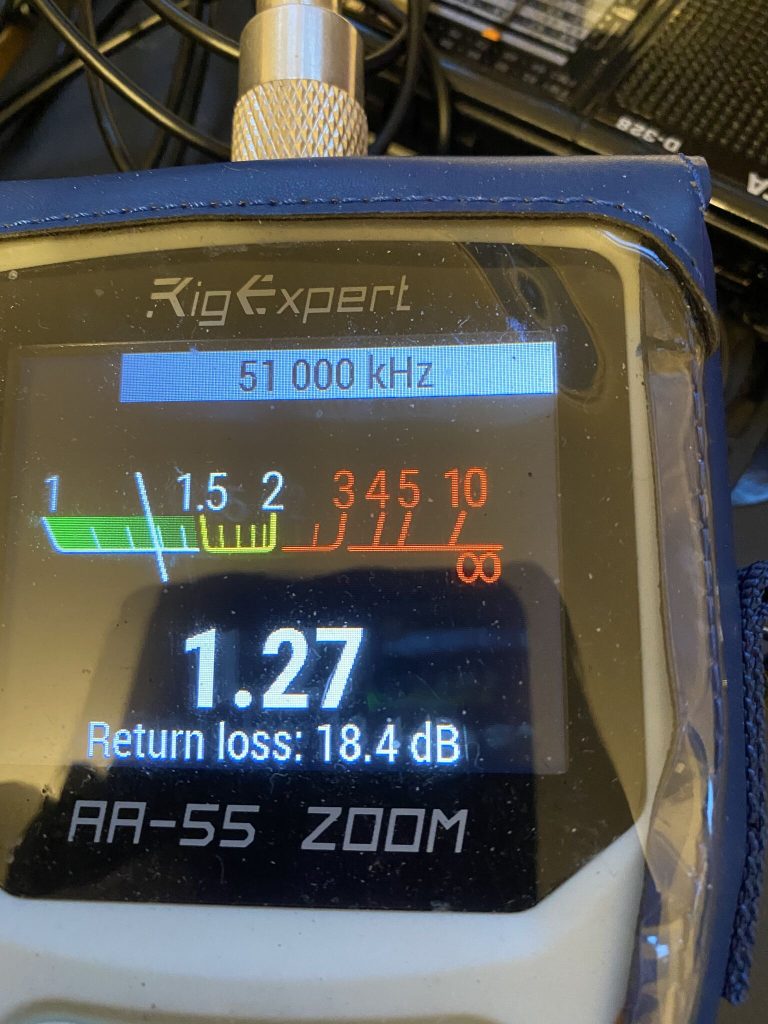
As you can see from the Rigexpert output SWR results are satisfactory to excellent. All the bands where I have elements are tuneable on the IC-7300’s internal tuner, and in some cases not even needed. I was amazed at the results for 60m, being a ‘new’ element to me on how well the SWR was. 10 and 6m look good as well, but think with a dipole conditions would need to be very good in the ‘E-Layer’ t pick up any signals.
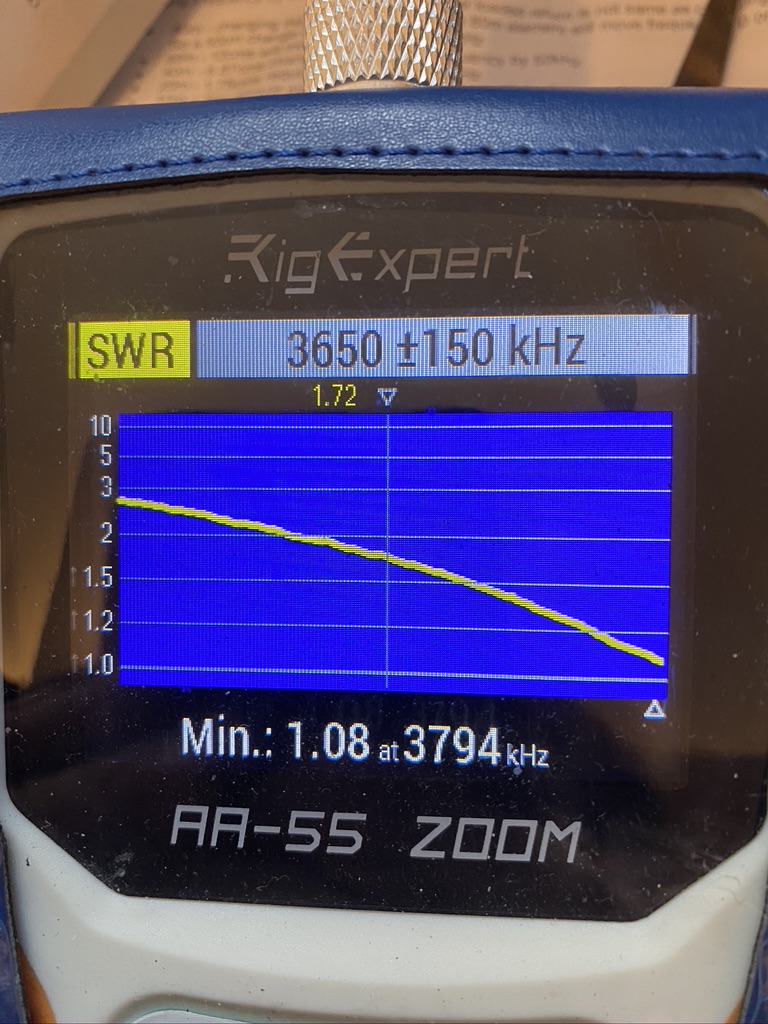
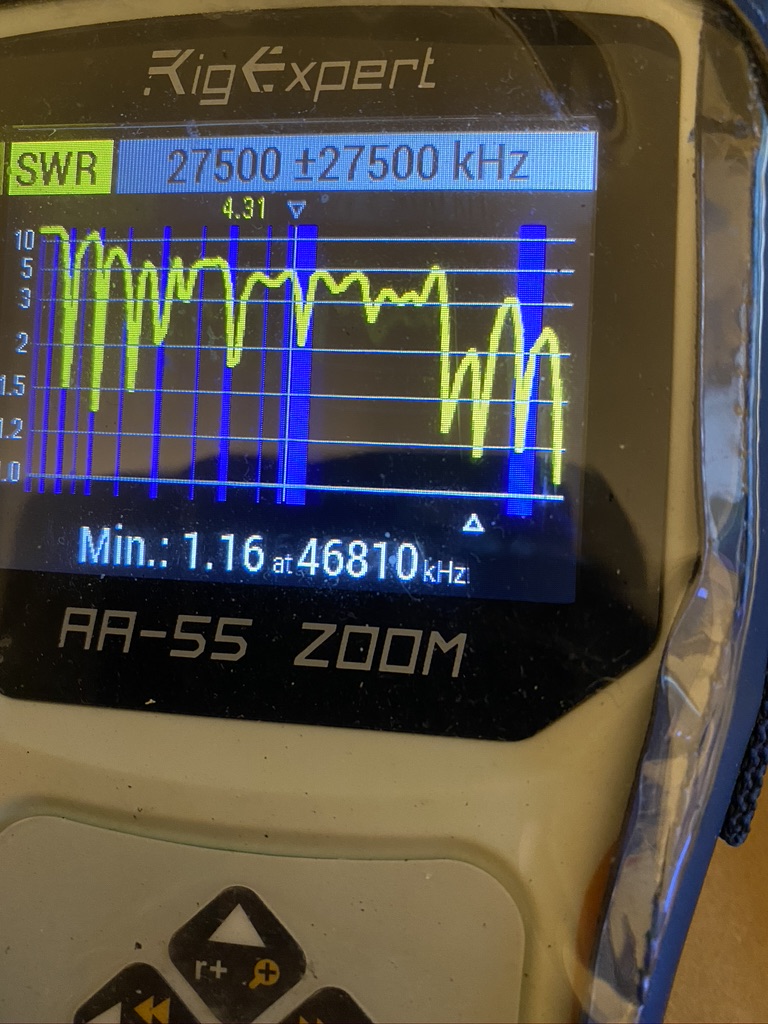
80m
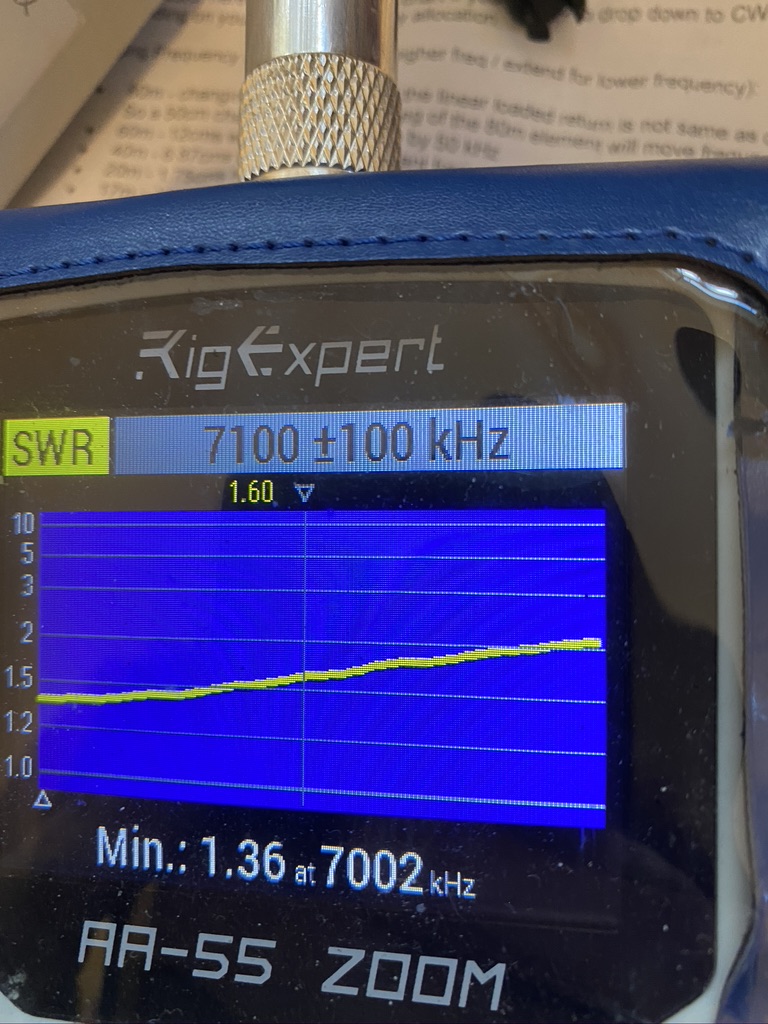
40m
5Mhz band
30m
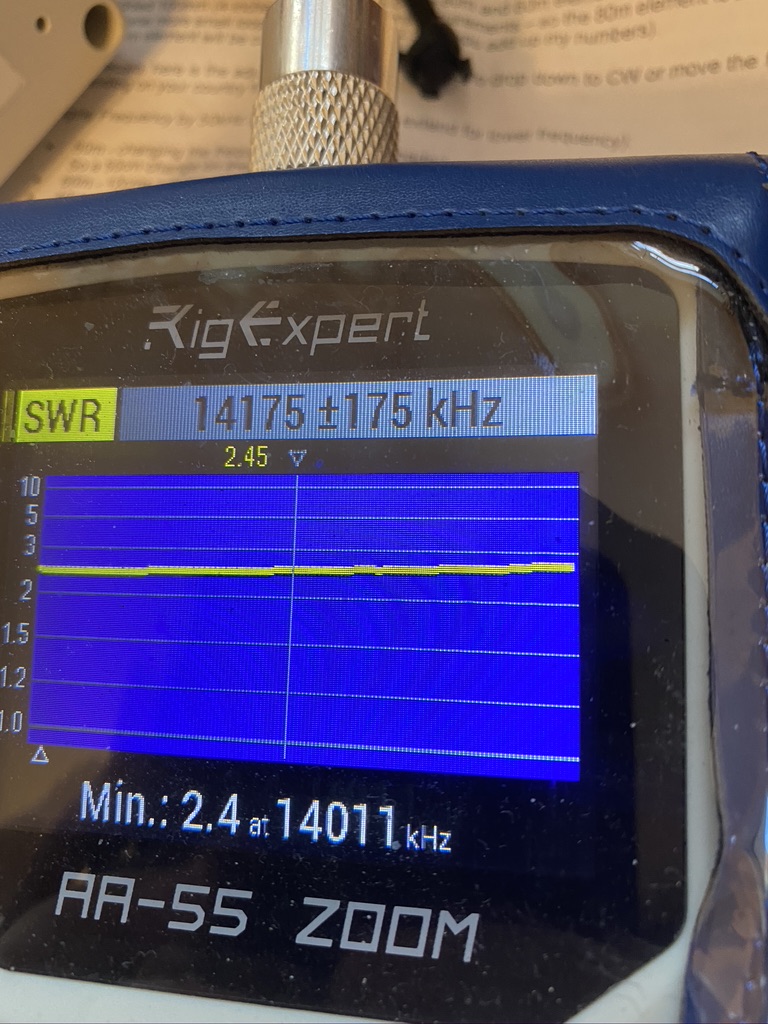
20m
17m
27Mhz
10m
6m
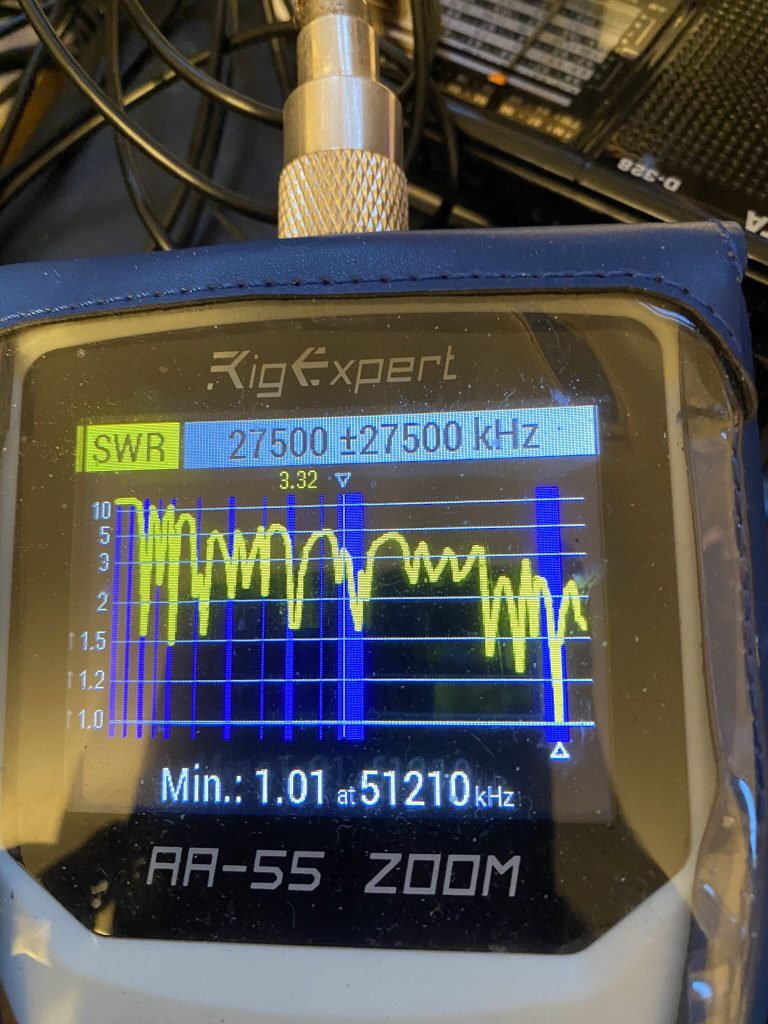
all
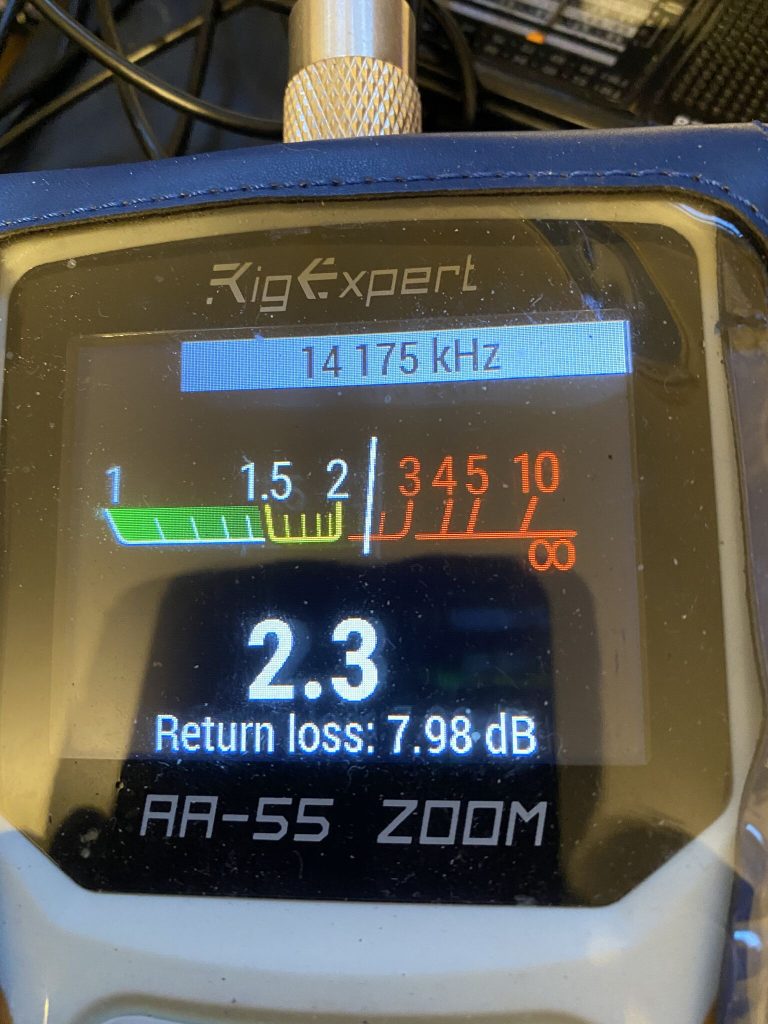
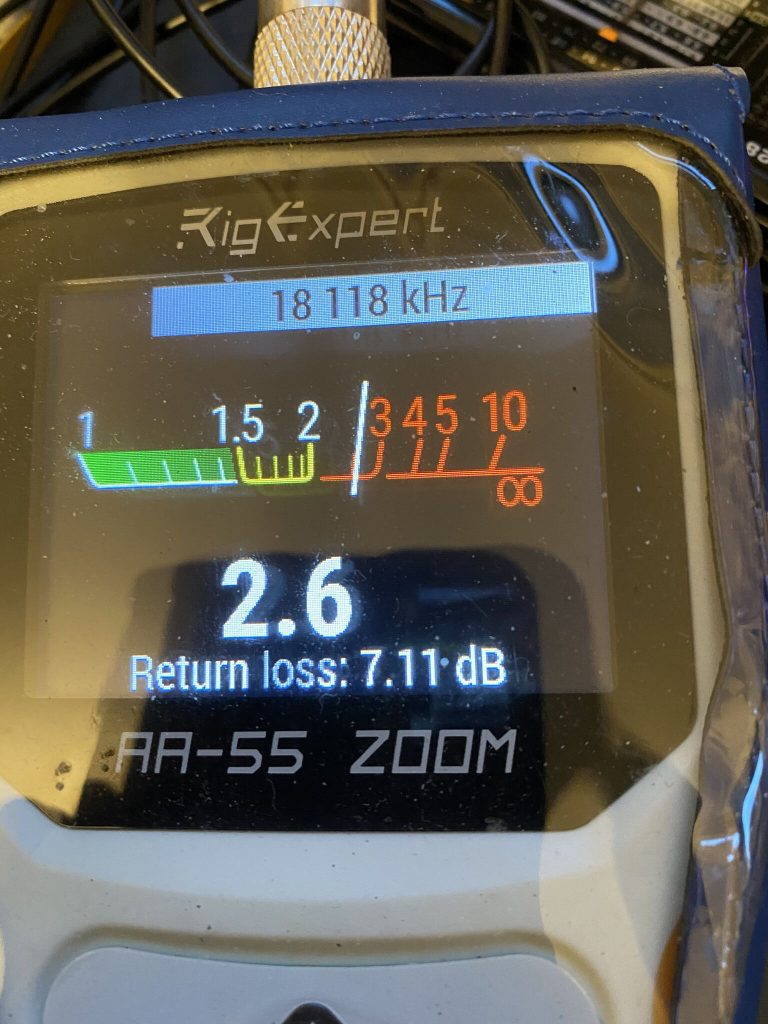
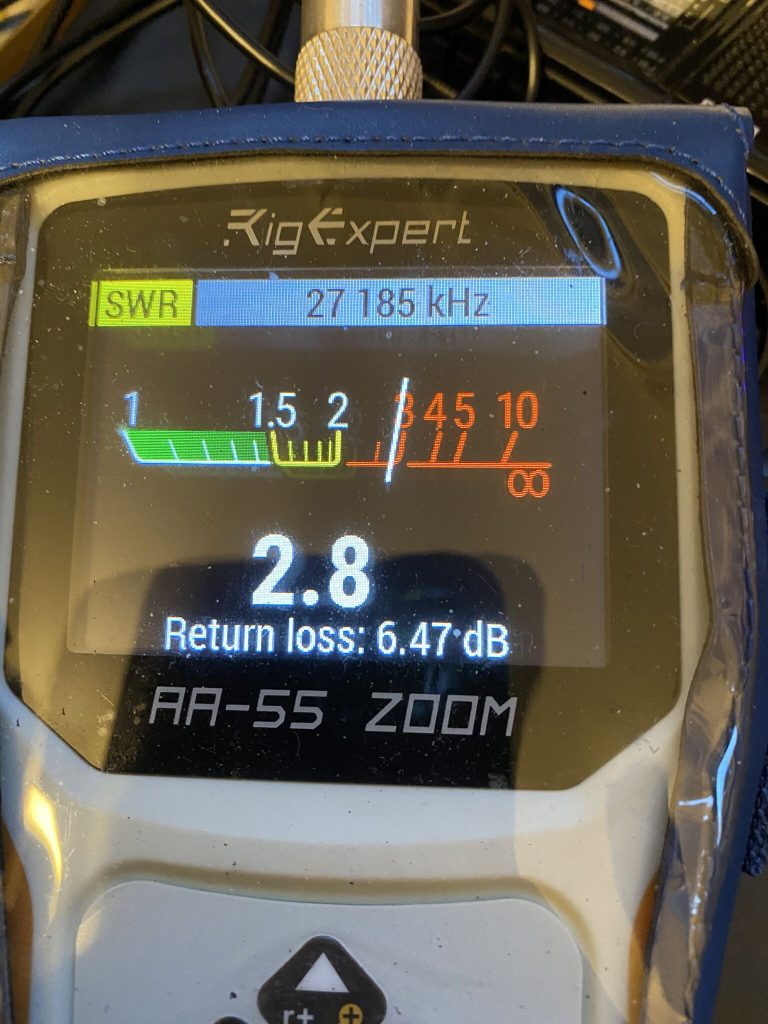
SWR/Return Loss per band and all-band overview graph
The S.W.R. reports for each frequncy mid-band demonstrated the effectiveness of the Nebula. As a Intermediate licence holder, i cannot transmit on 5Mhz, but I will tune in and listen for sure ! I think the SWR’s for all the bands is quite acceptable.
dummy load
When I’m not using my radio, or my antenna is down, i put this dummy load on. Whilst not rated for 100W, its better than not having anything on there. I’ve never tried to transmit without an antenna in place, but this strikes me as a good idea to ensure the longevity of the rig..
nebula in full effect
multiband ahoy
one happy 2E0FWE
awesome nebula
happy end to the day
summary shots
By now i had taken our dog Sweety for a walk, as well a few bits and bobs around the house. I do enjoy taking a break and having a cup of tea with me missus, it keeps things at a sane pace.
I knew at around mid-aftenoon it would be slightly close to get the antenna fully vertical and all the radials reattached before night came along, thankfully we are getting slightly more sun now and dusk is getting later everyday (well until the clocks go back…)
I was really happy with how I ahd really enjoyed the build and the results from it in acceptable S.W.R. readings on the desired bands. The tilt-base was awesome and I finding easier and easier to get the mast vertical and guyed each time.
The Nebula is my most recent additon in terms of antennas, but I’m very confident it will be one that i will be using for many, many years.
Heres a video of the mast up with all the elements attached.
At last the nebula is vertical and with 80, 40 and 20m elements added. I had a very hard time de-tangling the radials and manged to get 3 out of the ‘ball’ of wire i had managed to produce.
Adding 40 and 20 was quite straight forward and same process as on the classic. I dare say i could re-use the old vertical elements from the classic on the nebula, but its nice to start a fresh.
With just 3 sets of radials (4*10m wire each) i set about putting the antenna analyzer to work !
MuliSWR fucntion
not bad for first attempt
useable
likewise, useable
first analysis
Initial results are very encouraging, I’m happy that the S.W.R. readings are close to what they should be, esp as the full set of radials isnt in place. I was able to test (and tune) easily on 80/40 and 20, making sucessive QSO’s on FT8 around Europe.
I still have all the radials from the ‘classic’ and these had worked well before on both 80 and 40m, so in the last bit of sunlight added these to tne Nebula. The results speak for themselves
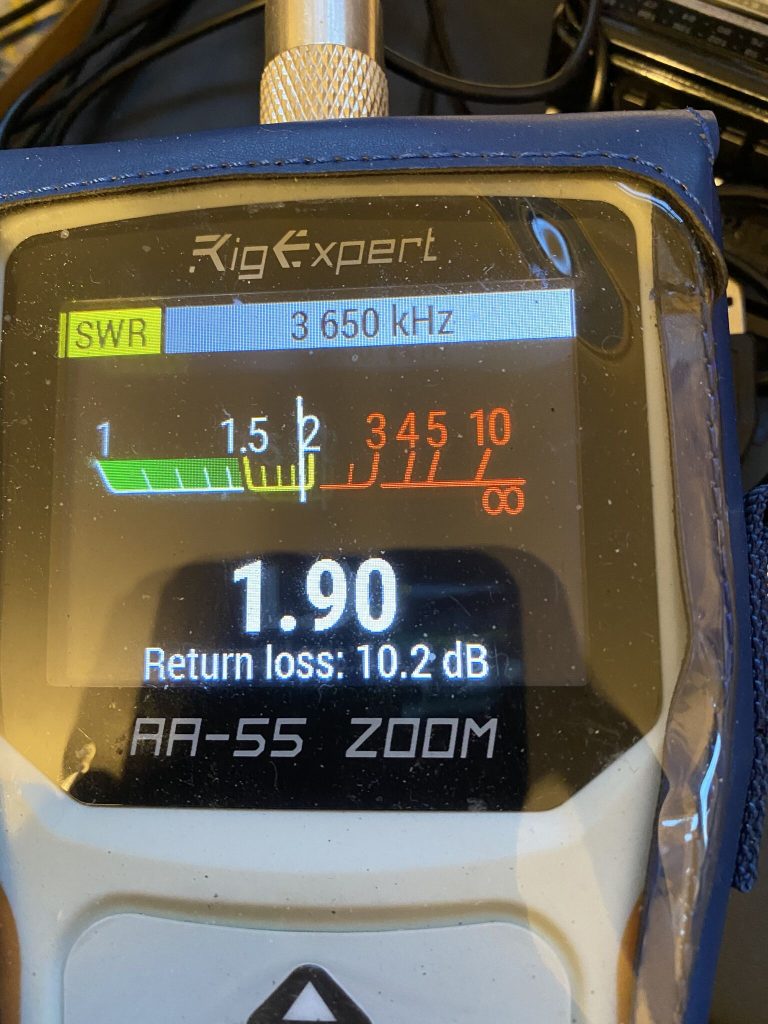
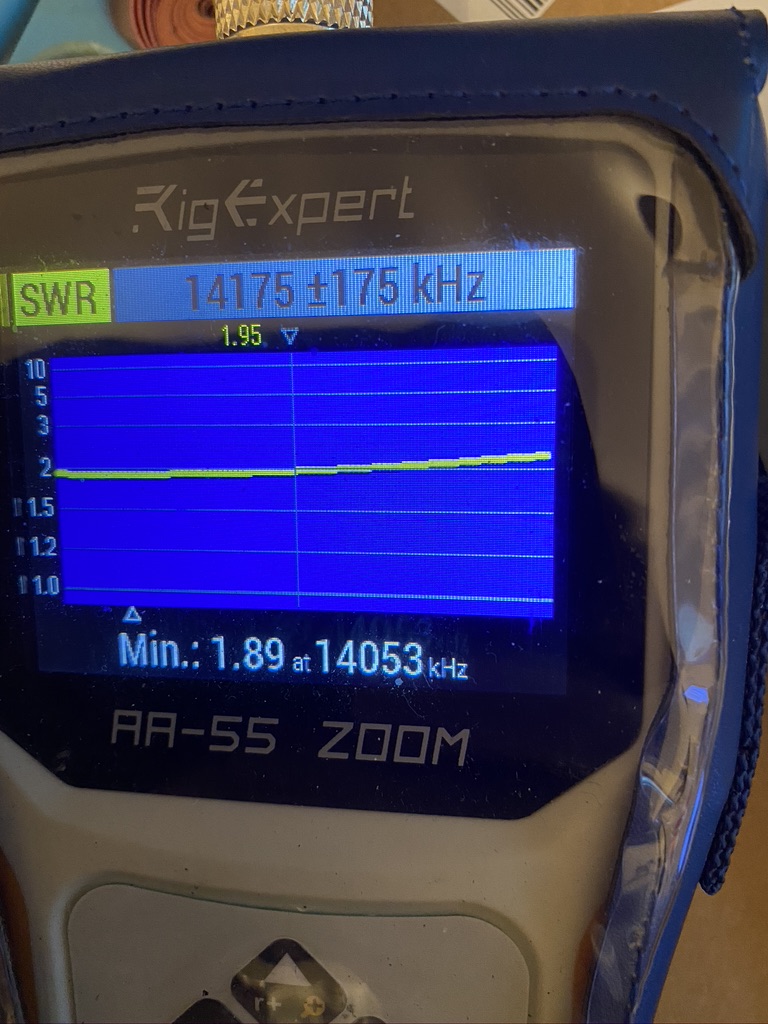
20m down to 1.89
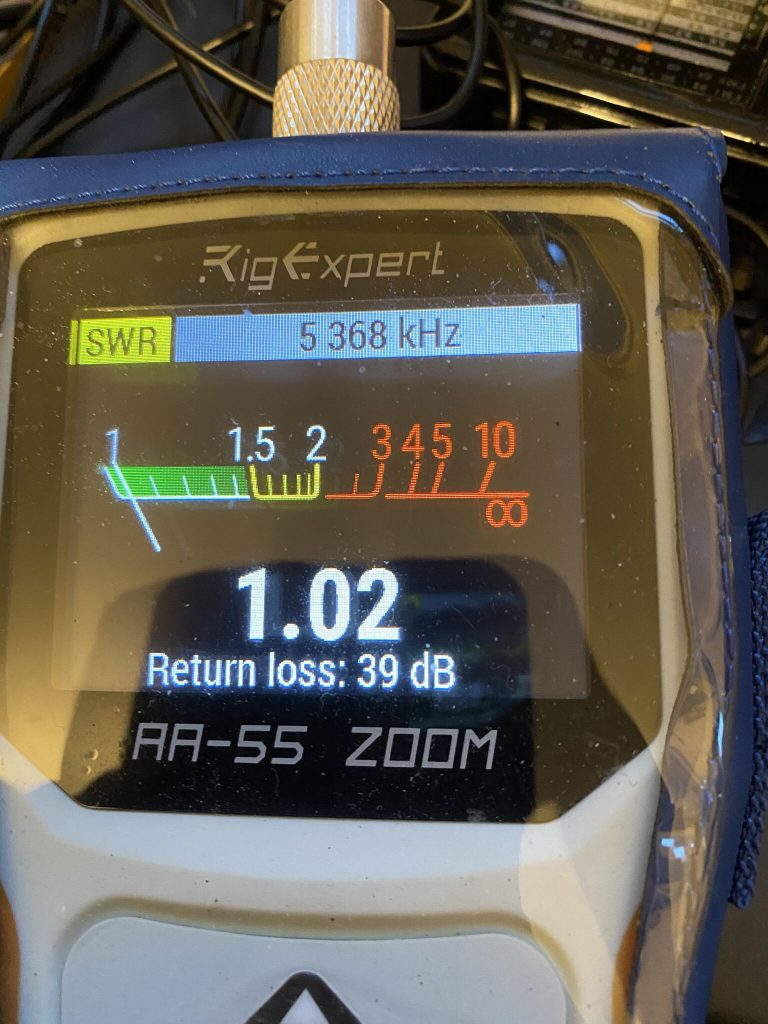
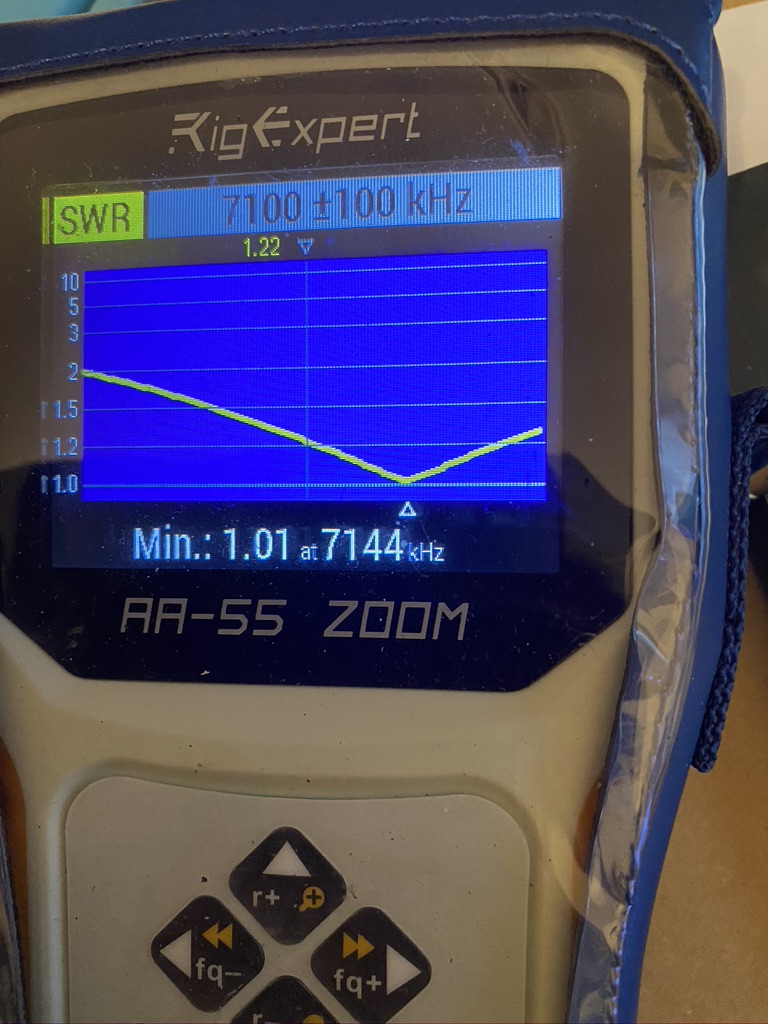
40m down to 1.01
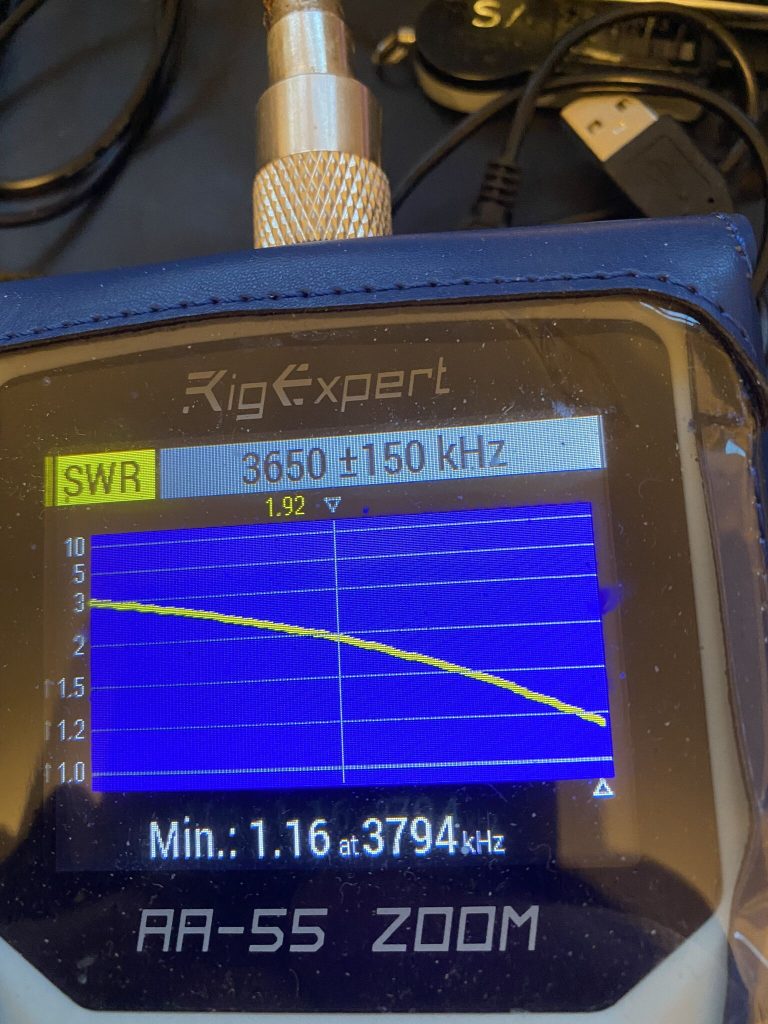
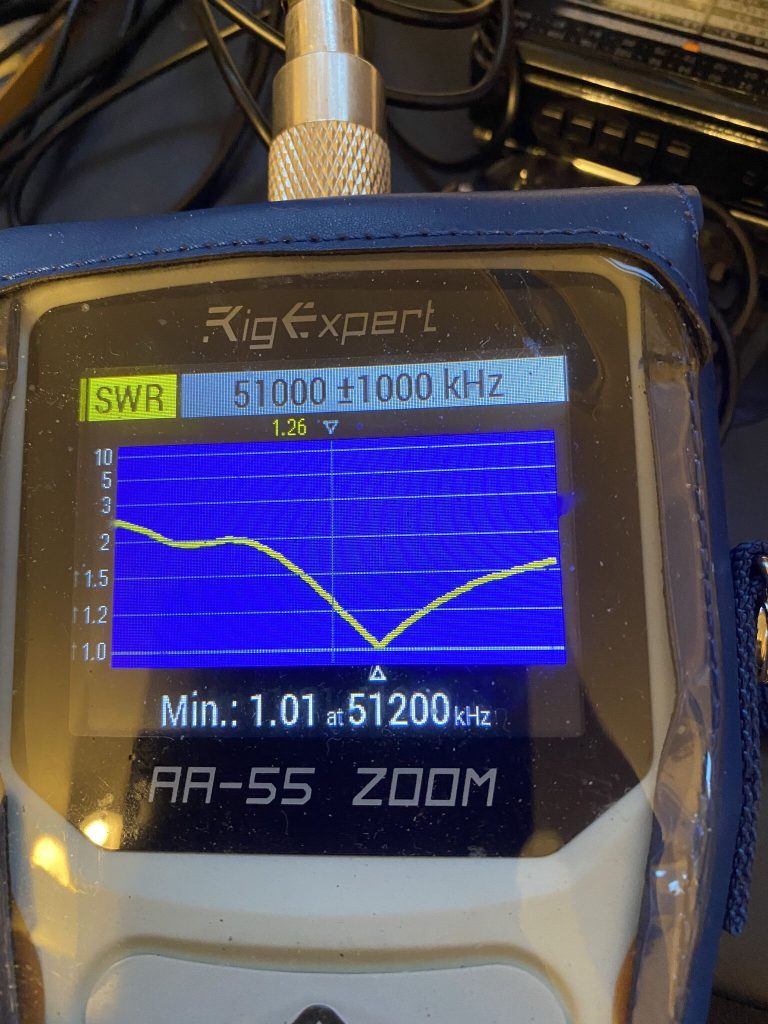
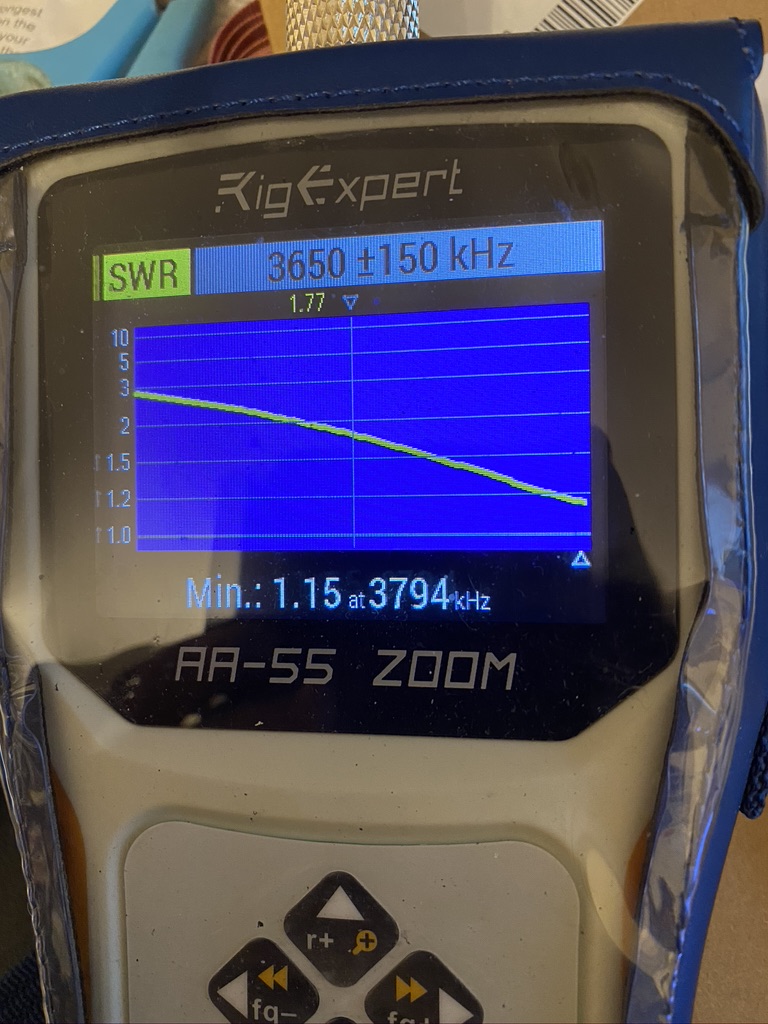
a nice slope on 80
Adding further radials from the classic
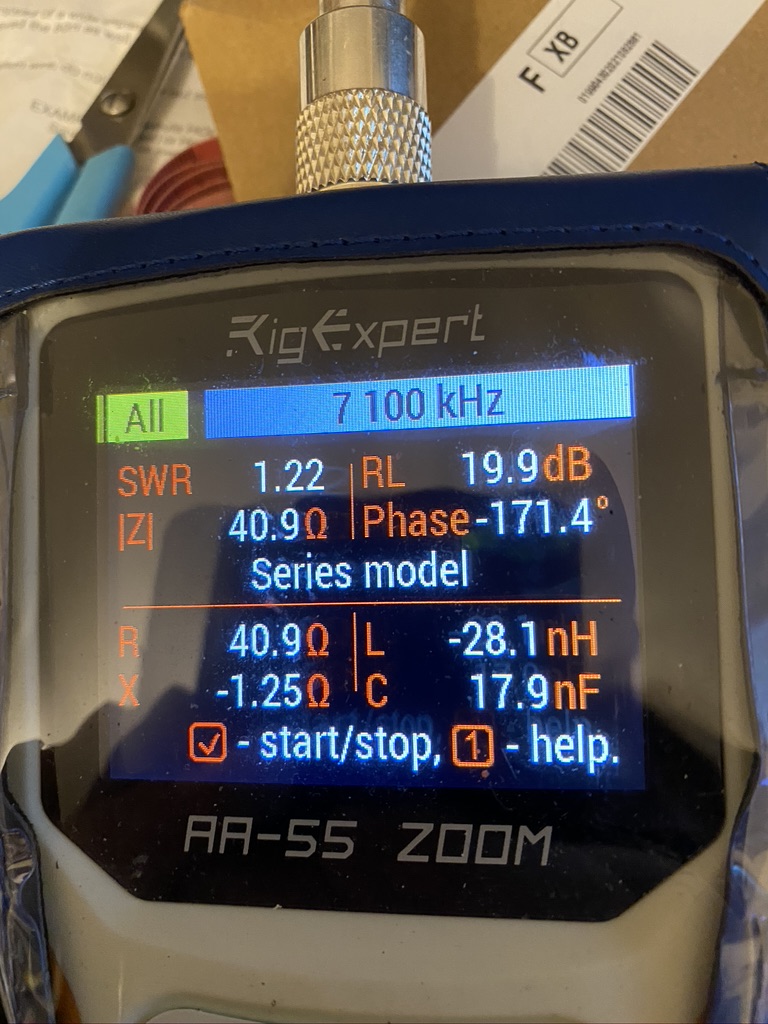
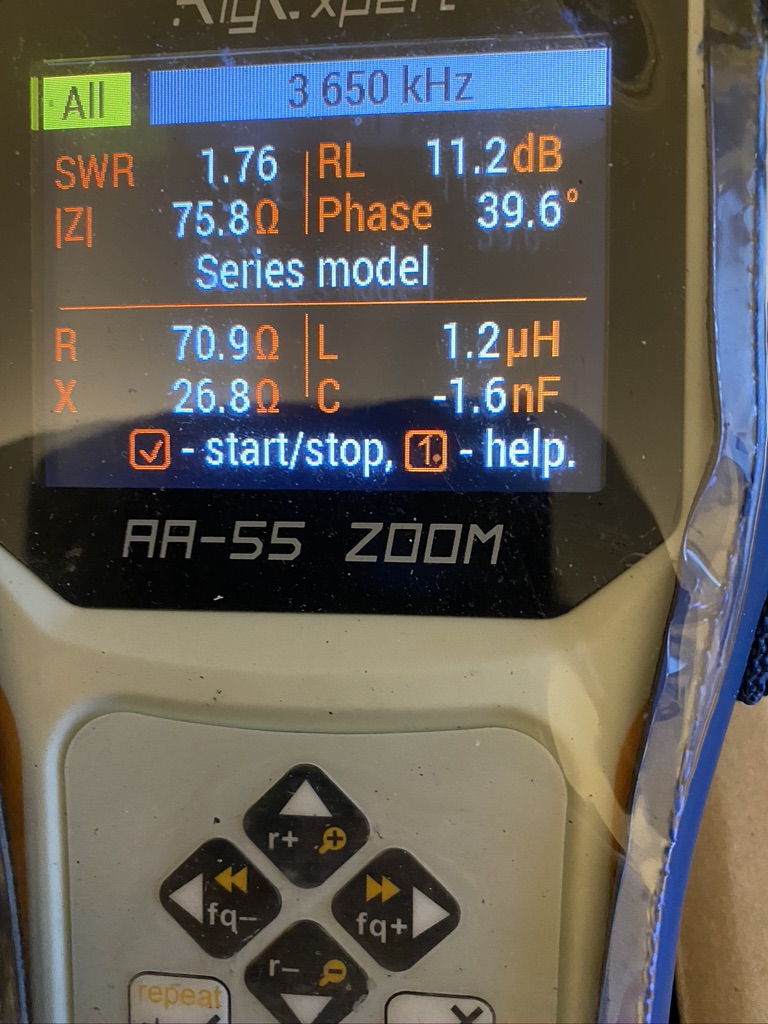
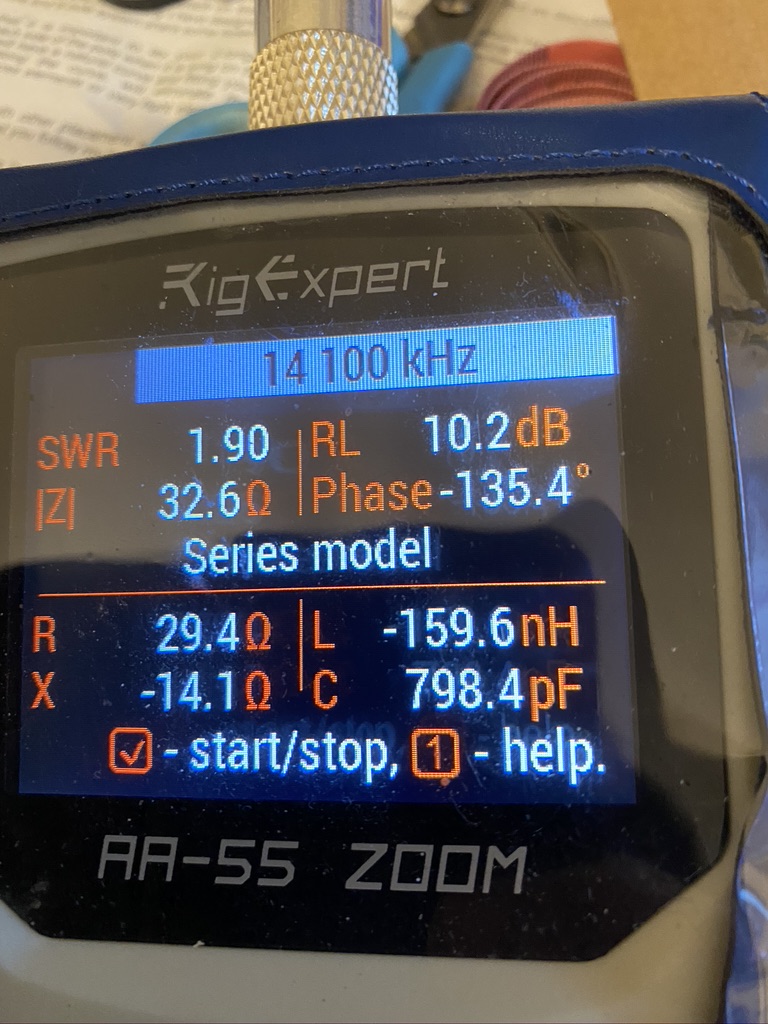
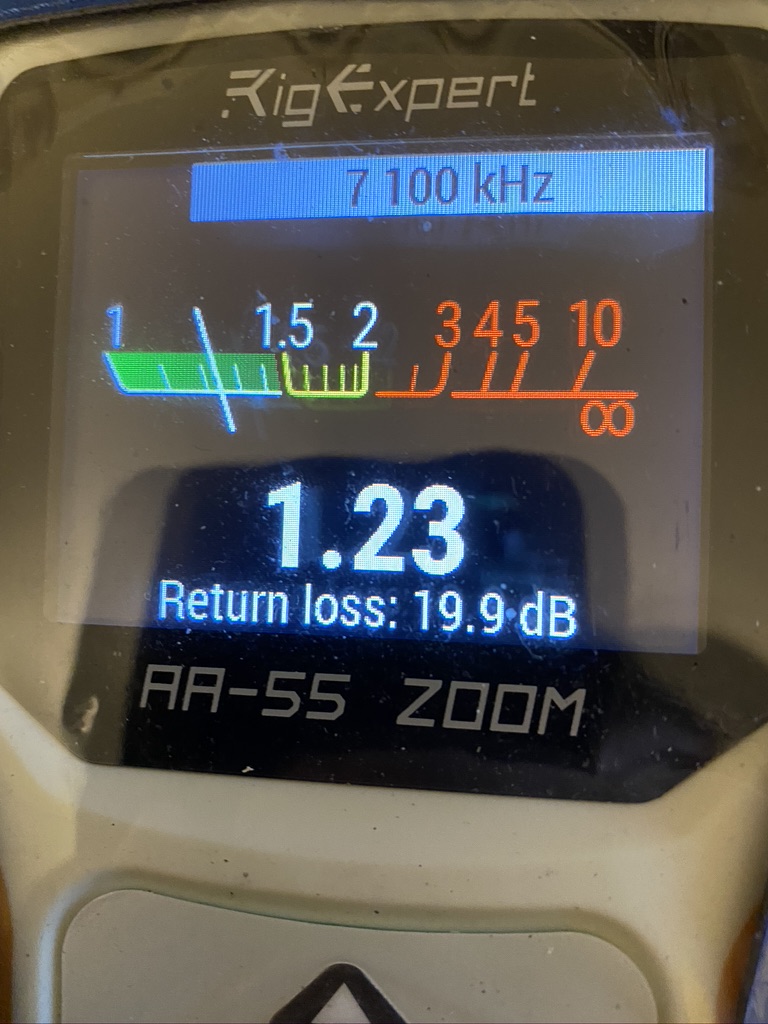
I then wanted to experiement with some of the features of the rig-expert i seldom use, low SWR is often good enough for me, but as I’m going to upgrade the feed cable, went and got more measurements.
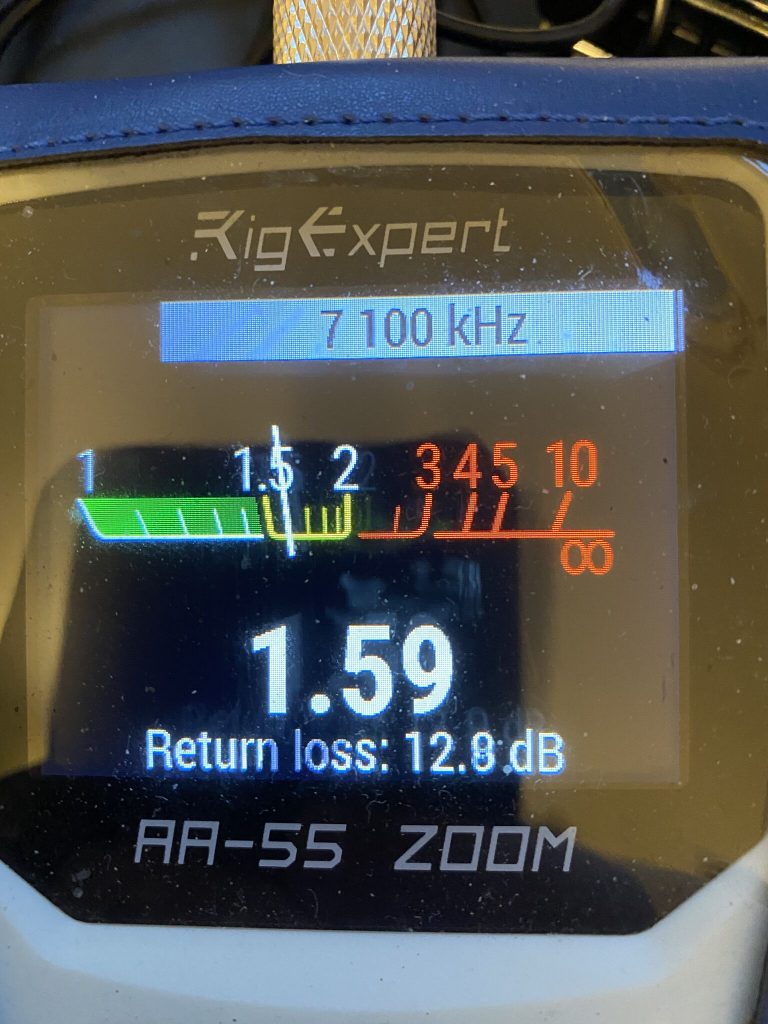
40m values
80m
20m
Additonal metrics
Now I’ll be the first to say I dont understand all the metrics on here, but I know that the return Loss of 19.9dB is very good !, likewise I’m happy with 11 and 10 for 80 and 20 metes as well.
I will find out more on what the other values mean.
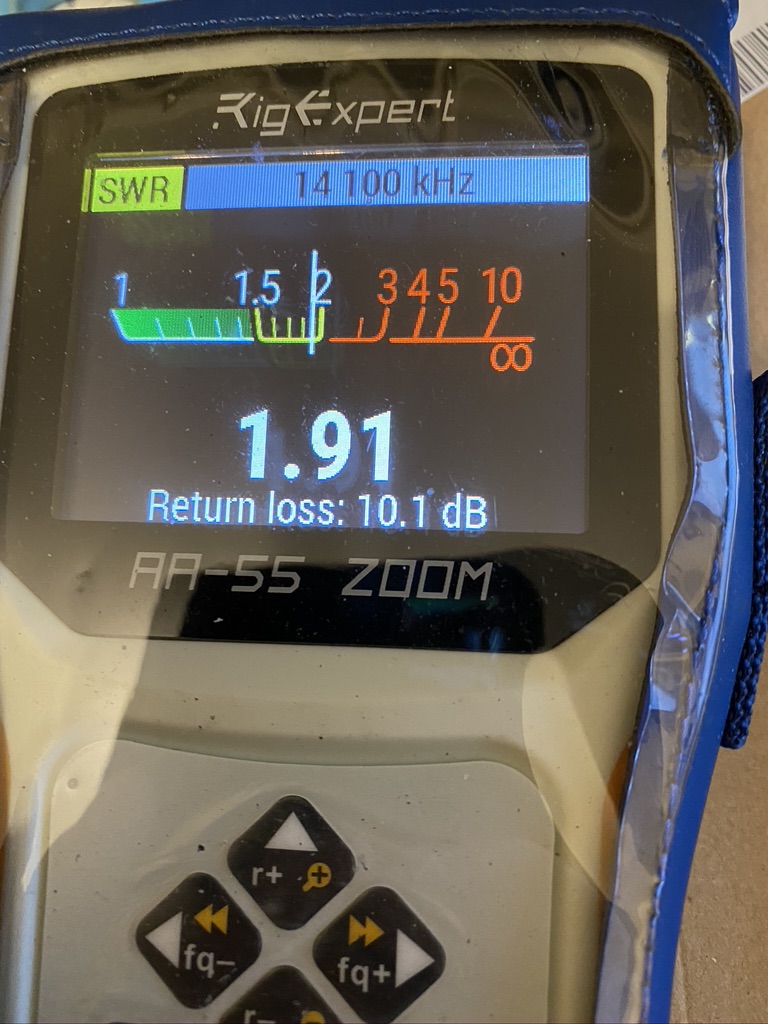
20m
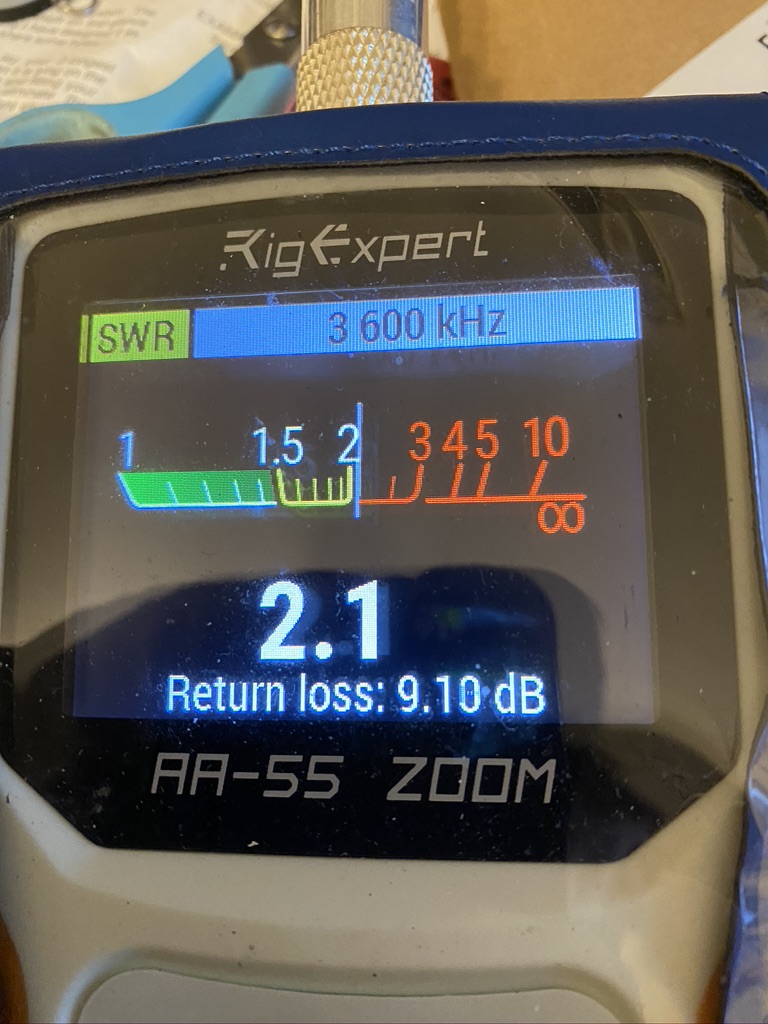
80m
40m
SWR & Return loss readings
Very happy with the clear reading sfrom the SWR meeter on the Rig Expert. I’m hoping i can get 80 and 20 even lower SWR and better return loss.
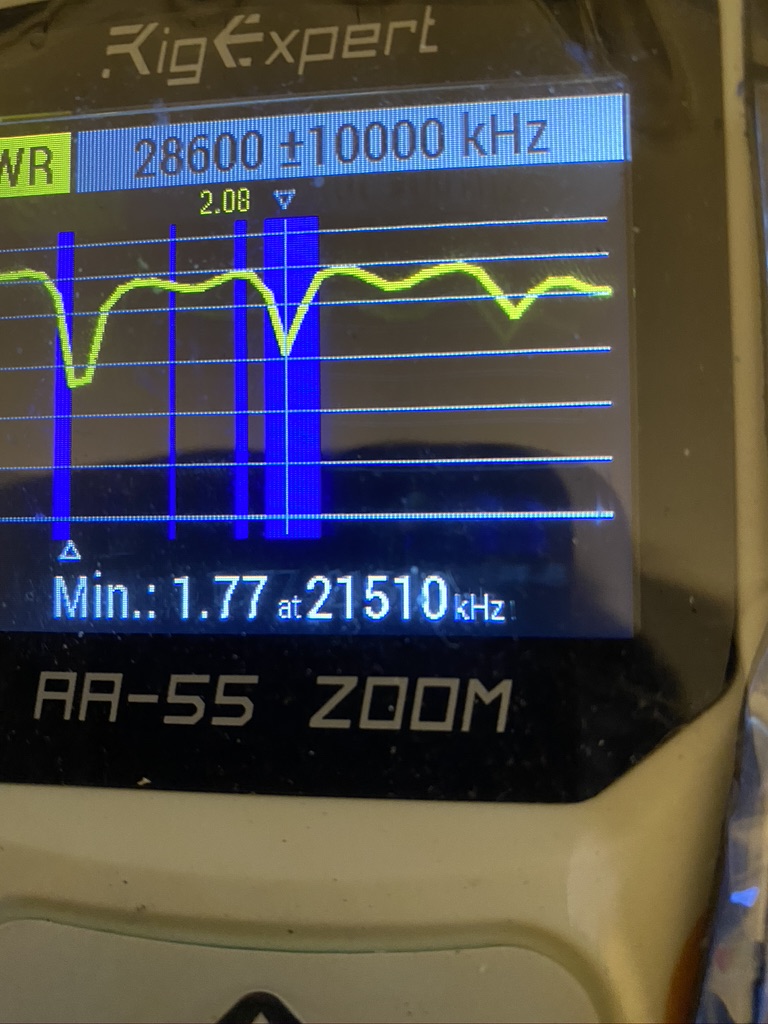
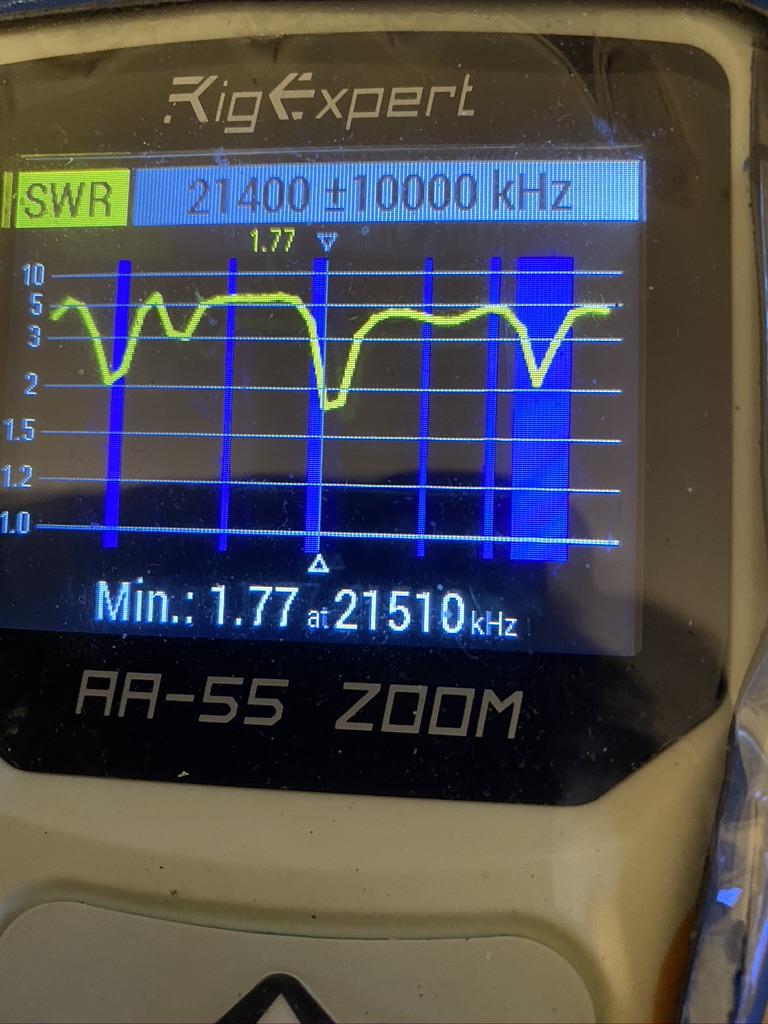
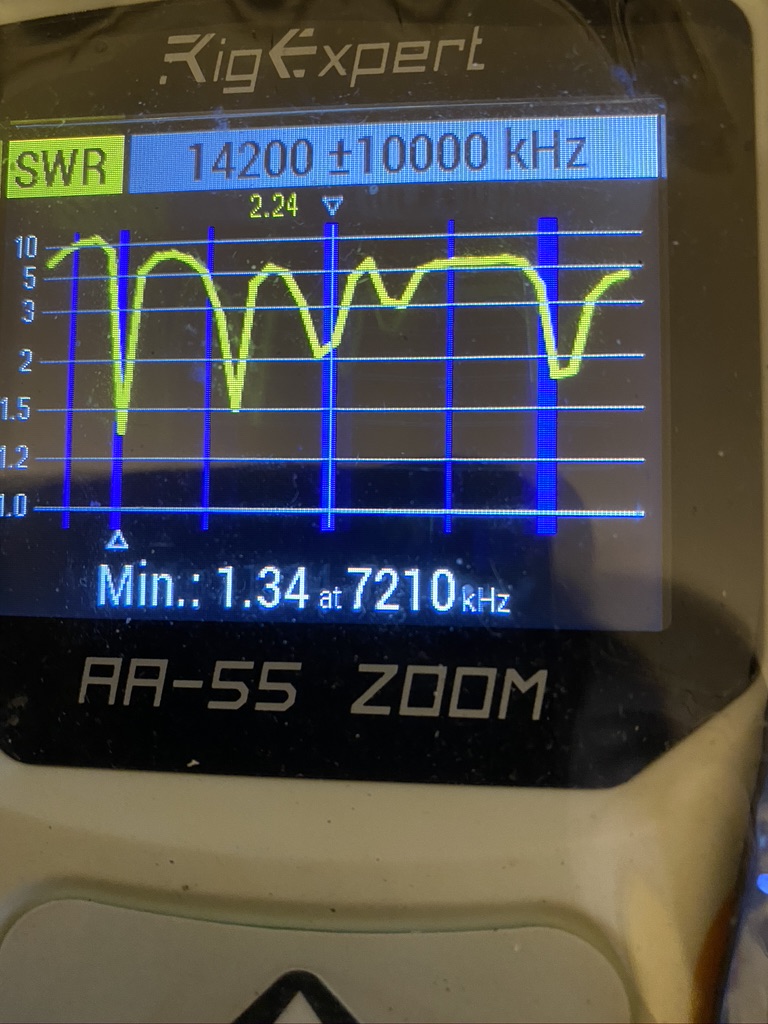
All band analysis
The all band analysis gave me a good visual on where the Nebula was resonant with just 3 elements. I’m looking forward to taking it upto 6, but with just 80, 40 and 20 these ar ethe main bands I use, so am happy with them. I could pull out my MFJ ATU – which I used to use to get me on top-band easily, so will see how i get on.
I’m going to manufacture the new feed lines, i’ve heard such good things about the coax and M&P connectors, i cant wait to see what happens.
End of the day I’m hugely satisified with how the Nebula is performing.
Another fine day of English weather, typical for the season herald the morning. Having been up early to start the bread-mix off, i set the alarm for day-break at 8AM. It was still quiet dark, but enough that i could wipe the mast down and look at the next set of tensioners for the 80m wire.
inspection of yesterday
whats left for today
working out from vid
cant be that hard…
continue the tensioning
The initial tensioner at the 3rd spreader plate had held up over night, and was pretty good, having wiped the mast down to remove any moisture/rain i looked at the 4th and 5th plates for the next set of tensioning. I dont mind saying that i found it more wordy than how-to, so i watch Calum’s video again on how he done it and tried to remember how to do it out in the garden !
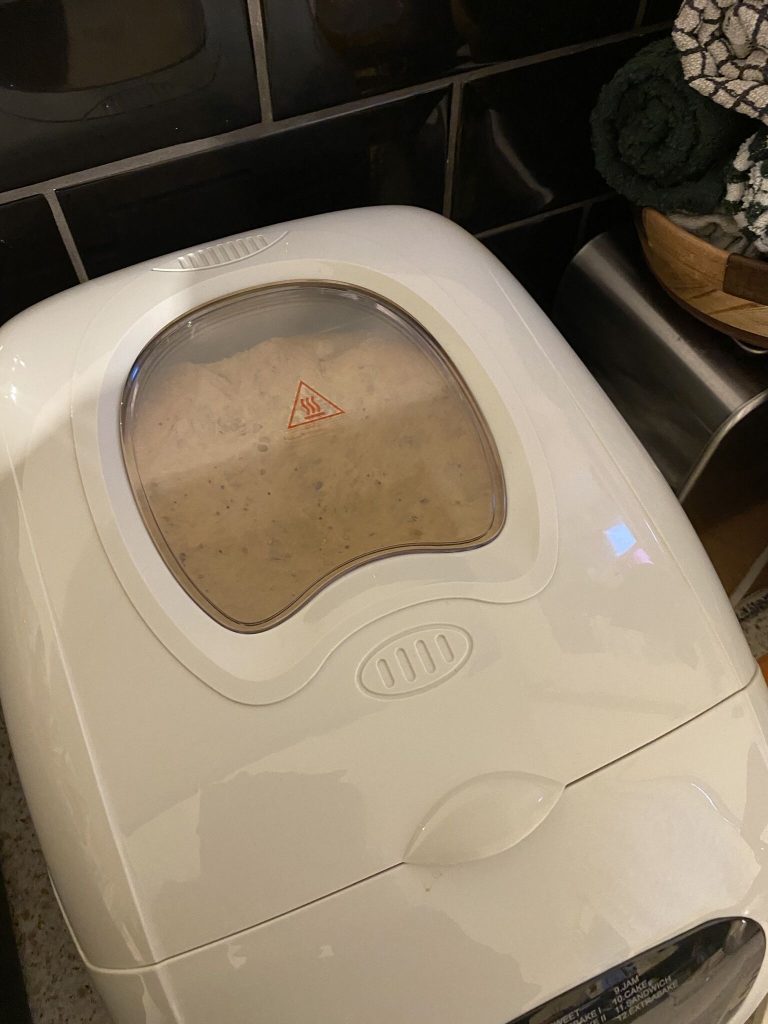
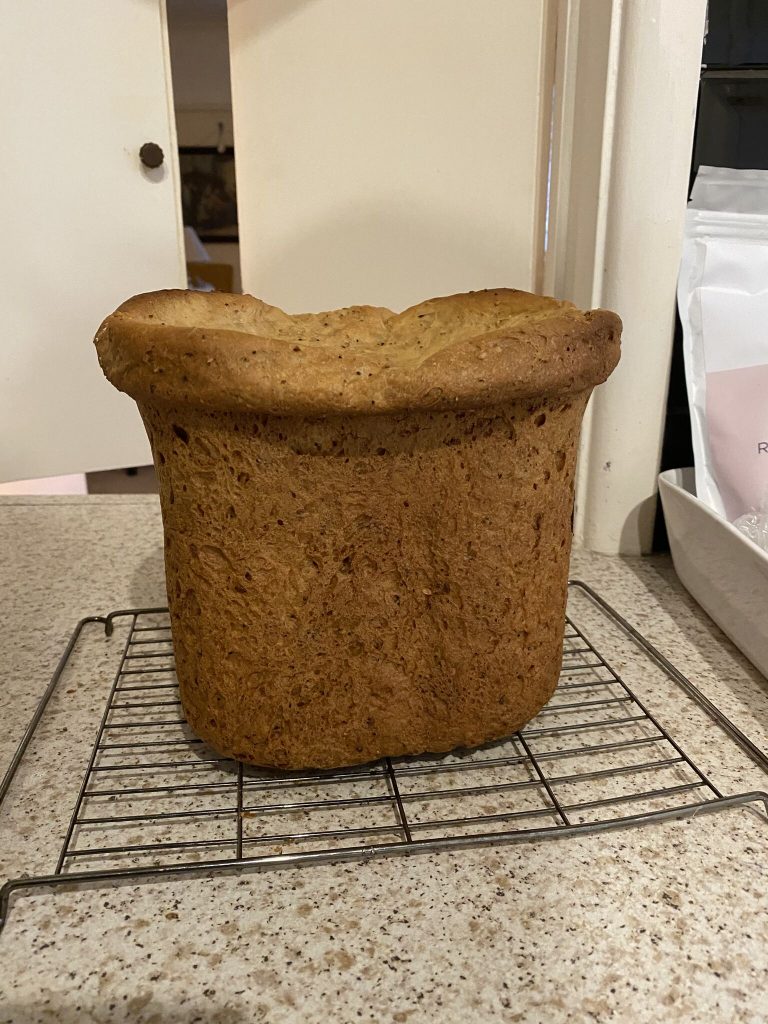
bread, almost done
ding
a bit more of tension
all the way up and down
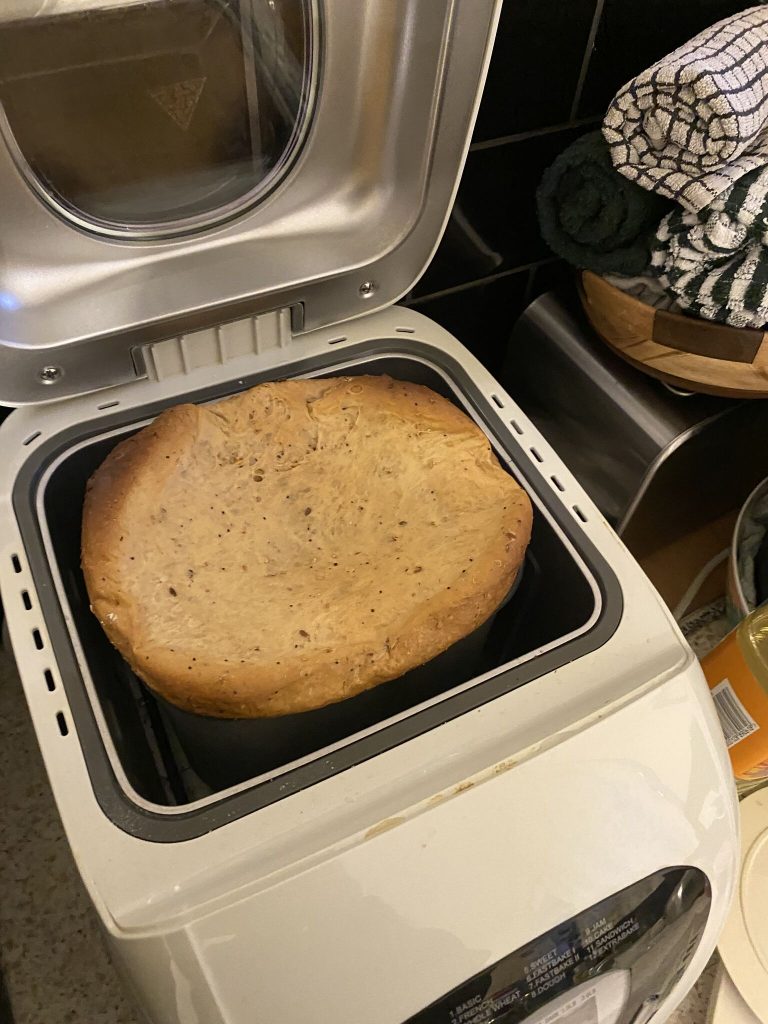
flat-top bread
80 meter tension and bread !
I managed to get the intial tension into the 4th spreader, and by now the aroma of bread was fillng the house. I took the bread out onto a rack to fim up and then tided up ready for a day of work – cant complain for 50 minutes of time – i like making small, steady progress.
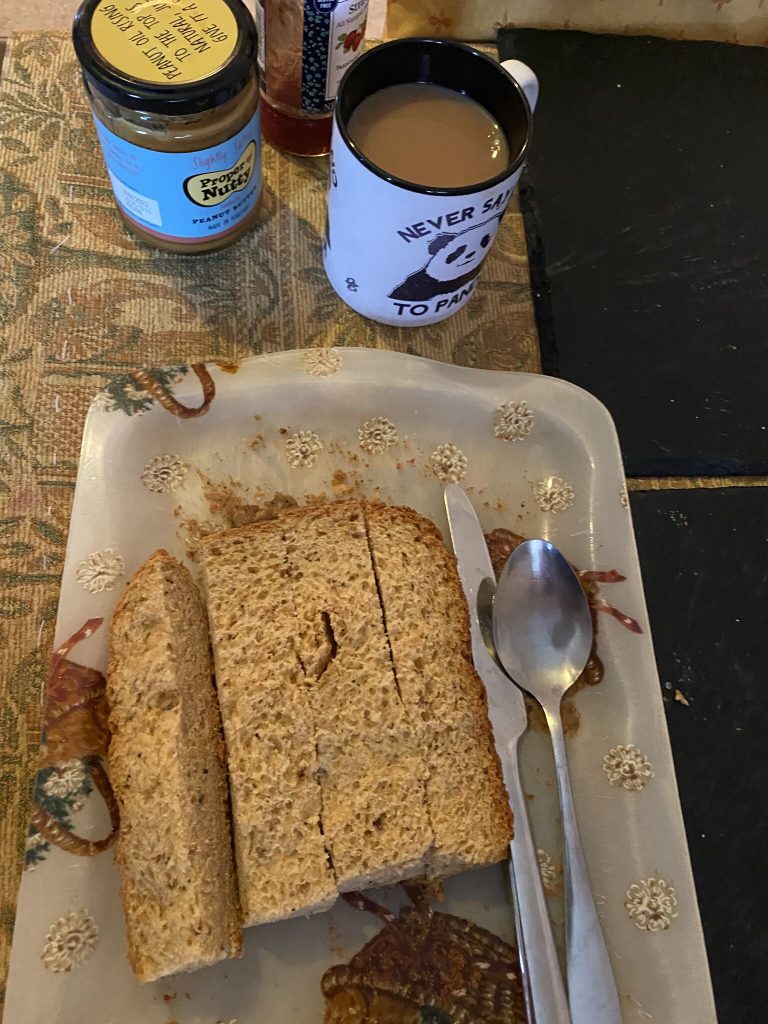
pandas breakfast
tube-fixture
tensioning
pandas breakfast and tube-holder
By now panda (aka Monica) had woken up for her breakfast, we both really enjoy havign fresh home made bread with no salt or sugar in it, it tastes lovely and is safe for both of us. I popped out to look at what i could do during lunch, and put the pipe-tube tensioner on to give me an idea of how all the upper side tensioner should work.. but to be honest i was still quite confused of how to get some decent tension.
hmm
tension…
at the top
80 meter tensioner.. bit hmmm
I spent my lunch break putting in the tensioners for the 4th and 5th plates. I don’t mind saying i found this quite stressful as I really wasn’t happy with the tension I had compared to what Callum had in his video.
tension on the 1st plate after 4/5 plate
By now i was honestly a bit miffed by it all and was eager to get back in with my day-job. I felt i had made some progress, but I wasnt very happy with the tension of the wire and also worried that the ‘doubling’ for the loops will create a linear load that will off-set the S.W.R. readings.
I came in, a little frustrated, but still glad i had made some progress midweek. The weather tomorrow looks quite abysmal with warnings for rain and wind where the next thing i have to do is to vertically erect the mast and guy it, before adding all the radials.
I will see how things are tomorrow morning, the worst thing would be to catch a cold/cough in the current climate and I’m not adverse to finding other ways to progress. The forecast for the weekend looks promising, but if anything this has been a ‘standard’ documented build so far, what comes next is the hard part, with all the unknowns of wire-lengths, loops and metal guy wires that could effect how the antenna performs..
Even thou a monday, i took advantage of the pre-daytime WFH sunshine to get small amounts of progress on the antenna.
radials ahoy
80 meter
radials and verticals
I set about alining the radial plate and spreader plates. I actually make use of the ‘DX Commander’ stickers as an easy visual way of aligning the spreader plates, whilst I do have each of the vertical holes labelled (80/40/20) its still easier to see the stickers from a distance.
1
2
3 & 4
spreader plates with dx commander stickers
I threaded the 80 meter wire thru the top eyelet, which by now was totally rock-solid on the mast.
top spreader
the the eyelet
down the pole
80 meter wire up and over
I also used my lunch break to attach the SO-230 – i found the tape very fiddly to work with, but nevertheless got it on to waterproof the connector. I’ve left the shield on for now. I then started on putting the tensioner loops into the 80m wire, which took me a bit longer than expected (sorry no photos!). but got the first one done at the 3 spreader.
I’m hoping the weather is ok tomorrow morning and I can get the last of the tension loops on the 80m wire in place, and all being well, get the mast vertical with the 80m wire going up it. A know the radials will take plenty of time to get out, so whilst I’m optimistic i might get a S.W.R. test tomorrow, realistically the first reading might not be until Wednesday.
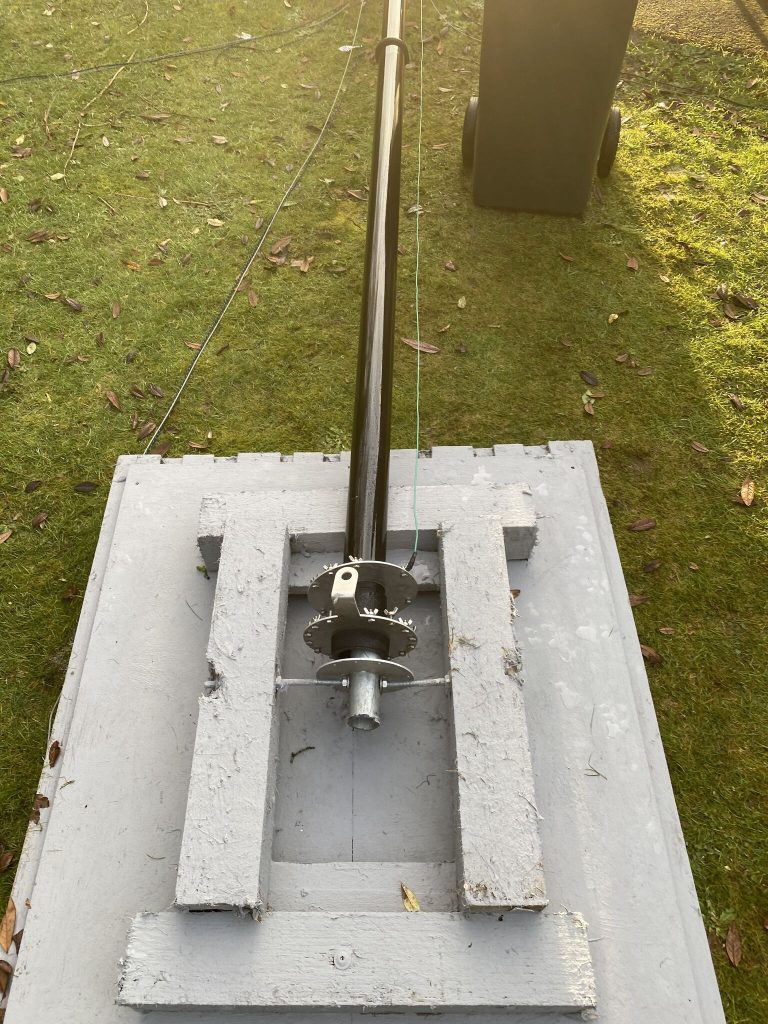
So I treated myself to a bit of a lay-in this Sunday, which for me is getting back into bed at 6 when i usually wake up, At 8 it was a gorgeous sunny morning and I was full of get-up-and go to complete the final bit of rigging/guying for the antenna.
agood start to teh day
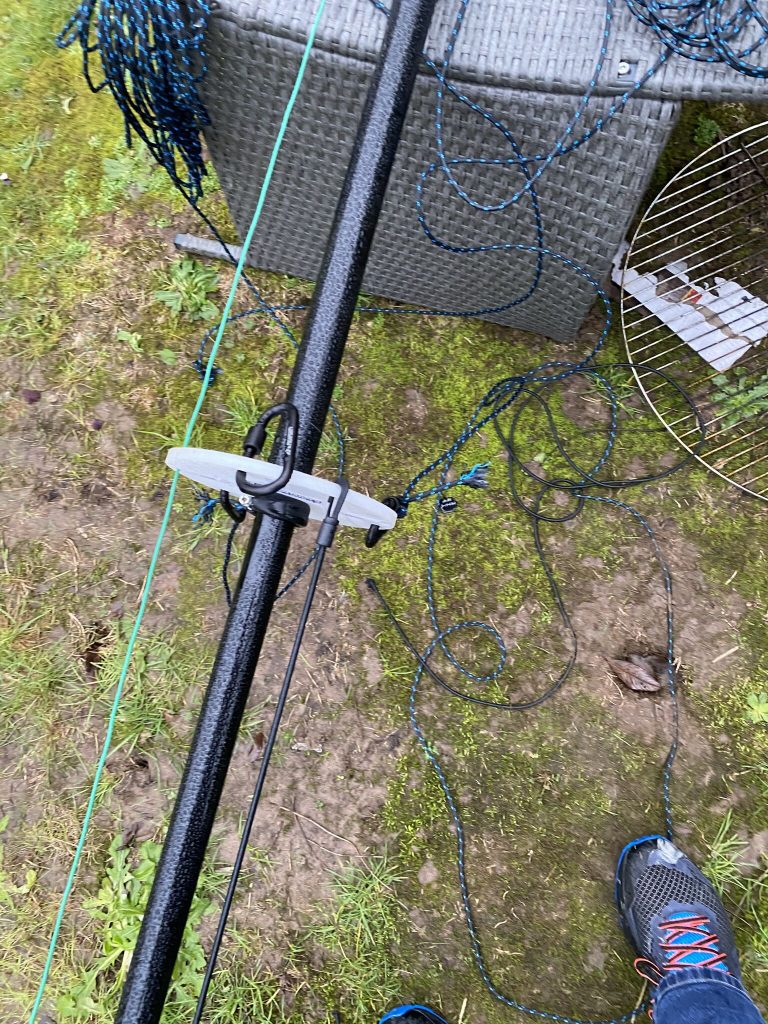
some tilt, but thats tension
rigging the top spreader
There was some tension in the top spreader as can be seen in the final picture, but i know that slacking that off will give me a nice straight vertical. It took me about 30 minutes to complete, but its a quesiton of being safe and methodical.
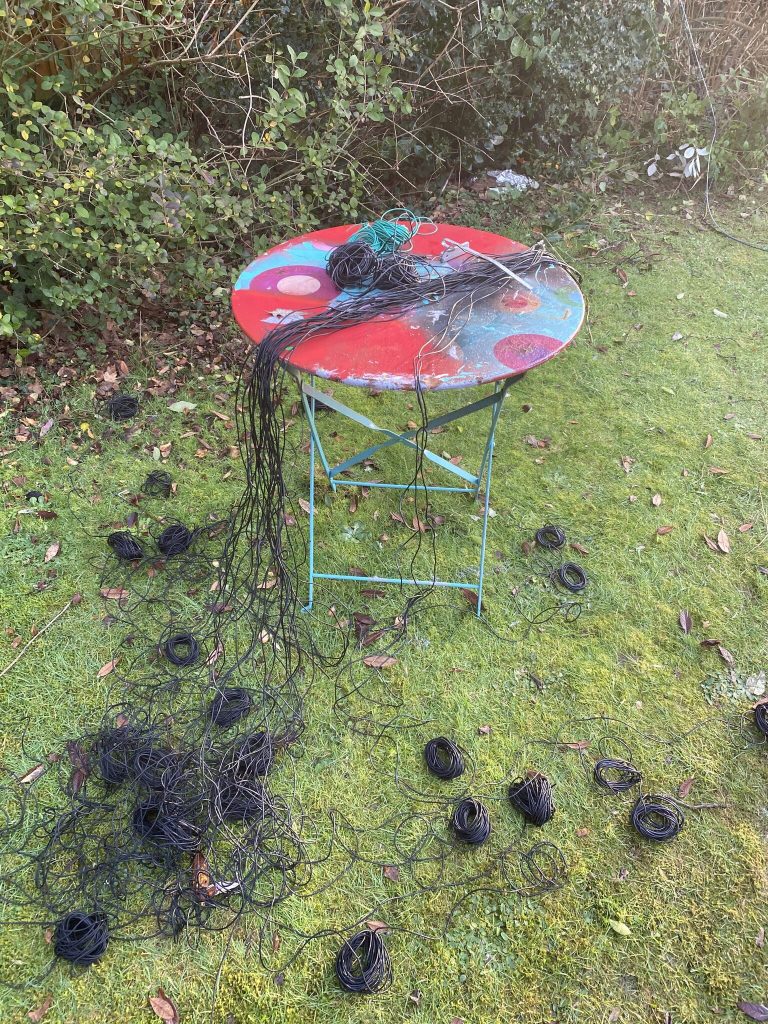
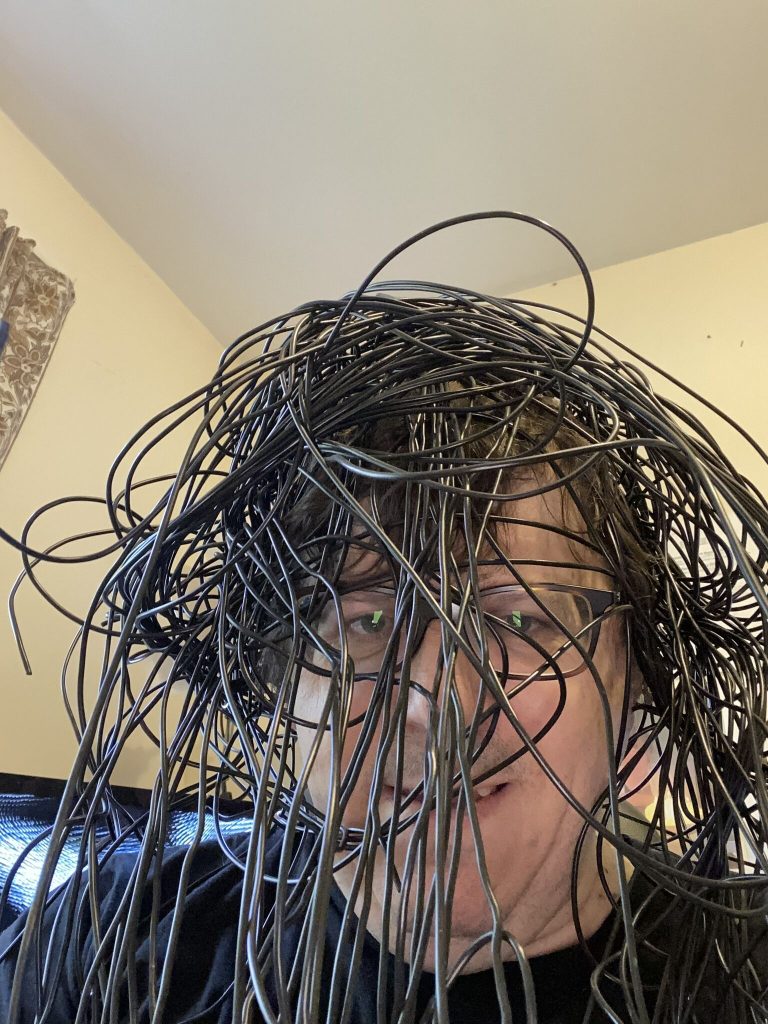
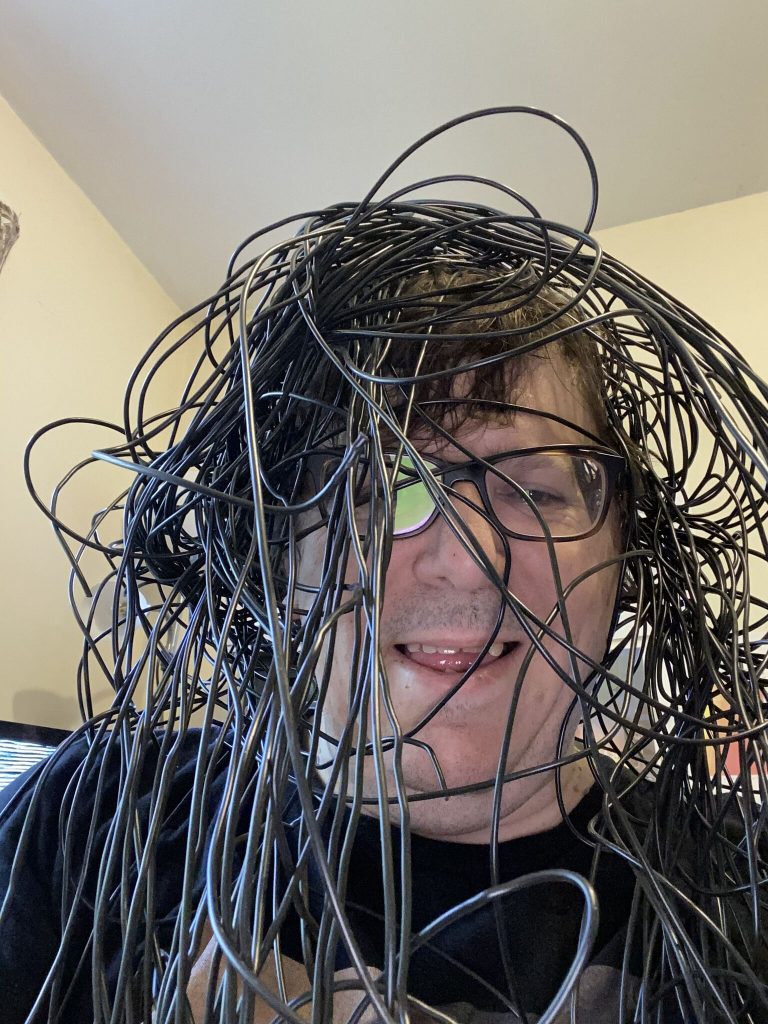
Next was to start the construction of the radial elements, i had brought these into the shack and they was already creating a quite bit of mess and getting tangled.
radial-wig
no comb-over required
it gets messy
messy radials make poor hairpiece
When dealing with this much wire, its essential to have a process and method, else wire/construction materials just get all over the shack and making working not the fun it should be.
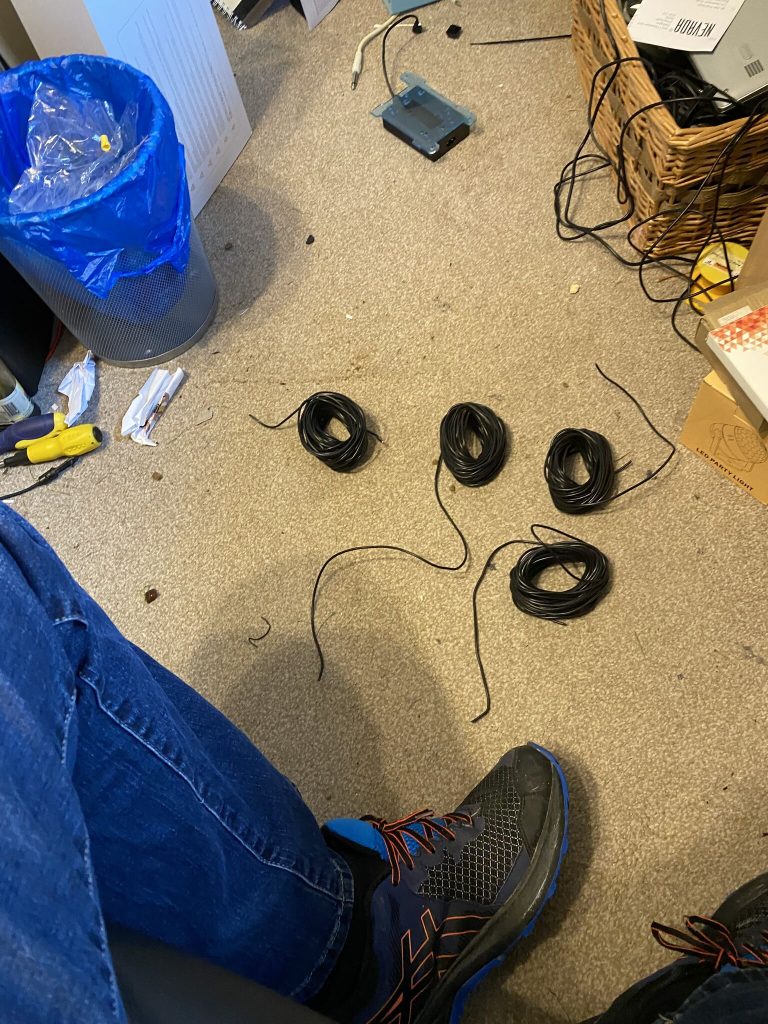
divide by four
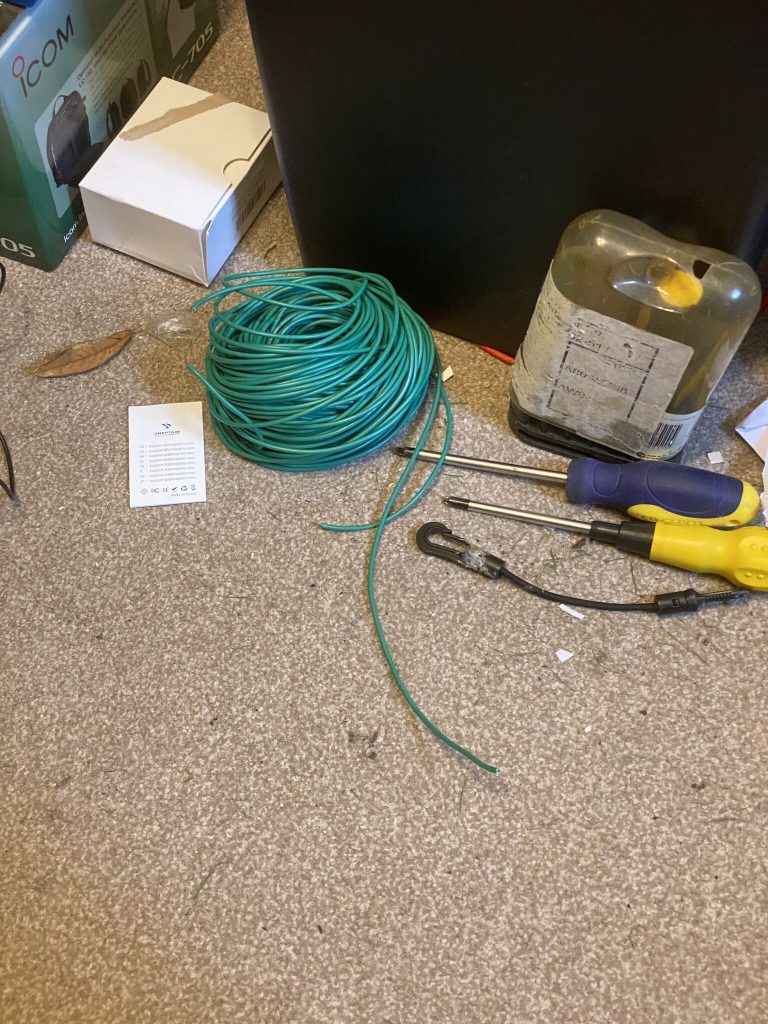
verticals
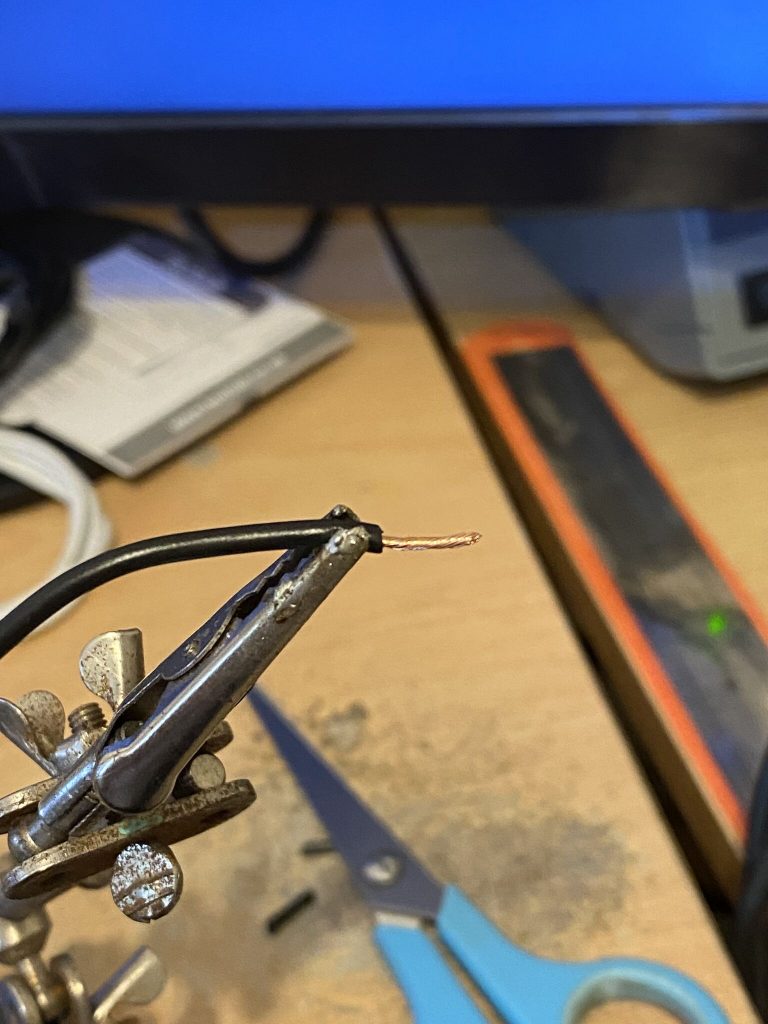
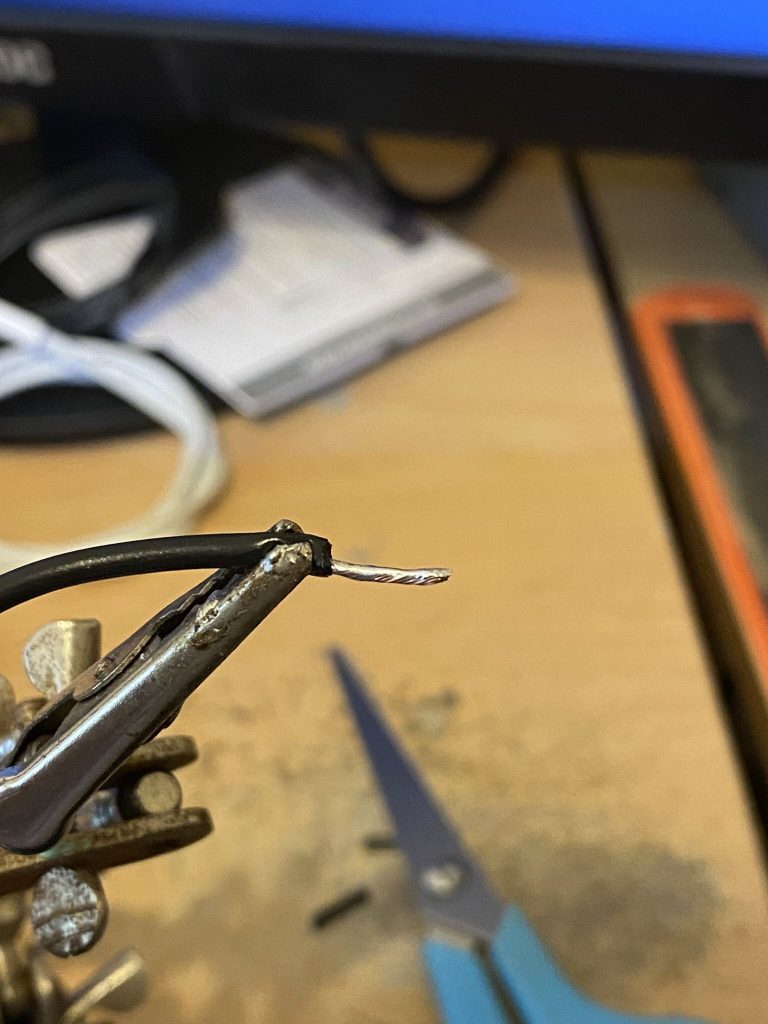
strip
solder
tin well
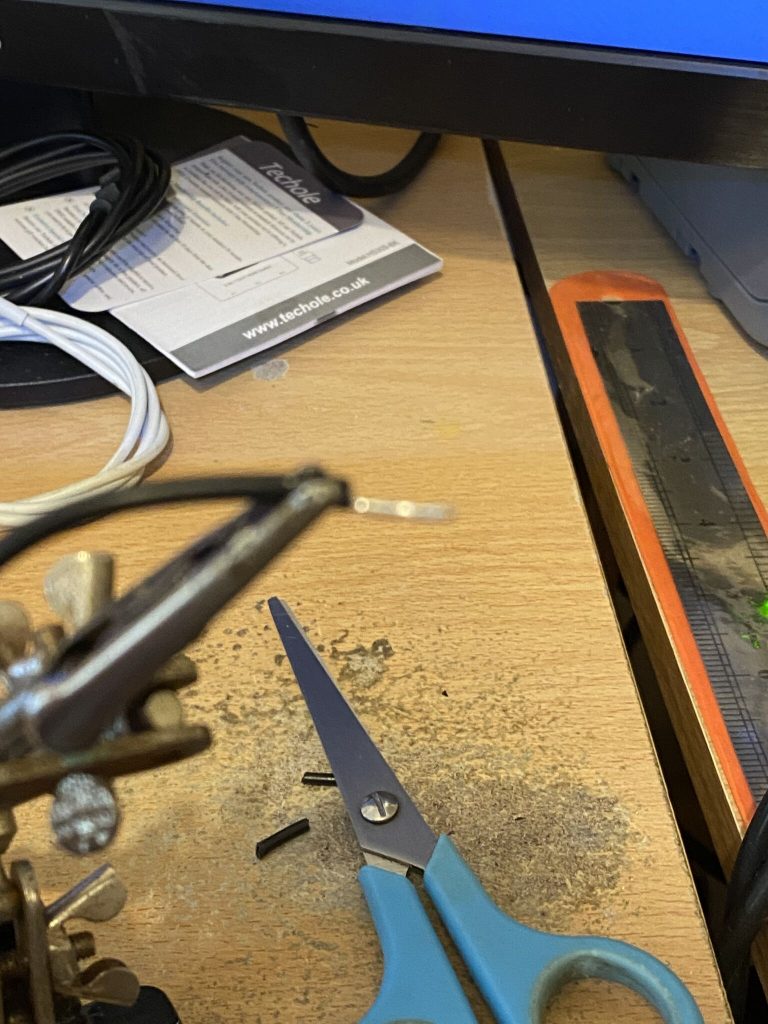
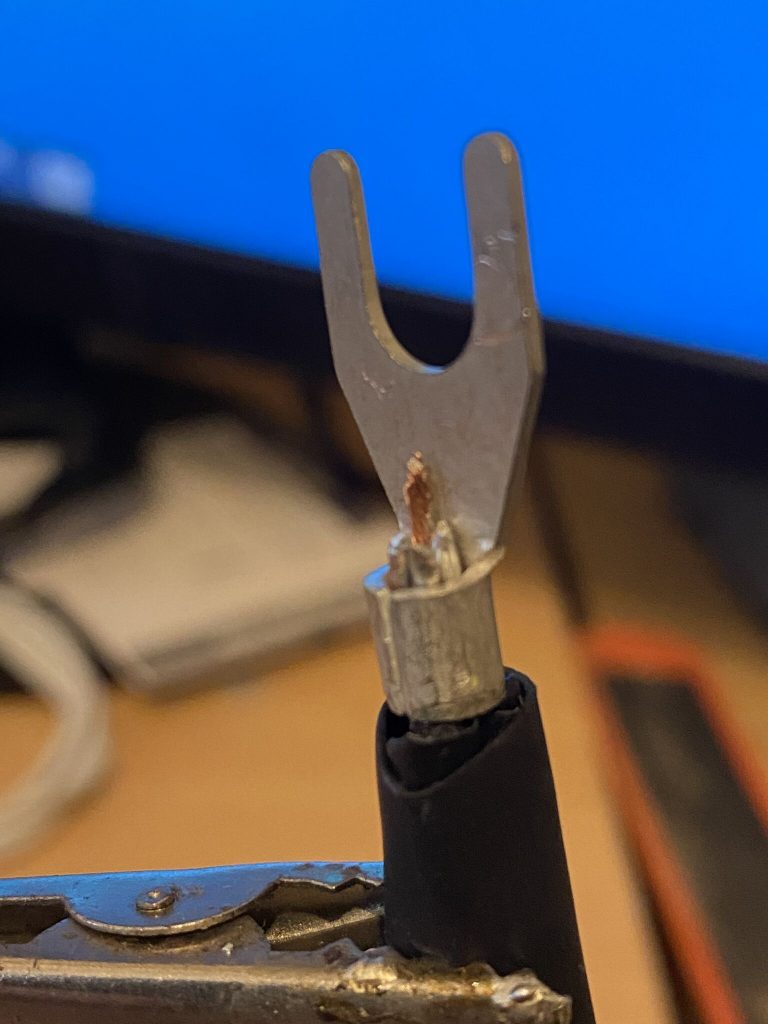
remove cover
bond
solder & crimp
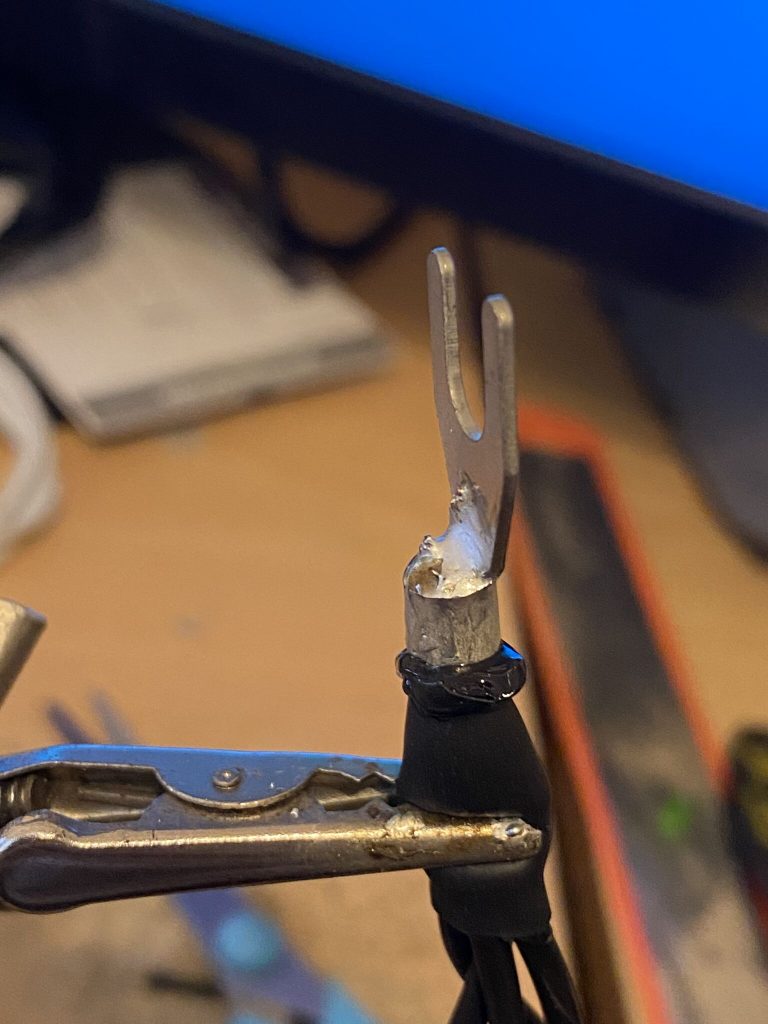
take to garden
radial construction process (* 7)
So i wanted to keep 4 radials to one connector so seperated them out that way from the big ‘rats nest’ of wire i had. I then stripped, tinned and when all four were tinned, inserted them into the lug. I could then use the glue-tube and some tape to keep everything waterproof. With all four radials on, i would then take them out the shack to the garden, ensurign a ‘clear’ workspace to continue working.
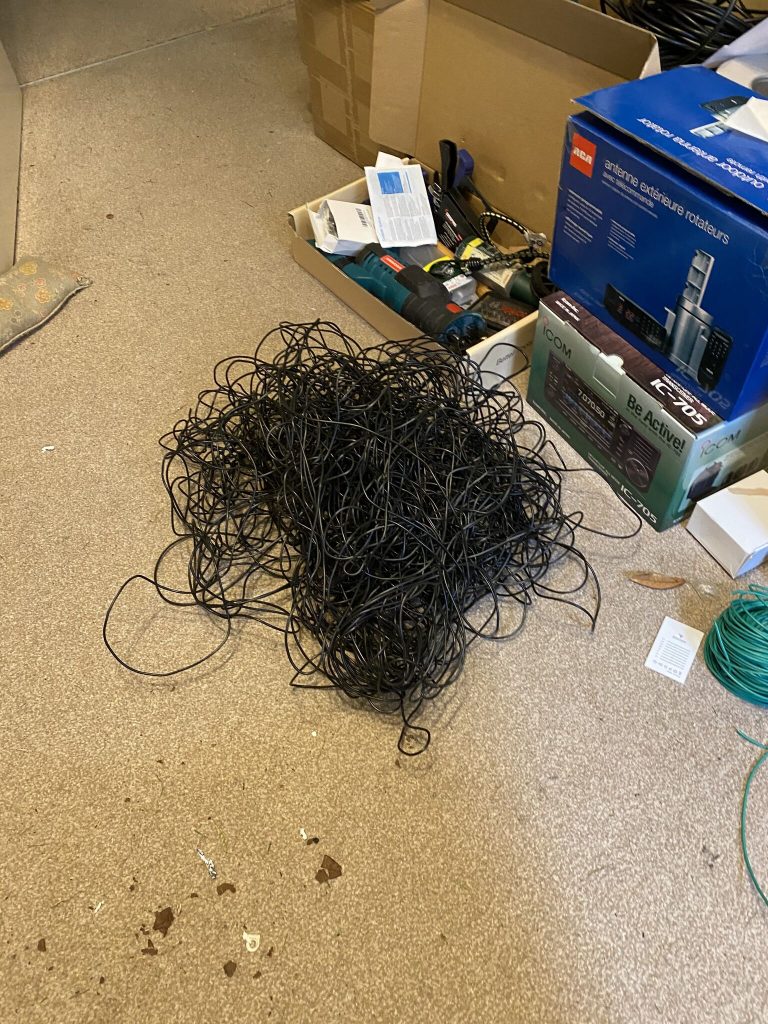
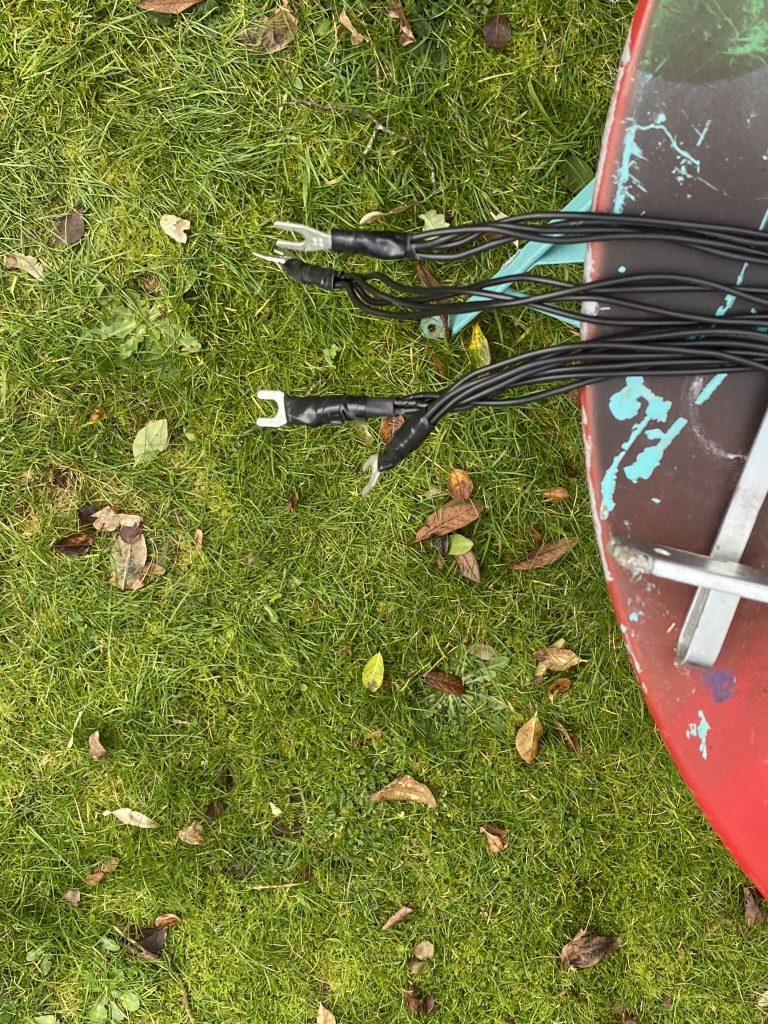
radials
lots of wire
ALOT
24 radials.. 6 to go
radials in the garden
By now it was getting close to 4 and the time to tidy up and think about what i would do in the coming week. I was really pleased with my progress today, albeit not quite transmitting, but with a well rigged antenna and the majority of the radials (batch 1) completed.
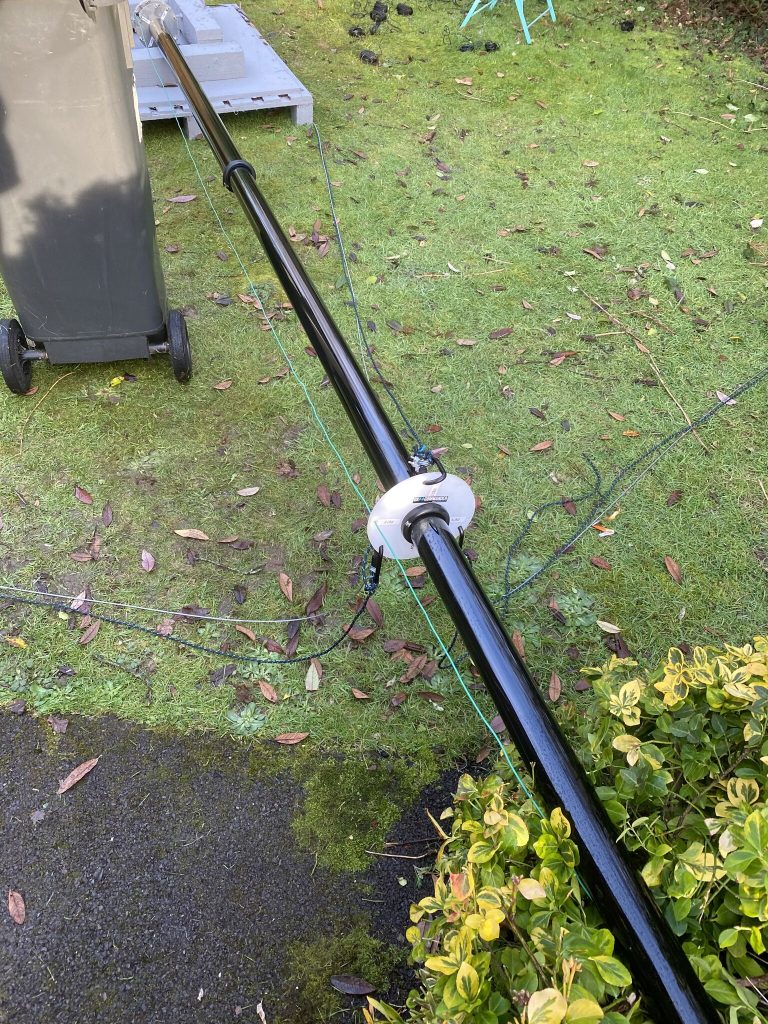
fish-eye glued on
upper spreader ropes
mid-spreader ropes
fish eye and spreader ropes
I used the industial strength superglue to attach the fish-eye for the 80m wire to loop thru and tidied the ropes on the upper two spreaders. Keeping things as tidy as I can helps with getting the mast vertical well and reduces any tangles/issues with getting it vertical.
So I have a few more radials to make up to get the full compliment of 30*10m ready, then completing the vertical construction with loops/hooks and feeding. Having built the ‘classic’ and Callums videos, I’m sure this will be quite straightforward.
I’m hoping that this time next week I’m measuring SWR on 80, 40 and 20 meter bands and they are close to being useable, if not perfect, but I know things can not always go to plan !
Heres looking forward to getting the Nebula on air – i think some form of naming ceremony will be required 🙂