Cable Testing !

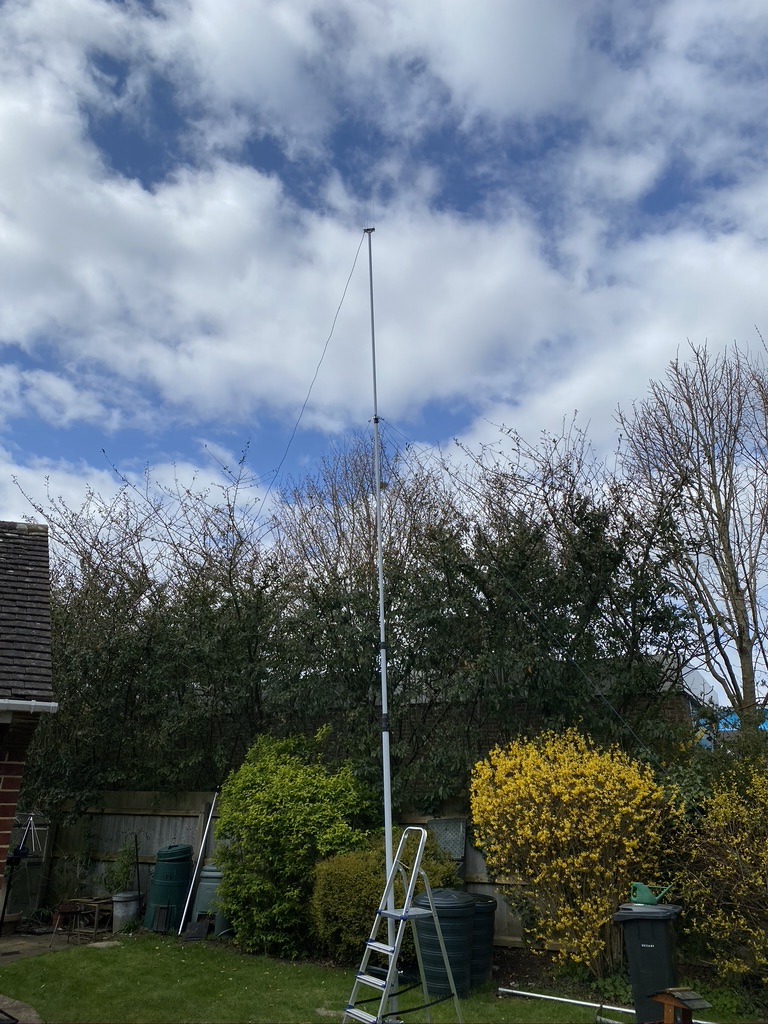
So the weather was pretty fair today, no rain, light breeze. Having completed the cable the previous evening it was time to attach it !

40ft up, 2m Jpole with the Radioorld Guy kit used to keep it firmly to the ground with the heavyweight mast and mast support.

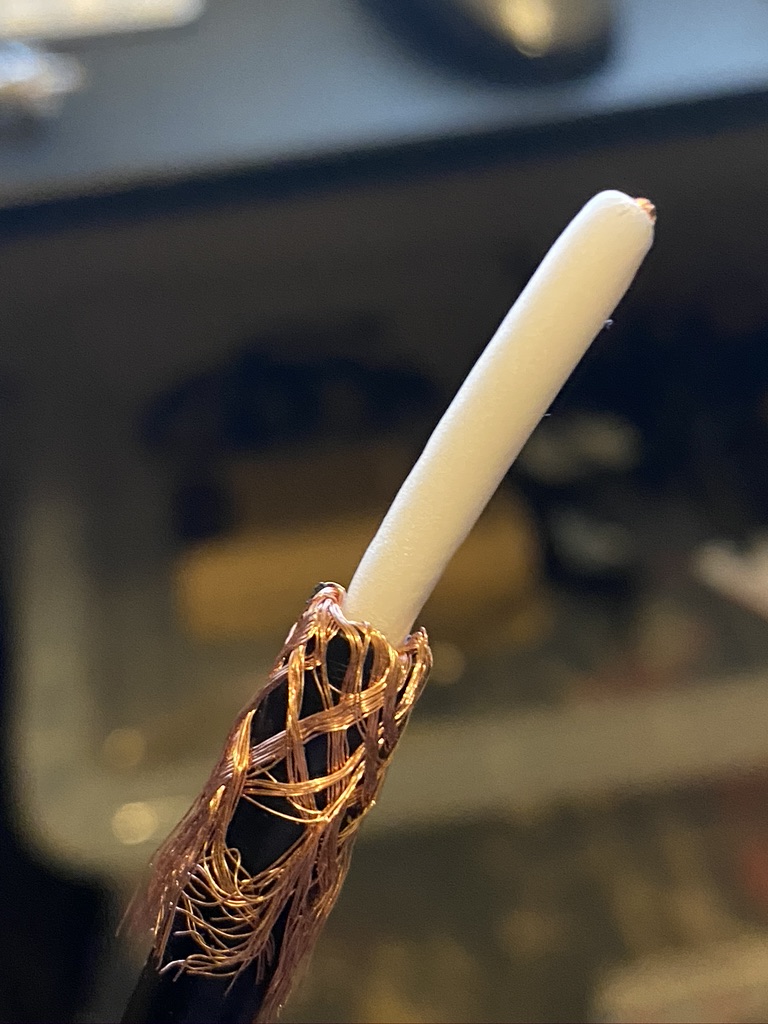
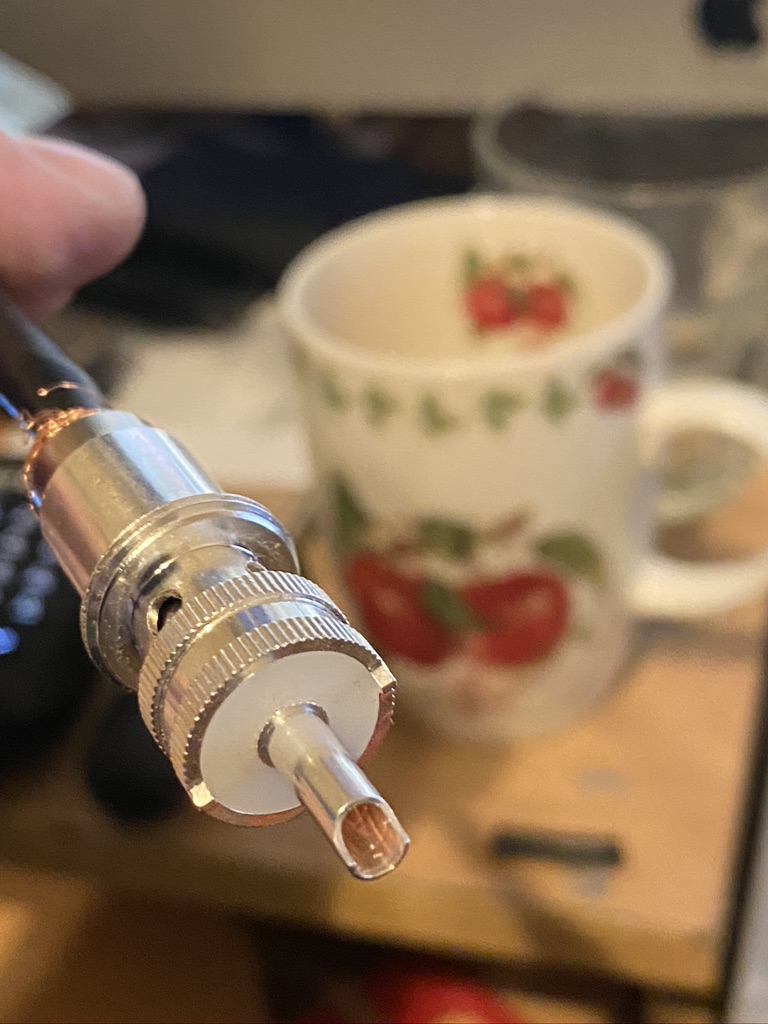
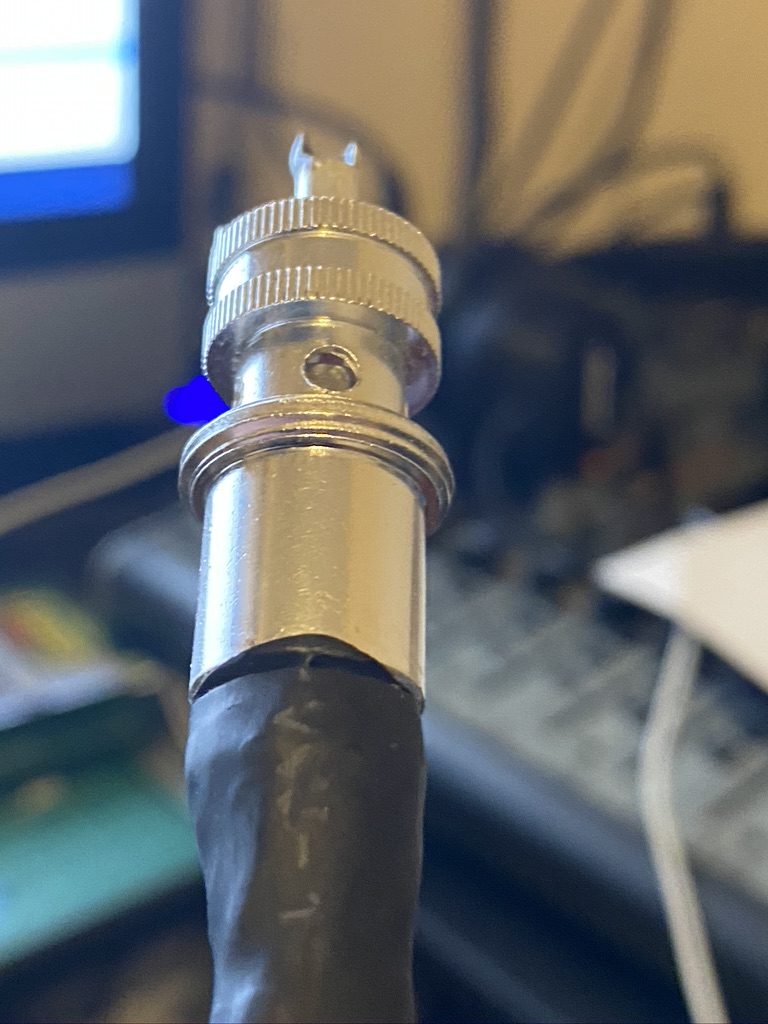
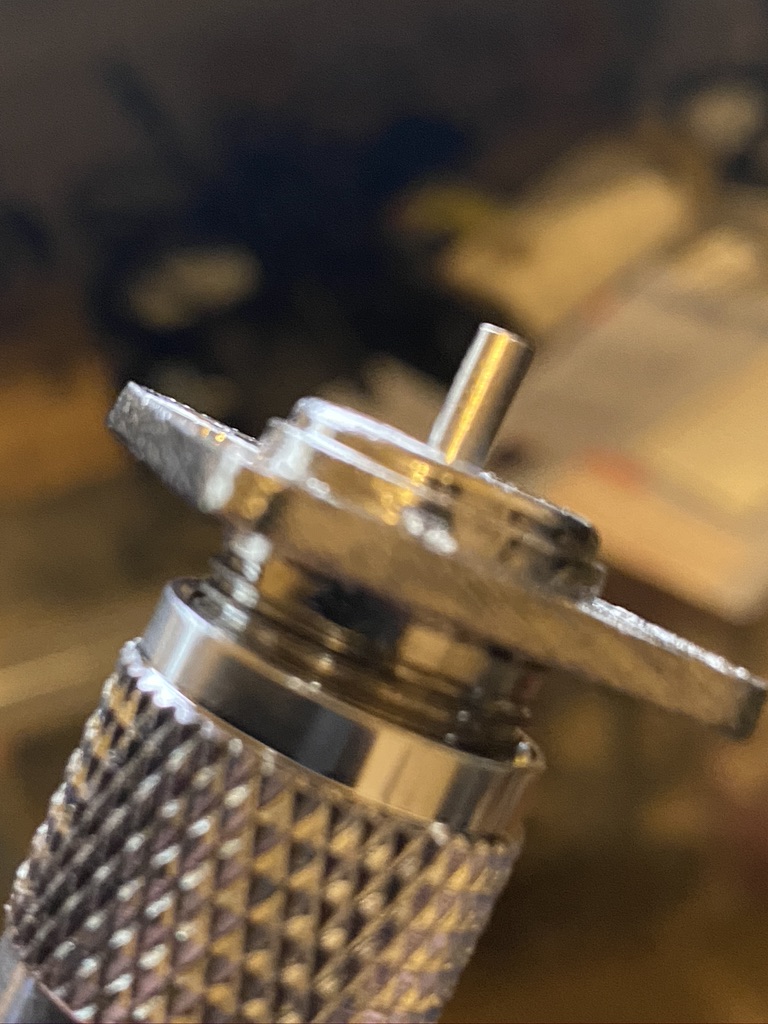
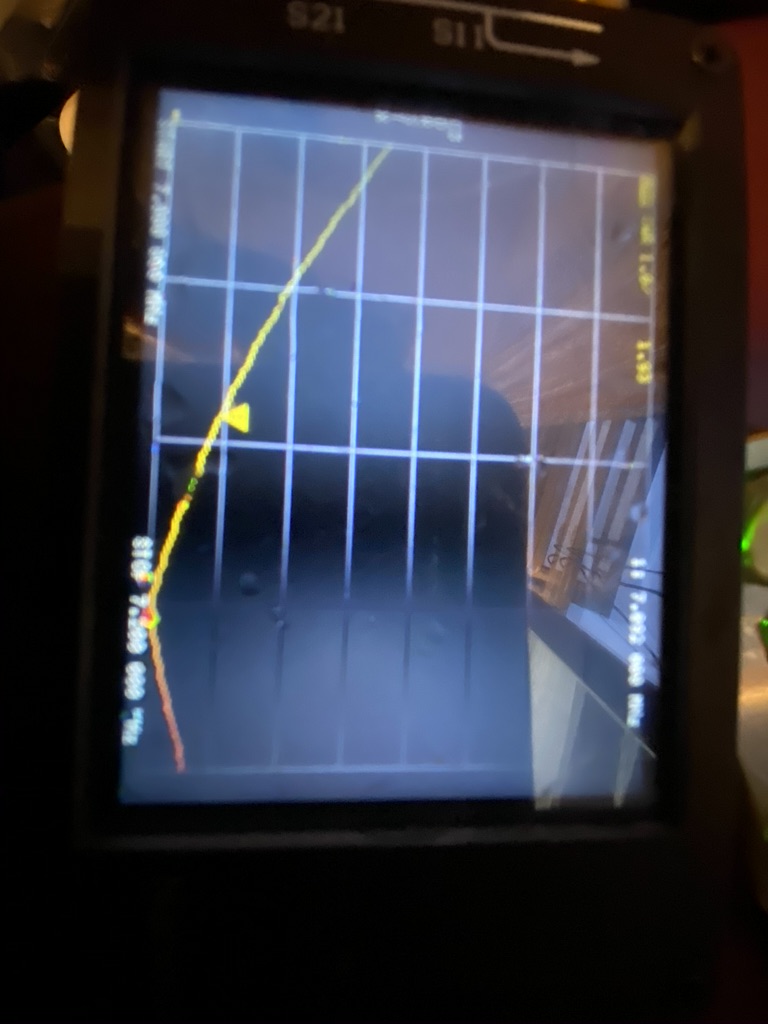
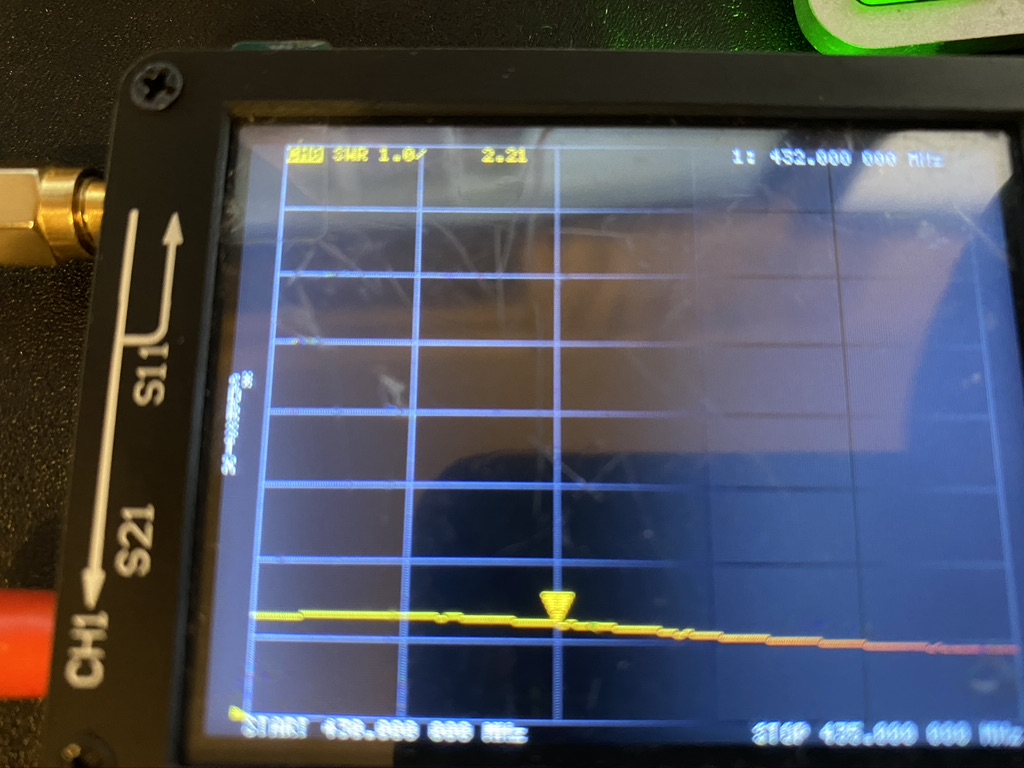
First, I fed the cable from in the ‘shack’ outside, brought the cable up the small step ladder, and lowered the mast. I then connected the PL259 into the moonraker 2m/70cm jpole. I returned inside and before attaching to the RT90, done a SWR check. The SWR had gone up to 3.0-4.0 ! Not the result i wanted, so i went back out and took both ends of the cable with me.

the mast is in this very strong base and held in with heavy duty tent pegs. There are links for chains available, but its secure as is.

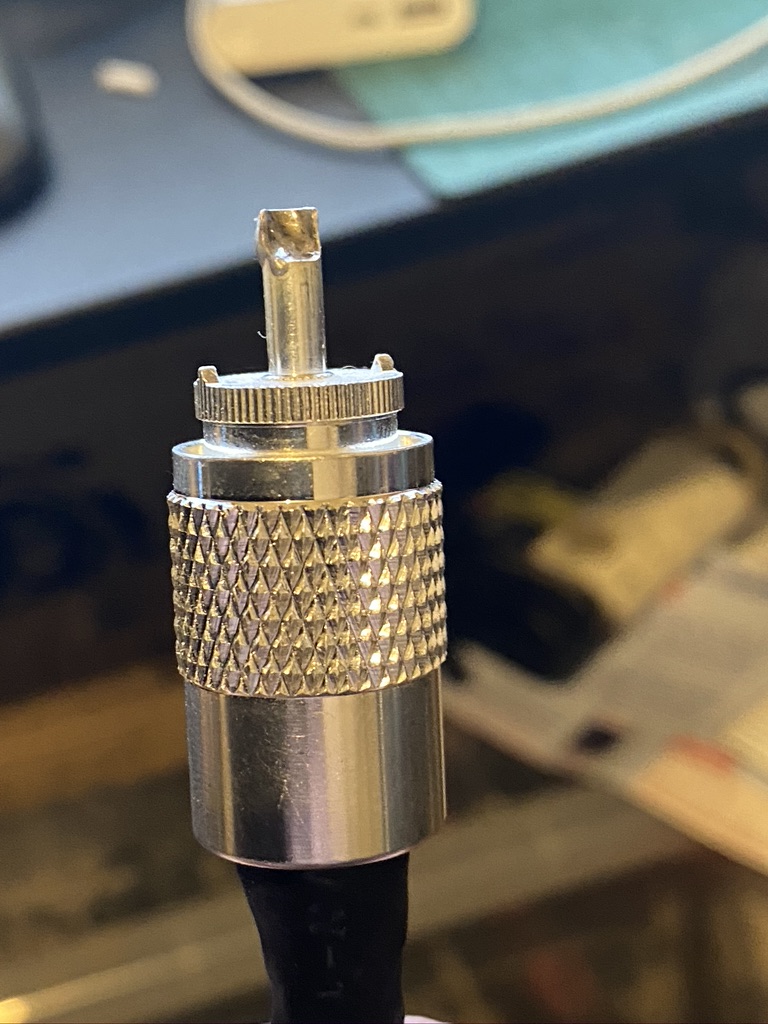
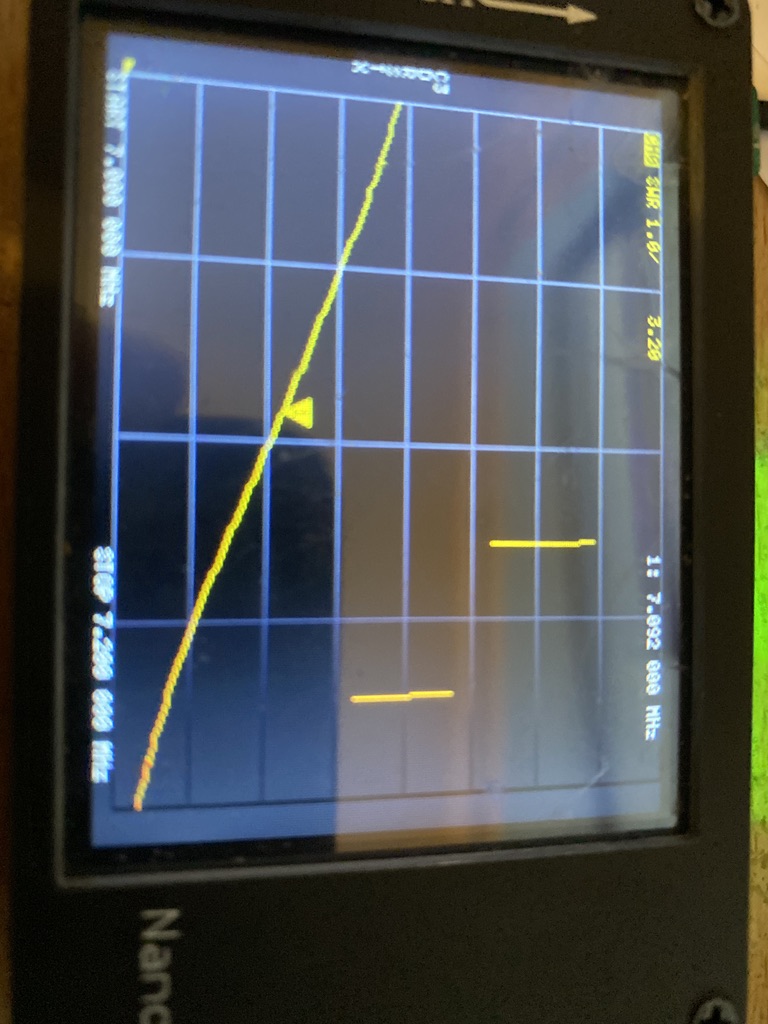
Backup the stairs and with the base back down, I started measuring and checking the mast the connector. I found that that there was just a bit of solder on the tip that wasnt allowing the plug to fit snug. A quick file with a very small round file made the PL259 fit nice, but better than that, i changed ends, and measured outside first. In the bright sun it was hard to read the meter, but was getting back 1.6 – 1.7, not brilliant, but thought that was ok and good enough from transmitting. I also noted that with the extra length, some cable was on the ground, and that may effect the SWR reading from my nanoNVA.

SWR on 70cm is a little high, but still ok for operation – I dont have a ‘favourite’ repeater on 70cm, mostly there for UHF/VHF coverage in one unit.

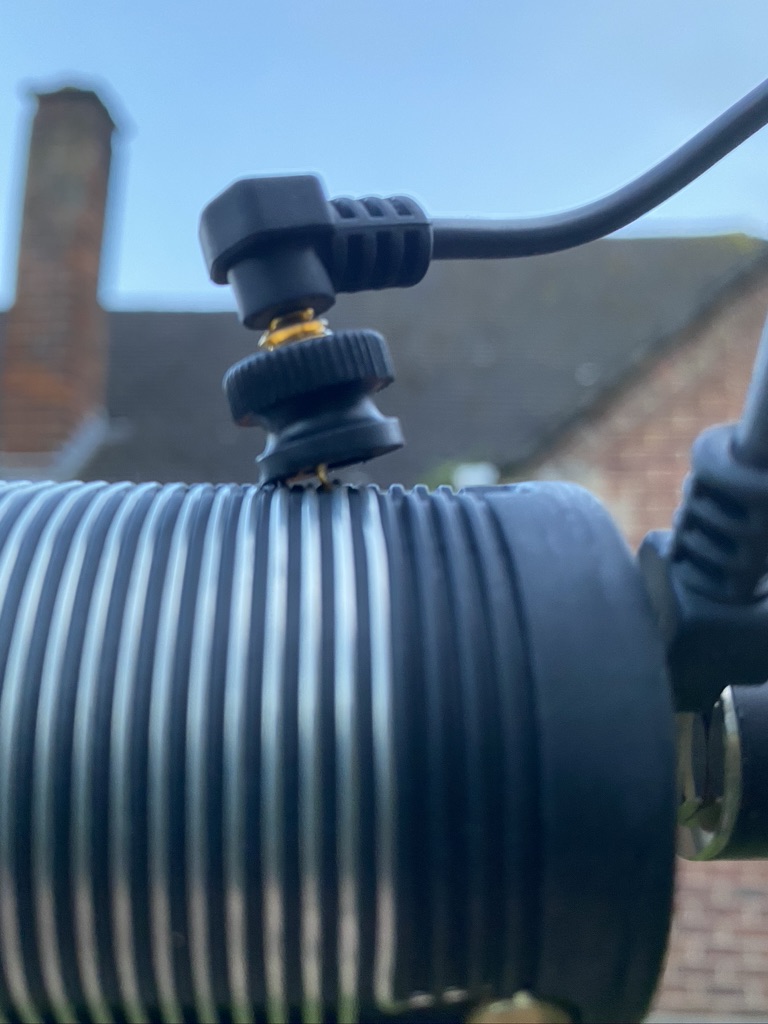
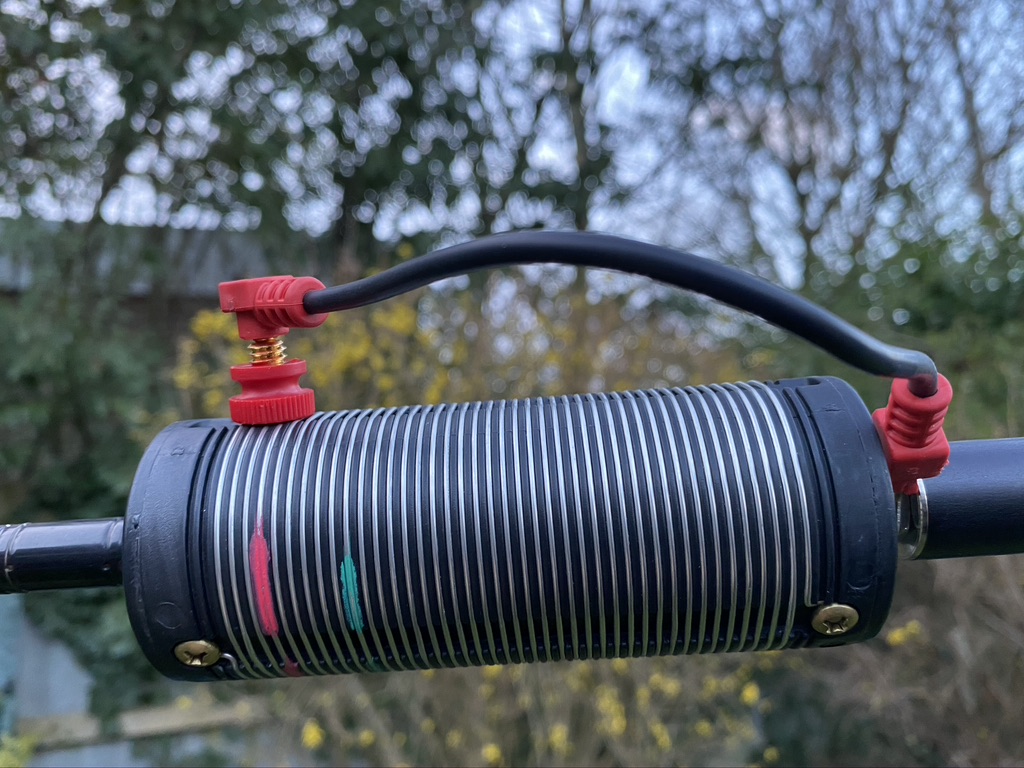
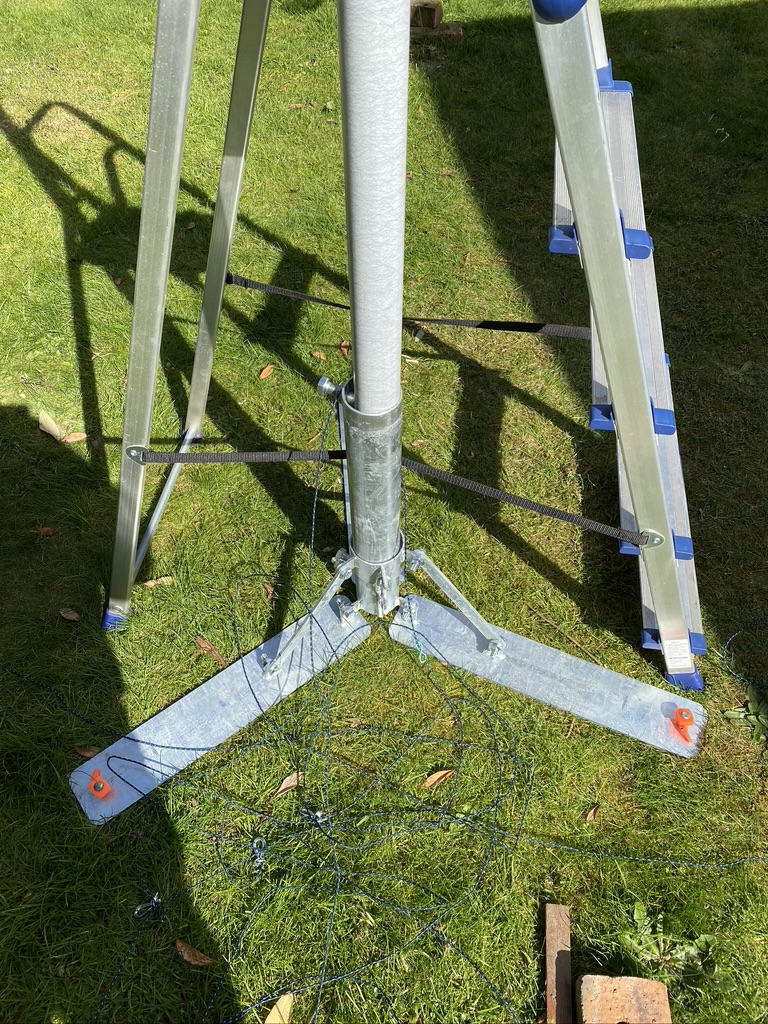
I then made sure all the mast-stakes where still very much in the ground, these are huge, see https://www.radioworld.co.uk/complete-guy-kit-light-weight. I put them in the ground with a club hammer – for sure those stakes are not going to move, and the guy-rope is very well made, with metal hook attachements each end.

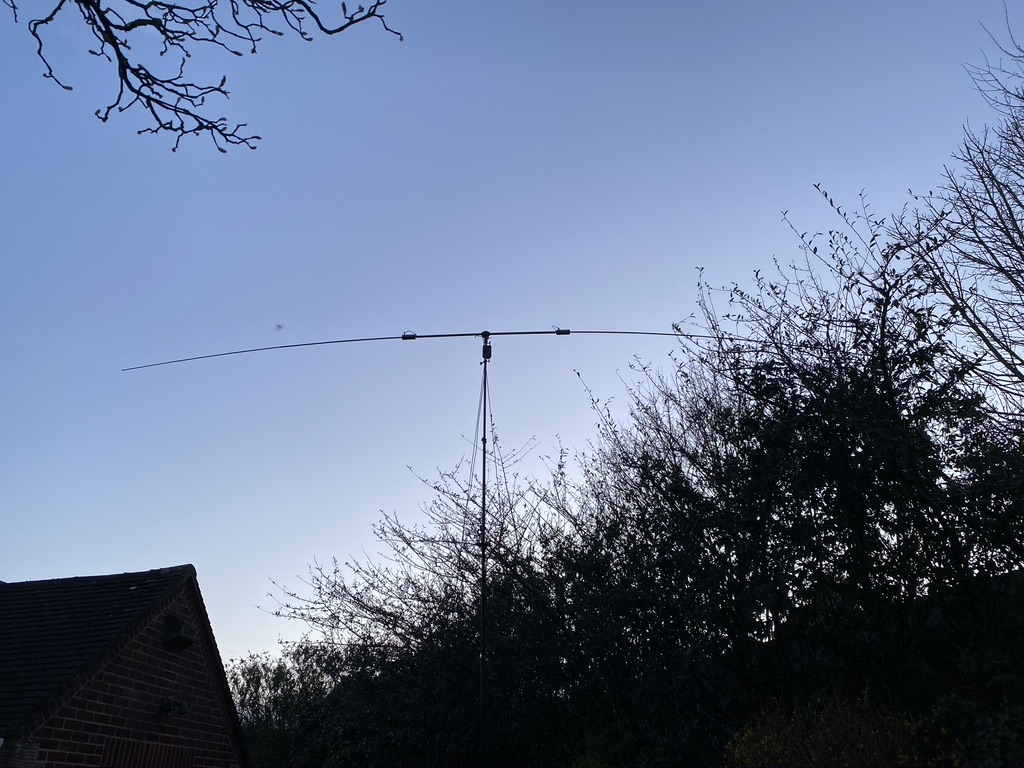
TIme to push a 40ft mast up ! I dont mind saying it was hard work – but then i am not in the best fitness at the moment !

S.W.R. on 2M on the frequenys used for the repeaters and simplex channels is <1.5 – a very good result

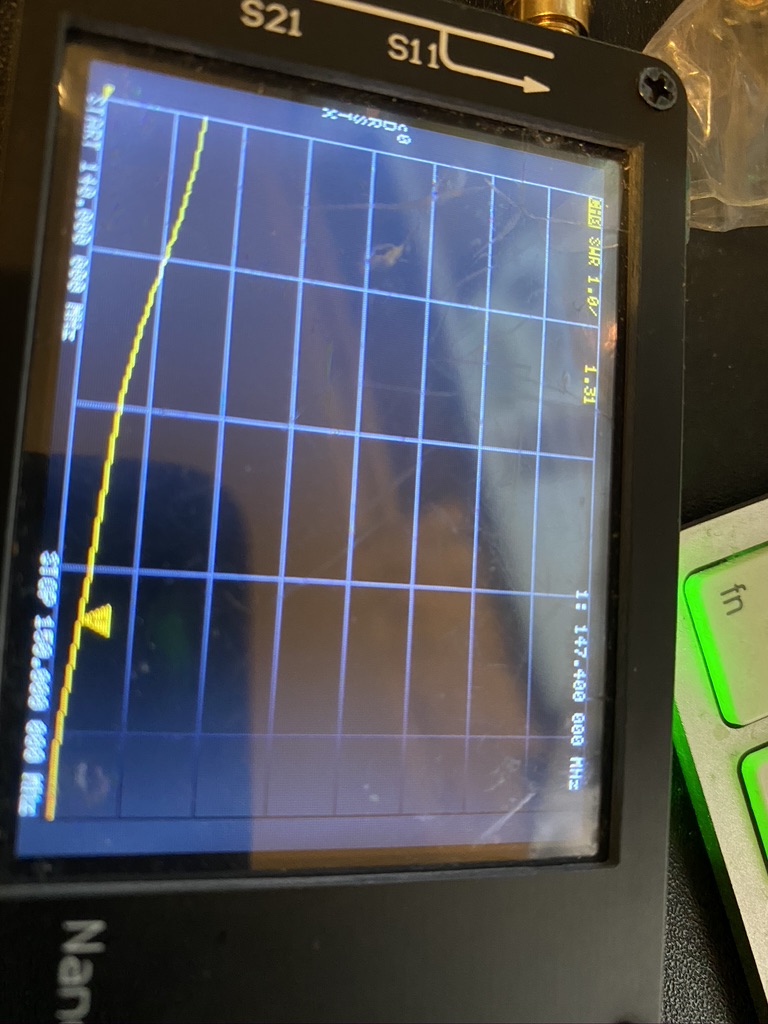
With the mast up, i returned indoors and took some SWR readings – on 2m i was getting good results, so i put it on the transceiver. I was now getting Southampton, Dorchester and Blandford as clear as bell on repeater tests – the effort was worth it for such a clear signal.

I done a test on the local Poole repeater and was glad to hear a well known specalist on who gave me a good signal report, so was very happy with that !

I’ve got more reviews to write on the mast and RT90 this week, but will try to get them out as its largely setup in terms of UHF/VHF frequencys and the antenna/mast configuration.

73’s for now, M7ALU

So much, where to start…

Well hello, maybe your reading my blog on amateur radio – I had a very nice weekend off and relaxing/downtime getting things done, but with that there was ALOT be done with regard to Amateur Radio !

Where do I start… well, lets first say thanks to my good friend and fellow radio amateur Trevor (PA2TG) who has been absolutely amazing in offering me advice on what I’m about to talk about ! So here we go !

40ft Moonraker mast with 2 Meter JPole

So I have got (two) new masts, willl talk about the other in another posting one day, but lets focus on the the fibreglass 40ft one for now.

Despite Covid, nature is still making some lovely flowers… time to go home after walking the dog, finish work and make a cable

I took some careful time rigging, i used the lightweight rigging but I really didnt want to start with. This looked good, and I got the mast upto full height. The problem then become apparant that my coax was now too short ! At 30m in length, at the time that seemed long enough as i was using my buddipole then and the coax was purely for experimental purposes.

Stripped of the sheath

The 40ft mast, is amazing, i will give it its own posting, in this post I want to concentrate on the coax I made for the mast as I’ve got some great advice, with more understanding about coax and loss that I could of ever asked for thanks to Trevor. I will point out that I ordered and received the coax a while ago, before speaking to Trevor, but I now know what to order next time, and it will make me appreciate what I have and how much power is being lost in the coax itself (you would think not much, but suprsingly, even the top quality coax, has some loss!)

watching the core slowly emerge.. the thread on this plug is very fine

So the Coax I had is https://www.radioworld.co.uk/rg-8-mini-coax-cable-50-ohm-military-spec-50-metre-drum – I really dont undertand all the specifications, and the price is right. I soon learned from Trevor not everything is what it seems and also websites on coax/loss confirmed what he had told me http://m0taz.co.uk/2017/11/coax-cables-and-associated-losses/ This cable is RG8, so of my 10 Watts going up the cable, on 2m 3.5w will reach the base of the antenna, so getting 1:1 S.W.R. is really important ! (3.5w !!?!LOL!>!!!)

first some electical tape, then heatshrink, looking rather good if I dont say so myself !

So I set about making my cable with the coax, I found this video most useful https://www.youtube.com/watch?v=GjO5ERU6a78 and following it found that I had created an awsome cable. Now if I was honest, that would be the end of it, but I have to admit I made rather hilarious mistake… In the video he does a continuity test, to ensure the cable is shielded and the center pin will deliver the RF power/energy.. I thought, well, why not strip the other end and check from both ends ! Great idea M7ALU ! So I stripped the other end.. measured continuity, come on 0… 1… a solid 1, not any reduction.. traces cable.. i’ve stripped the cable from the reel… So, when stripping cable, make sure you get the right one.

Putting a SO239 on to make sure it will fit on the mast / jpole connector ok

In the end I stripped. sheathed and plugged my cable in with loads of testing for continiuity, because I dont want to get it 40ft+ up and find its not working. Results soon.

a completed cable, both ends done, 0.0 on the power meter measuring continuity

Tomorrow she goes up, lets hope 1) I got the length right 2) it keeps working 3) The cable is good enough spec for me on 2m/70cm and 10 Watts of power.. We shall see !

Covid19 & Amateur Radio

So I cannot do an update without mentioning Covid 19, Cornavirus, or the other names it is known by. For me it means a lockdown, working from home and taking even more care, but it does mean i get to use my radio quicker than when working in London.

I have configured my Buddipole on a 2M configuration, as I feel more confident (well had been !) than on HF. It is simply amazing the amount of people on 2M and the repeaters, and I now think that the Poole repeater is now connected to ‘hubnet’ so it has even more traffic – when it stays up.

I was informed by a well regarded amateure that my signal on 2m repeaters was having issues, so i have held off using them, but in my spare time have been trying to get DSTAR working on my IC2200H – so far the results have been, well, frustrating, but the good news is that whilst trying to get out on a Digital mode, i was using my SDR to listen for the offest the MMDVM was putting out on, and picked up a conversation on 550.

Long and the short of it what was a challenging (ok, it was annoying me by late evening) time to get DSTAR working turned into a fantastic 1/2hr conversation with a very local contact and amazingly a contact on the Isle of White -some 20+ miles as the crow files.

The banter was fantastic, a good mix of tech, hobby info/insights and enjoying each others company. I felt so glad to be back out on the Icom on a simplex channel and no reports of dodgy voice outputs, moreso with two very fine amature operators who were a pleasure to speak to.

The amount of operators on the repeaters is akin of how busy it was on CB back in the day, it seems everyone who had a licence has remembered they have one, and got back onto VHF/UHF and learning about repeaters – even with my ‘new’ licence, there is some users who have forgotten ‘repeater’ etiqutee (you dont need to calll CQ, you do need to leave a gap), and the ‘net’ moderators haver done an amazing job in holding 10+ people having a conversation – with Echolink,etc more people are on 2m, so its almost *too* busy.

Anyhow I am so glad to have met a local and also got out so far on my buddipole setup, DSTAR is looking like something I might look at again, as I have a dual 2m/70cm radio en-route with DMR on it, and think that willl give me the kind of range/connectivity i need, but am wondering, was my signal really that bad that I needed radio now, given i got a 5/7 report from the IoW….

Stay safe and hope everyone is keeping well during these difficult times. I know the Radio is helping me alot being so isolated and is a nice escape being able to talk to other amatures, i just hope we all get out the other end of this being able to meet each other in person hopefully.

40m with the Buddipole Extended Whip Arms

I set about setting up my Buddipole in a 40M (7Mhz) configuration. For this i added 2 new extended whip arms to my collection of Buddipole parts. The majority of my Buddipole parts come from Radioworld, who I really dont mind promoting in my blog as they are very quick on delivery.

To start with I used the “Buddipole in the field’ setup recommendations, which helped get the physical setup. Of what to plug in where, as I’m still learning it really helps having a printed A4 page with the diagrams on, and I stuff that in my pocket or my external table as I work along.

It took me about 15~20 minutes to get the pole and the whips setup at ground level. The whips are really long at 9ft which is what you’ll need for 40M and they must be fully extended. Take your time pulling them out from the tips and firmly, but gently extending them.

aobe roof level and secure

Now I dont mind saying I have already lost two smaller (5ft) whips with messing up guying and the Buddipole nearly falling on me, so if you are reading this, please, please take your time with guying/rigging your buddipole up. Mine moves around my backgarden, so i dont have a static mount point, I could use Pythagorus equations to work out the technical lenght, but I find that rasing the antenna, checking the tensions and taking it back down and then up as required is the safest. When I’m indoors and it starts getting windy, i want to know that its not going to fall !

Anyhow after guying and getting to an ok height (above the roof line) I started on tuning the S.W.R. inital results were a little disappointing, as I expected some loss on rising, but it got a bit high. So I brought the dipole down again and spent more time on the coils.

hmm, not bad, but not what i was after

Getting the coils setup was a real exercise in patience – having not done this for a specific frequency before, it took a few good attempts of going from left to right coil to get the nice curve I got below.

The S.W.R. on the lower frequencies is a bit high, but as I’m not going to be attempting morse (yet), thats not a concern to me.

Improved SWR on 40m

I was quick to take some photos of the coils to log where I had put them, maybe next time i can get a better improvement, but this is where I had them this time.

Black coil – almost right to the very end (versatee to the right, whip to the left in this pic)
Whip to the left, versatee to the right in this pic.

I got in and even tho it was getting later and the sun going down had a great time tuning in and listening on 40m. It was very busy on the voice frequencys and finding a gap to transmit and knowing I was ‘spilling’ over to others was a bit nerve racking.

I did try putting a CQ out, but no response, but the SWR reading on the radio was very good, even tho i am only using 10W.

So next time I will show more about the CAT and digital interface I now have, but thats another post 🙂

All the best and 73’s from M7ALU

Not-so-6M, Tidying the lab and more kits !

So it has actually been not-so-bad weather in England this weekend. I have a dedicated 6M radio, the Yaesu – FT650, and havent really used it since purchasing. So having got all the components required to build a 6M Yagi with my Buddipole System, i set about building it up.

I was really amazed with the SWR I could get with this and how high the antenna could get, and I felt comfortable in the moderate breezes. I do apologies that I neglected to take any pictures of it up in the air tho.

Once I got the antenna up, i plugged it into the FT650 on 6m, sadly it was very quiet, i could make out some morse, but no FM/SSB voice. Whilst i was a bit disappointed, i was glad to get the Yagi up, having previously had a bad antenna failure, damaging an expensive buddipole antenna.

With that, the good weather continued and I needed quality time with the missus. Below more info on the Yaesu 🙂

Kits

So having sucsffuly built a KK Moon component analyzer, I am now getting ‘ambitious’, and went for the KKmoon DSO138 Digital Oscilloscope Kit It came with the main IC attached, but had plenty of surface mount resistors to attach.

With *alot* of patience and the amazing maginifying glasses I got the surface mount chips attached ! Whilst not amazing connections, I’m really happy that it worked and i could check all the resistor values with my voltmeter.

for scale, thats a mac keyboard, with other regular sized components and the SMT resistors !

Having tested the resistors I then took a nice break (i.e a day !) and will carry on with the IC’s. Its hard work, but rewarding, and am really looking forward to having a ‘working’ oscisscope, albeit a basic one, it will be great for what I need to do in the lab, and most importantly it is building my confidence for the Kanga DC Kit (which is nearly 50 quid !)

The Oscilloscope kit board, still far to go, but getting the SMT Resistors on made me happy!

Tidying the lab / Keeping the lab TIDY

I’ve been a licence amateur since December, and 3 months in have built up an assortment of radios. Also I had various 27Mhz (Citizen Band) radios sitting around as well. Overall the lab was getting ‘untidy’, and i found myself more frustrated than enjoying working the airwaves.

I set about the routine tidying, and sorting, putting the equipment I want to use when portable/in the bongo in a dedicated box, which will make moving/using it easier. This tidied alot of space right away !

I was then left with desk space, having tried 6M on the Yagi earlier, and found it rather empty, i thought, do i need the Yaesu setup now ? How much will I use it that given the Kenwood also does 6m, albeit on a seperate antenna (can only listen 6M or HF).

more deskspace without the Yaesu, but have to switch between 6m and HF on the Kenwood.

I decide for now to put the Yaesu in the radio box, ready for when I have more vertical space and a dedicated 6m antenna i can use. This has result in given far more space for the Kenwood and my Icom/Anytone which I use on 2m/70cm.

I set about tidying up the rest of the lab, esp the computer cables and mixing console which had got out of shape a bit, so that is now all in order.

I’m happy with how lab is now, can move about and build my kits in relative comfort and tidyness !

A tidy lab is a happy lab.