
With the Easter weekend and good weather it was a good chance to get the multiband Yagi installed. It has been sitting in my garden since it was *missing parts* which then had to be ordered and paid for from the original supplier in the Netherlands.
I’ve had the rotator and coax for VHF/UHF for some time as well so was really looking forward to bringing it all together.
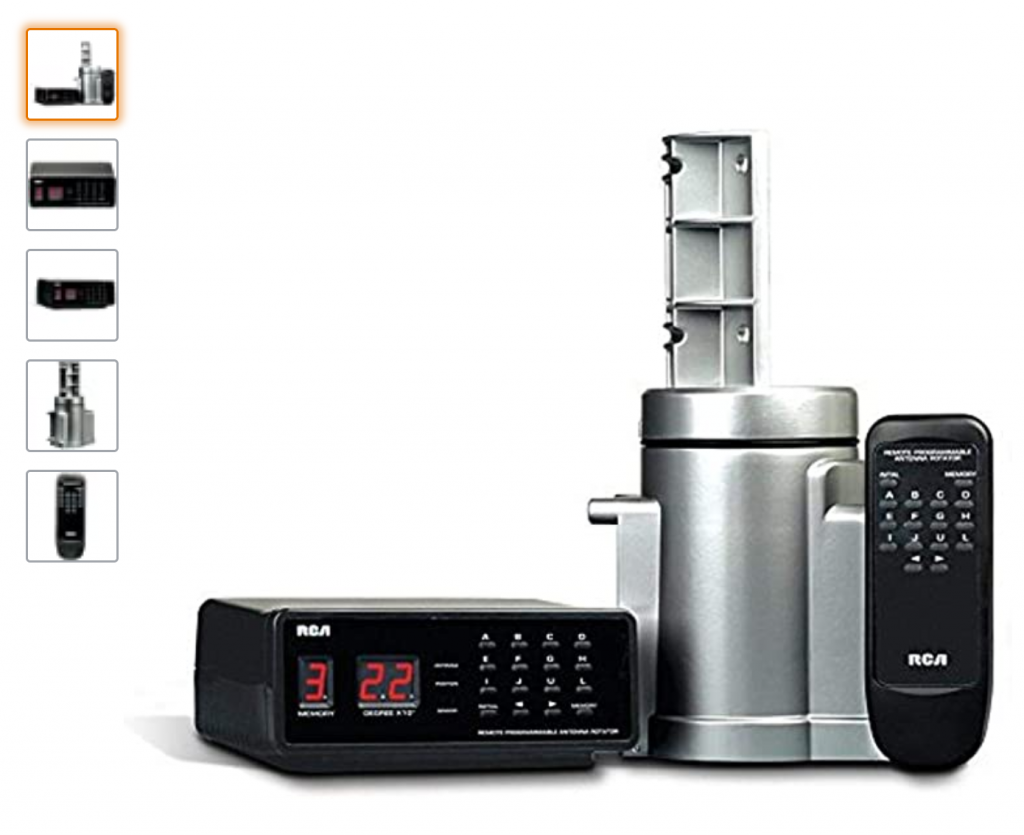
The rotator was purchased from Farnell, no longer available, but ‘RCA VJ226E’ may find some sources on the Internet. warning – my unit came from the US so requires a step convertor for UK usage for 240v -> 110v.
I really liked the instructions for the unit, clear and easy to follow, unlike the sketch-sheet of poorly presented documents that came with the GB-3 Yagi, which looked like something a DIY or student would put together. May the instructions from DX-Engineering on their Hustler just spoiled me..
I started with assembling the rotator indoors and checking the necessary parts. I didnt have a long enough run of coax cable for the feed line, but was quickly sorted out by a local dash to B&Q for “Time Black 3 core Multi-core cable 1.5mm² x 50m” – this is meeting or exceeding the specification required for the unit. I’m approximatting 10 meters of ground-feed and about the same going vertical.
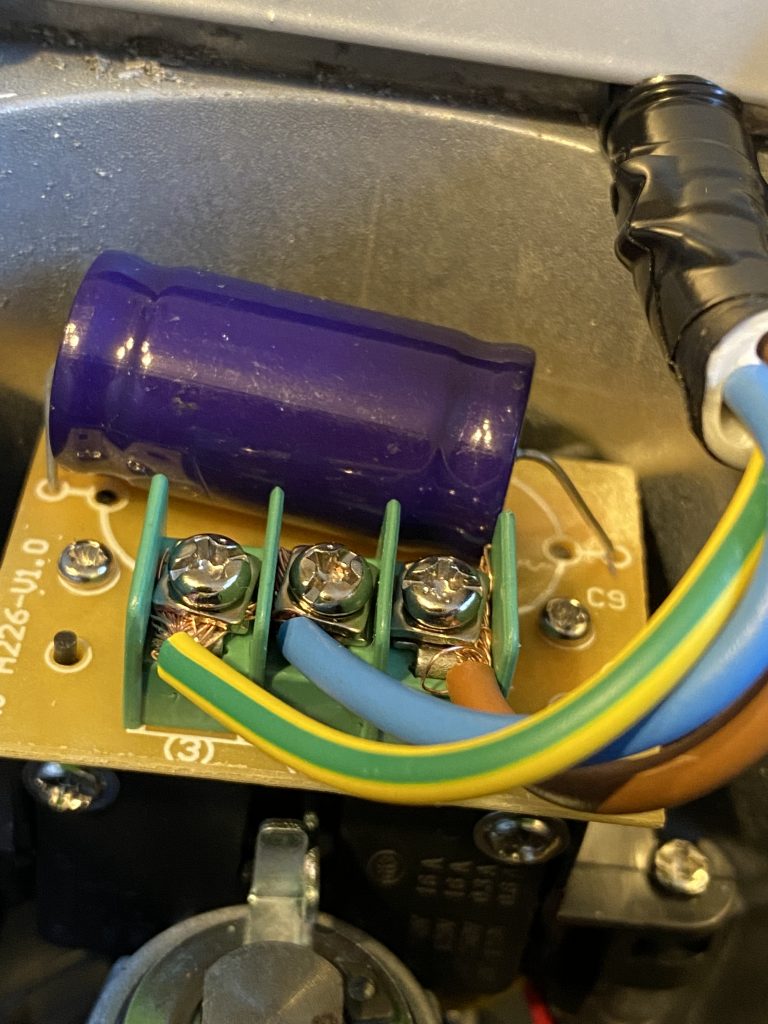
Whilst the instructions used black/red/green, i swapped out for ‘live/netural/earth’ but the thing to ensure is that the colours both ends are the same.
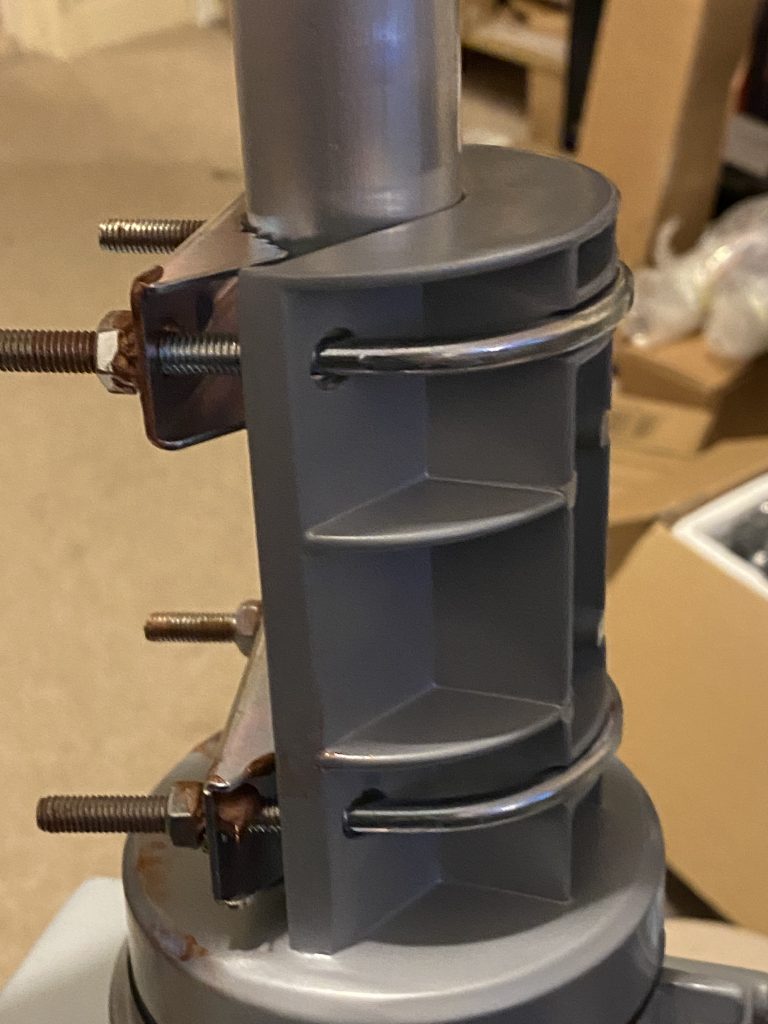
the rotator brackets 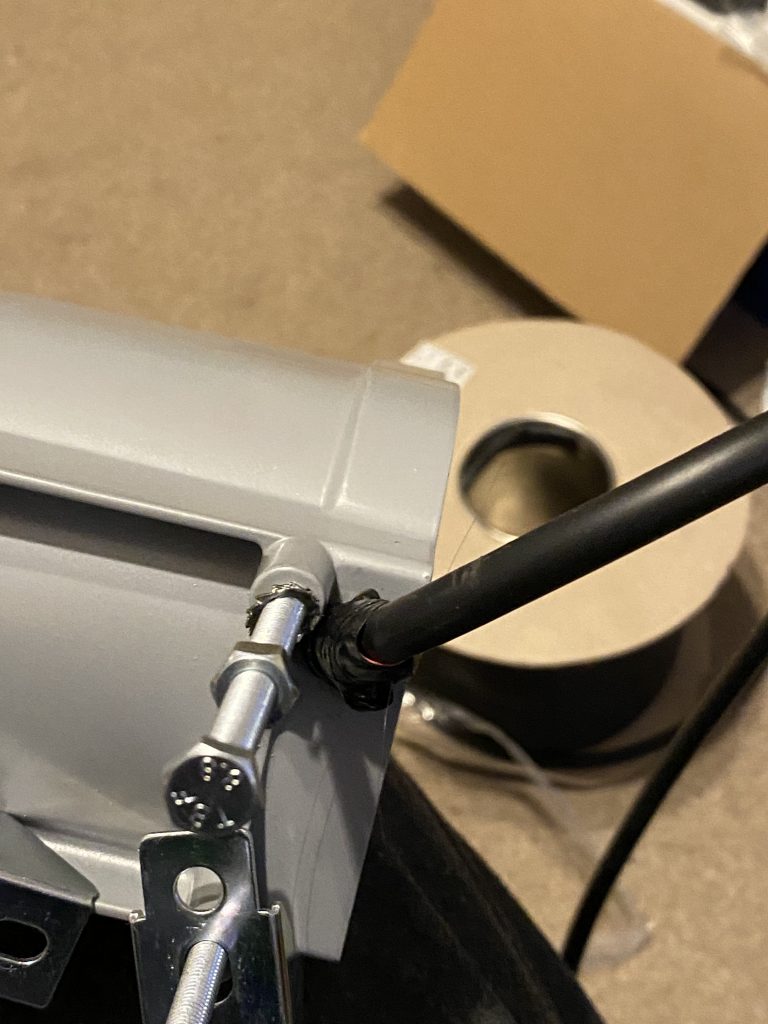
use super33 
3ft of mast pole 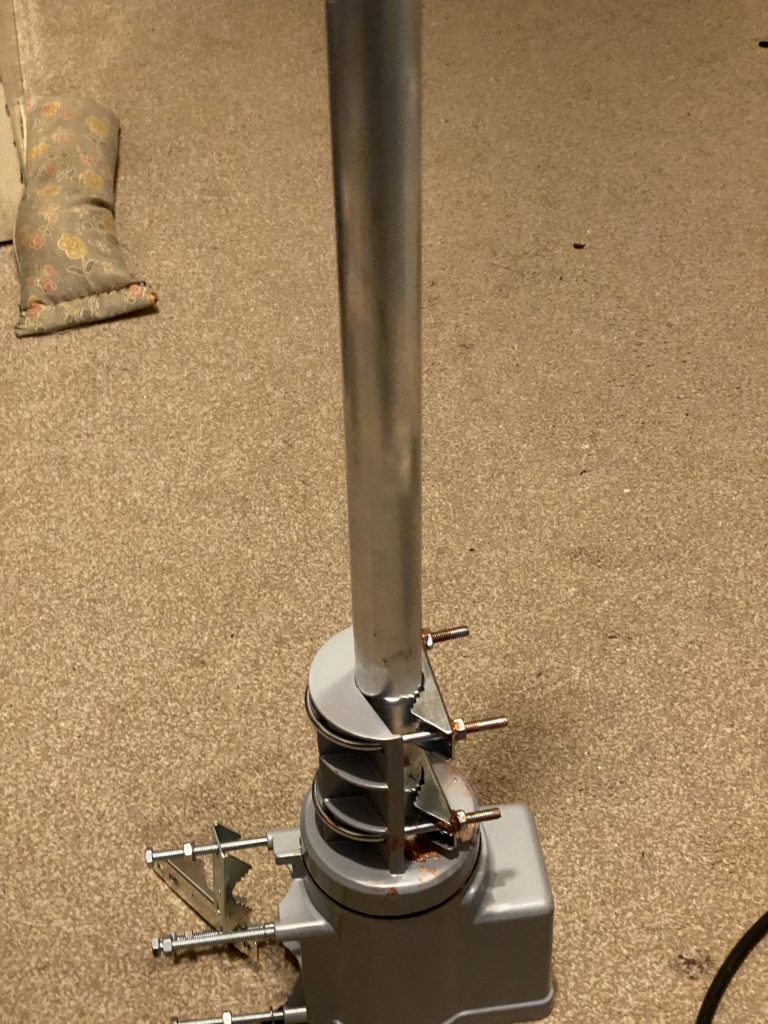
the completed rotator 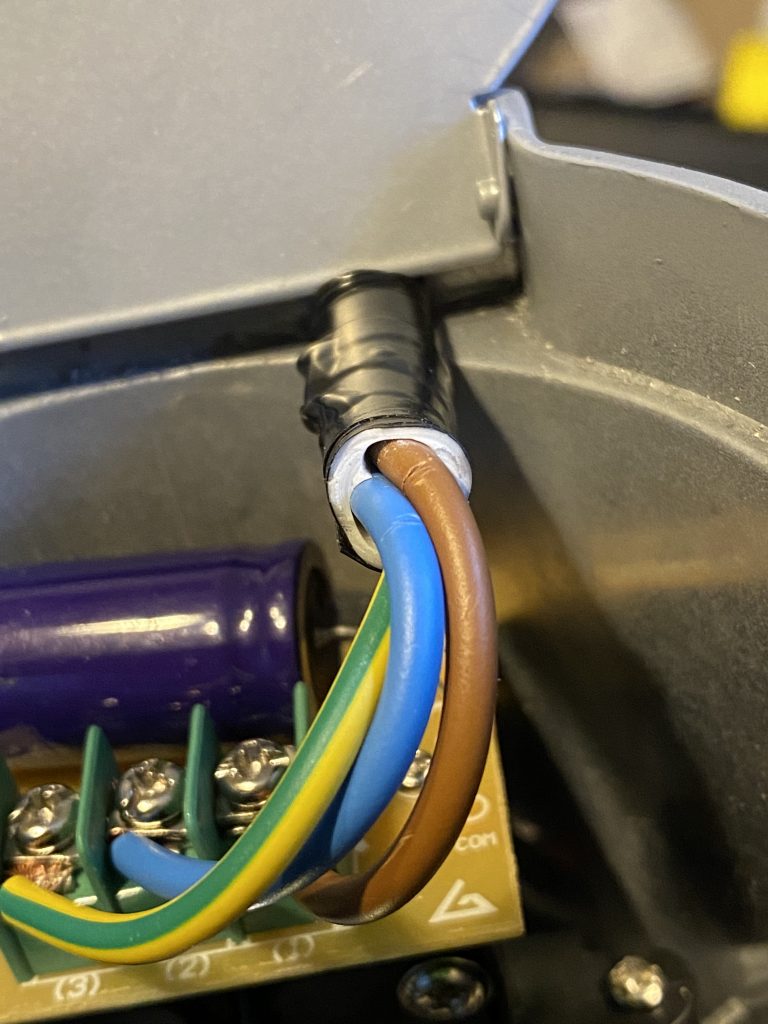
insulation and super 33
Once I Had completed the wiring and had a clear idea of how to mount the rotator mast, i set about how to mount the yagi.
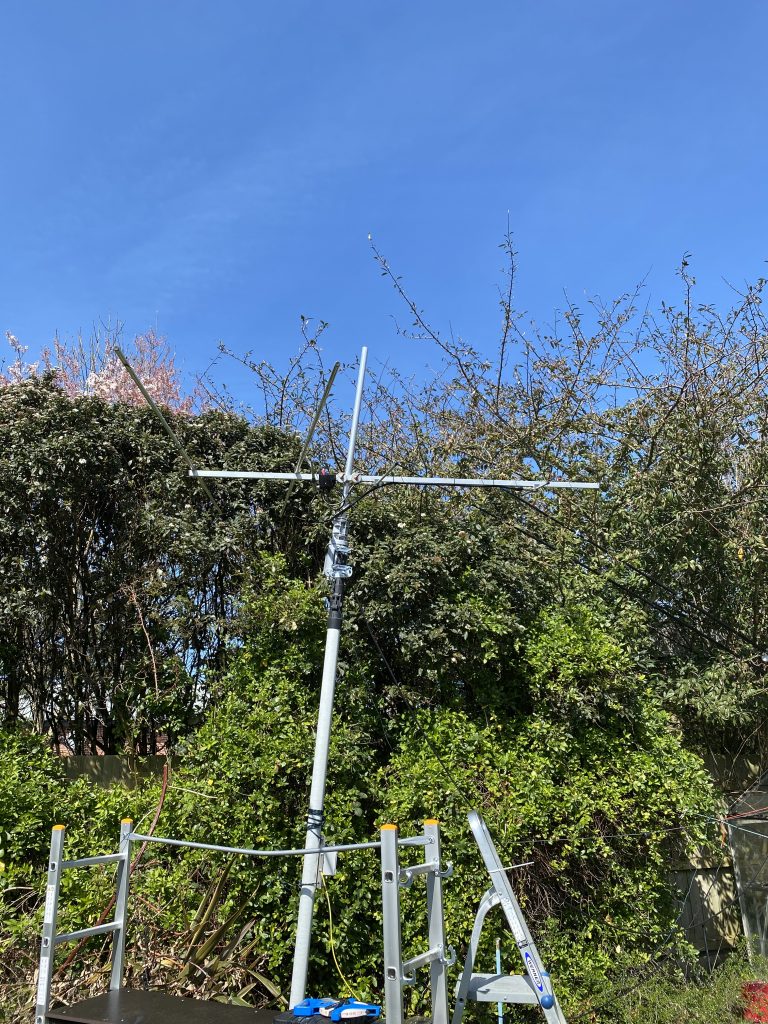
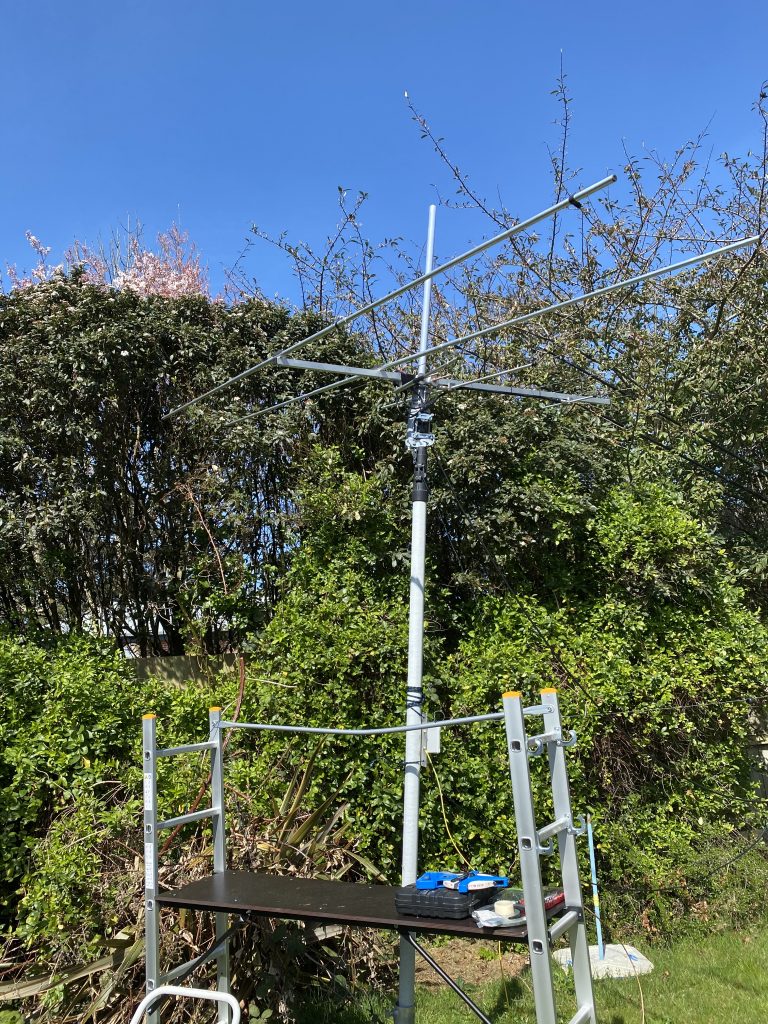
Because an extensive amount of time would be at about ground level I invested in a support so i could work at height with better saftey than just a ladder.
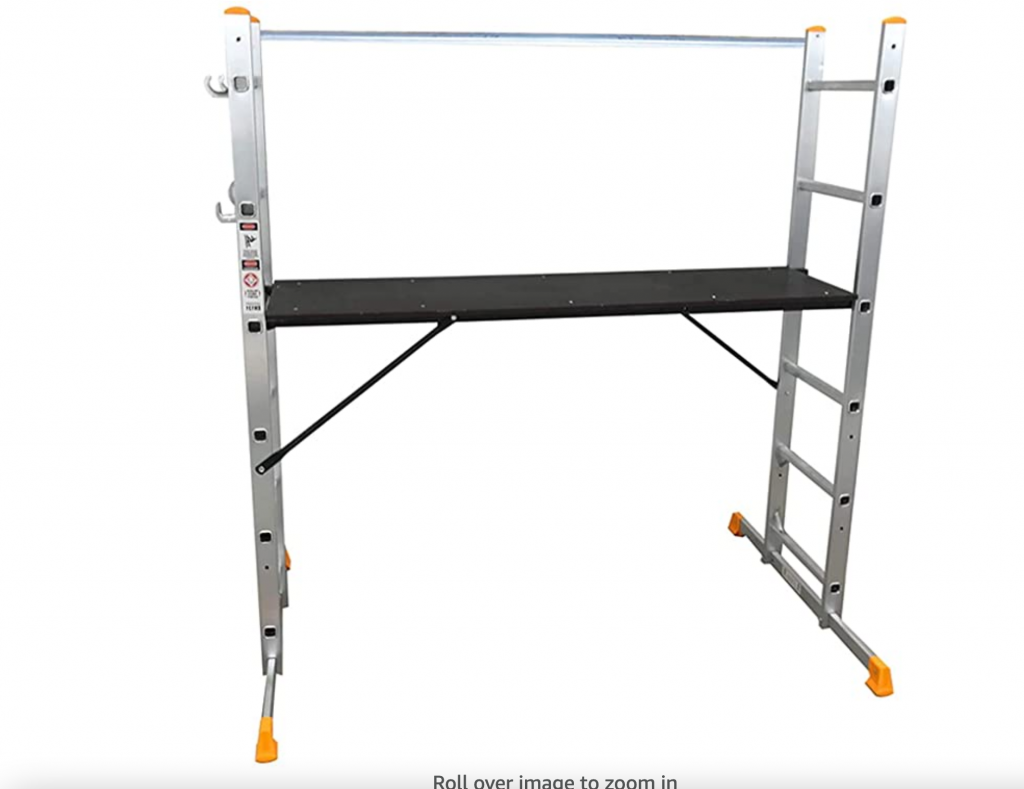
At £114.99 the Abbey 5 Way Multi Purpose Platform and Scaffold Combination Ladder from Amazon would do the job, and also allow me to work on the higher parts of the Mazda Bongo that I have.
Construction was simple enough with a few bolts and rods to put in place. I’m not a ‘light’ person and getting on the first time was a challenge. I used another smaller step ladder to get on and off, which helped. Using one end to get on and off from helped with usign the strength of the frame as a support.
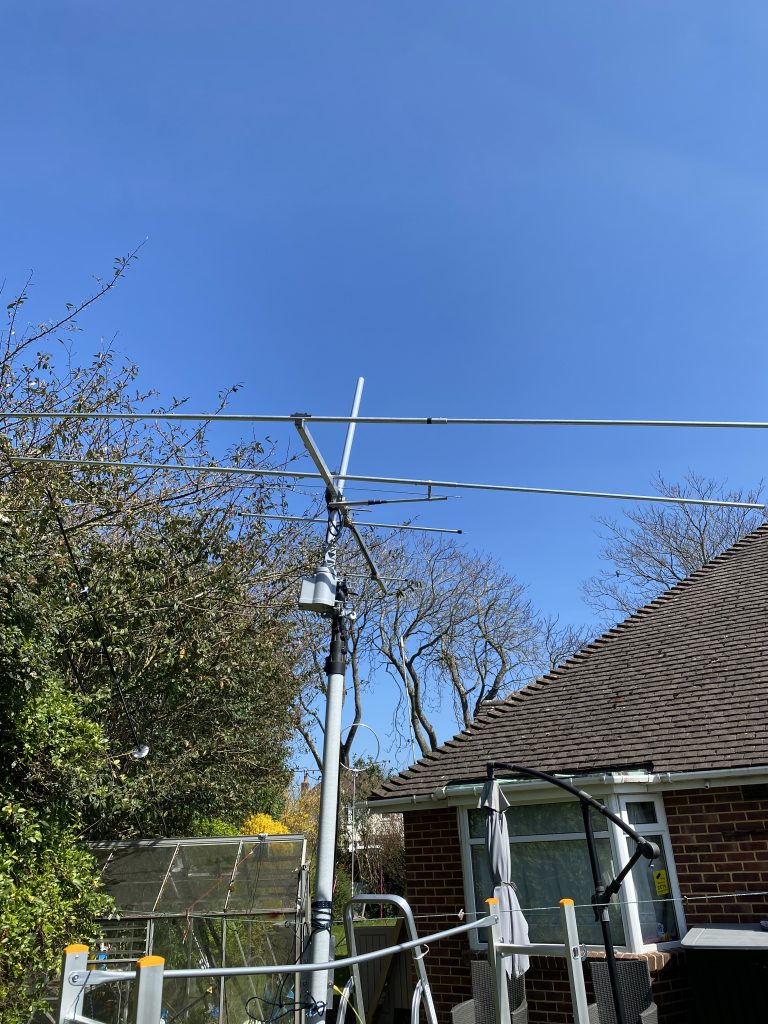
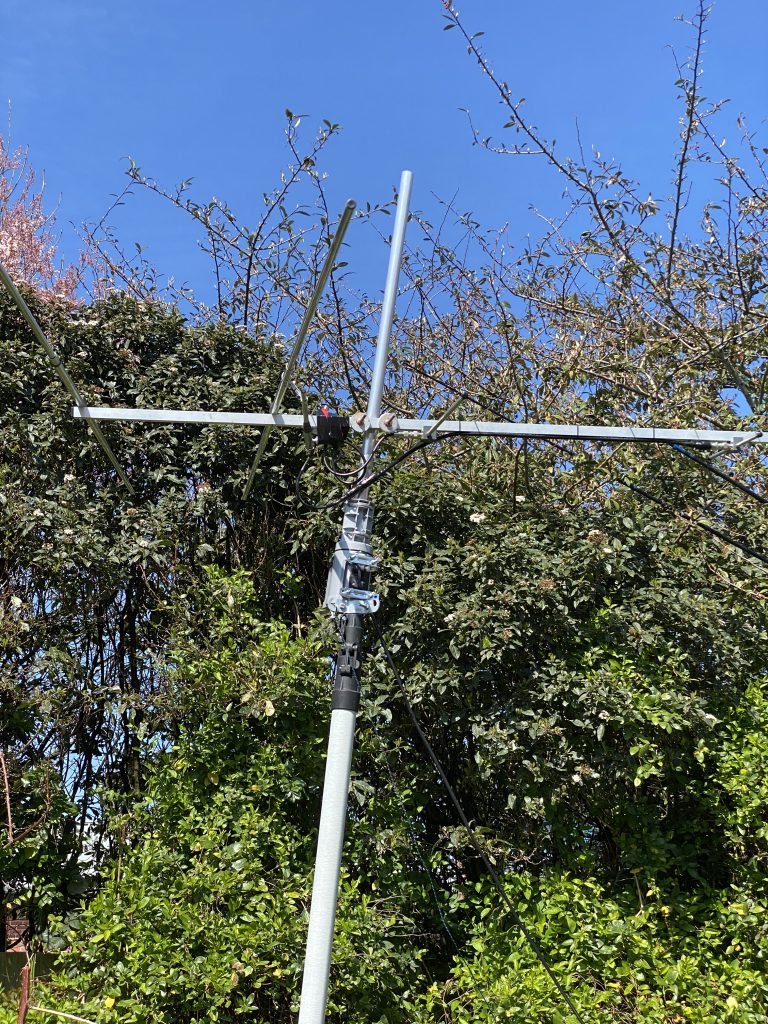
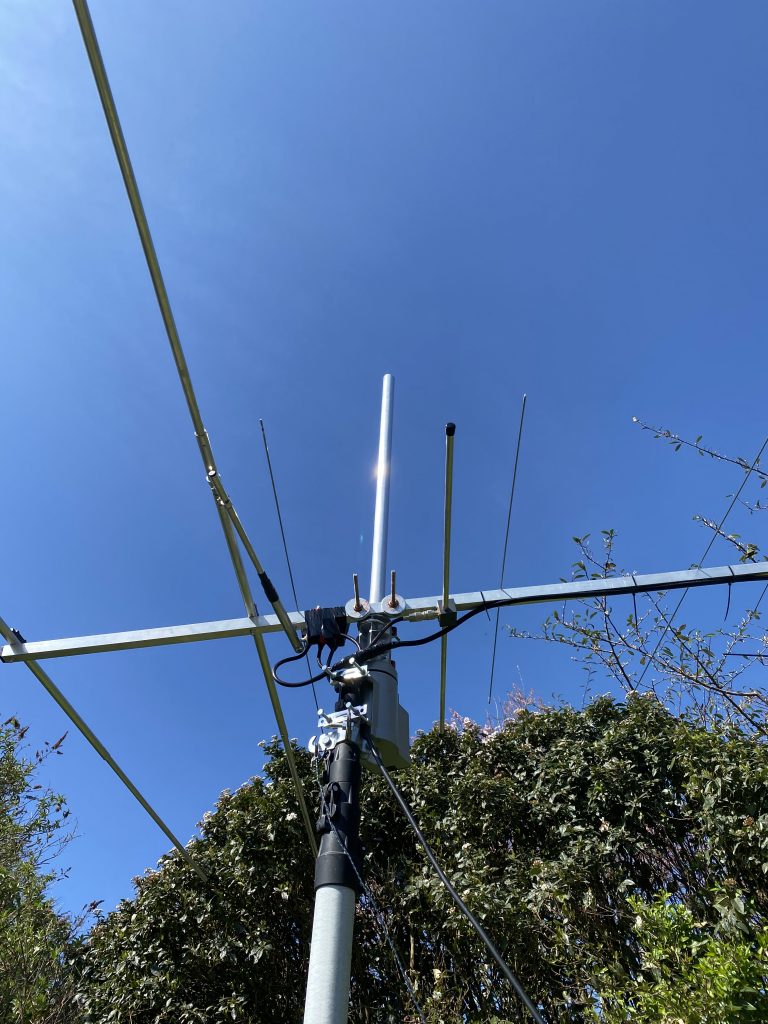
Having got the working platform up, i mounted the rotator onto the mast, this wasnt as easy as I thought as some of the clip-sections blocked the rotator, but with some fine adjustments, was able to get the rotator on.
I went back over all the nuts and bolts at ground level on the Yagi to ensure they was of good tightness, and brought the Yagi over to the mast to assess how to raise it. With help, I was first able to attach the Yagi onto the mast. I checked it from ground level and could see that some cables would get caught so with help raised the yagi slightly up the support mast by about 1 foot allowing more distance for the cables on the Yagi.
I ran the electrical feed wire back to the QTH and then noticed that the power is 110v – I’ve ordered Tacima SC5474W/BP Step Down Voltage Convertor which at a 50 Watt rating is easily over double what the rotator will draw.
I done some preliminary SWR readings using the Rig Expert Stick Pro. I bought the Stick Pro to accompany my HF AA-55 Zoom, which doesnt have 2m or 70cm capability.
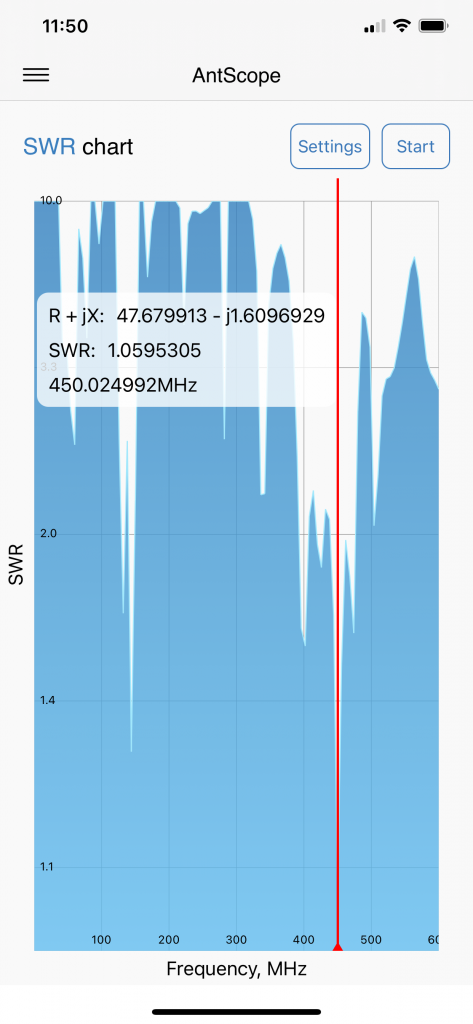
Band report 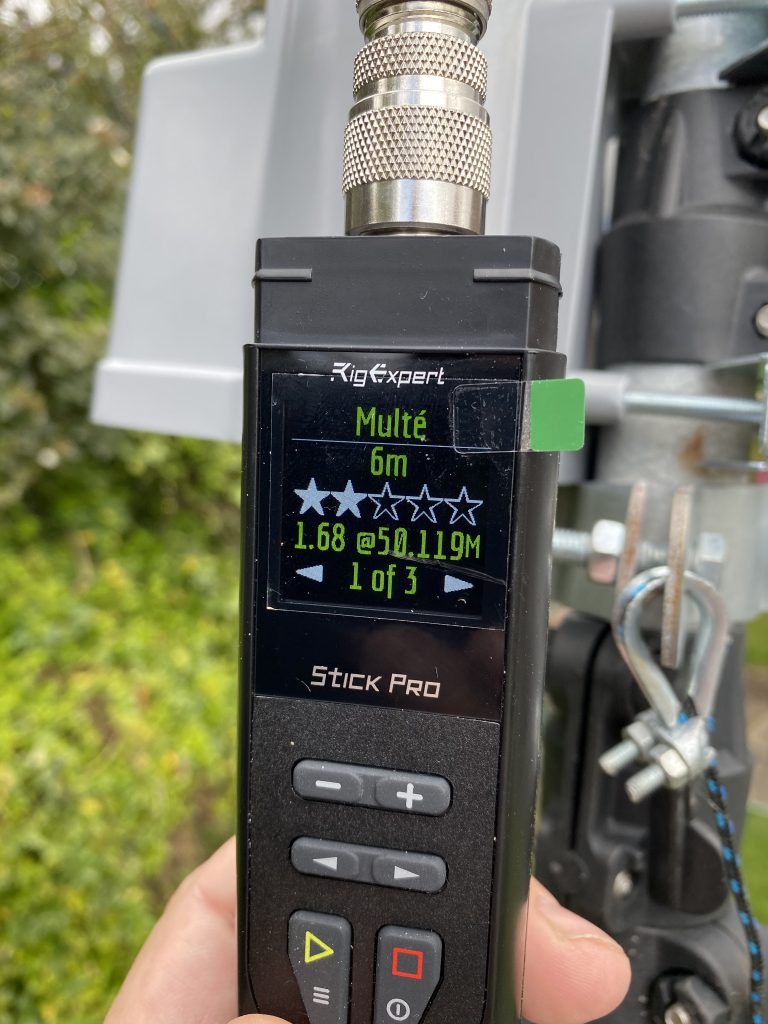
1.68 @ 6m 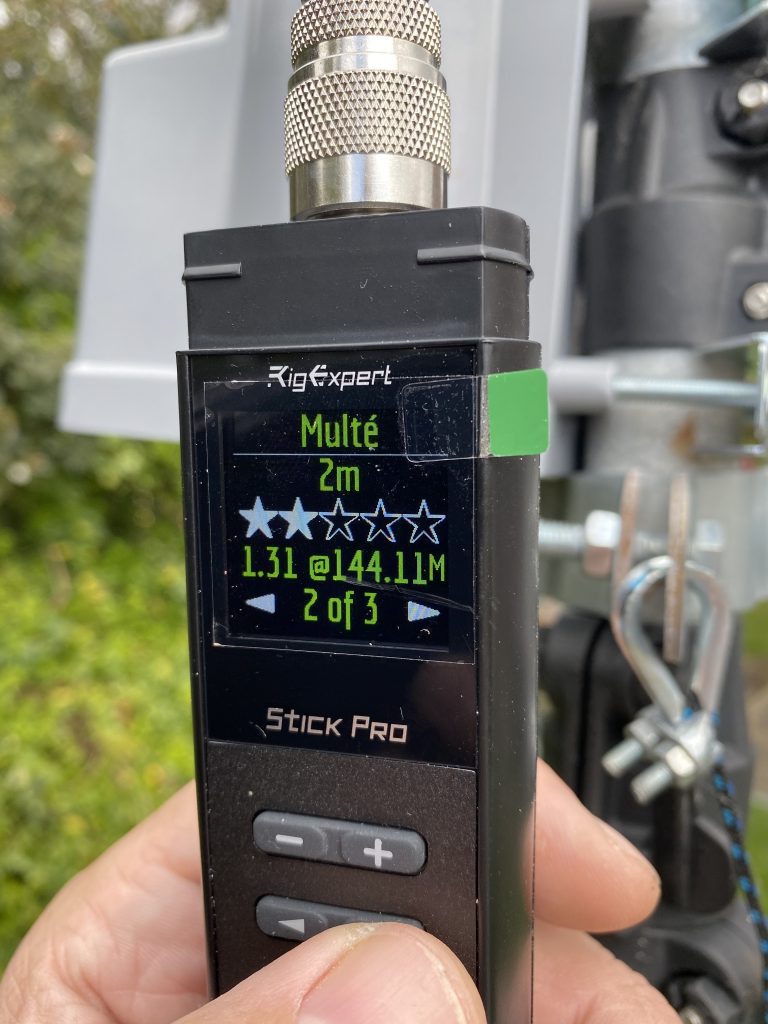
1.31@2m 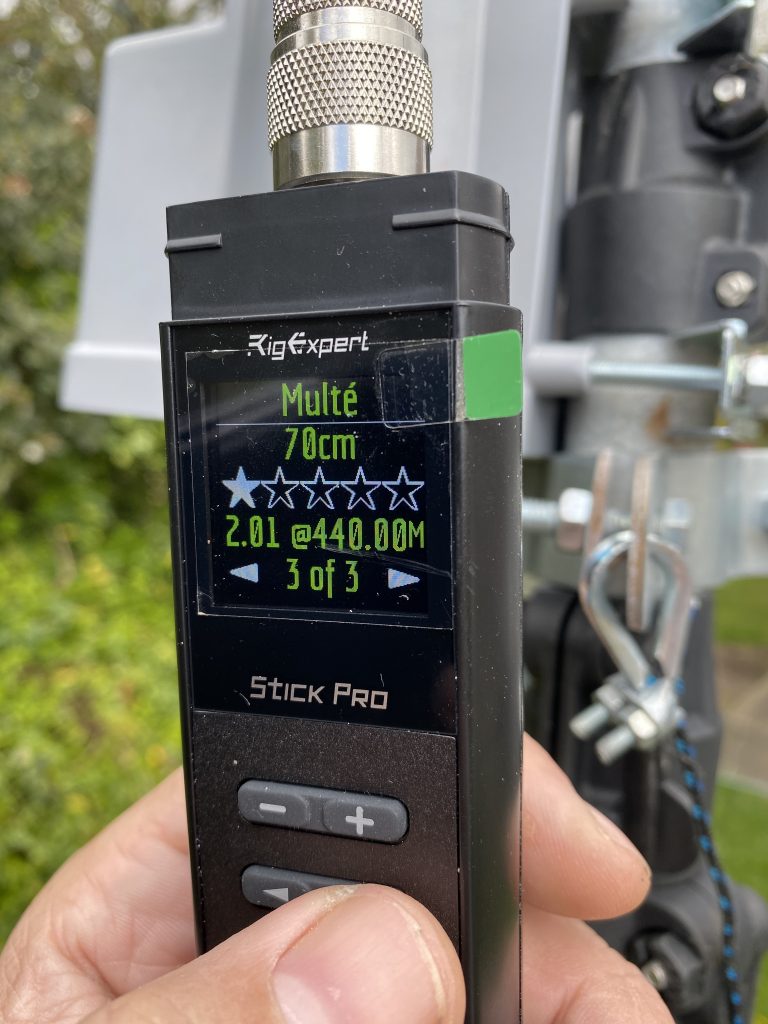
2.01 at 70cm 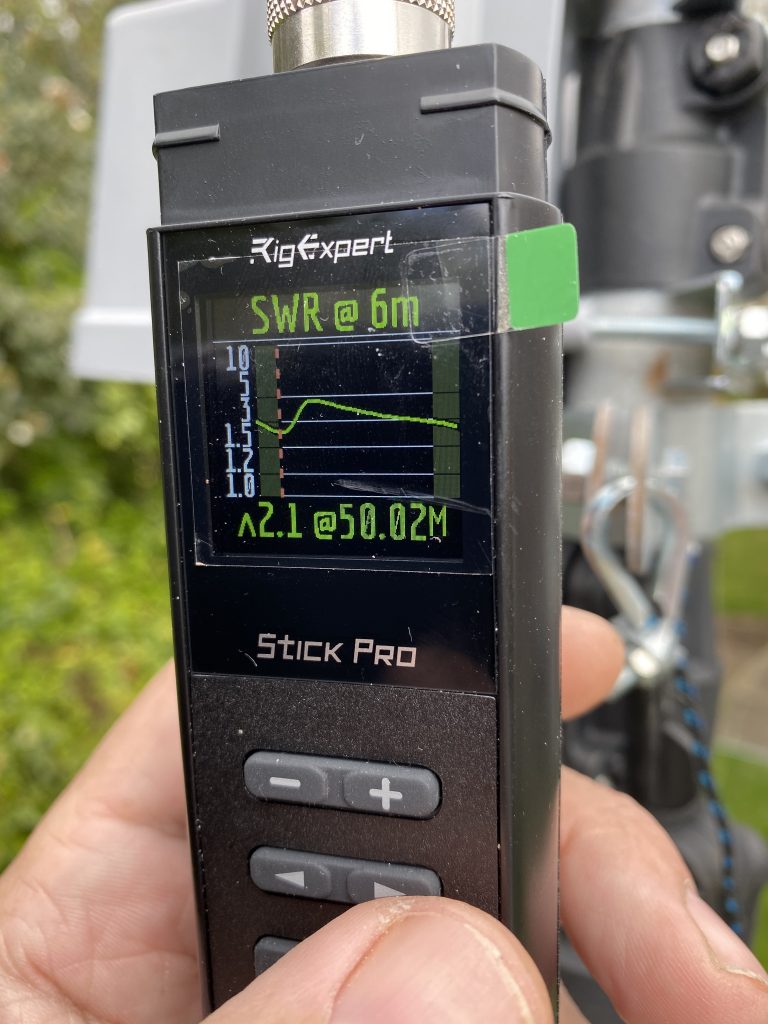
SWR Chart 6m 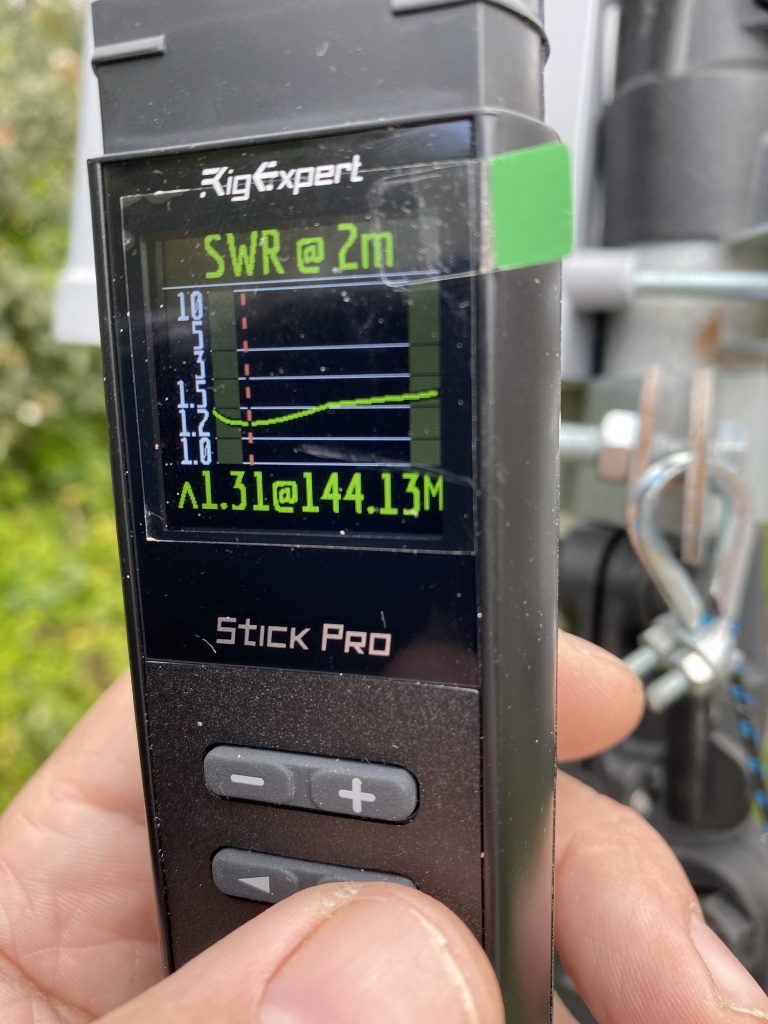
SWR Chart 2m
For a first attempt I was happy with the SWR readings with no adjustments. I think the next step will be to connect different coaxes and measure their losses, which at VHF/UHF coax can have a real difference.
I’m looking forward to testing out the rotator and seeing how good the gain is on the antenna – with a J-Pole I was able to reach Blandford, Southampton and of course the local repeaters.