
Having got the 705 which is DSTAR capable spent the afternoon/evening with getting this setup. I already had the components, it was a question of getting it all together !
Register your callsign with DSTAR!
To be able to use the reflectors on the DSTAR network, you need to register your ID. This took only a few hours, so if your waiting on your MMDVM, do this now and you’ll hit the ground running when both your registration and MMDVM arrive!
Register here, you will need your email, callsign and dont forget your password !
https://regist.dstargateway.org/instructions/
Once your registration is acknowledge you can then setup your gateways. You should add the ‘Z’ prefix, as this ensures the account will stay open (any left without modification for 2 weeks will be expired).
Add B and C for UHF and VHF frequencies to your callsign (which will be automatically populated)
This will take time to propagate across the DSTAR network. For DSTAR Administration this is all I had to do to allow my hotspot to attach to the DSTAR network.
PI-STAR
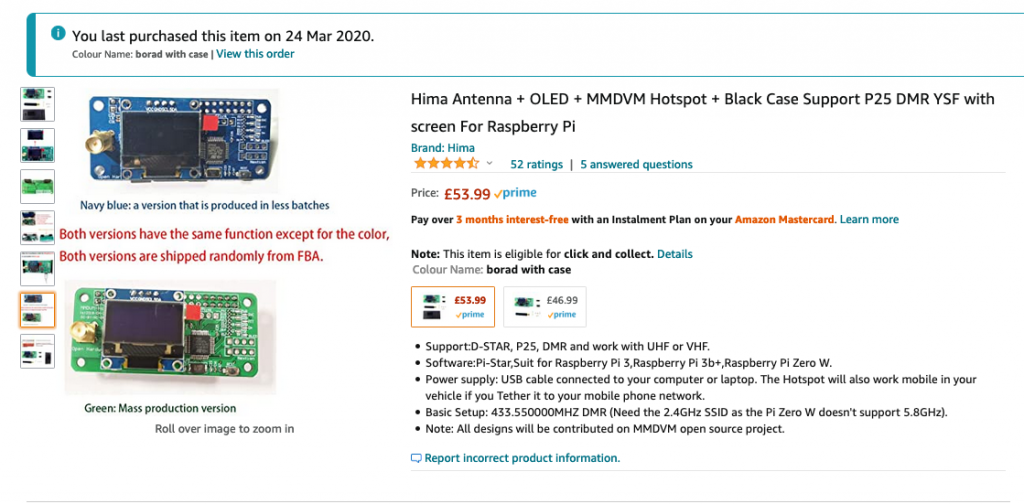
The MMDVM being used is a popular one available from Amazon. This comes as a kit to assemble and includes all the necessary parts to get up and running – although I would recommend getting a dedicated power supply rather than depending on just USB ampage
70cm Antenna using Buddipole
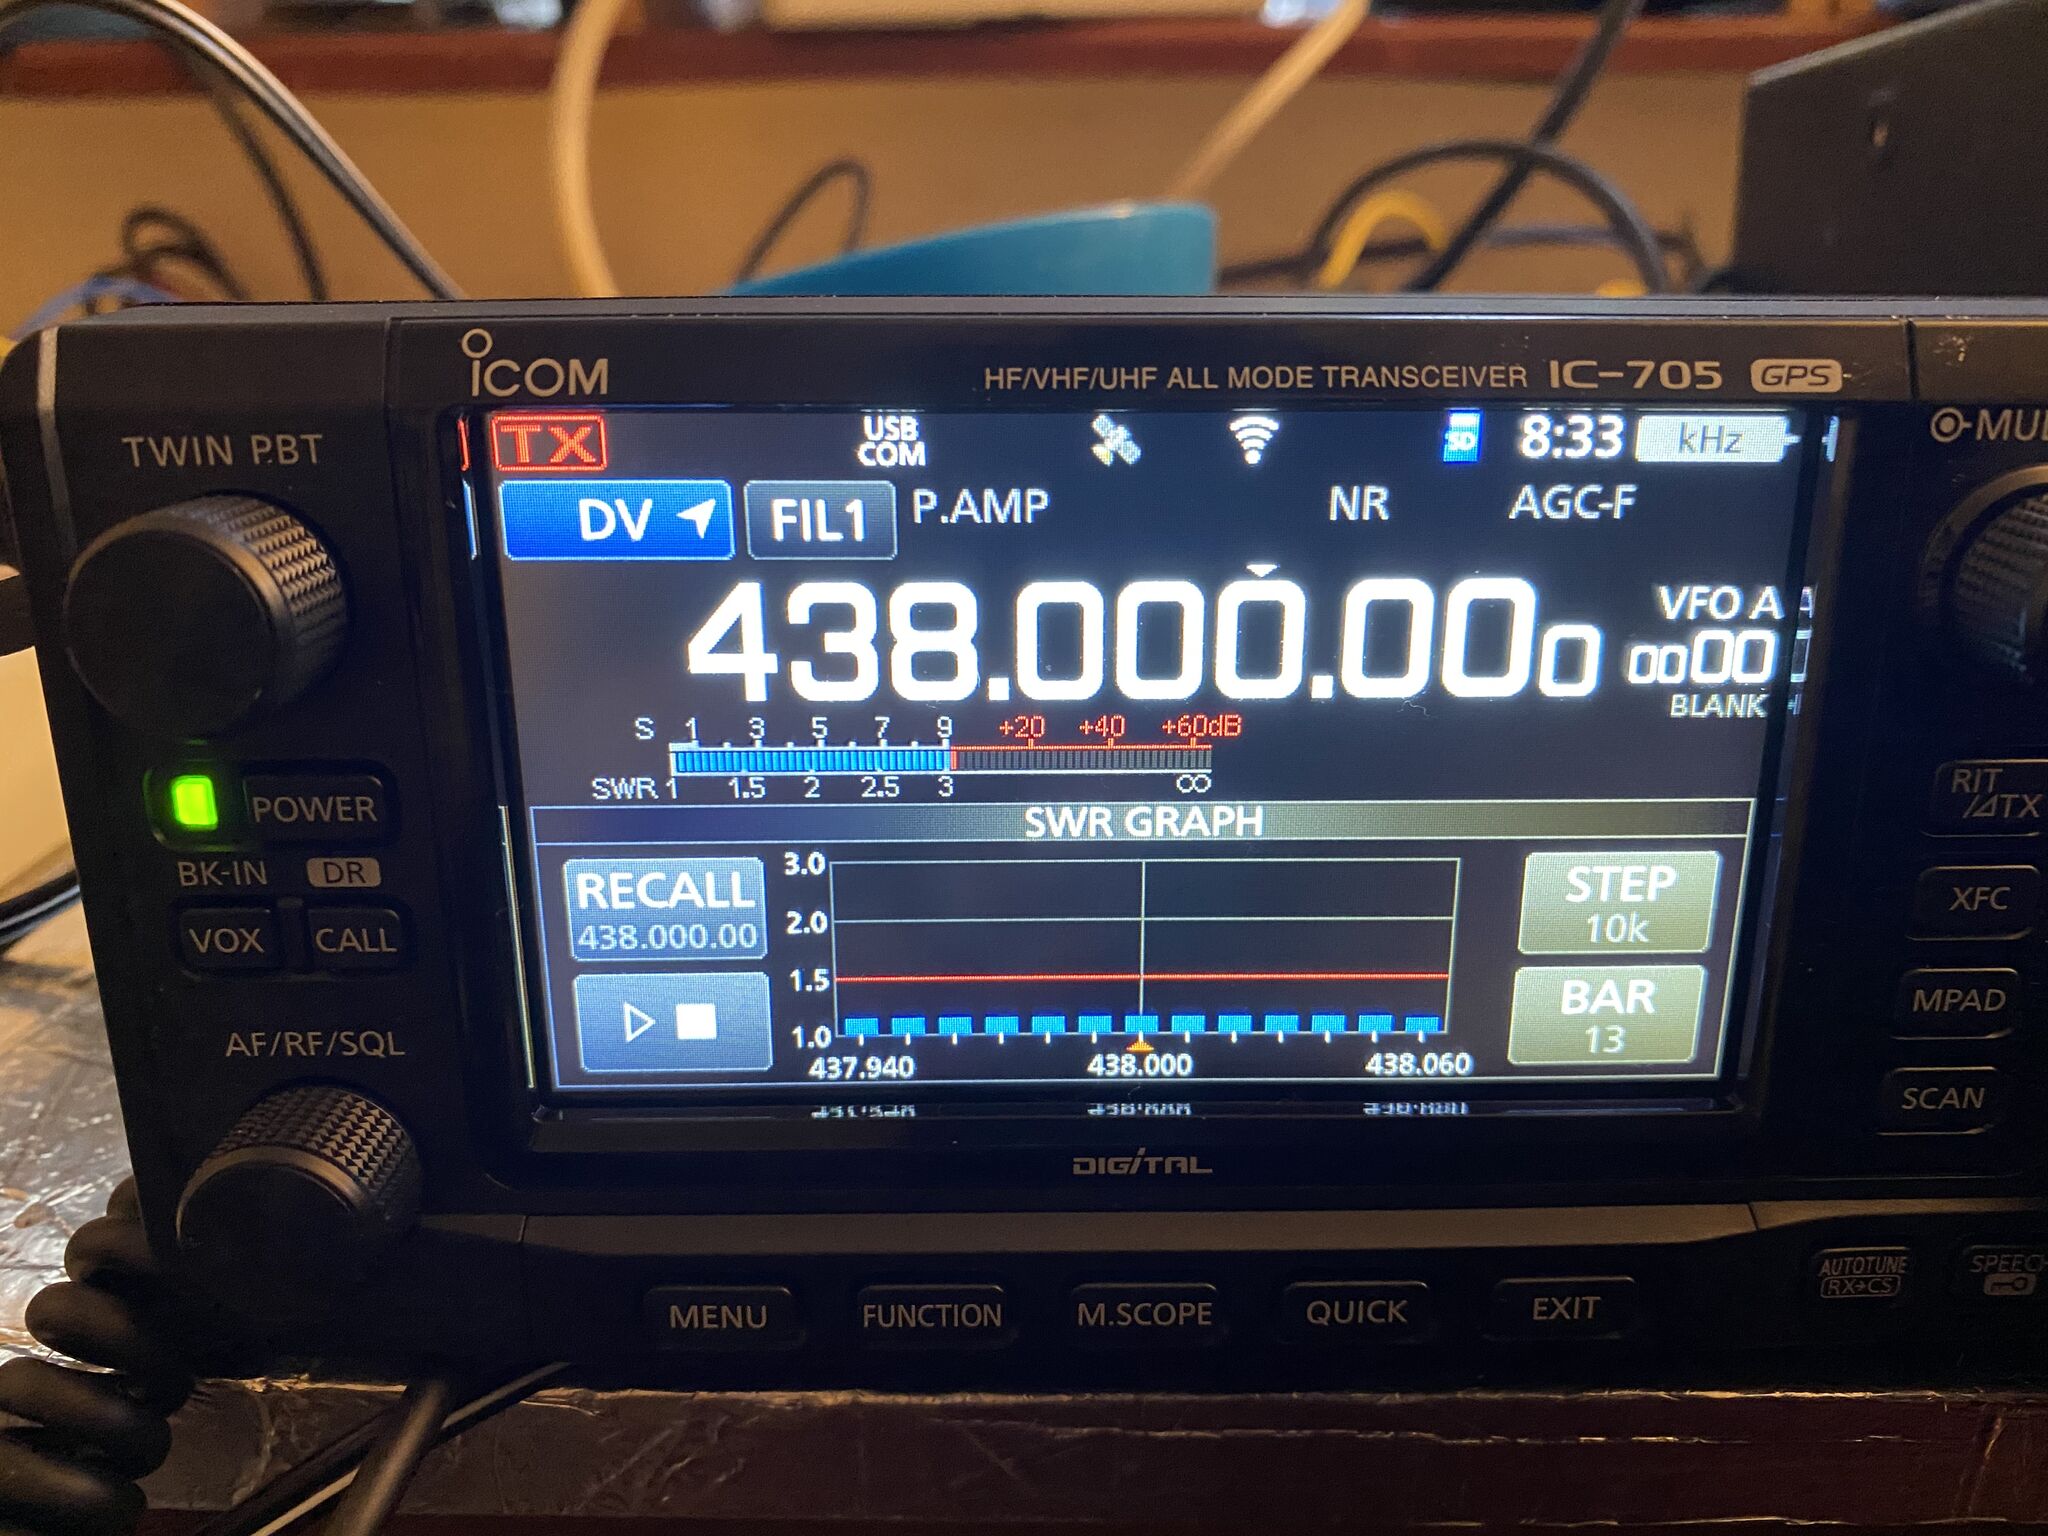
I do have an external 2m/70cm antenna attached to a mast but was unable to get that to work (although later checks via SDR proved it was ok, will detract from the thread). I setup first in 2M configuration then ‘played’ with various lengths to get the VSWR down to 1.1. I used the IC705 internal SWR analyzer.
Lengths used and respective colours –
| frequency | black | red |
| 2m | 14.62″ | 43.75 |
| 70cm | 67″ | 32″ |
Configure the IC-705 via Software
I used the IC-705 configuration software on Windows to be able to recreate the configuration steps. I’d advise you to first download your current configuration and save it to ensure you can recover to your pre DSTAR config.
The software is available to download from here – its a simple Windows Instal. The USB cable interface on the IC-705 is located just under the power cable.
This is the full video on how to configure, but snippets of the essentials are shown below.
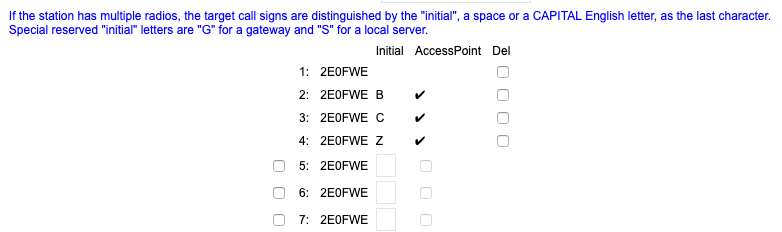
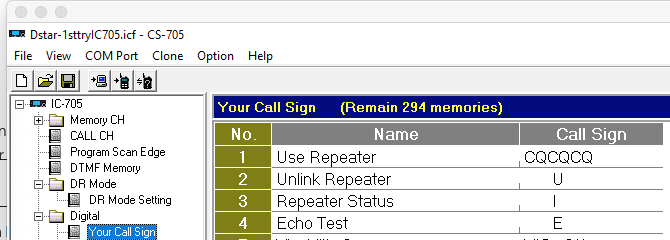
Once loaded, the essential configuration is the Digital/My Callsign. Although its called ‘your call sign’ it contains anything but (for this configuration). Add in the following table
| No | Name | Call Sign |
| 1 | Use Repeater | CQCQCQ |
| 2 | Unlink Repeater | U |
| 3 | Repeater Status | I |
| 4 | Echo Test | E |
All, apart from CQ, DSTAR commands are 8 Characters long, so where you see the white-space these are created by 7 spaces, then the character, i.e. for Echo Test <SPACE><SPACE><SPACE><SPACE><SPACE><SPACE><SPACE>E
You will then need to configure the radio for the new pistar hotspot
I created a new group called ‘hotspot’
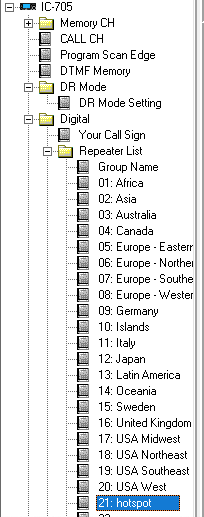
I then added the configuration for the hotspot to match the DSTAR configuration and the frequency of the radio (obtained from Amazon page – in this case, 433.550.000)

You don’t need all the entries, the signifiant ones are as follows
| Number | Type | Name | Subname | Repeater Call Sign | Gateway Call Sign | Operating Freq | DUPt | Mode |
| 1 | DV | Hostpot | Hotspot | 2E0FWE B | 2E0FWE G | 433.550.000 | DUP- | DV |
I then pushed the configuration to the radio and rebooted. This completes the IC-705 Configuration.
Pistar Configuration
The next step is to configure the Pistar for DSTAR. If you havent configured your PI for Wifi yet, you’ll need to do that first. Probably the easiest way is to use the PiStar configuration tool, but that means sending your Wifi username and password, which some may not like, alternatly I connected a keyboard and screen with configuration on the commande line.
https://www.pistar.uk/wifi_builder.php
Once reachable on wifi, you will be able to reach the pi-star administration pages. Most routers running DHCP will allocate a record in the .local’ domain, so simply htttp://pistar.local/ will get you to the portal, default logins are username pistar and password raspberry. I suggest changing this on the admin page right away.
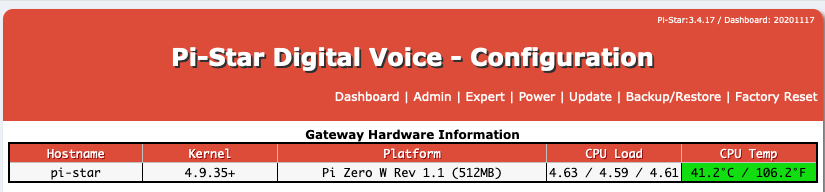
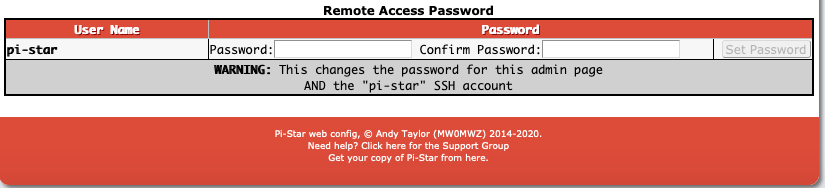
Restart the pistar and login with the new password.
First configure to use DSTAR. from the panel. For now, keep it at DSTAR only.
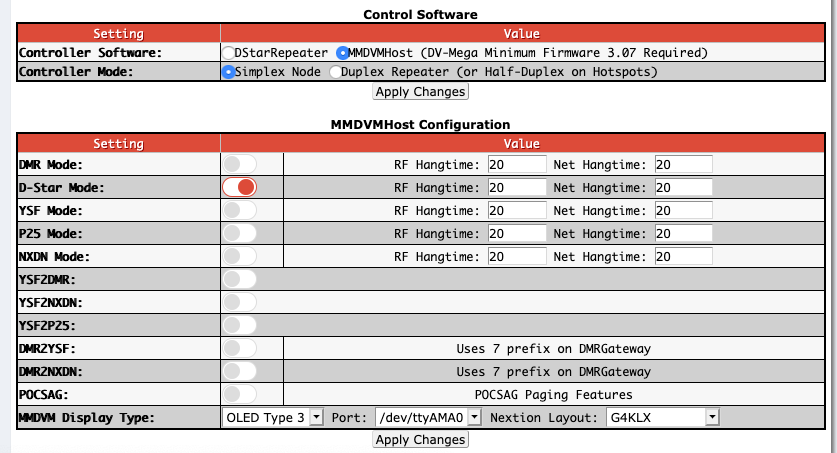
If you make any changes, you must click on Apply Changes for *each section* else your changes will be lost.
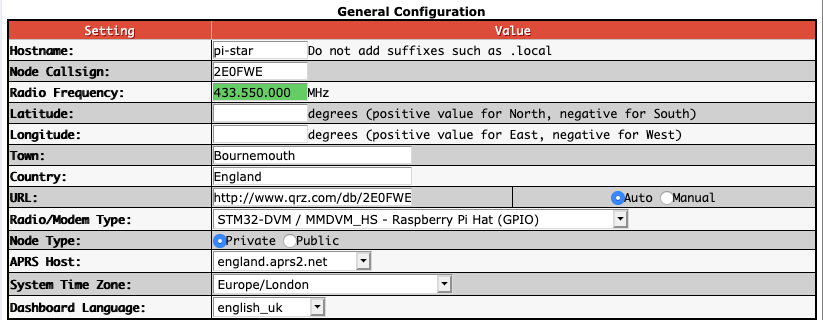
The essential part here is to get the radio frequency and call sign correctly, i.e. 433.550.000 for frequency and your own call sign in place of 2E0FWE. I’ve removed my exact Long/Lat, but you can put your own in. Once complete, click apply changes. I believe in the UK we are required to put ‘Mode Type’ to Private as we cannot ‘broadcast’ as amateur radio users in the UK (which I think ‘public’ effectively does)
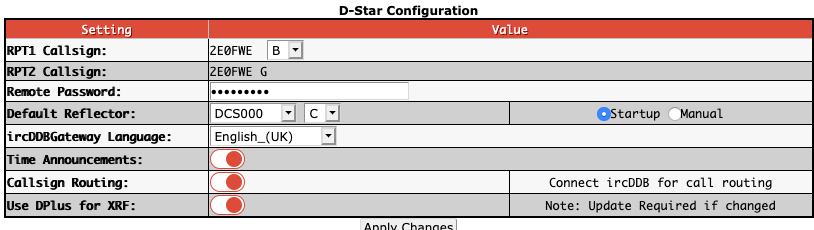
Here we match our hotspot config with the DSTAR network. As the node is on 433Mhz, Channel ‘B’ is the one to use, if it was 144Mhz, then C. Hit apply and that wil complete your configuration !
IC-705 Usage
With the DSTAR Registration, PiStar and IC-705 Configuration complete, its now time to enjoy using the IC-705 on DSTAR via your own hotspot !
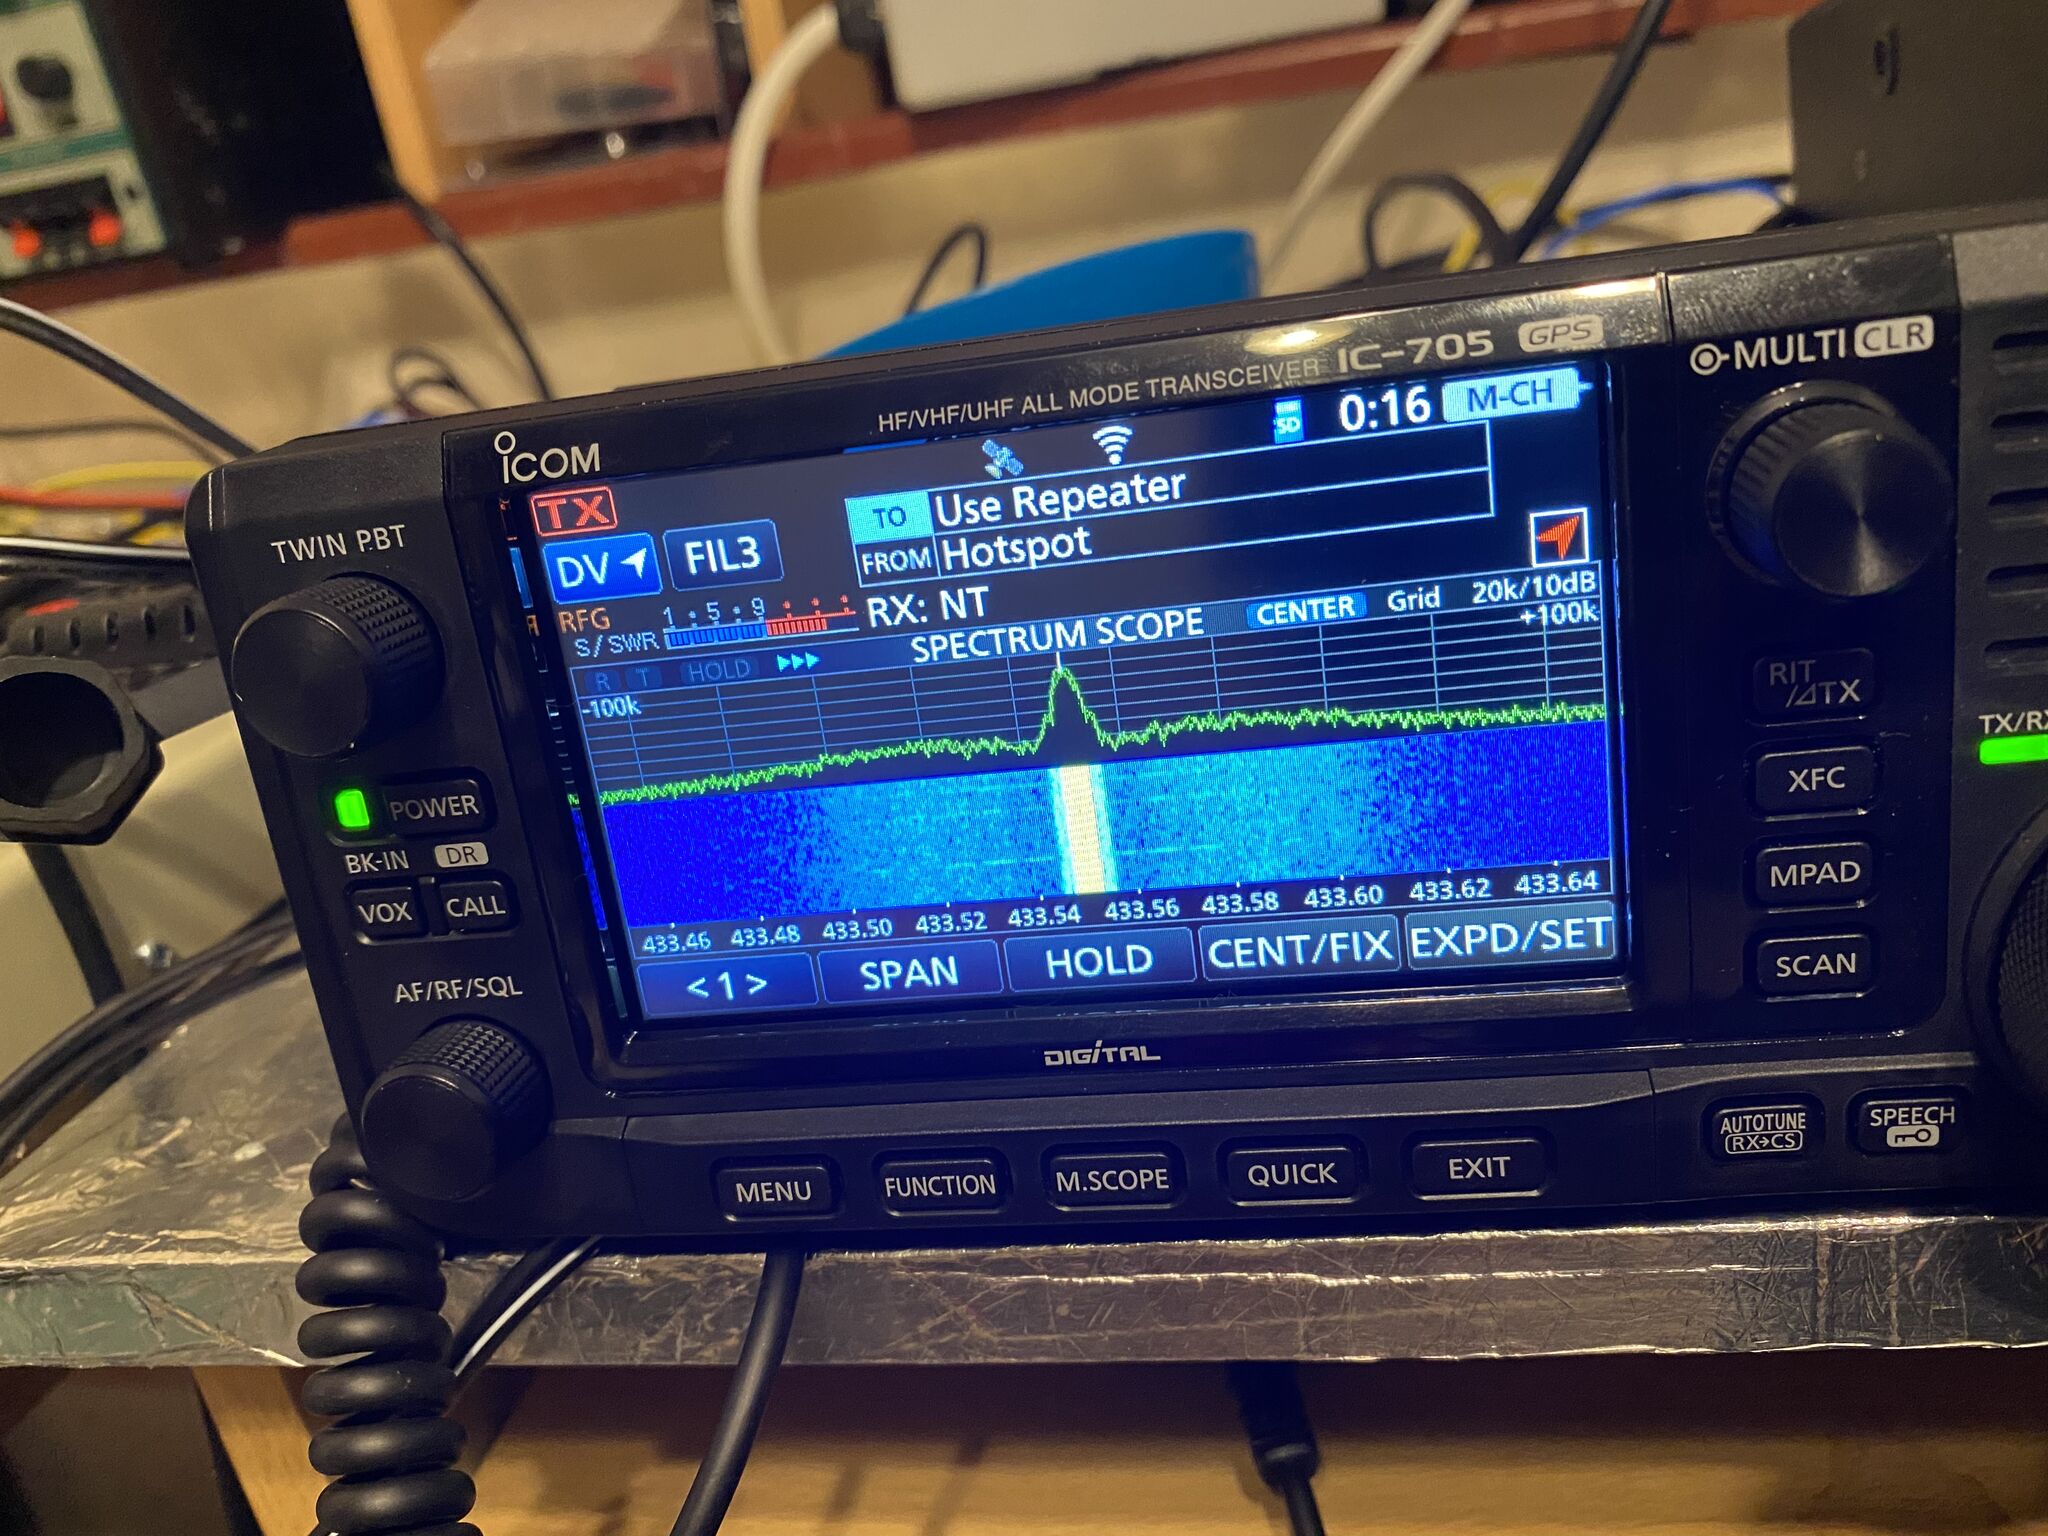
PRess the CALL button situated on the left side of the radio and change from FM to DV. To use the hotspot tap ‘from’ on the screen, select ‘repeater list’, ‘hotspot’ then the hotpot added via the configuraiton tool, in my case 2E0FWEB.
To start using right away, tap ‘to’, select ‘your call sign’ and ‘use repeater’. You should now be able to key-up and call CQ on DSTAR ! Of course you can test using Local Echo and Status commands (just adjust the last step in ‘yor call sign’.
You will be able to confirm your radio is communicating with your hotspot and the DSTAR Network.
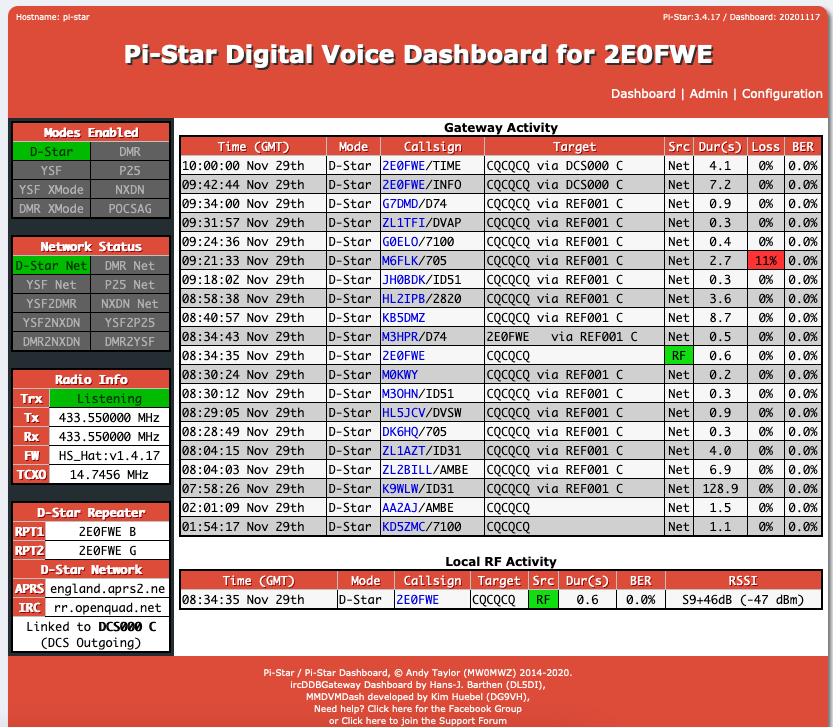
The DSTAR ‘last heard‘ feature can then confirm you are on the DSTAR network.
Finding talk groups / repeaters,etc.
With your IC-705 now on DSTAR you can choose which Talk Groups and Nets to join. There is an extensive list available on here. You can configure the group via the Pistar admin page and putting or selecting the reflector.

I hope this helps people use the IC-705 on DStar, it took me a little while to piece together all the pieces (including the antenna !) to get it working, but is worth the effort. There seems to be an increase in simplex D-Star usage on HF with the IC-705 being able to do the full range of HF, VHF and UHF.
Hope to hear you in DSTAR !