Whilst I’ve been getting on air from home with the IC-705, even calling CQ on 17 and 80 meters a couple times and getting a few contacts, I’ve also been getting prepared for the changing climate.
NOAA Antenna move
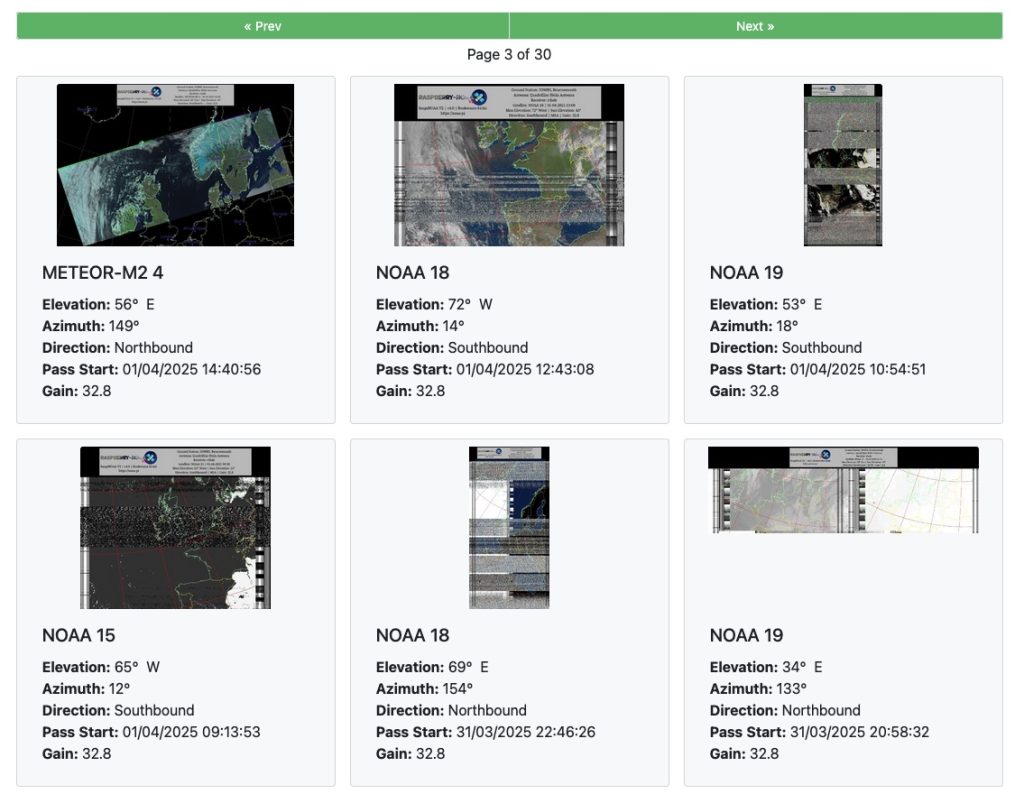
It was easy to spot that my NOAA and METEOR reception had taken a turn for the worse.
Bad scans
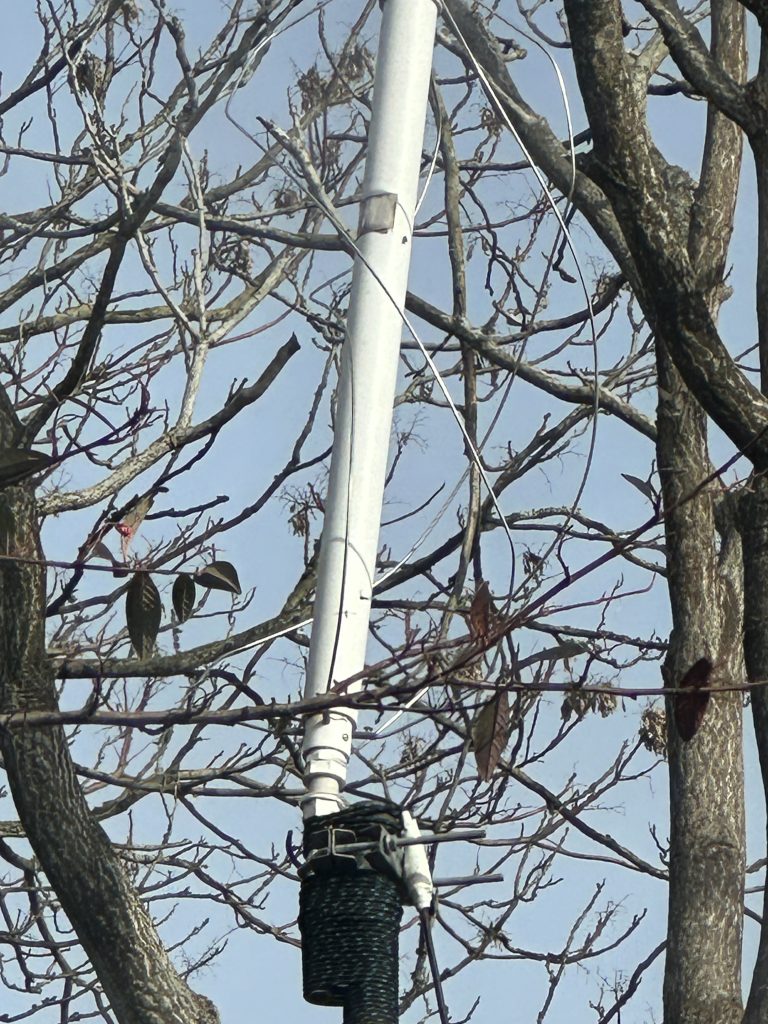
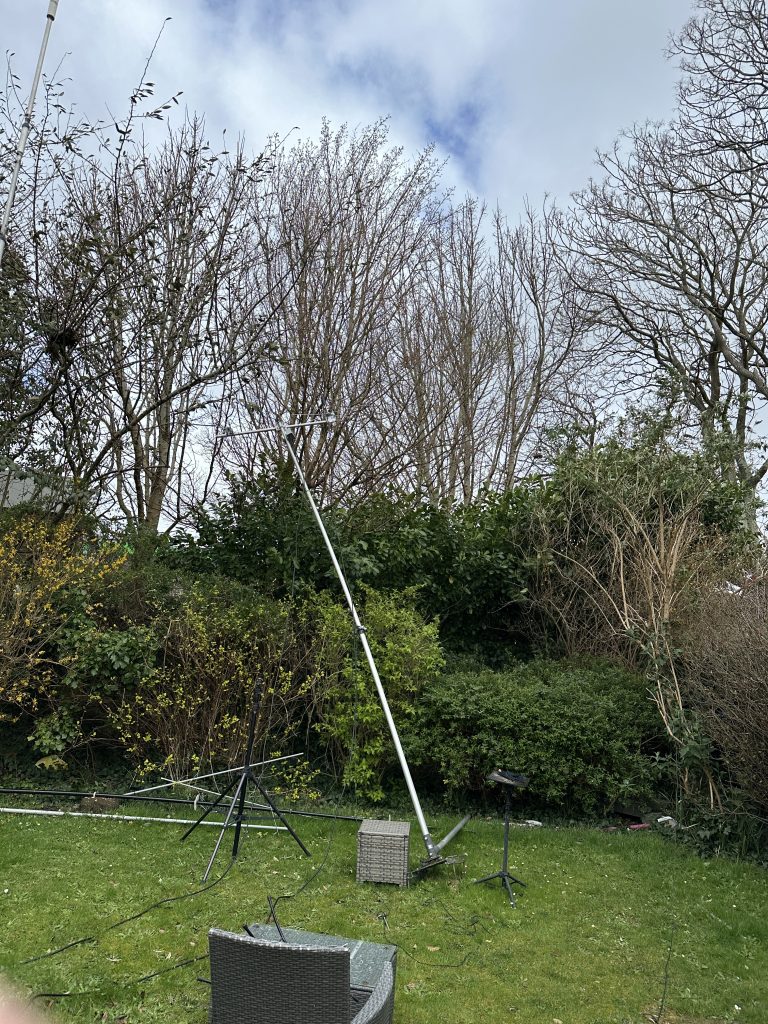
Looking at the postion of the antenna, it was surrounded by trees which are now beginning to grow their spring time leafs and flowers. Having checked the rest of the RPI/Amp/Filter setup, I thought it likely the signal quality was most likely due to those trees blocking the signal.
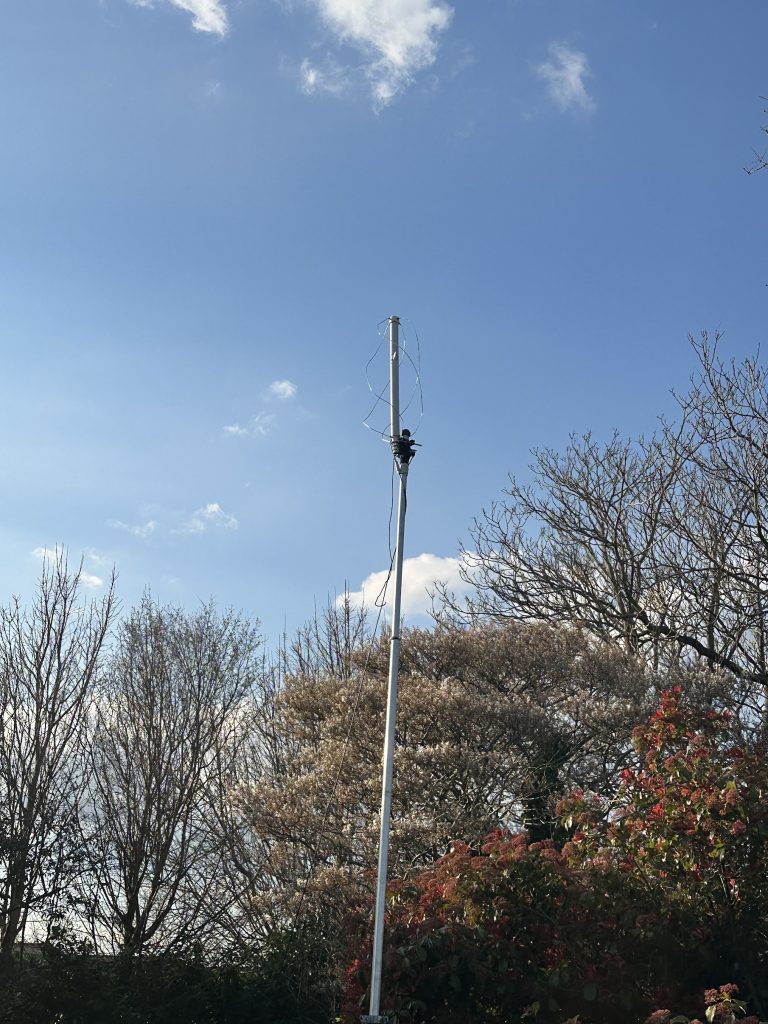
relocated further from treesnext to EFHW
Moving the antenna was easy enough, I basically untethered it and moved the whole tilt base, whilst cumbersome, it wasnt heavy and I could get it to the front of the garden away from the trees and a better line of sight to the horzion to the south, east, west and improved to the north, although the trees are still there, i think they are further from the 30 degree LOS that NOAA and METEOR are picked up from.
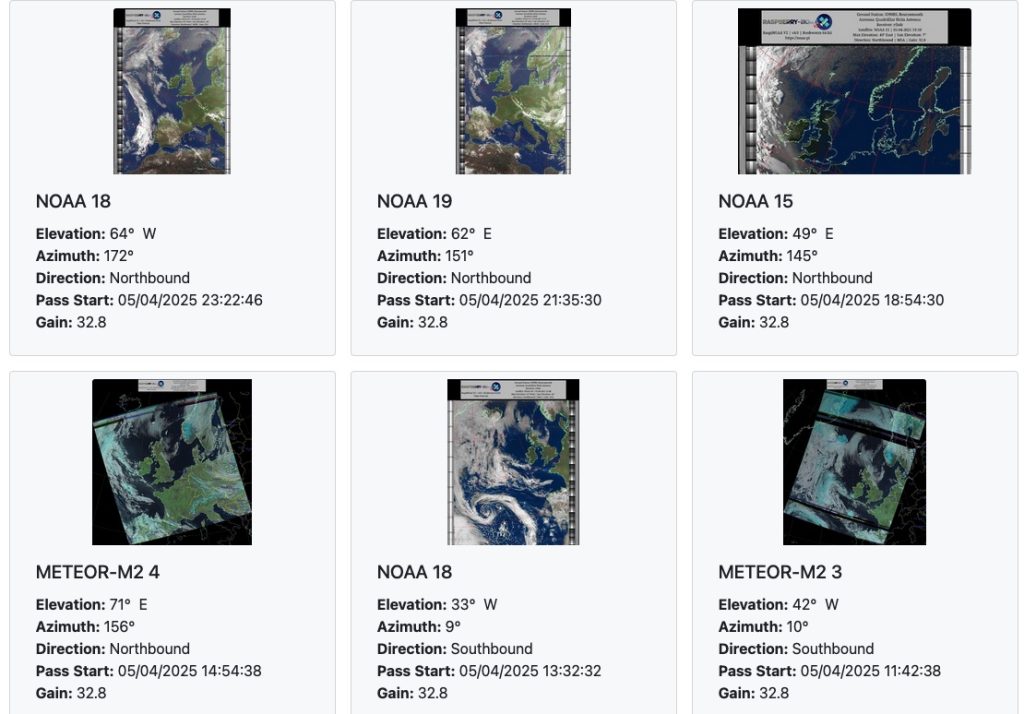
much better
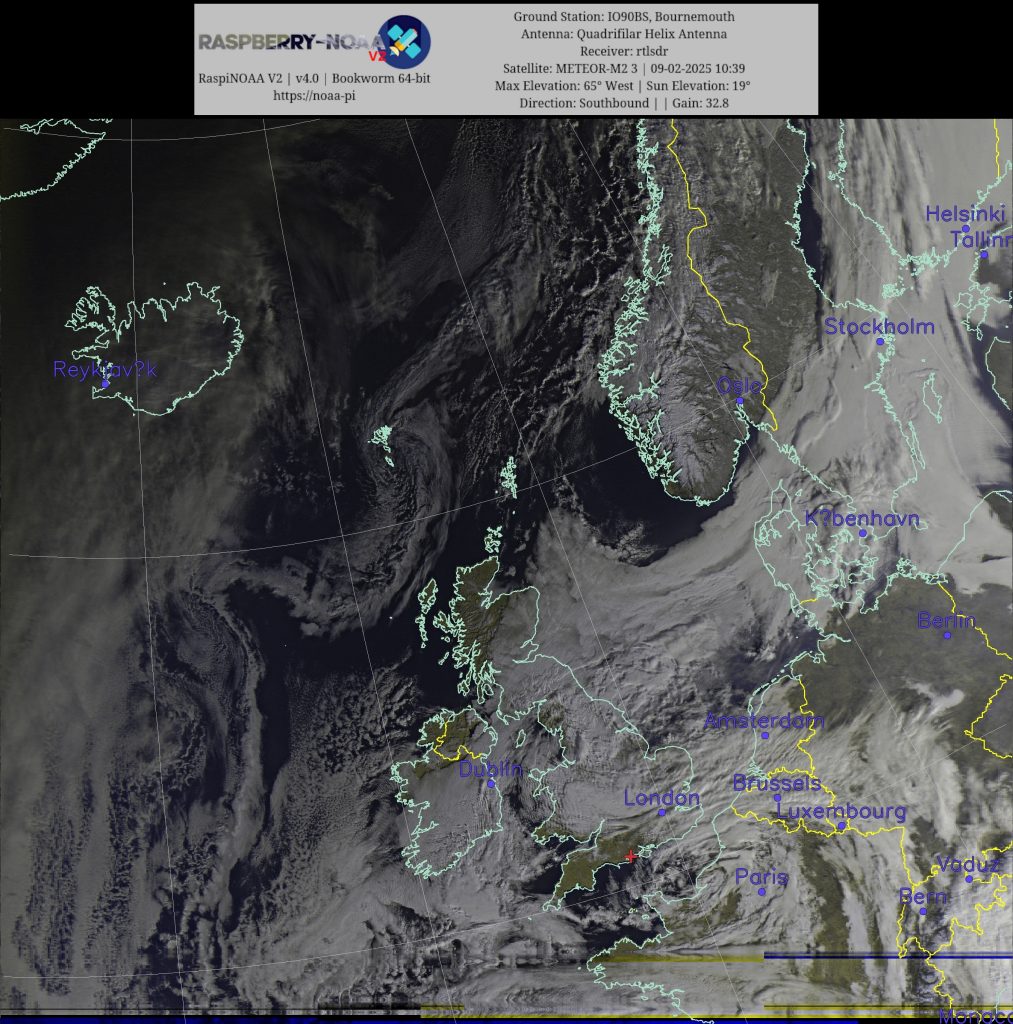
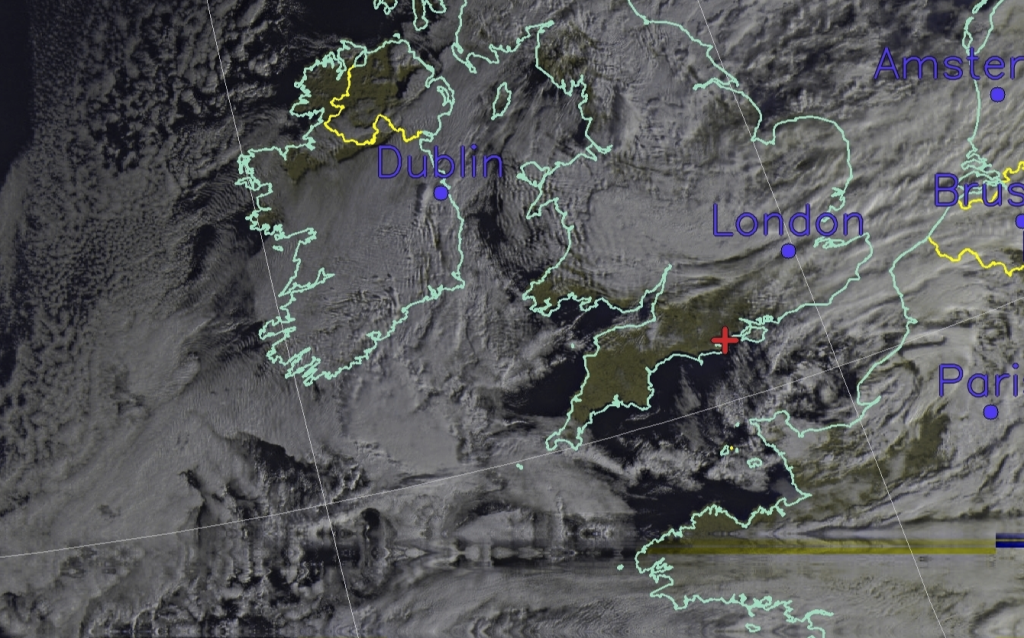
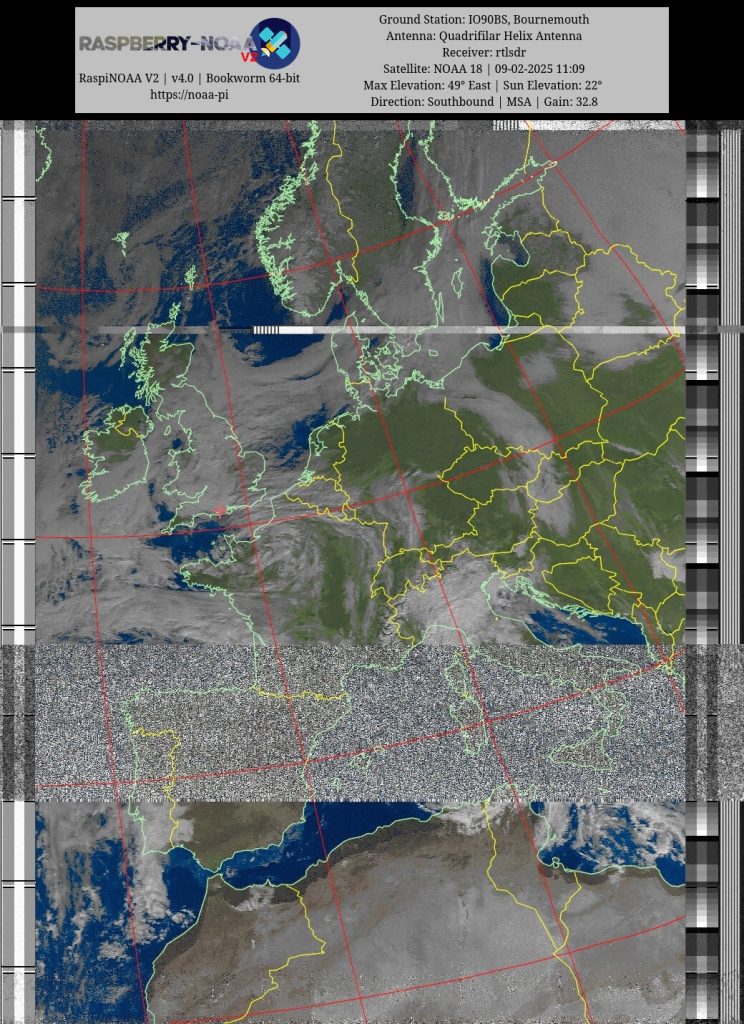
Having run the antenna in its new location for several days now, its proven much better, if anything all the signals are coming in much better now, there is the odd occasion, but as the above picture shows, I’m getting all the scanns in from the operational weather satellites when they pass over. I’m also seeing that whilst I set my RPI to pick up from 30 degrees, the reception now is lasting longer to sometimes around 20 or 15 degrees above the horizion. Not bad for an antenna thats barely 3/4 meters high !
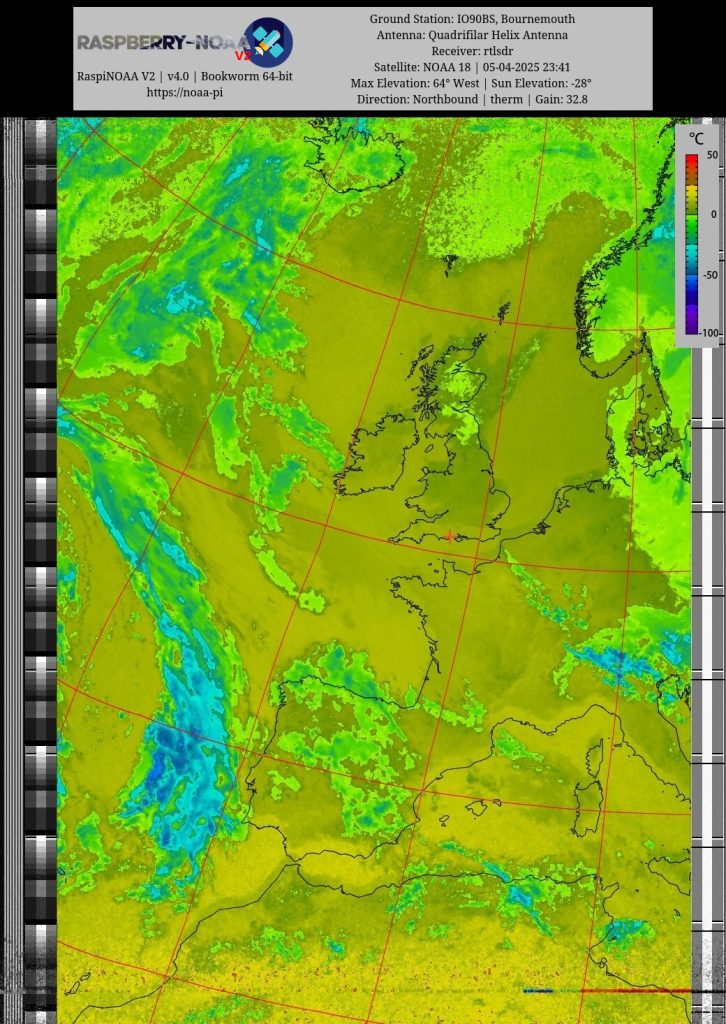
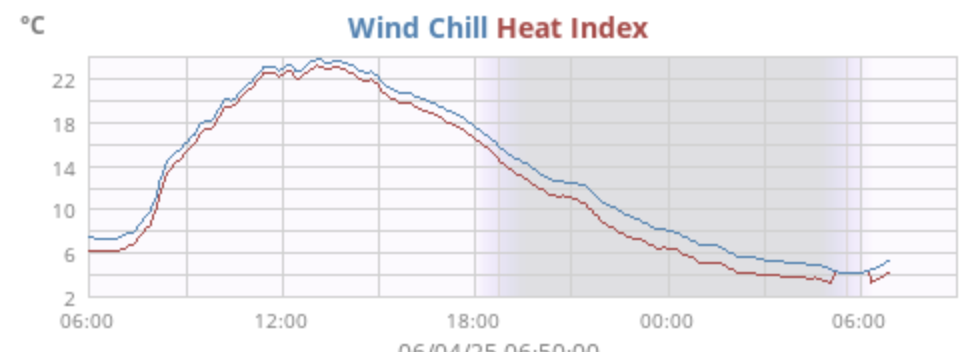
We can see from this great night-fly over of NOAA-18 and the thermal output its starting to get warmer now, with the WX topping out at over 22 celsius !
Bongo and APRS
So its near time for my nearly 30 year old Mazda Bongos annual check (MoT as it is known in the UK). It has been running a bit rough of late, but the warm weather has brought the bongo back to life ! I rejoined the Bongo Fury forum, very affordable and great fact sheets, I have no doubt my problem is caused by glow plugs, however as long as it starts for now, i’ll get it thru its MoT and then see about fixing it before it gets cold again!
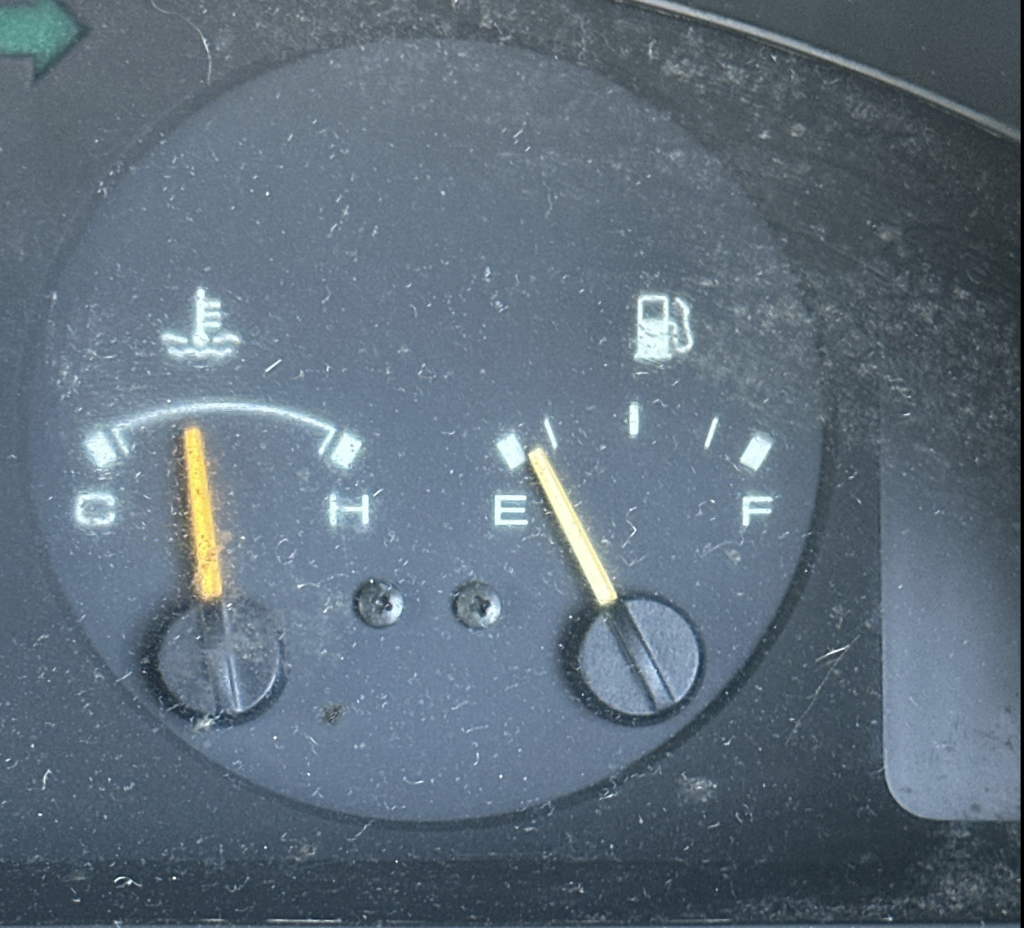
Bongo running cool ! but low of fuel…
The good news is that I topped up the coolant, recharged all the batteries (lesiure and starter) and was able to enjoy a good local drive out with the Kenwood radio beaconing APRS positions on 2M really well. I’ve noticed a few more APRS digipeaters in the area and am getting better coverage than when I first started this back many years ago !
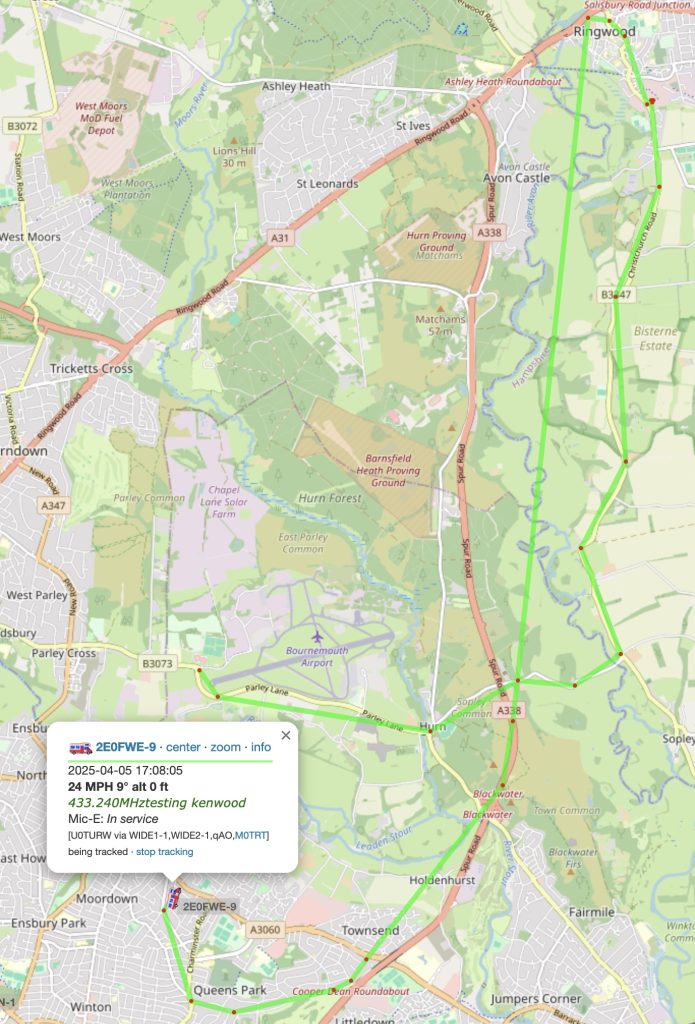
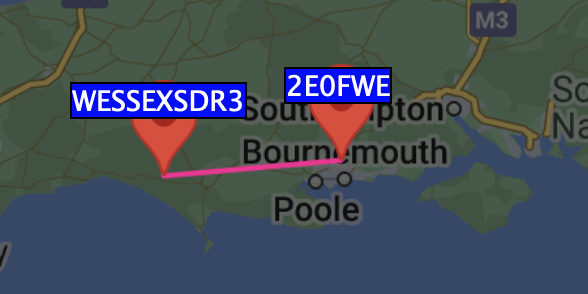
APRS from IO90BS to Ringwood
I’ve still yet to deicde to do with my 2M/70cm antenna here at the QTH, its up but currently not connected to anything. I’m tempted to setup the THD7 with one of the SSTV cams so it runs independent of any computer, and a CTCSS tone will force it take a picture. Which I think could be fun, even if it ends up with me only using it !
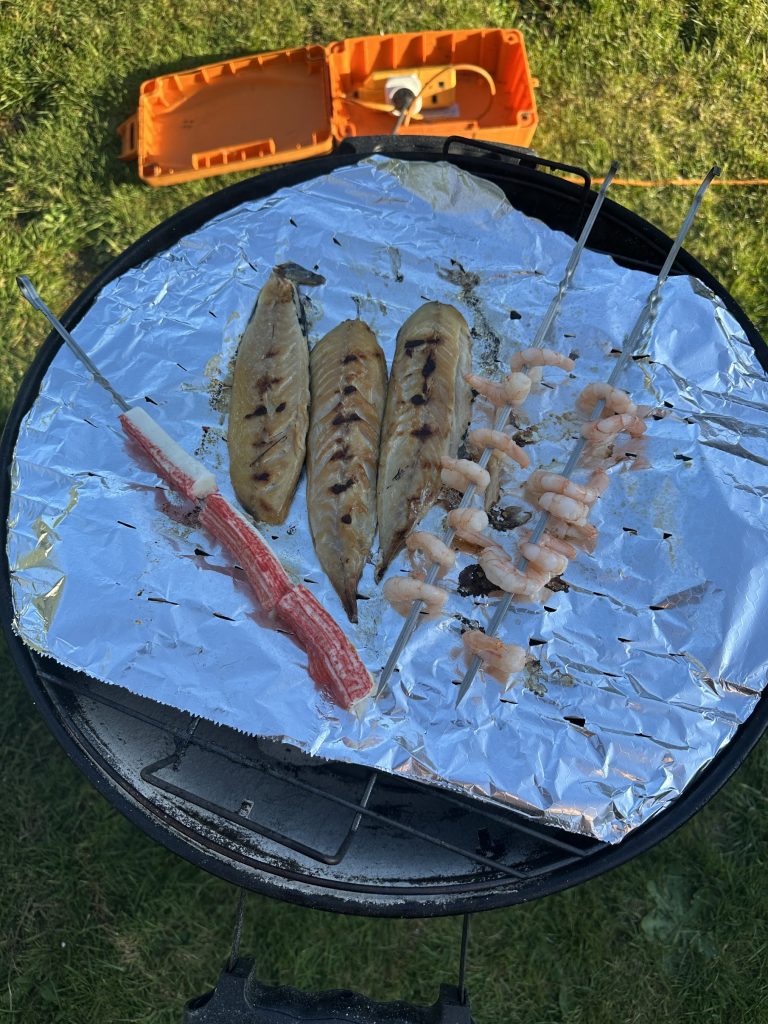
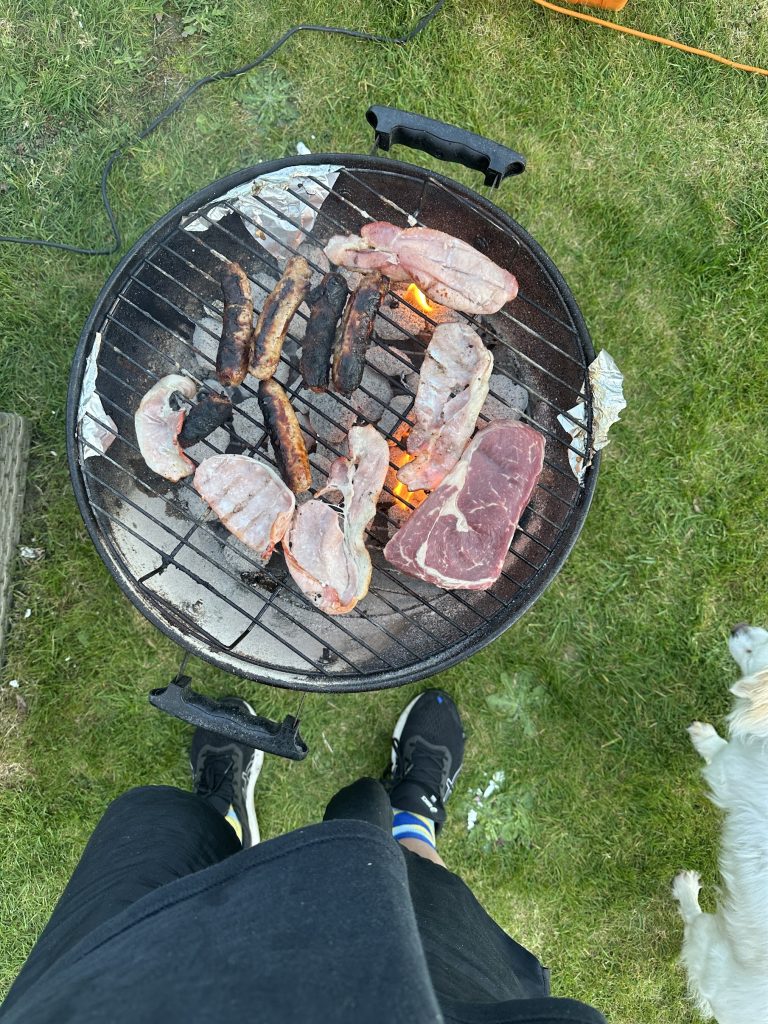
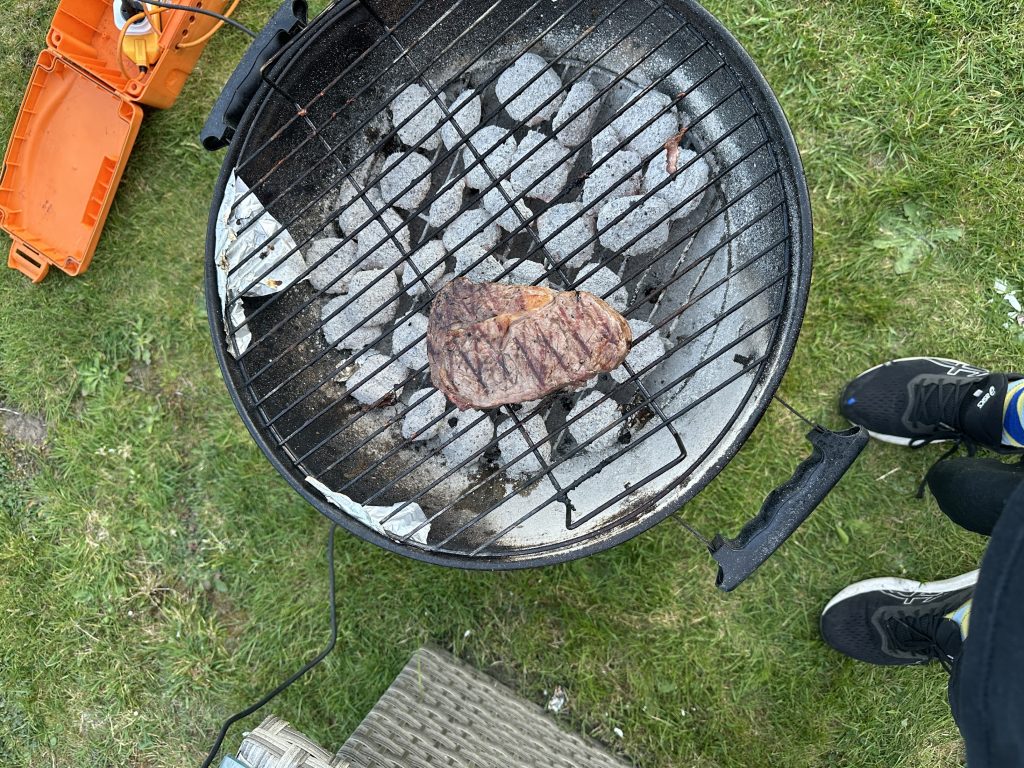
I ended the afternoon with a lovely BBQ, pre-cooking a steak for dinner and some sasuages which i’ll put into a toad-in-the-hole for eating this week 🙂 I also tried cooking fish and prawns for the first time on the BBQ for XYL Monica, and the fish was very well received !
fish!p0rksteak
I’m confident I’ll be able to get the Bongo thu the MoT and again start getting out with the Bongo and doing more POTA, I’ve spotted a few more new parks pop up nearby as well !!
I have been on the airwaves with 10W power from the IC705 at QTH for just over a month now, and I have to say when I’ve been able to get on the air, its been fantastic. I’ve had several SSTV QSO’s with really good signal reports, and I continue to scan and upload pictures from 20m and 80m SSTV CoA’s. I was also impressed that the MAT-705 ATU was able to make the 80m EFHW antenna ‘tune’ to top-band, and I was able to have FT8 QSO’s on 160m.
Who needs 100W when 10W will do
Whilst do my model train, i’ve also enjoyed just doing SWL on 80m, there are some really good converstaions to be had and being 80m I have no problem hearing both ends of the conversation. I was thoroughly impressed to pick up a DX station from East USA having QSO’s all over Europe, most of which I could easily copy on the IC-70% internal speaker with no need for external DSP and speaker.
NOAA Setup
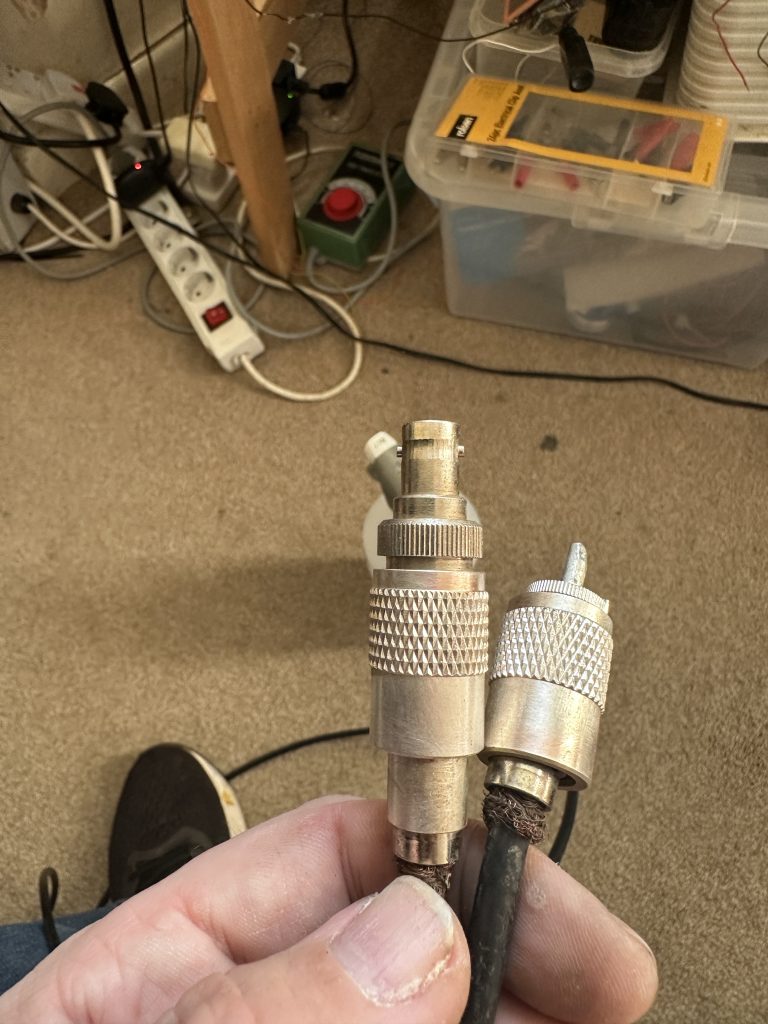
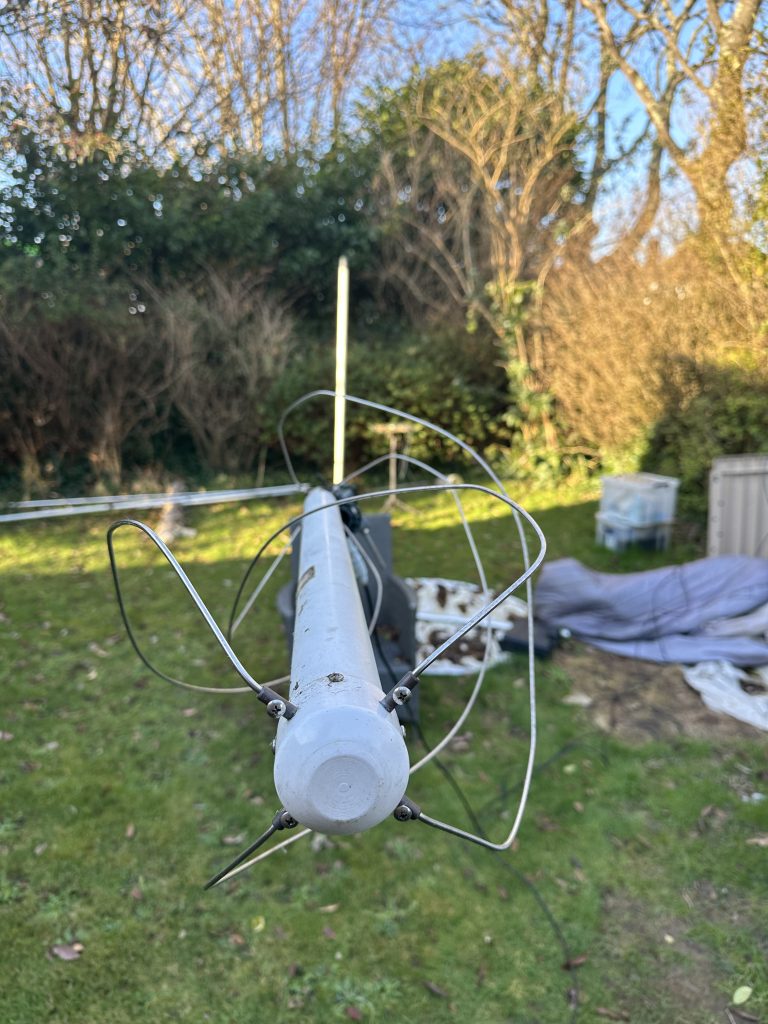
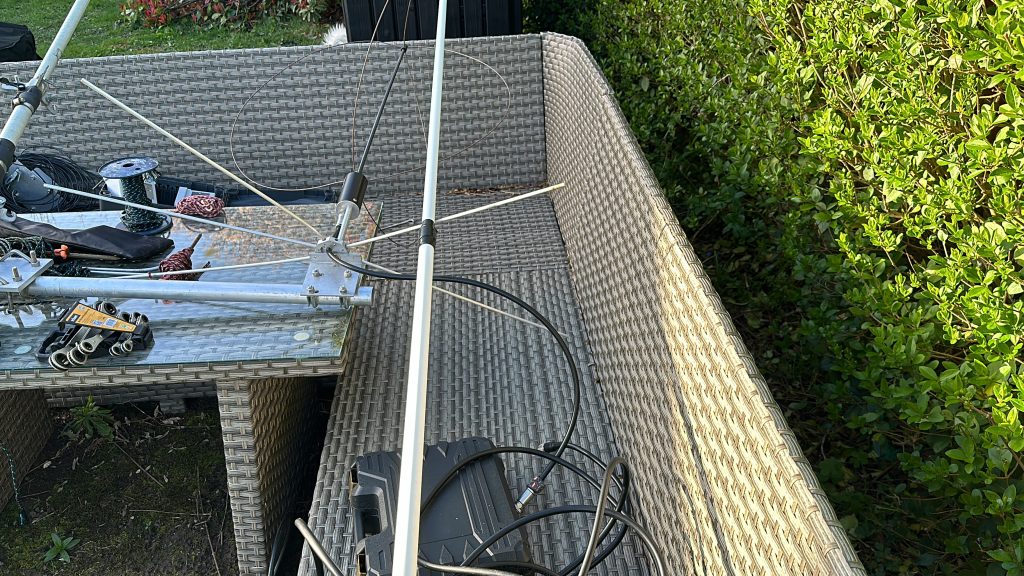
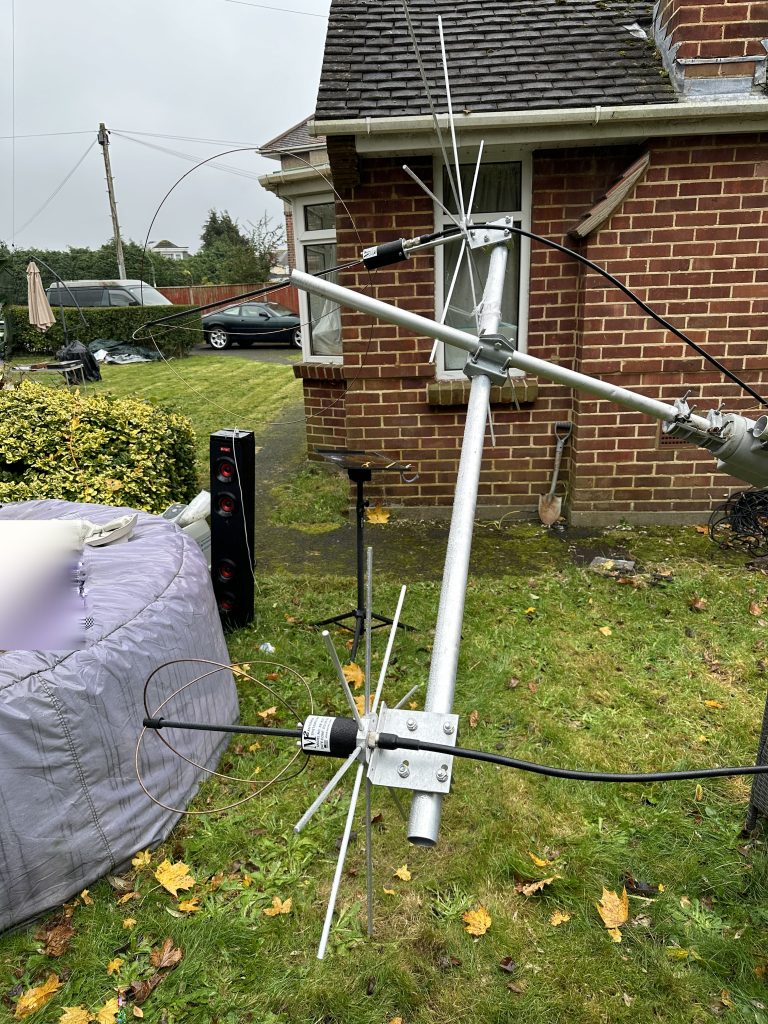
As I dont have alot of time for interactive radio, I wanted to use the equipment I do have. As such my Quadrifilar Helix antenna which was shipped from the USA several years ago had been sat neglected in the garden for many years, as well as the coax (PL259 to BNC).
I first set about making sure the antenna was in working condition, I attached it to my Rigmaster which covers all the frequencys, including the NOAA frequency of 137.9Mhz. Sure enough SWR/Return loss on the antenna was fantastic. So I set about restoring the feed line to good use.
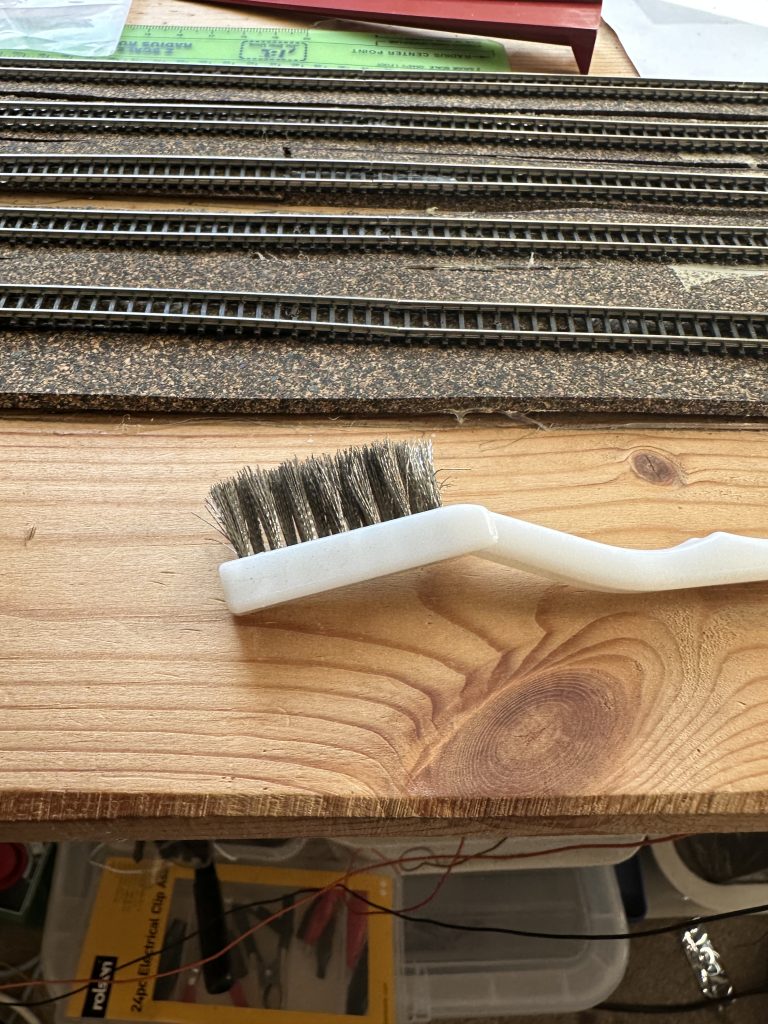
metal brushbeforeafter
Having used pure alcohol and a metal brush I restored the connectors, getting all the collected dirt from inside the connection joins and external, whislt comestic at this point, it would be important for later when adding tape to protect the connection.
Sure enough after cleaning the connectors I was amazed that the coax had very low (almost nil) reistance between both points, meaning the years of abuse in the garden hadn’t destroyed the cable.
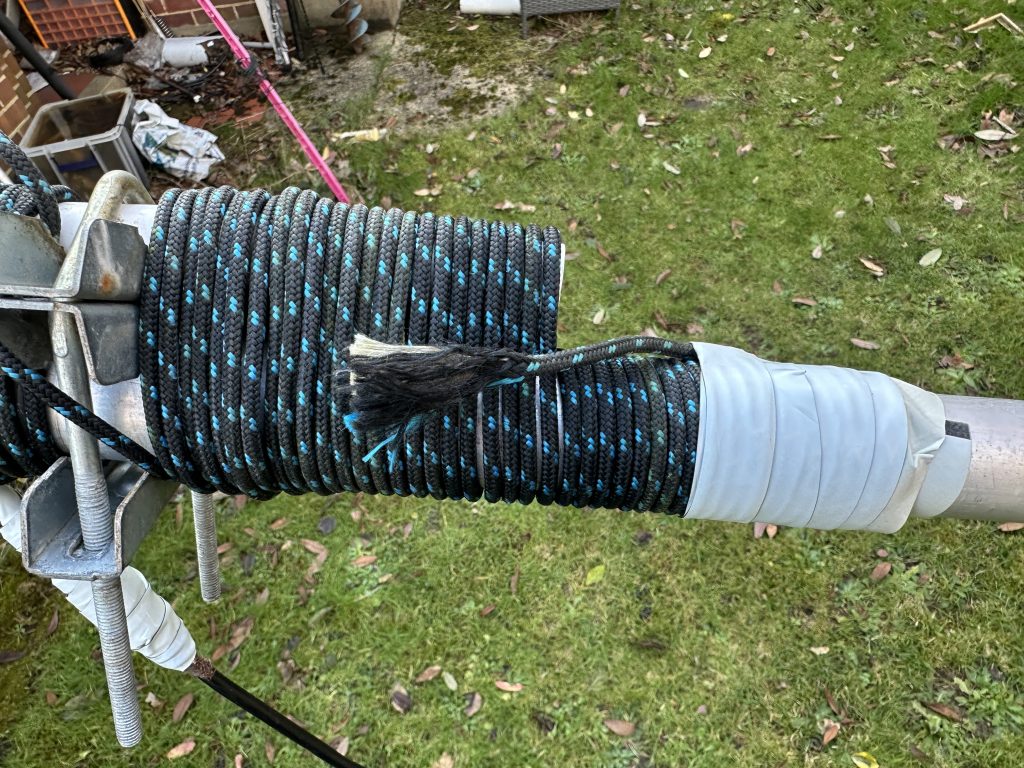
binding to masthalf-mast viewvertical
Having checked the antenna and coax, it was left to the elements to get the antenna up. Thankfully there was a brief period of time in Janurary to get outside and so some antenna work, so I binded the antenna to the mast, first with a clamp, then with tightly bound guying rope. That way I can be sure the antenna will stay as close to vertical as the mast allows.
With Debian up and running it was time to run the Raspberry Noaa install script, and my, what a majestic piece of coding this is. It really is a superb piece of automation, all that is required is to setup the confg file correctly. I give mine below as-is as getting the gain values right was the trickiest part, the install script took care of everything else.
cd $HOME/raspberry-noaa-v2/
./install_and_upgrade.sh config/settings.yml
The config file I used for my location in IO90BS./ Bournemouth is as follow, the coordinates are actually for the center of Bournemouth.
---
# base station configurations
#   latitude: south values are negative
#   longitude: west values are negative
latitude: 50.721680
longitude: -1.878530
altitude: 0.0

#Website language settings
#   lang_setting: see the 'webpanel/App/Lang' folder for available
#                 languages (2-letter filename - e.g. ar, bg, de, en, es, nl, sr, ru, it, hu, gr, lt, kr, ro)
lang_setting: en

# ntp configurations
#   ntp_server - if you have a local server (e.g. stratum1), you can use this setting
#        to specify a hostname or ip address to communicate with the ntp server
ntp_server: '131.111.8.171'

# receiver settings
#   receiver_type - the receiver type which program uses ('rtlsdr', 'airspy_mini', 'airspy_r2', 'airspy_hf_plus_discovery', 'hackrf', 'sdrplay' or 'mirisdr')
#   noaa_decoder - which receiver method to use (either 'wxtoimg' or 'satdump')
#   meteor_decoder - which receiver method to use (either 'meteordemod' or 'satdump')
receiver_type: 'rtlsdr'

noaa_decoder: 'wxtoimg'
meteor_decoder: 'meteordemod'

# test settings when running test scripts
#   test_gain - gain to use for scanner test scripts
#   test_sdr_device_id - device ID of the SDR device to be used for scanner test scripts
#   test_enable_bias_tee - whether to enable bias tee when running scanner test scripts
#   test_freq_offset - receiver frequency offset (PPM)
test_gain: 32.8
test_sdr_device_id: 0
test_enable_bias_tee: true
test_freq_offset: 0

# whether to schedule specific orbiting objects for capture
#   <satellite_name>_schedule - whether to schedule captures for the satellite
#   <satellite_name>_sdr_device_id - device ID of the SDR device to be used for recording for the satellite
#   <satellite_name>_freq_offset - receiver frequency offset (PPM) for the satellite capture
#   <satellite_name>_enable_bias_tee - whether to enable bias tee for the recording of the satellite
#   <satellite_name>_gain - gain setting for specific satellite captures
#   <satellite_name>_sun_min_elevation - threshold for sun elevation for specific satellite captures
#   <satellite_name>_sat_min_elevation - threshold for sat elevation for specific satellite captures
#   <satellite_name>_memory_threshold - for METEOR satellite, minimum free memory (MB) required to store pass in RAM
#   select_best_overlapping_passes - whether to select the best overlapping pass when multiple passes are available, or let user manually delete the passes
#   select_meteor_pass_over_noaa - whether to select Meteor passes over NOAA when both are occuring at the same time
#   use_device_string - whether to use the device string scheduling passes when you have multiple SDR devices connected of the same type (most users should leave it to "false")

noaa_memory_threshold: 50
meteor_m2_memory_threshold: 10

select_best_overlapping_passes: true
select_meteor_pass_over_noaa: true
use_device_string: false

noaa_15_schedule: true
noaa_15_sdr_device_id: 0
noaa_15_freq_offset: 0
noaa_15_enable_bias_tee: true
noaa_15_gain: 32.8
noaa_15_sun_min_elevation: 6
noaa_15_sat_min_elevation: 30

noaa_18_schedule: true
noaa_18_sdr_device_id: 0
noaa_18_freq_offset: 0
noaa_18_enable_bias_tee: true
noaa_18_gain: 32.8
noaa_18_sun_min_elevation: 6
noaa_18_sat_min_elevation: 30

noaa_19_schedule: true
noaa_19_sdr_device_id: 0
noaa_19_freq_offset: 0
noaa_19_enable_bias_tee: true
noaa_19_gain: 32.8
noaa_19_sun_min_elevation: 6
noaa_19_sat_min_elevation: 30

meteor_m2_3_schedule: true
meteor_m2_3_sdr_device_id: 0
meteor_m2_3_freq_offset: 0
meteor_m2_3_enable_bias_tee: true
meteor_m2_3_gain: 32.8
meteor_m2_3_schedule_sun_min_elevation: -6
meteor_m2_3_sun_min_elevation: 10
meteor_m2_3_sat_min_elevation: 30
meteor_m2_3_80k_interleaving: false

meteor_m2_4_schedule: true
meteor_m2_4_sdr_device_id: 0
meteor_m2_4_freq_offset: 0
meteor_m2_4_enable_bias_tee: true
meteor_m2_4_gain: 32.8
meteor_m2_4_schedule_sun_min_elevation: -6
meteor_m2_4_sun_min_elevation: 10
meteor_m2_4_sat_min_elevation: 30
meteor_m2_4_80k_interleaving: false

# how many days to schedule passes - note this MUST be an even integer,
# and the current day counts as "1" - passes will be scheduled until midnight
# of the `days_to_schedule_passes` final day
#
# NOTE: If you want to set this value LOWER than a previously configured
#       value, you must run the schedule script manually and pass the '-x' switch
#       after re-running the ./install_and_upgrade.sh script to align the variables:
#           ./scripts/schedule.sh -x
days_to_schedule_passes: 7

# pruning capabilities - must be configured in cron (see documentation)
#   delete_oldest_n - how many oldest captures to delete on each run
#   delete_older_than_n - delete all images older than this many days
delete_oldest_n: 0
delete_older_than_n: 30

# whether audio files should be deleted after images are created
# if you choose to keep files, they will be automatically deleted after set number of days in delete_files_older_than_days (default is 3 days)
delete_noaa_audio: false
delete_meteor_audio: false
delete_files_older_than_days: 3

# processing settings
#   flip_meteor_image - whether the meteor image should be flipped
#   produce_spectrogram - whether to produce a spectrogram image of the audio recording
#   noaa_crop_telemetry - whether to crop the left/right telemetry in image captures
#   image_annotation_location - where to place the annotation in images - valid options are:
#        NorthWest, North, NorthEast, West, Center, East, SouthWest, South, SouthEast
#   extend_for_annotation - whether to create a black extension on the north/south location of
#        the image to place the annotation into (vs. overlaying on the captured data)
#        (note: this will ONLY work if the image_annotation_location is NOT one of [West|Center|East])
#   produce_noaa_pristine_image - whether to produce a pristine image (unmodified) for larger
#        composite-based use cases
#   produce_noaa_pristine_histogram - whether to produce a histogram of the NOAA pristine image
#   produce_polar_az_el_graph - whether to produce a polar graph that shows the pass
#        azimuth and elevation over the course of the pass, truncated to satellite min elevation
#   produce_polar_direction_graph - whether to produce a polar graph that shows the pass
#        direction over the course of the pass, including AOS and LOS
#   ground_station_location - free-form text for indicating ground station location in image
#        annotation (leave blank if you wish to exclude the ground station annotation)
#   antenna_information - free-form text for indicating antenna information in image
#        annotation (leave blank if you wish to exclude the antenna information annotation)
#   show_sun_elevation - whether to show sun elevation in annotation
#   show_pass_direction - show which direction the satellite is moving in the image annotation
#   noaa_daytime_enhancements - list of enhancements to create images using during daytime captures
#        (note: default value seen includes list of ALL supported image processors excluding 'avi' which must be explicitly added when opting to 'enable_animation' below )
#   noaa_nighttime_enhancements - list of enhancements to create images using during nighttime captures
#        (note: default value seen includes list of ALL supported image processors excluding 'avi' which must be explicitly added when opting to 'enable_animation' below )
#   noaa_crop_toptobottom - whether to crop the top and bottom noise out of the noaa capture
#   noaa_interpolate - whether to interpolate and oversample the images (larger images produced)
# settings for thermal map output for NOAA captures
#   noaa_thermal_temp_overlay - whether to overlay a thermal map for color codes to temperature
#   noaa_thermal_temp_overlay_location - where to place the thermal map in images - valid options are:
#        NorthWest, North, NorthEast, West, Center, East, SouthWest, South, SouthEast

# noaa map configurations
# http://usradioguy.com/wp-content/uploads/2020/05/wxtoimgcommand-line.pdf
#
# note - colors are in format 0xRRGGBB (only applicable when the
#        feature is enabled), where:
#   RR: Red hex value
#   GG: Green hex value
#   BB: Blue hex value
# Colors can alternatively be specified as one of the following:
#   black, white, gray, light-gray, dark-gray, red, pink dark-red,
#   light-red, # green, light-green, dark-green, black-green, blue,
#   light-blue, dark-blue, black-blue, yellow, light-yellow, dark-yellow,
#   magenta, light-magenta, dark-magenta, cyan, light-cyan, dark-cyan,
#   orange, dark-orange, purple, lavender, violet, navy, turquoise,
#   aquamarine, chartreuse, gold, beige, tan, brown, and maroon
#
#   noaa_map_crosshair_enable - whether to place a crosshairs on the base station location
#   noaa_map_crosshair_color - color of base station crosshair
#   noaa_map_grid_degrees - latitude/longitude lines drawn every grid degrees (default 10.0, 0.0 to disable)
#   noaa_map_grid_color - color of gridlines for latitude/longitude
#   noaa_map_country_border_enable - whether to enable country borders in images
#   noaa_map_country_border_color - color of country borders
#   noaa_map_state_border_enable - whether to enable state borders in images (Americas only)
#   noaa_map_state_border_color - color of state borders (Americas only)
extend_for_annotation: true
image_annotation_location: 'North'
produce_polar_az_el_graph: false
produce_polar_direction_graph: true
ground_station_location: 'IO90BS, Bournemouth'
antenna_information: 'Quadrifilar Helix Antenna'
show_sun_elevation: true
show_pass_direction: true
produce_spectrogram: false    #NOTE: the spectrogram option here is available for NOAA only, and the spectrogrma produced is from demodulated audio, not IQ baseband file

noaa_crop_telemetry: false
produce_noaa_pristine_image: false
produce_noaa_pristine_histogram: false
noaa_daytime_enhancements: 'MSA MSA-precip MCIR MCIR-precip HVC-precip HVCT-precip HVC HVCT ZA therm sea CC HE HF MD BD MB JF JJ LC TA WV NO histeq enhanced-IR'
noaa_nighttime_enhancements: 'MCIR MCIR-precip HVCT ZA therm NO TA sea histeq enhanced-IR'
noaa_crop_toptobottom: true
noaa_interpolate: false
noaa_jpg_image_quality: 90
noaa_thermal_temp_overlay: true
noaa_thermal_temp_overlay_location: 'NorthEast'
noaa_map_crosshair_enable: true
noaa_map_crosshair_color: "0xcc3030"
noaa_map_grid_degrees: 10.0
noaa_map_grid_color: "0xff0000"
noaa_map_country_border_enable: true
noaa_map_country_border_color: "0xffff00"
noaa_map_state_border_enable: true
noaa_map_state_border_color: "0xffff00"
wxtoimg_map_offset: 10.5                    #Change this value only if you see map offsets from the ground on WXtoImg NOAA images

meteor_daytime_enhancements: '221 321 124 MSA MCIR MCIR-precip HVC HVCT ZA therm sea CC HE HF MD BD MB JF JJ LC TA WV NO enhanced-IR'
meteor_nighttime_enhancements: '654 456 MCIR MCIR-precip HVC HVCT ZA therm sea CC HE HF MD BD MB JF JJ LC TA WV NO enhanced-IR'
flip_meteor_image: true
meteor_jpg_image_quality: 90
meteor_draw_map_overlay: true
meteor_draw_cities: true
meteor_map_crosshair_enable: true
meteor_map_crosshair_color: "#CC3030"
meteor_map_country_border_color: "#FFFF00"
meteor_create_rain_probability_overlay: true
meteor_create_equidistant_projection: true
meteor_create_mercator_projection: false
meteor_create_spreaded_images_without_overlay: true

# web server configuration settings
#   web_server_name - server name to use for the TLS certs and web endpoint - this MUST be
#                     resolvable to the IP of this host (if you don't have DNS, simply use
#                     the IP of the Raspberry Pi host)
#   enable_non_tls - whether to enable a clear-text web listener (default port 80)
#   web_port - port to run the web server clear-text (non-encrypted) endpoint on
#   enable_tls - whether to enable the TLS-encrypted web listener (default port 443)
#   web_tls_port - port to run the TLS listener on
#   lock_admin_page - whether to require username/password when attempting to access the admin page
#                     of the webpanel - WARNING: DO NOT SET THIS TO TRUE UNLESS YOU ONLY HAVE A TLS
#                     ENABLED SITE - SETTING TO TRUE AND RUNNING A CLEARTEXT SITE IS ALMOST CERTAINLY
#                     ASKING FOR YOUR CREDENTIALS TO BE STOLEN MID-REQUEST
#   admin_username - username used to access the 'admin' endpoint of the webpanel (WARNING: see 'lock_admin_page' above)
#   admin_password - password used to access the 'admin' endpoint of the webpanel (WARNING: see 'lock_admin_page' above)
#                    NOTE: MAKE SURE YOU SET THIS TO SOMETHING REASONABLY COMPLICATED!
#   web_passes_date_format - format to display the dates in the pass list view - note that this MUST conform to
#                            https://www.php.net/manual/en/datetime.format.php or else bad things will happen
#   web_datetime_format - format to display date and time in the web interface for captures - note that this MUST conform to
#                         https://www.php.net/manual/en/datetime.format.php or else bad things will happen
web_server_name: noaa-pi
enable_non_tls: true
web_port: 80
enable_tls: false
web_tls_port: 443
lock_admin_page: true
admin_username: 'admin'
admin_password: 'changeme'
#web_passes_date_format: 'm/d/Y'
web_passes_date_format: 'd/m/Y'
#web_datetime_format: 'm/d/Y H:i:s'
web_datetime_format: 'd/m/Y H:i:s'

# log level for output from scripts
log_level: DEBUG

# whether to enable the satvis visualization for satellite tracking
# in the passes view - note that this iframe-driven visualization is
# by default disabled on "extra-small" devices such as phones due to
# the processing and space requirements
enable_satvis: true


# whether to enable the "Coronal mass ejection activity" display
# in the passes view - note that the GIFs can be ~70 MiB and not cached
# thus they slow down the page & can lead to quite big data usage
enable_coronal: false

# whether to enable the image video in the passes view - note that this
# is by default disabled on "extra-small" devices such as phones due
# to the processing and space requirements
enable_animation: false

# operating system configurations
#   disable_wifi_power_mgmt - if running wireless internet and you want to
#       disable "sleep" mode of your wifi device (assuming it's wlan0), set
#       this to true (note: updating this requires a reboot)
#   disable_at_mail - if you do not want "at" to send mail after job execution
disable_wifi_power_mgmt: false
disable_at_mail: false

# push processing settings for sending images elsewhere
#   * NOTE: Make sure you set up your ~/.msmtprc file before enabling email push!
#   enable_email_push - whether to send all images to an external email
#   email_push_address - if enabled, address to send all images to
#   enable_email_schedule_push - whether to email an image of the nightly-created
#       pass-list schedule to the email destination
#   enable_discord_push - whether to push images to a Discord channel
#   discord_webhook_url - webhook url for the Discord channel
#   enable_twitter_push - whether to push images to a Twitter feed
#     * see docs/twitter_push.md for instructions
#   enable_matrix_push - whether to push images to a Matrix room
#     * see docs/matrix_push.md for instructions

# Whether you want to contribute to creation of community created Meteor and NOAA composites gathered from RN2 stations from all around the world
# We do not collect any personal data
# Thank you very much if you choose to contribute :)

contribute_to_community_composites: false
contribute_to_community_composites_url: 'https://voxgalactica.com/upload'

enable_email_push: false
email_push_address: change@me.com
enable_email_schedule_push: false
enable_discord_push: false
discord_noaa_webhook_url: 'https://discord.com/api/webhooks/1135901731918717068/ZELG3Sv1fRxQ8KgoYtMMOBYM07az0yIkzeLdad-8WxxhV-F8LhPQdZFFon044awMvLsD'
discord_meteor_webhook_url: 'https://discord.com/api/webhooks/1135901731918717068/ZELG3Sv1fRxQ8KgoYtMMOBYM07az0yIkzeLdad-8WxxhV-F8LhPQdZFFon044awMvLsD'
enable_pushover_push: false
pushover_link_url: 'https://<url-to-webpanel>/captures/listImages'
pushover_apitoken: ''
pushover_user: ''
pushover_prio: 0
enable_twitter_push: false
enable_bluesky_push: false
enable_mastodon_push: false
enable_facebook_push: false
enable_instagram_push: false
enable_slack_push: false
slack_push_url: ''
slack_push_to: ''
slack_link: 'https://XXXX/captures/listImages'
enable_matrix_push: false
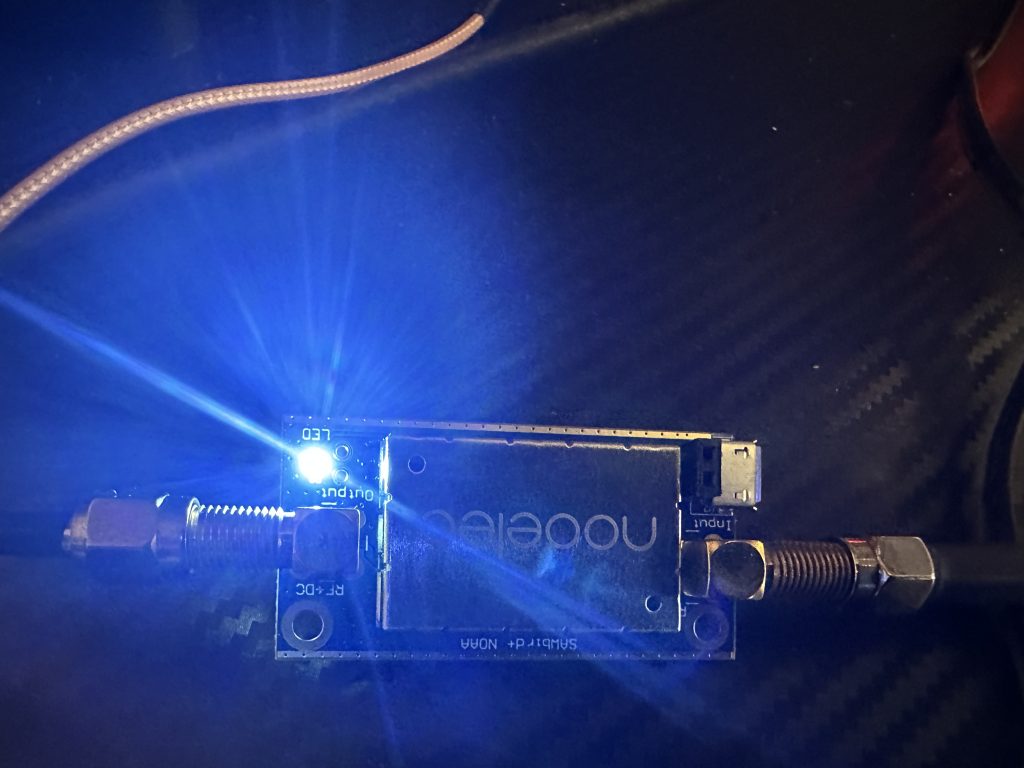
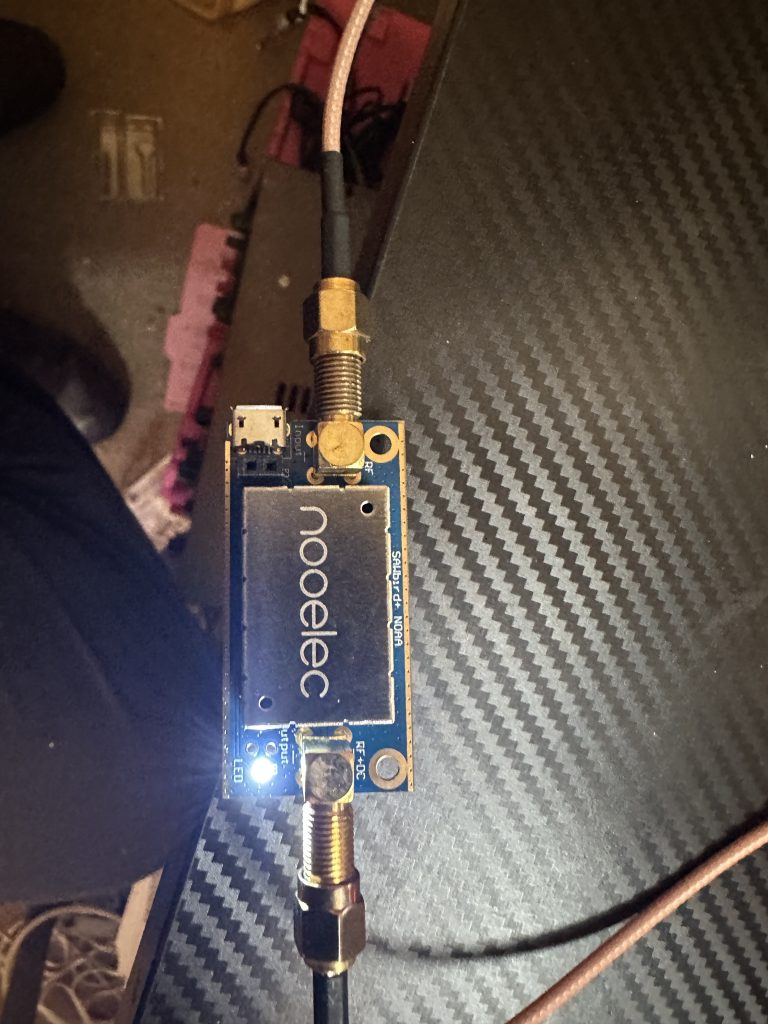
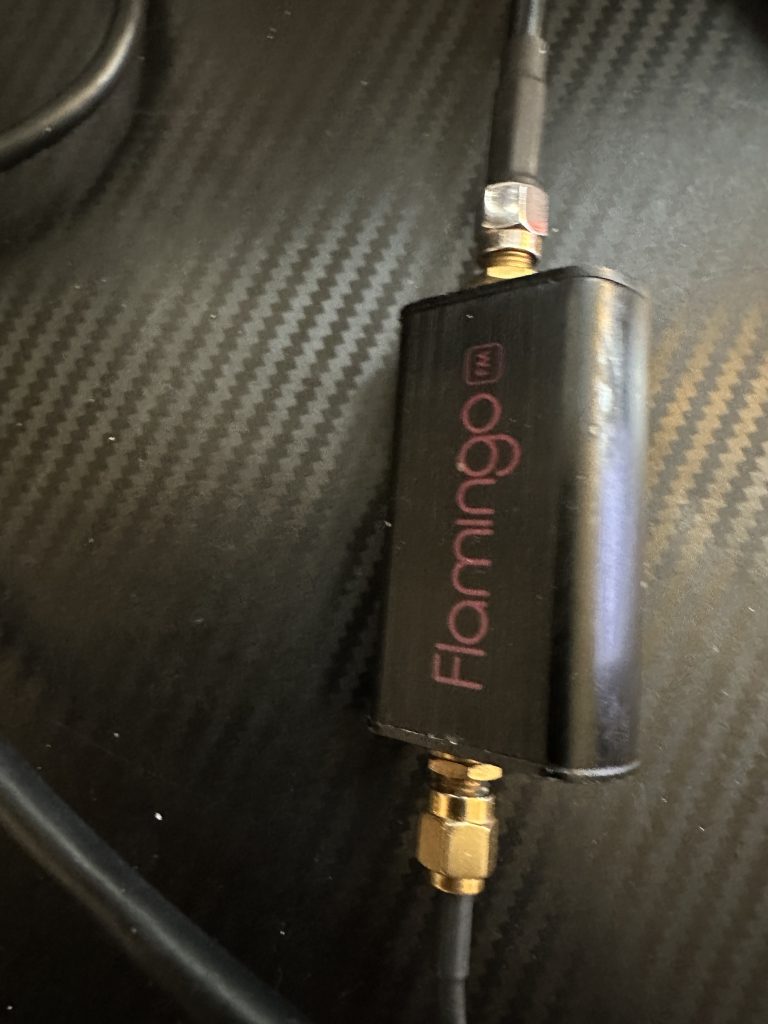
The important changes are based on your SDR. I’m using a nooelec SMARTee which produces the bias-t voltage for the amplifier and flamingo signal blocker. Please note I am *not* using a DC Blocker with this configuration as it is not required, you will need to check if your SDR needs a capacitor or Nooelec DC Block if it is not the same SDR as my the I am using
lsusb
Bus 001 Device 006: ID 0bda:2838 Realtek Semiconductor Corp. RTL2838 DVB-T
I attached my original Sawbrid NOAA amplifier and the Flamingo FM band blocker, but my first attempts at receiving the images was disappointing.
initial results
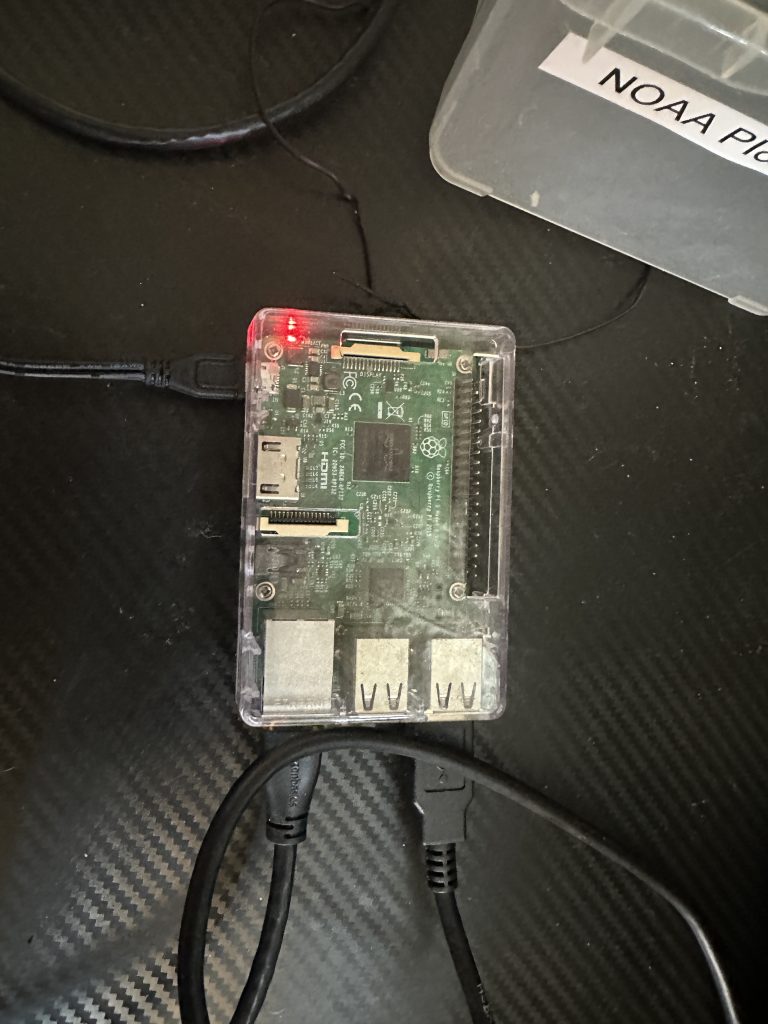
I removed other components and directly connected the SDR to the Pi and the anntenna to the SDR. This proudced better results, but nothing as good as the antenna should be capable of. Even tho this is a RPI3b and doesnt suffer from the same Wifi/Bluetooth Issues that the RPI4 does with NOAA reception, I still moved the SDR away from the Pi, as it was geting hot. The resulted in improved signals so I again inserted the Sawbird NOAA antenna.
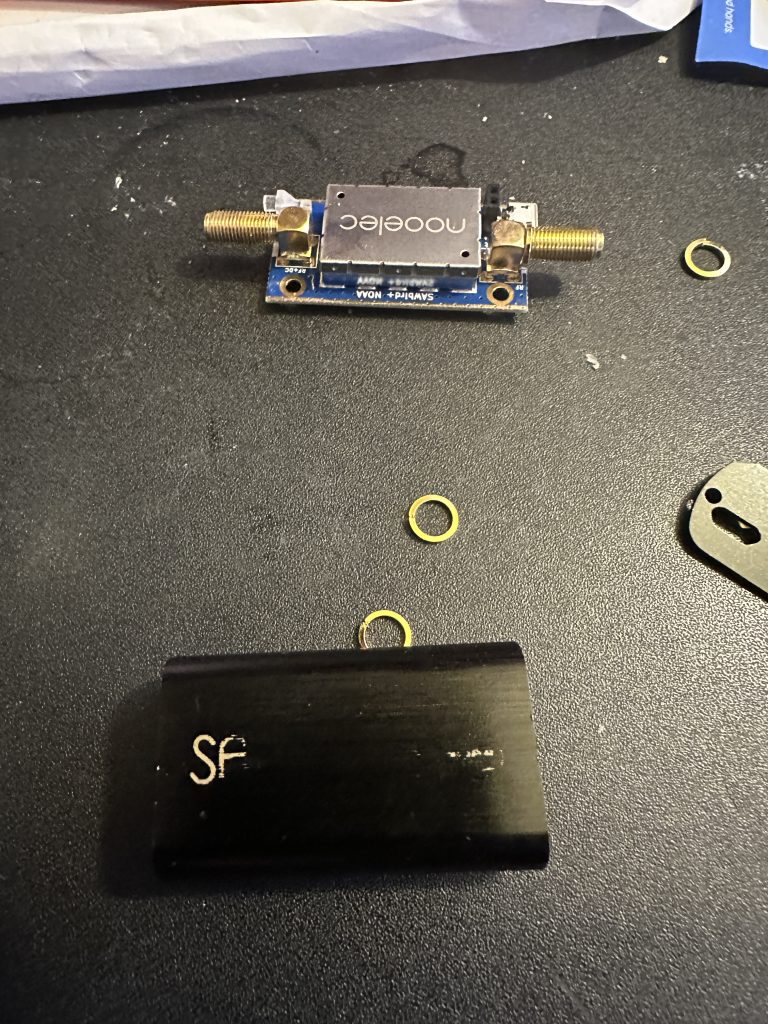
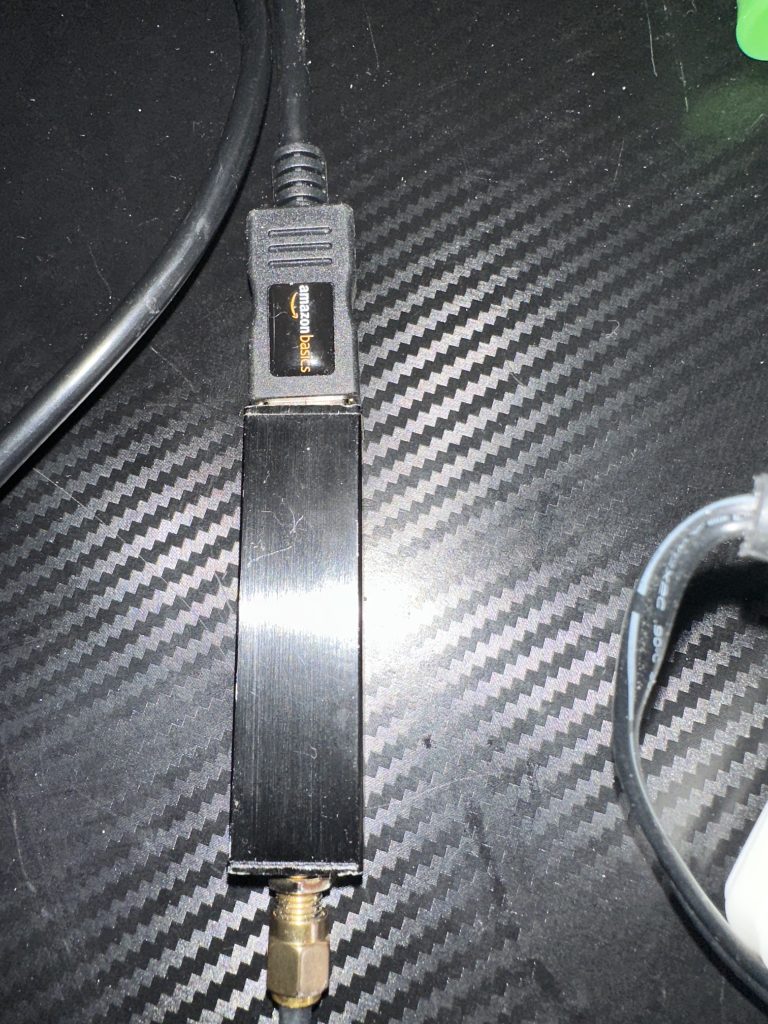
This resulted in static being received once again, so figured that I had blown up the pre-amp by supplying it too much voltage, therefore I bought a replacement bare bones amp board from amazon, which at £37 pounds seemed reasonable. I was really impressed that I ordered the amp early in the morning (around 8am) and it was here the same evening by 6pm. Upon arrival I immediatly inserted it in the signal path.
barebones boardpower via bias-t
I was not to be disappointed, i was soon picking up NOAA pictures like before, as one of my IRC friends used ‘crisp’ defined the pictures that where now coming through.
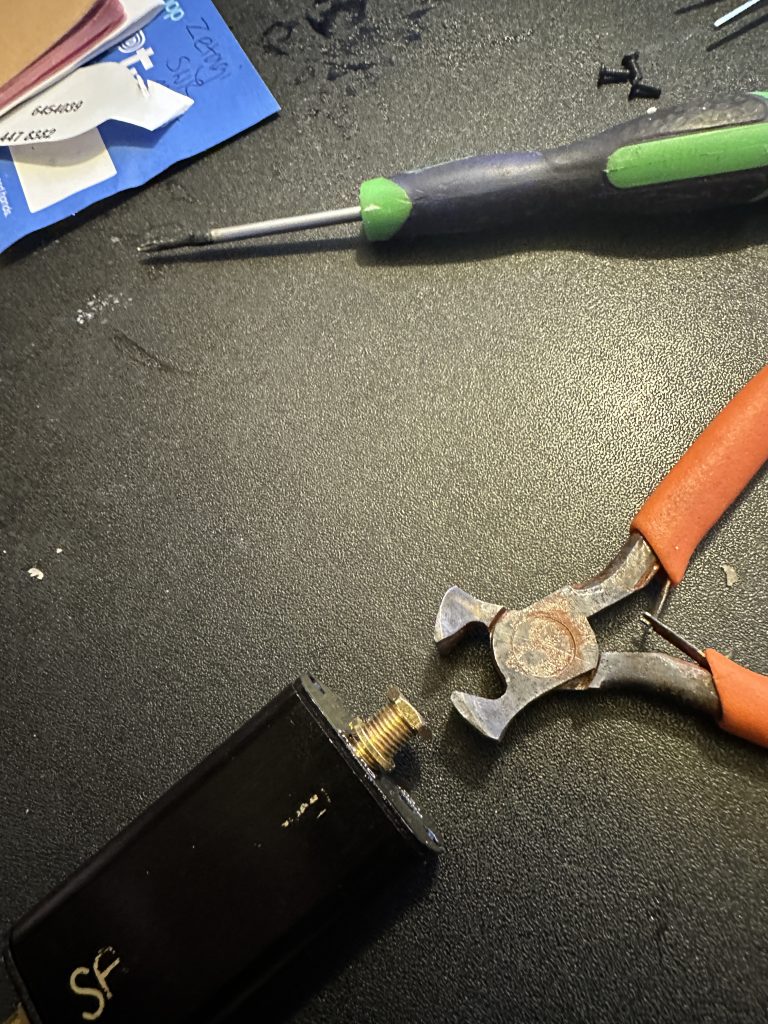
I set about re-housing the amp back in the broken amps container, but imagine i must of connected something wrong as the signal was again reduced to static.
remove old boardtighten screwsrehoused
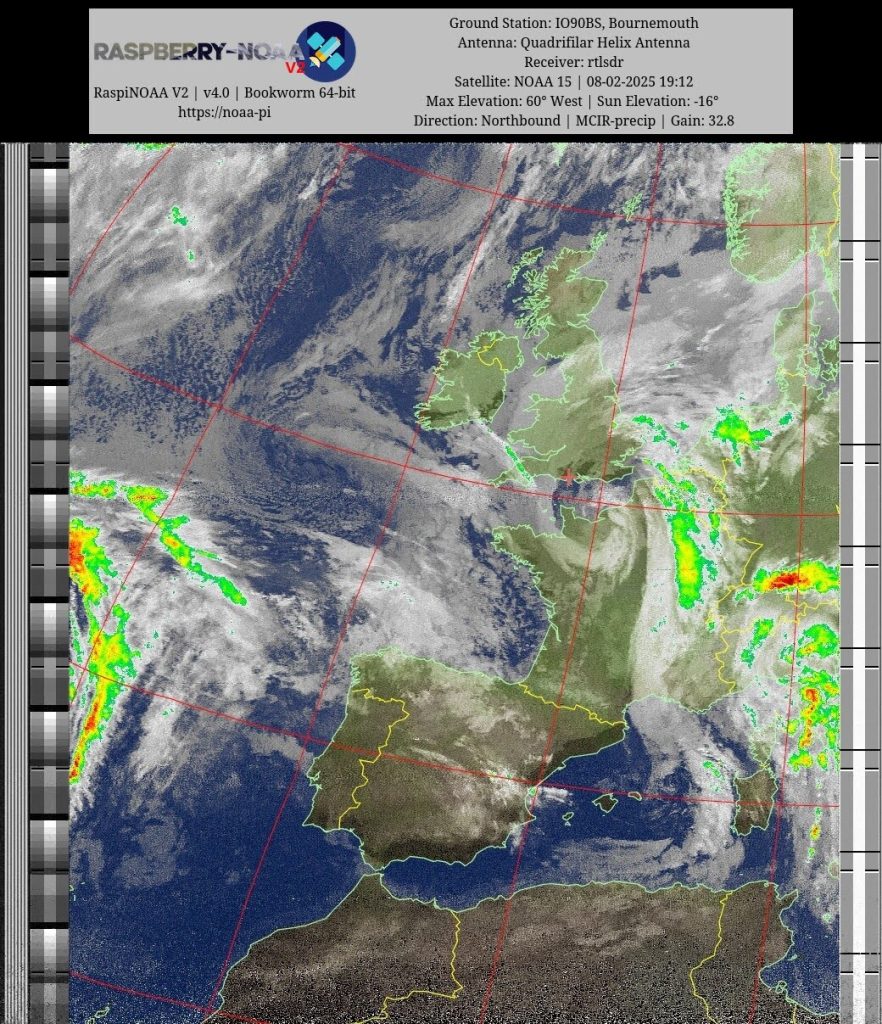
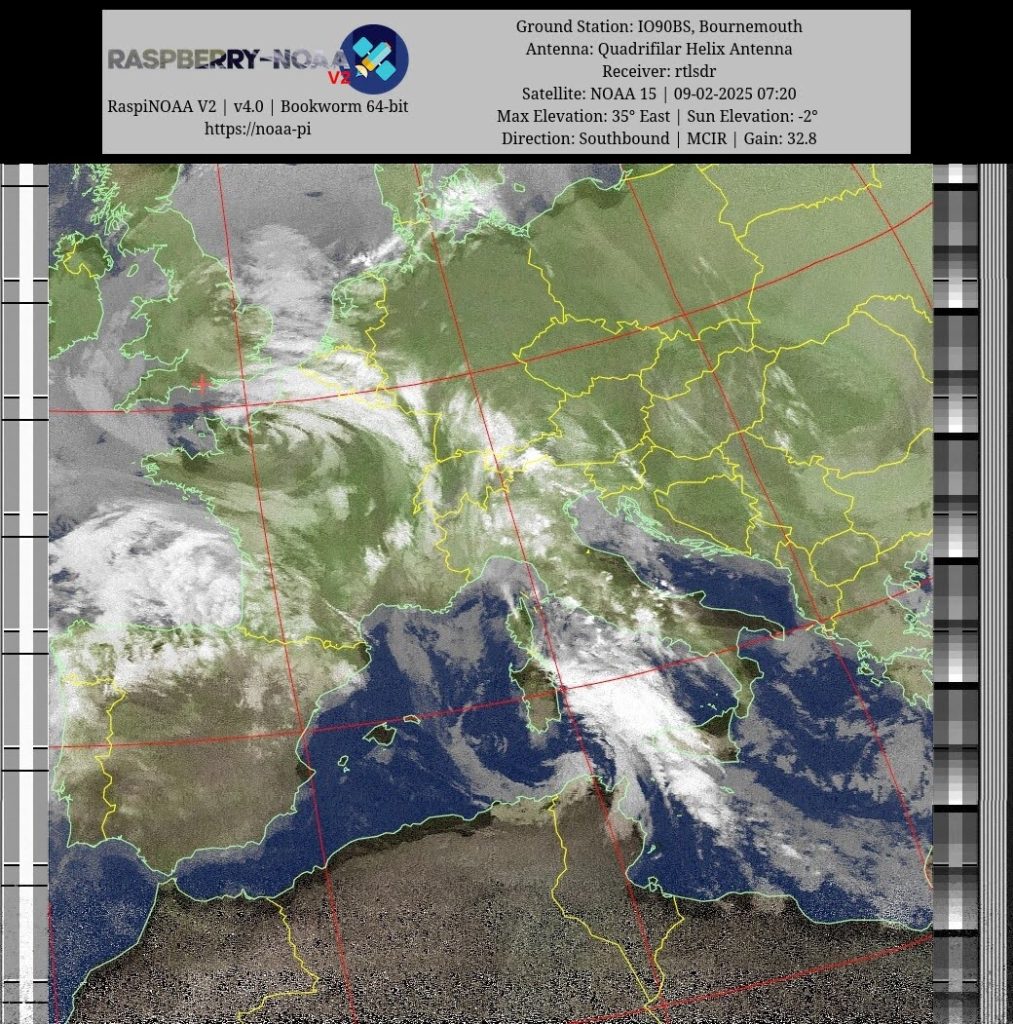
It was a quick enough job to remove the casing and restor the amp to its ‘naked’ form, then continued to receive NOAA images and METEOR that where fantastic. I modified my config so the static was clipped from the images, resulting in even more presentable images.
fantastic imagescrisp
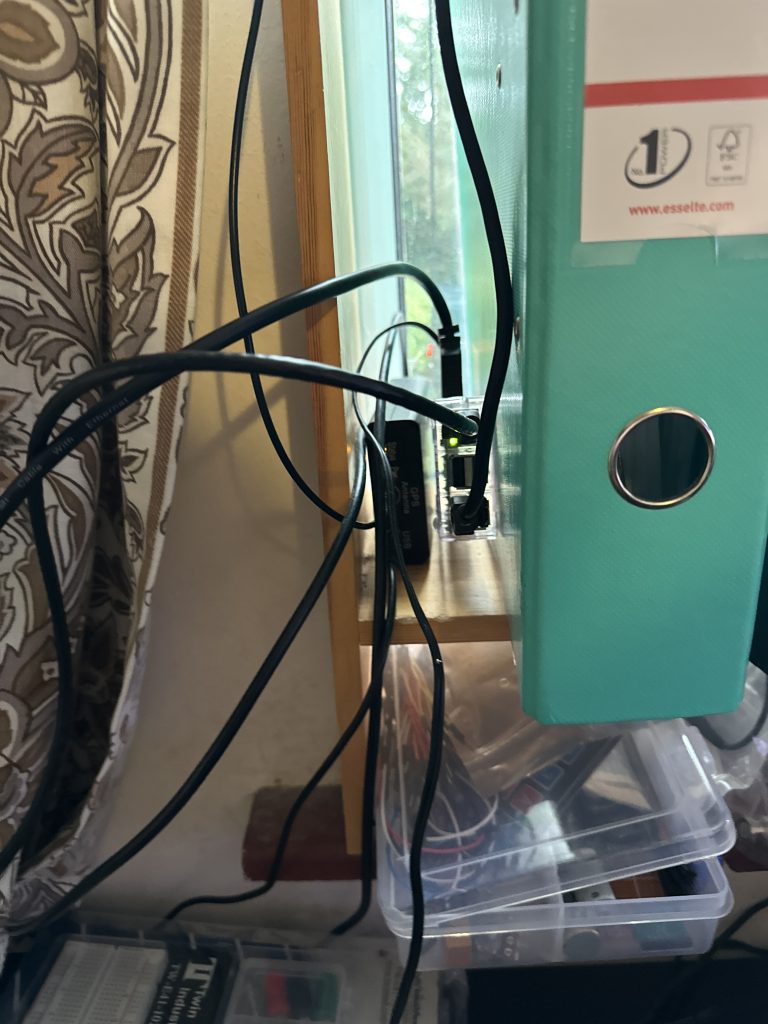
I set about making a better home for the SDR and signal chain, what is important is to keep all parts of the input signal away from any interference, espeically noticable is DC supply voltage if the amplifier or noise blanker get near a power supply or power feed wire, the ‘classic’ 50Hz mains hum is very apparent in the pictures.
Pi..SDR via extensionAnpFM Filter
So the feed chain is made totally clear, this is how I have setup my NOAA station.
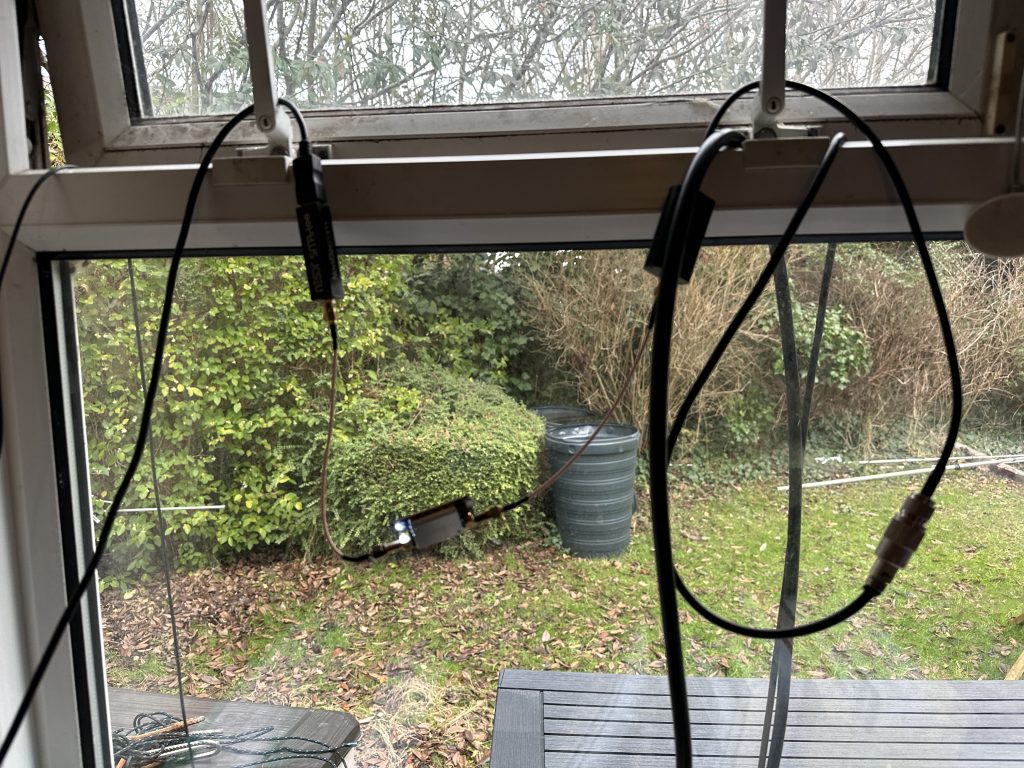
To get the working setup off my desk and reclaim my research area, i have ‘hung’ all the components over my window handles, and this works really well ! The RF signal is well isolated from any interference and the components are well away from any potential sources of damage. I did consider ‘bundling’ them into a box, but thought the sake of a ‘tidy’ solution, it could introduce more issues, this way i have a nice air-cooled working solution and the light on the amp looks really cool as well !
NOAA dashboard landing page
I had modified the date format in the config so it was UK friendly which made the date the usual format (dd/mm/yy, hh:mm:ss). With that the pictures kept rolling in. It needs a degree of patience to get the settings right, your more than welcome to copy my gain settings if you have the same setup, even if not, just turn off the bias-t and see what your milage is like !
I was overjoyed at the excellent METEOR pictures, typically there are at least two passes a day of METEOR-M2 sats, and the images are very high defintion.
The above image is without clicking to get further detail out the picture as shown below..
The level of detail from these satellites really blows me away !
I went about my normal day of study activities and going out and it was always a pleasure to come back to a set of new images avaialble from my very own satellite image receiver ! Whilst the image does have a band of static across it, i was astounded that I still pick up the signal whilst the satellite went across Northern Africa ! Not sure if propergation had change, but I was really impressed with the setup and that the time spent on setting it up and now just letting it run was worth all the effort !
I will still get on the air in the evening and am setting up other SDR’s for the SSTV repeater and Wellbrook antenna to have a TCP controlled SDR I can listen to from my desktop .
Thanks again for reading my blog and I hope this inspires/helps others to enjoy other aspects of this amazing hobby that is radio.
The end of march saw a long weekend and the opputnity to do some work around the QTH. I wanted to make some progress on getting things a bit tider and also migrating the eggbeaters from the current trying/temporary location to up on the main mast. This would take quite a bit of physical effort, so was best done in stages and over a couple of days that the east bank holiday gave me.
first thing first, get the antennas out the trees !
The high levels of rainfall and wind combined to see that the egg-beaters fell victim to high winds, even with heafty guying stake pins and the tilt base, the soft ground wasnt able to hold the egg beaters. Thankfully no damage done and I was soon securing and lowering the eggbeaters to take them off their ‘temporary’ home.
end of the first days work, main mast and egg beaters ready for putting up
I had breaks and a nice time out in the sunshine, quite unusual for a English bank holiday weekend, but it was nice to get out and about locally, we didnt venture too far as to avoid the masses travellign miles to get to Bourenmouth. By the end of the day I had main mast down, and the egg beaters ready to put up. I was planning to put a mast-head preamp for the vertical, but high SWR meant I had to leave it out this time, I will be investigating and probably sending back to the vendor for repair.
Day Two
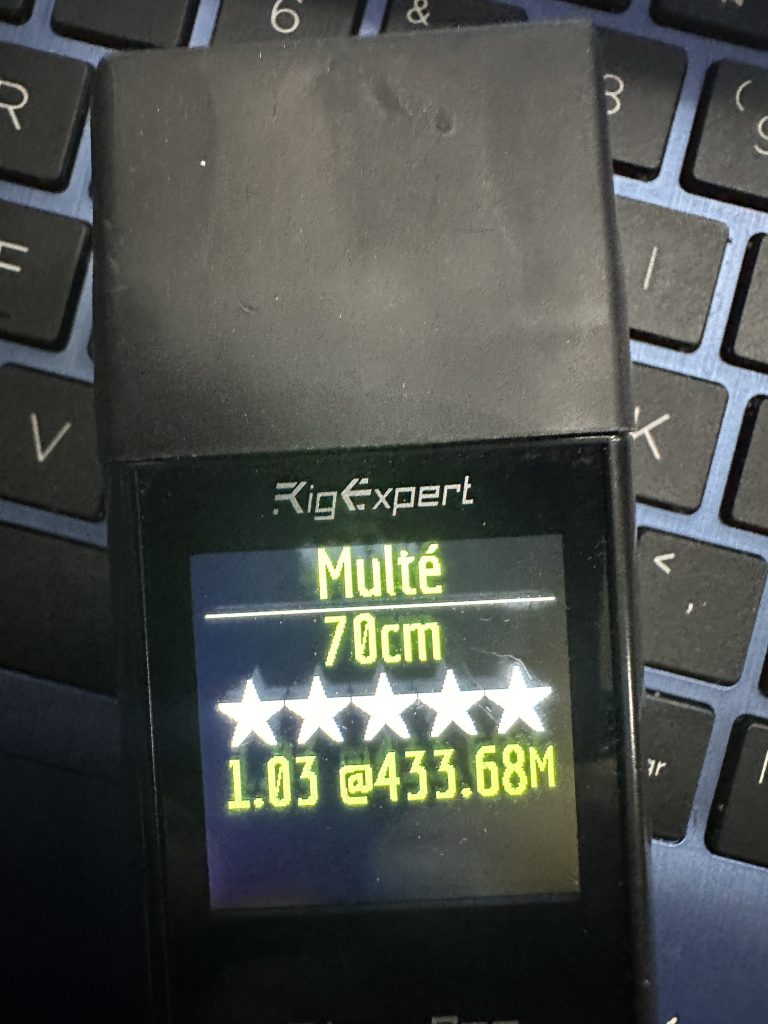
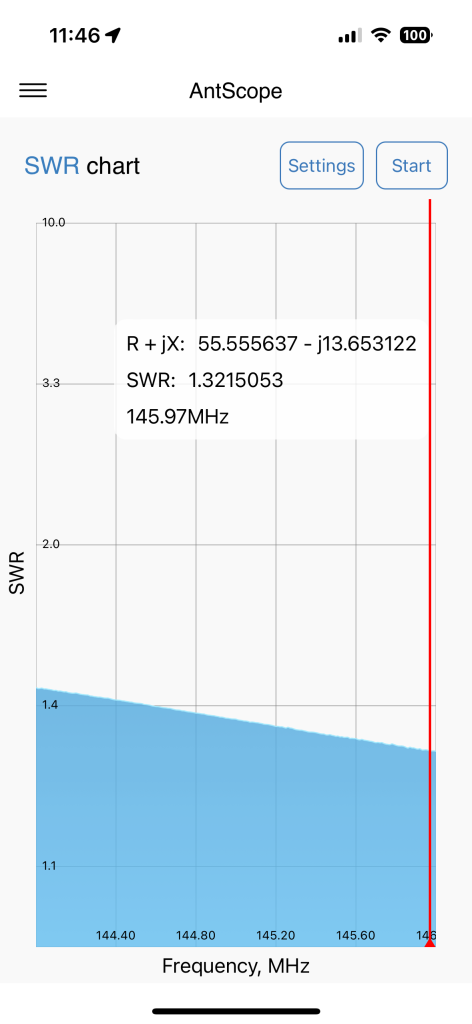
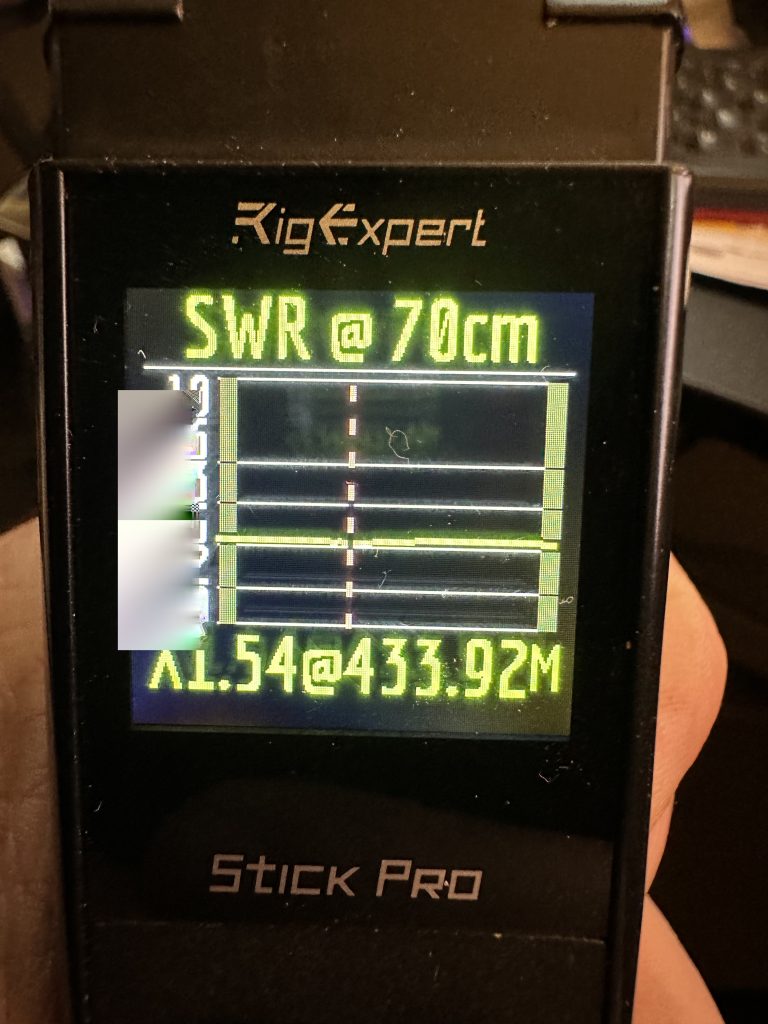
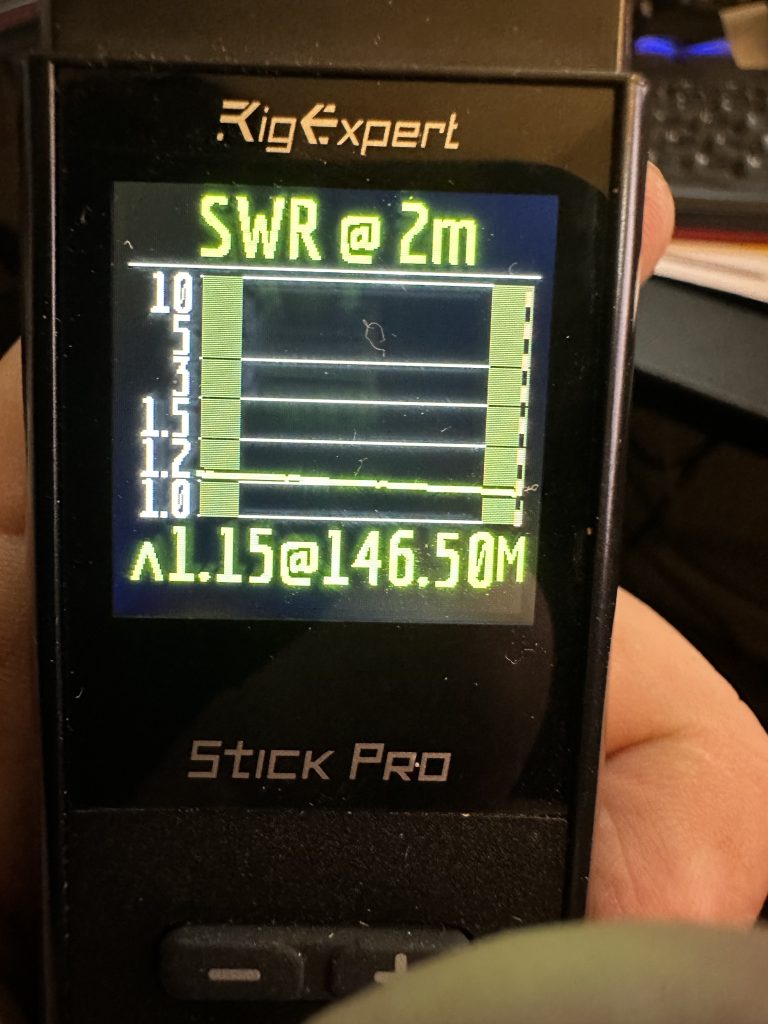
very good SWR70cm2m
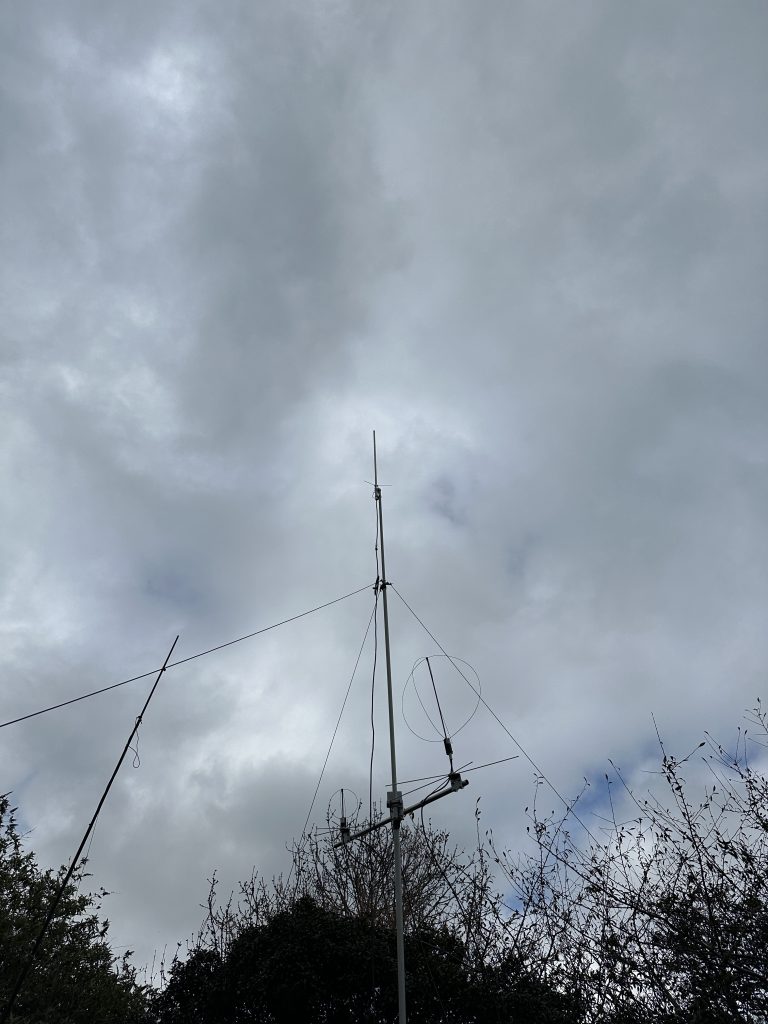
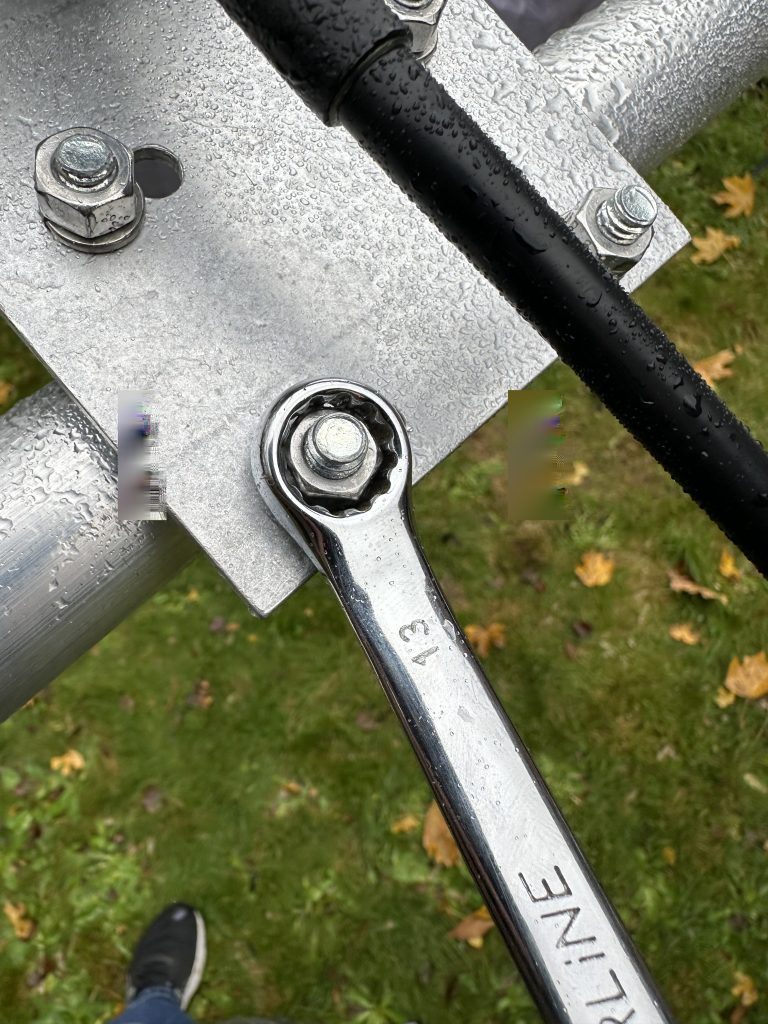
Day Two I got the Diamond X-30 on the very top of the mast, its is considerbly lighter than the X-7000 and even at half height I was able to get into my favourite 2m and 70cm gateway/repeaters (poole & southampton). I then set about putting the eggbeaters onto the mast.
Initially I put them on a lower (4th section of mast ) but found this too low, so I re-attached the egg beaters to the 3rd section. With plenty of prep I was able to get the egg beaters on and the use of the ratchet spanners really helped in securing the egg beaters both times to the mast. When your a meter up on a thin walking gantry, keping organized is essential and having things to hand ! Sure enough I was soon able to get the eggbeaters and the 70cm mast head up all setup. I put the new LMR400 on the antenna and tested from the base, then extended to the shack, the SWR results where satisifactory at around 2-3 meters off the ground.
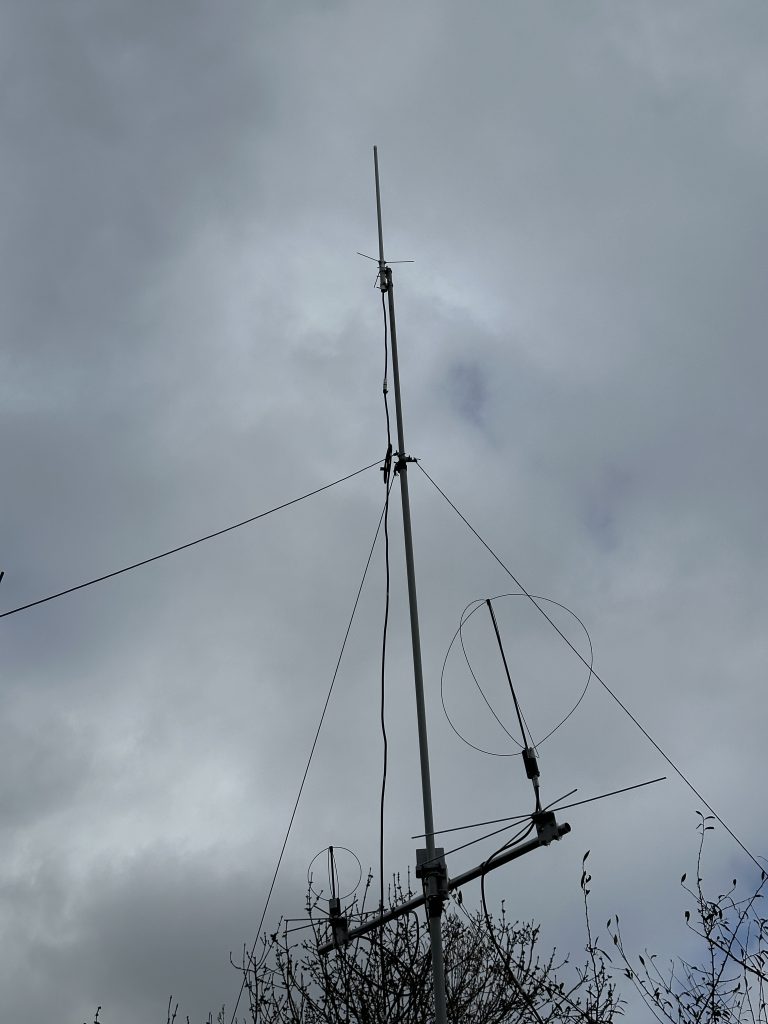
view from the gardenthis can go higher stillegg beaters above tree level
Day 3 (Easter Monday)
Having tired myself out the previous day, it was now time to get the antennas up as high as I was comfortable with to start with. This mast will go up to 40ft in the the air, currently I have it at about 33ft (minus one section) – I saw a previous video where I had just the X50 on the mast and fully extended to 40ft, so know I can rig the mat to get higher, but for today I was pushing up to 33ft and seeing how the antenna done. I was higher than in the corner on the temporary mast and had a much clearer line of sight in most directions. The additon of better quality LMR400 probably helped with less signal loss back into the shack and into the antennas as well.
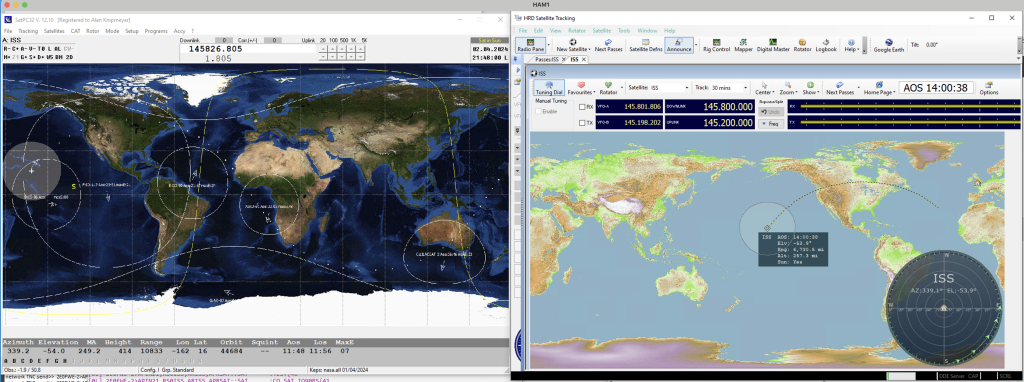
I started out by playing with HRD and the Sat Mode, the UI is really simple and easy to use for HRD and I like the graphics of the sat passes and the real time pass graphics.
HRD Sat module – Tracking the ISS low pass
The trouble i had with HRD is that its very intrusive to the IC9700, it near enough ‘locks’ the radio, even with the ‘manual’ frequency change selected, it would drop / loose the connection to the radio. I imagine the CAT signals between HRD + IC9700 are causing some conflict. Also I found that whilst eaiser to program, it wasnt perfect. THe doppler was good and alot of sats worked perfectly, but the linear sats, where a spectrum of frequncys are used during a pass, seemd more difficult to use. I would get up from my chair to tune the radio manually and then I was able to track the QSO’s, which was very exciting just to hear new and strong signals coming in.
I then tried to track/use LILACSAT-2, the satellite passed near enough right over, so should of been very clear to hear, and others on the satelitte tracking pass had heard it that day. This got me wonder if the tracking/frequencies was good for all satelllites. I turned my attention to SatPC32 – its UI is no means as ‘friendly’ or ‘good looking’ as HRD, but once the technical learning is done, it really does to work much better.
SATPC32 for CAT + HRD for Visual
With some time editing the DOPPLER.SQF and SUB_TONE.SQF I done CAT control via SatPC32 and visuals via HRD. This for me a a nice setup, as i could visually see the future passes and also have the right modes / doppler from SatPC32.
Day – Back to work and in the Shack
I wanted to try something that I was unable to do due to the weak signals from the previous location, so the APRS digipeater on the ISS was a good target. The iSS Crossband repeater gets VERY busy, but I reall enjoy listening to it, but I actually wanted to try out using the ISS from my egg beaters. This wasnt possible before as the APRS packets would be corrupted/too weak to decode.
I was very happy that once I had tuned into 145.825 FM-D I was able to receive APRS packets as clear as day, and unusually the ISS had several passes today, making the chance of actually working the ISS digipeater quite reasonable.
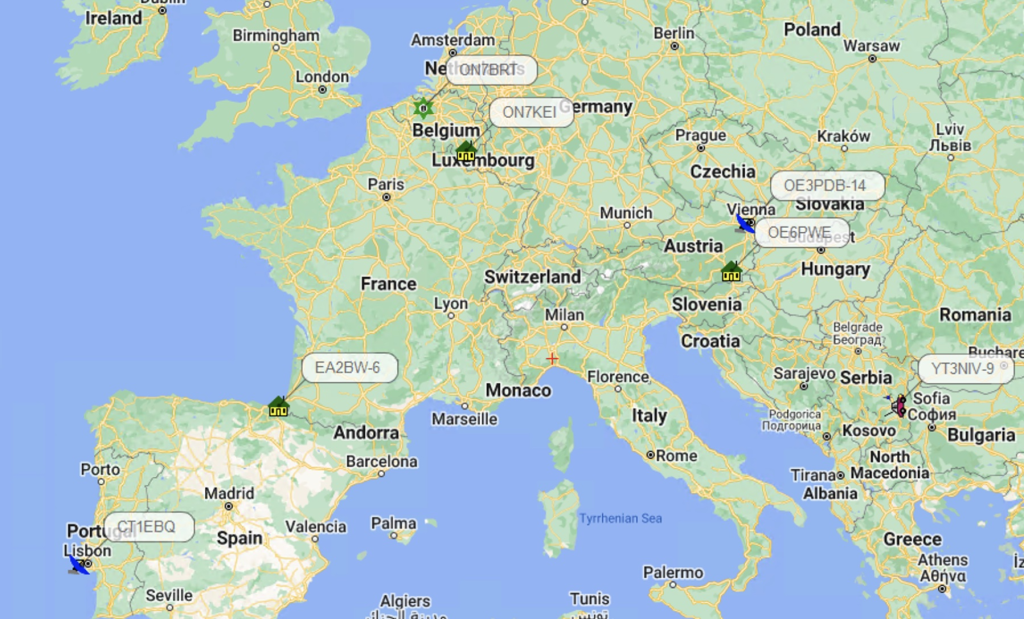
To start with I didnt do any special config for Direwolf, just a standrd 1200BPS and listen / send on the correct audio devices. This saw alot of packets correctly decoded. As I had used APRS before, my favourite, and free/donations is Pinpoint APRS software. I downloaded this and connected it to Direwolf. Sure enough the packets being decoded appeard on the map all across Europe in real time ! It was really amazing to see how well the egg beaters in their new postion was doing, and even on 2m where no mast-head amp was in place.
Pinpoint APRS decoding packets from ISS pass
As I continued to work thru the day, I enjoyed how each pass of the iSS brought in so many contacts on 2M via the APRS digipeater. I was really eager to try and get into the digi peater myself, and there was one more very low pass coming thru in the evening !
I searched the internet on how to setup for APRS via the ISS, the most important thing is to update the PATH, usually this is somethign like WIDE-1, WIDE-2 so other digipeaters will repeat the packets, but fo the ISS DIgipeater, this needs to be RS0ISS. I saw others also using ARISS so I put both in my path to make sure my packets would be repeated by the ISS Packet station.
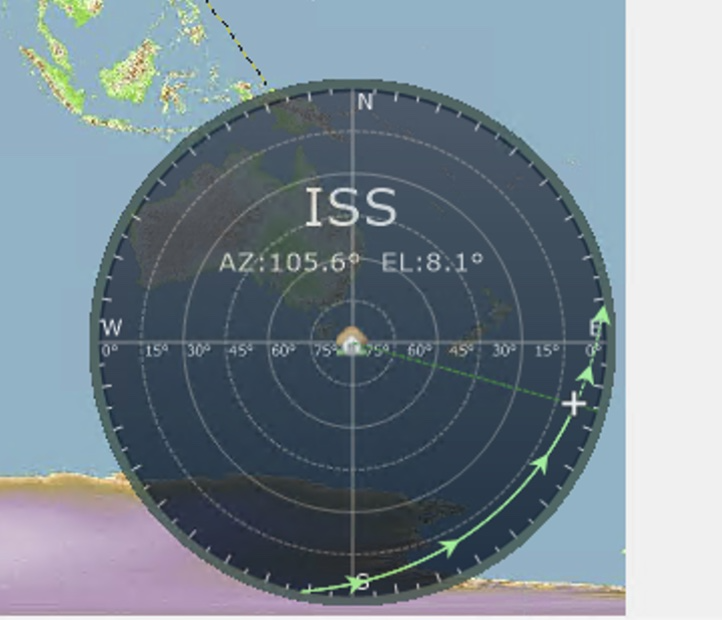
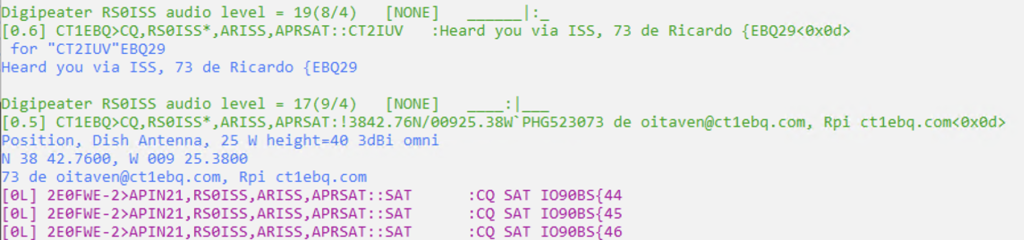
Direwolf receivng messages at a very low was (9 degrees above horizon) and me transmittingl.
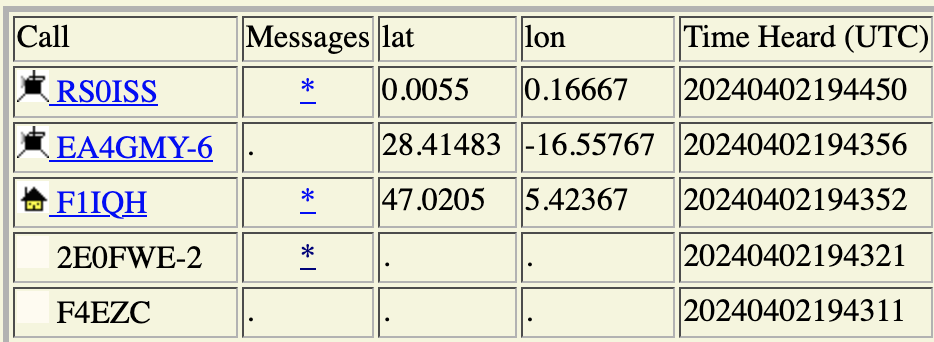
I transmitted a few times, I didnt receive my own signal back but was really please to see that on the ARISS webpage by packets had been received and re-tranmistted by the ISS !
No location, but I was heard !
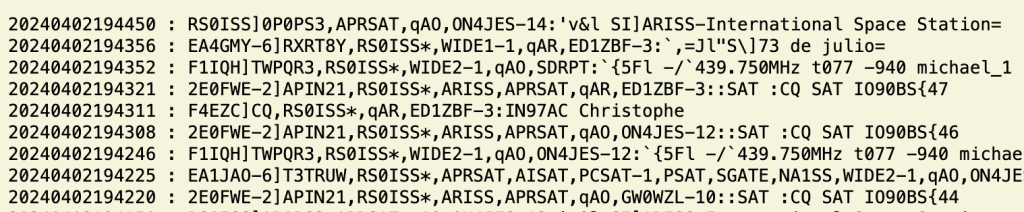
The raw data lower in the page confirmed my message was processed by the ISS APRS digipeater and am really excited for future passes that I should be able to have a QSO, several of which I had seen other operators do and request logging via LoTW which does Satellitle logging.
Raw data from APRS Digipeater on ISS
So whilst it has been hard work and its still early days with room for futher improvements, it seems all the hard work has really paid off. Heres to more ‘working the birds’ and looking forward to making a QSO.
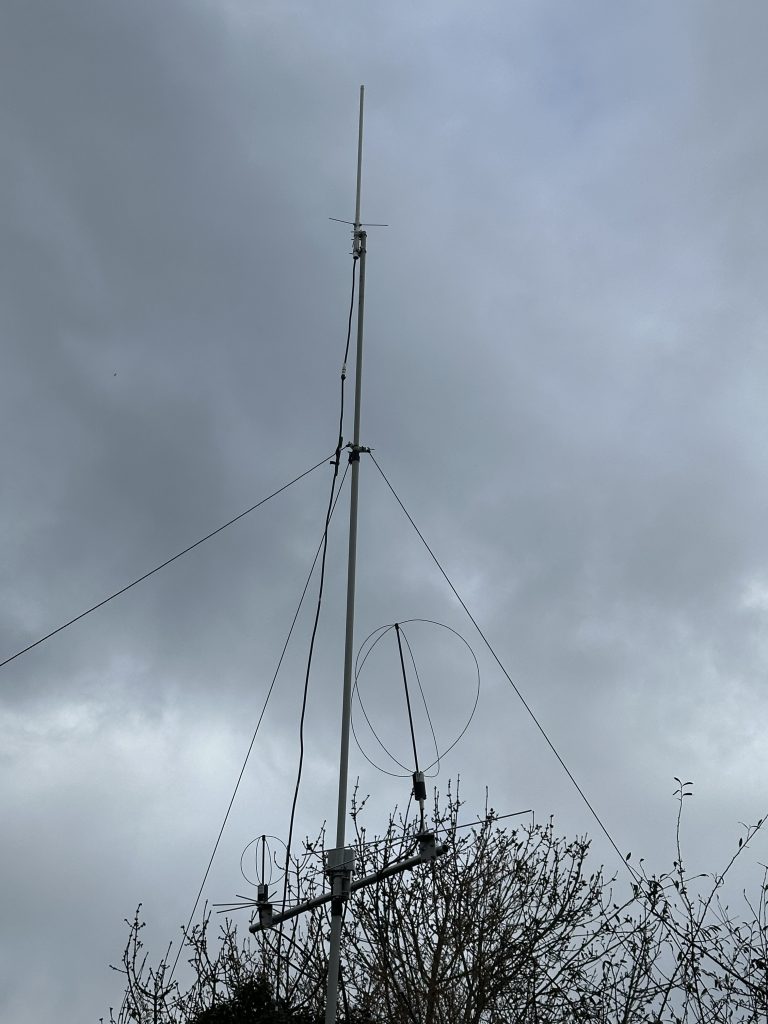
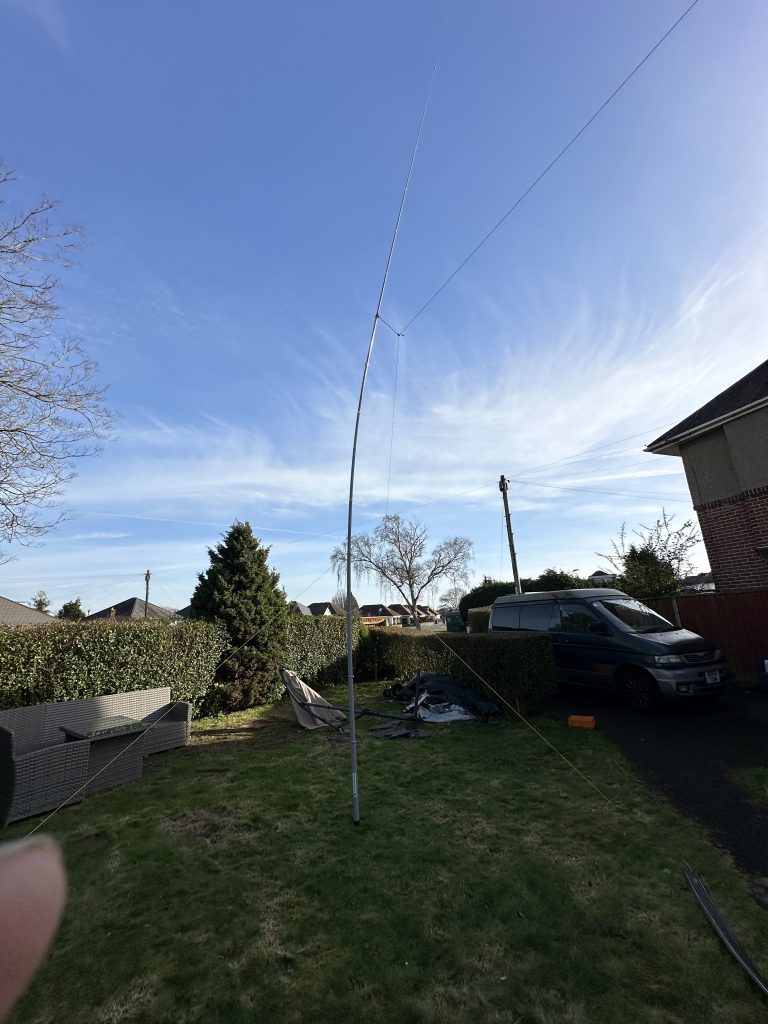
With some rather nice weather and available time, I was able to get to work on putting up the SOTABeams Travel Mast as a repacement of the DX Commander classic mast which has done me so well for serveral years, and one of the guying rings finally sucumbbing to the storms we had at the start of the month.
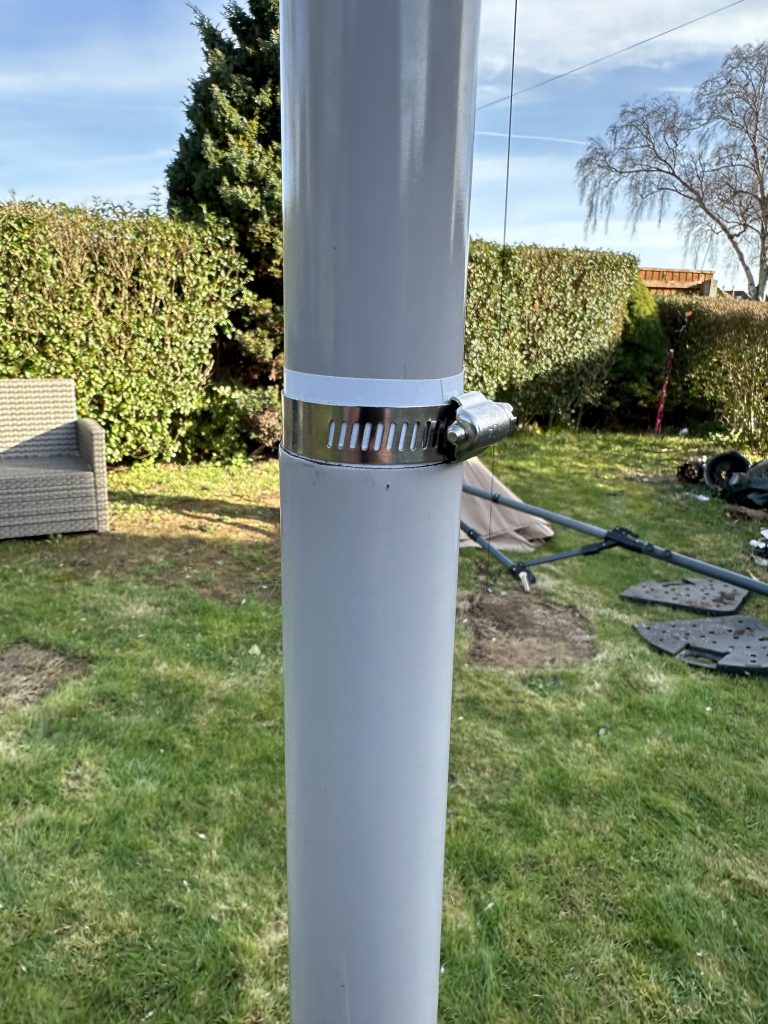
Use of electrical tape and jubilee clip to secure mast sections vertically
I put electrical tape and a jubiliee clip on each section to secure and make vertical slipping less of a possiblity. The same method worked very well for the DX Commander in keeping the sections up and those had to take a considerable strain when used in the way to use the split-dipole that the DX Commander is.
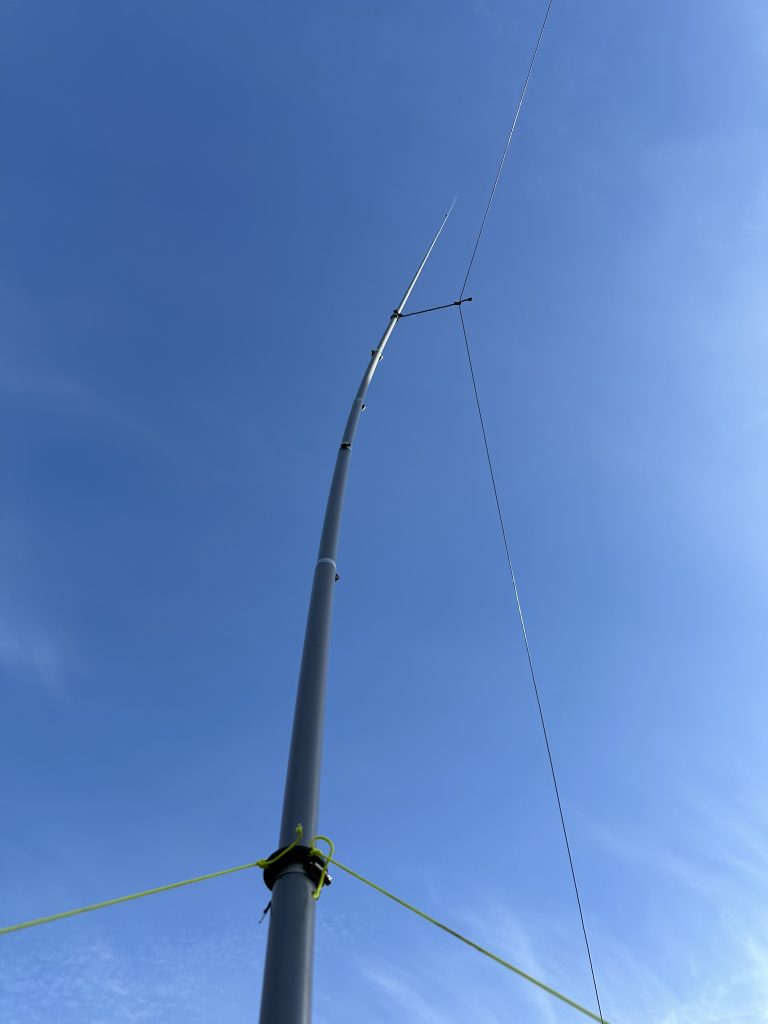
Wire up about 2/3s of the full mast height
I attached the wire to the mast via a piece of guying rope about 2/3’s up the mast. I may make this higher the next time I move the antenna, but as is, it clears the house nicely and is a good distance from the ground, I think more height will allow a full half-wave on 20m so something I want to do very much, given I enjoy SSTV on the 20M band alot.
guying and little strain
There is very little strain on the mast and a good level of taughtness to keep the wire from drooping and touching the house, the one set of guying wires are holding the mast very well, combined with some decent ground stakes.
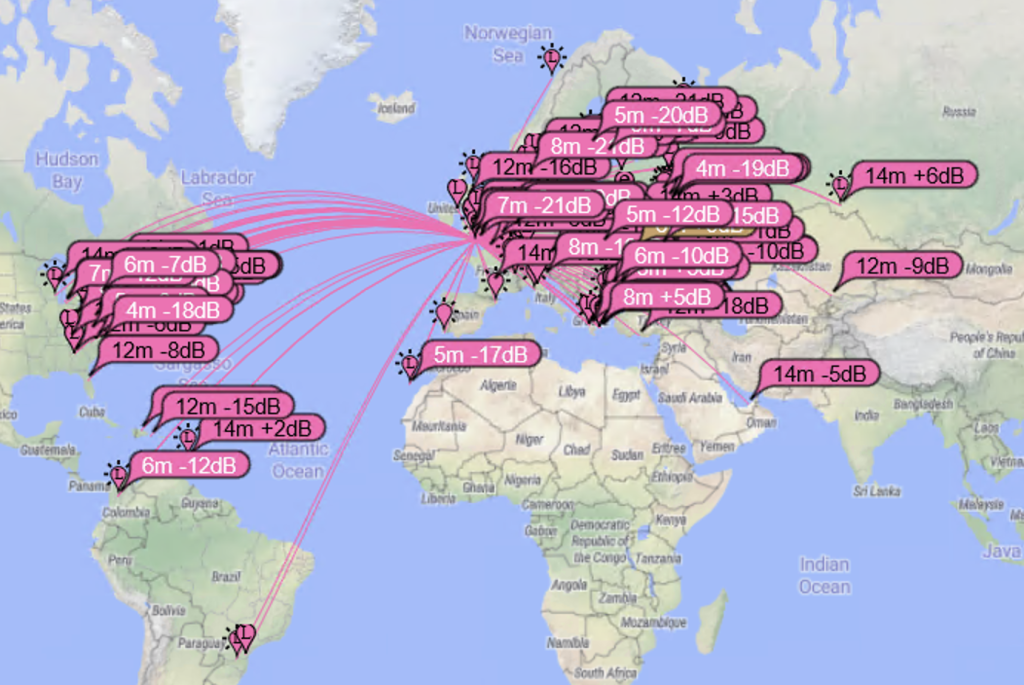
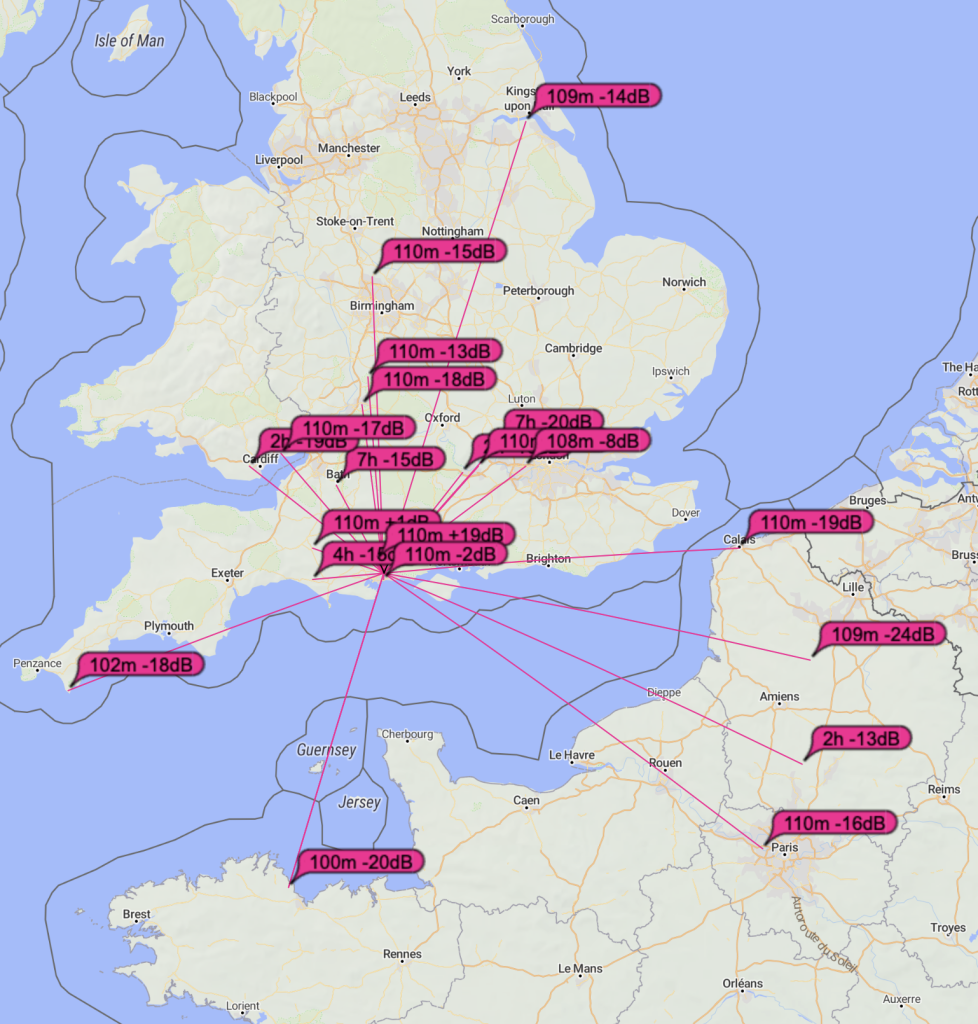
I went into test the mast, 20M SSTV was simply flooded with QSOs – unable to get a QSO in as the band was so buys, but I guess thats a good thing showing that the reception was doing well. I jumped on FT4 on 10M as the band was well open.
FT4 on 10M doing very well on the EFHW antenna
I was very please to test the antenna and have a FT4 contact with JS9DS in St Lucia over 4000 miles away !
I’m very pleased with the mast and will improve upon it as the weather and mast moves to allow us to use the front garden more. Looking forward to catching you on the airwaves !
Firstly Merry Christmas ! Its a relaxing day here and not the usual busyness for a Monday! Having an extra two days for the weekend has been really nice, I’ve done loads of other stuff and also playing with IC-9700 with the satellities, or attempting to, would be more accurate 🙂
So far I’ve heard zilch, as in nothing, not a tweet from a ‘bird’ I looked up Amsat’s tracking of sats other had heard, so would be confident that I should be able to hear them too, alas to no avail. I then tried FT8 on 2M, I was getting out just fine with the eggbeaters, but not hearing a thing, I did notice some very high peaks of QRM on the WSJT-X ‘scope’, so my first step was to move the antennas further from the house and a better line of sight of the sky to the horizion, which accomplished, well, nothing.
I then tried SSTV via a my hand held units into the IC9700 and MMSTV, this worked fine, so the 2M antenna was at least receiving and transmitting. I went to 70cm and found a clear frequncy and gave the same SSTV test, this worked fine… so what was going on ? Ok simple test, lets swap antennas between the Diamon X3000 which goes into the Kenwood, put that onto the 9700. Again,
WSJTX FT8 2M
No problem getting out with FT8 and no problem on SSTV. I tried WSPR with 5 watts on all three antennas, the egg beater 2M worked fine.
WSPR on 2M
I then checked thru the IC9700 settings, all good there and used the manual ATT/P.AMP switch on the front of the radio it self, what I noticed was that the internal preamp did increase the signal, but with the external pre-amp there seemed no increase in performance.
What I suspect is happening is that my mast-head pre-amp is designed for a single feed of coax into it, then into a single verticle antenna, where as I have splitters each end for taking the coax and seperating out the 2M and 70cm bands. By the reckoning I can hear local 2m fine (including MB7IPD) on the egg beater, I suspect that the 70cm RX is doing nothing, although the antennas resonent for TX, I think the multiplexer and multiband masthead are not working together correctly.
As its getting dark now, and have the luxury of another day off tomorrow, I will research which sat’s are most common and which band the RX is the most common, then I will setup a single feed for that antenna into the mast-head amp, and run two feeds from the egg beaters, then I should be able to find out if its the egg-beaters/coax/multiplexer causing the lack of ‘ears’.
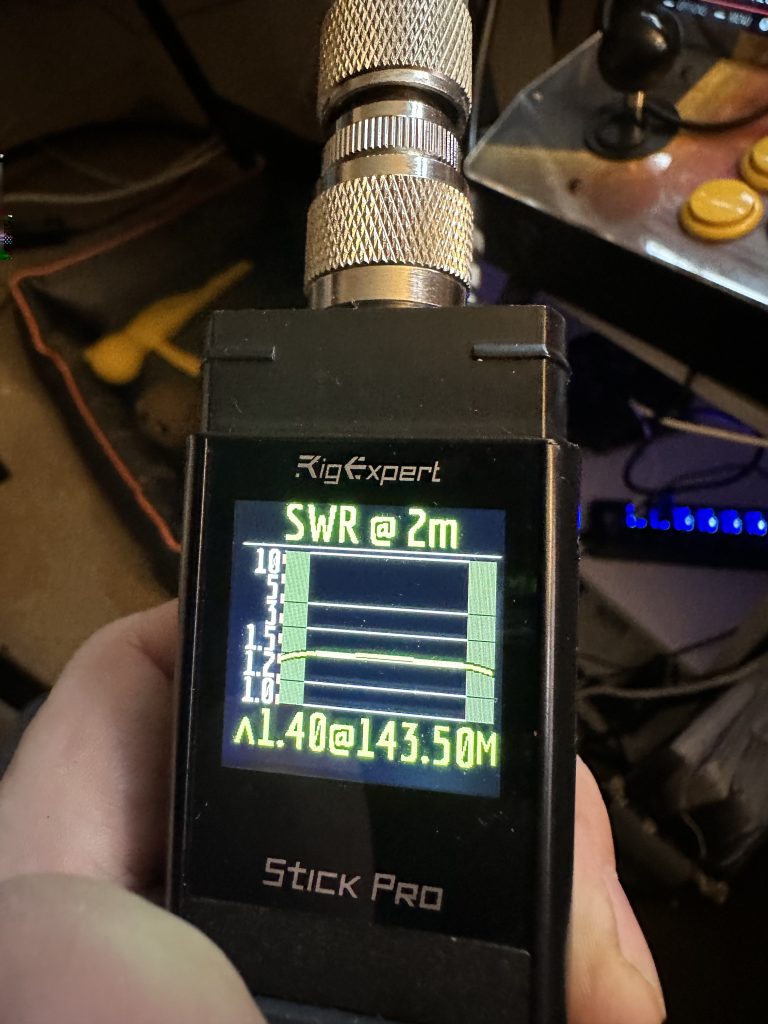
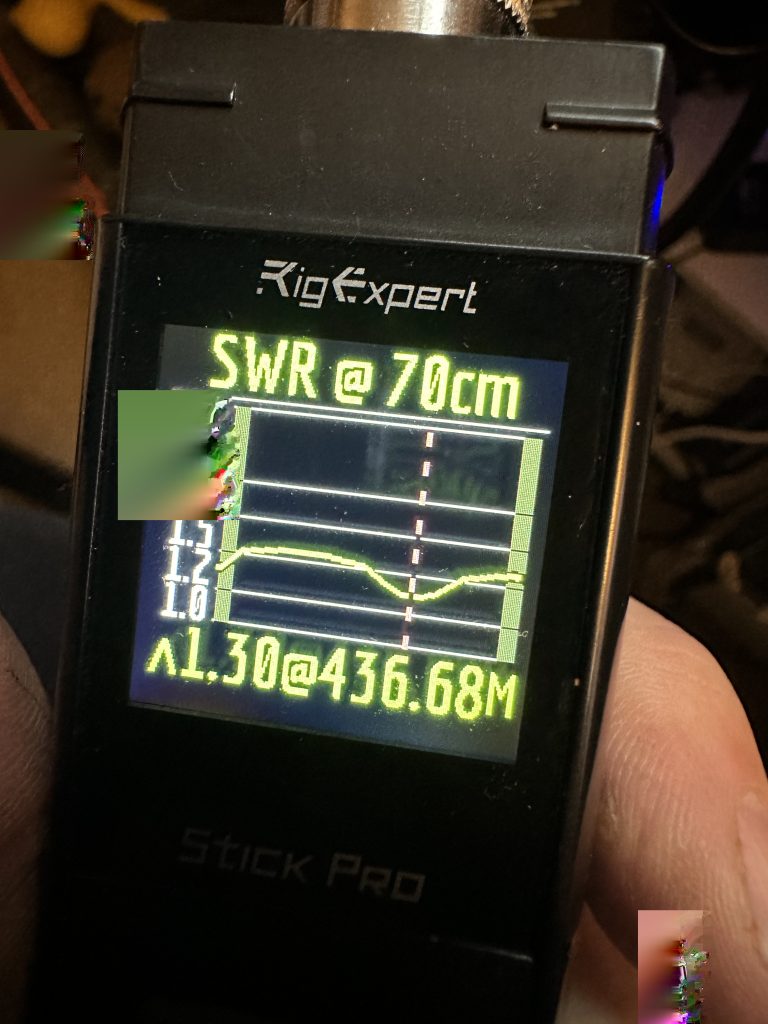
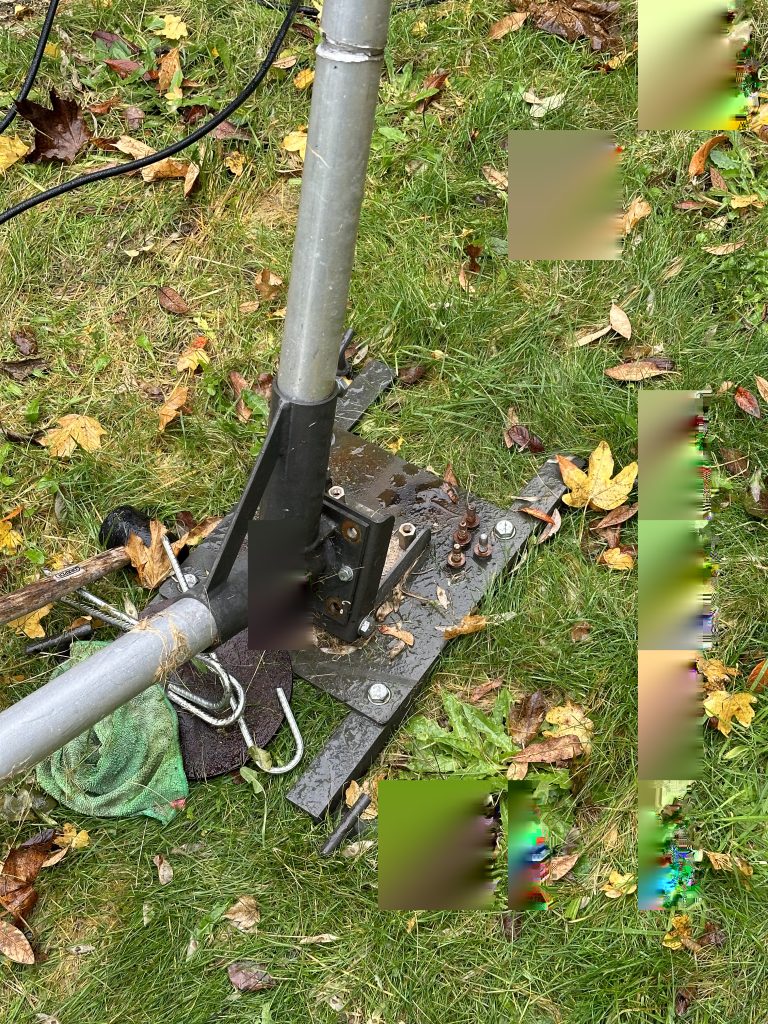
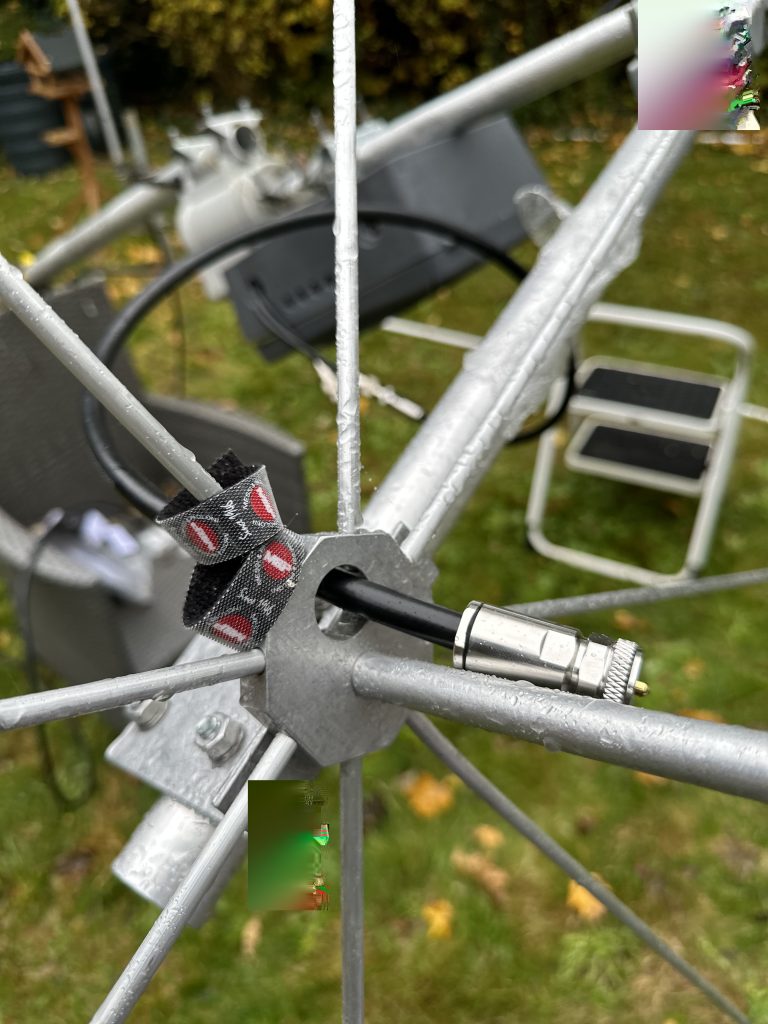
With no rain and getting the other radios on the air, it was time to tackle the errant SWR on the eggbeater antennas. I lowered the antenna on the tiltbase and with the rigexpert started going thru each connection on the antennas – there are quite a few with the single feedline solution going into the mast head amp, so there is plenty of possiblity for them not to be perfectly coupled/screwed together.
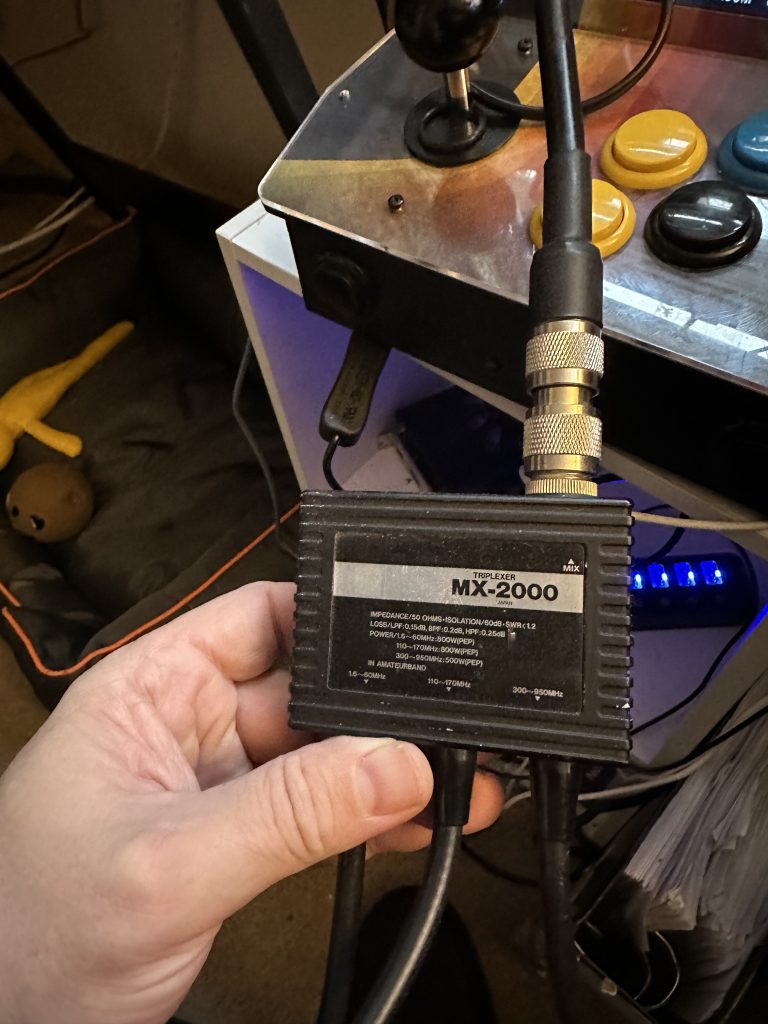
I started with directly connected to the 2m and 70cm eggbeaters, no issue there, SWR was spot on both, almost 1:1 on 2m and around 1.4 on 70cm. I then connected the mast-head triplexer and read the readouts from there, whilst this took some ‘wiggling’ it resulted in getting like-for-like direct readings. I then connected triplexer into the amp and read the output of the amp, the SWR here was higher, but not what i had seen previously, regardless, I re-tighetented all the connectors, this brought the output from the mast head down to the same results as from the output of the triplexer. I then reconnected the feedline from the transceiver back into the amplifier and measured from the far end, again good results. So the issue here was either a single or multiple loose connections. I suspect the the connection between the triplexer and the amp which is a double-barrel male N connector.
I put the title base back up and screwed all the bolts back into the base, feeling my age I was keen to get back into the warmth of the shack !
70cm2m
I measured the SWR from the feedline back into the rigexpert, again good results, so I went ahead and connected another triplexer to split the frequencies out into the 9700 2m and 70cm inputs.
triplexer with feedline2m with triplexer70cm with triplexer
With the results coming from the triplexer looking good i went about reconnecting to the IC-9700. The book-shelf rack proving useful again in getting the coax into the radio easily just by rotating the whole bookcase.
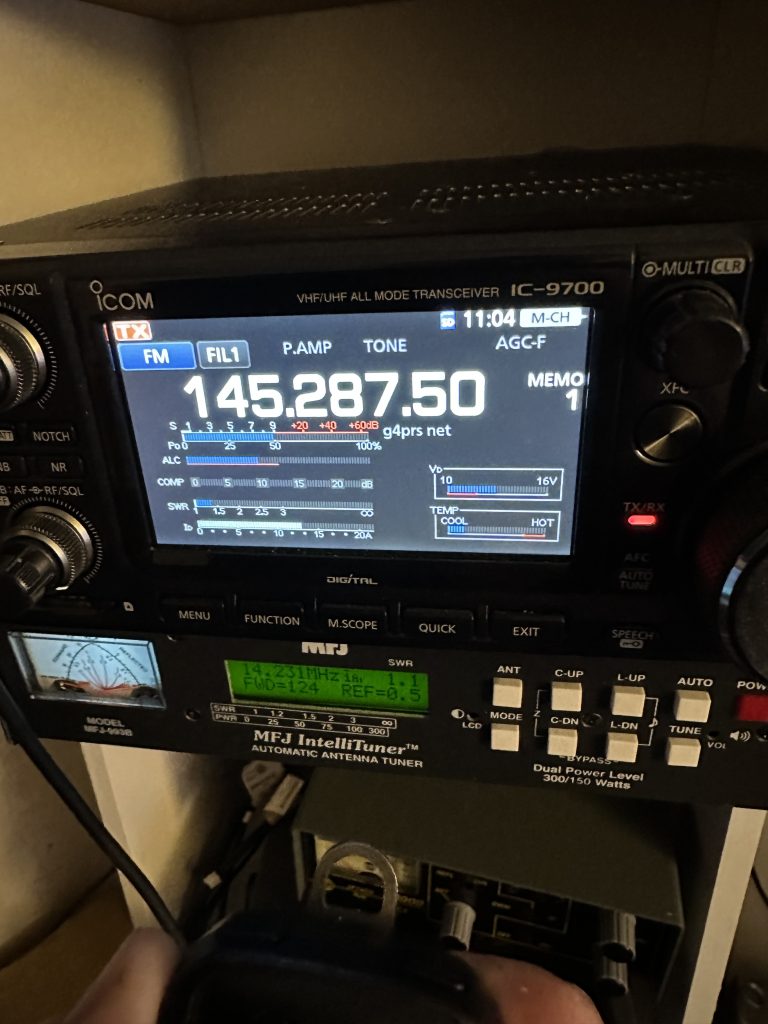
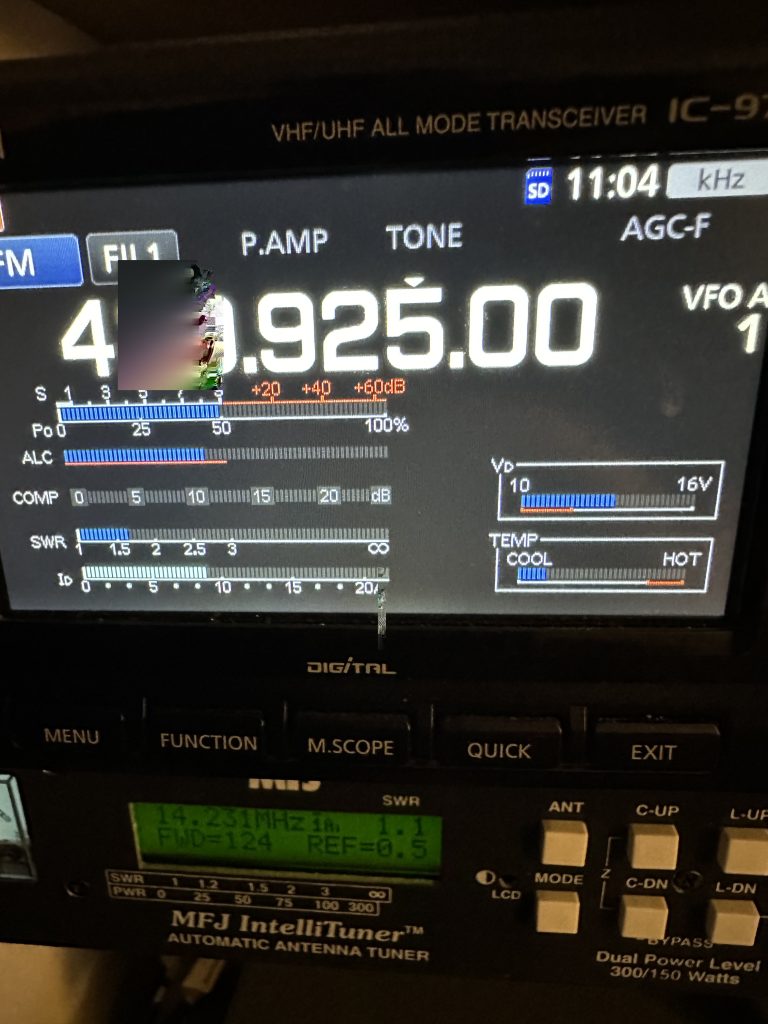
2m SWR Test70cm SWR Test
Both 2m and 70cm transmissions from the IC-9700 are looking spot-on – next I will try out getting the amp configured from the 9700 and start testing with some satellities !
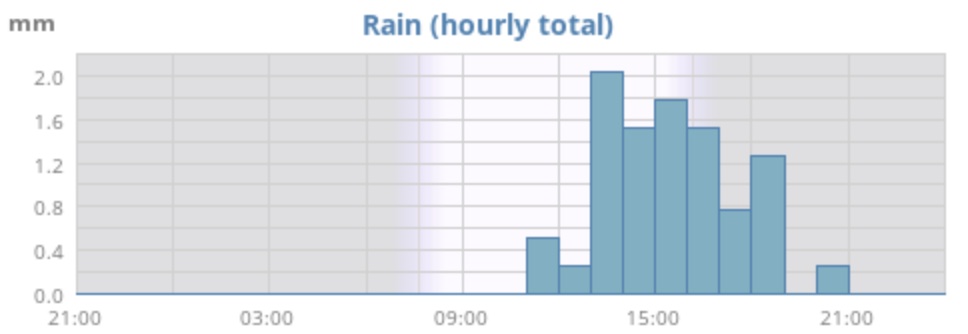
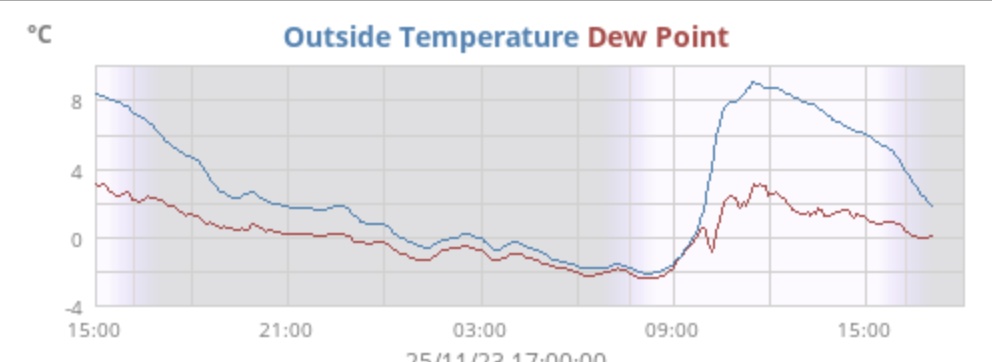
The splendid sunny day of yesterday could of been a whole season away – the weather today (26/11/23), bleak. Drizzle, a slight bit of wind so any gaps in clothing easily penetrated, it was not a good day to be outside, but I wanted to progress the mast head amplifier !
The weather station proving useful – preceptation whilst not heavy, was irritating..
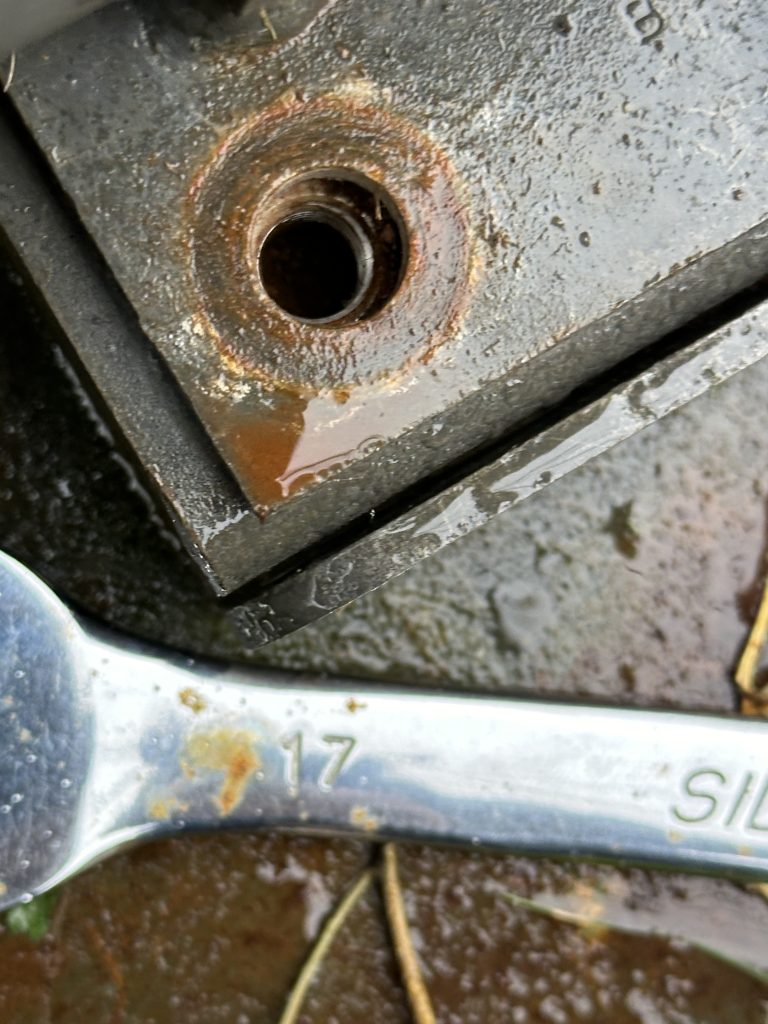
First step was to get the mast down, thankfully the barinco tilt base makes this really easy – having help to raise it first time was ace as getting it into the tilt base is great, but once in its easy enough to do on my own, although my aged bones do struggle with bending over and taking the nuts off. This time out I made note of the different spanner sizes required for each bolt which will be useful in the future.
1713fiddly bolts
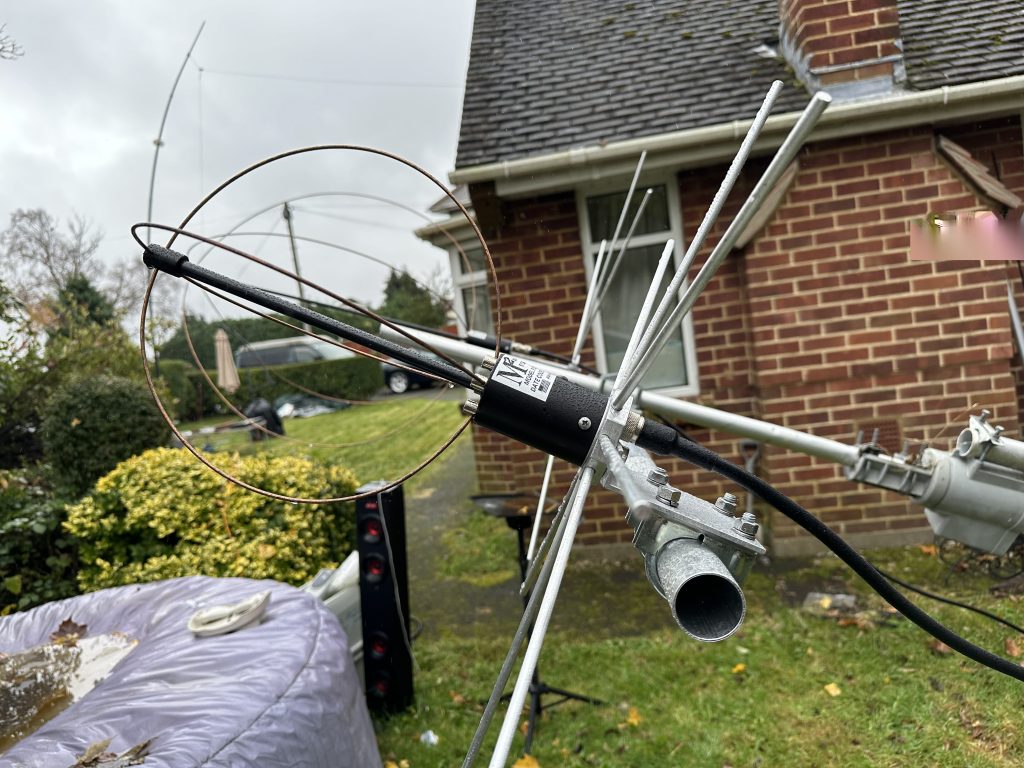
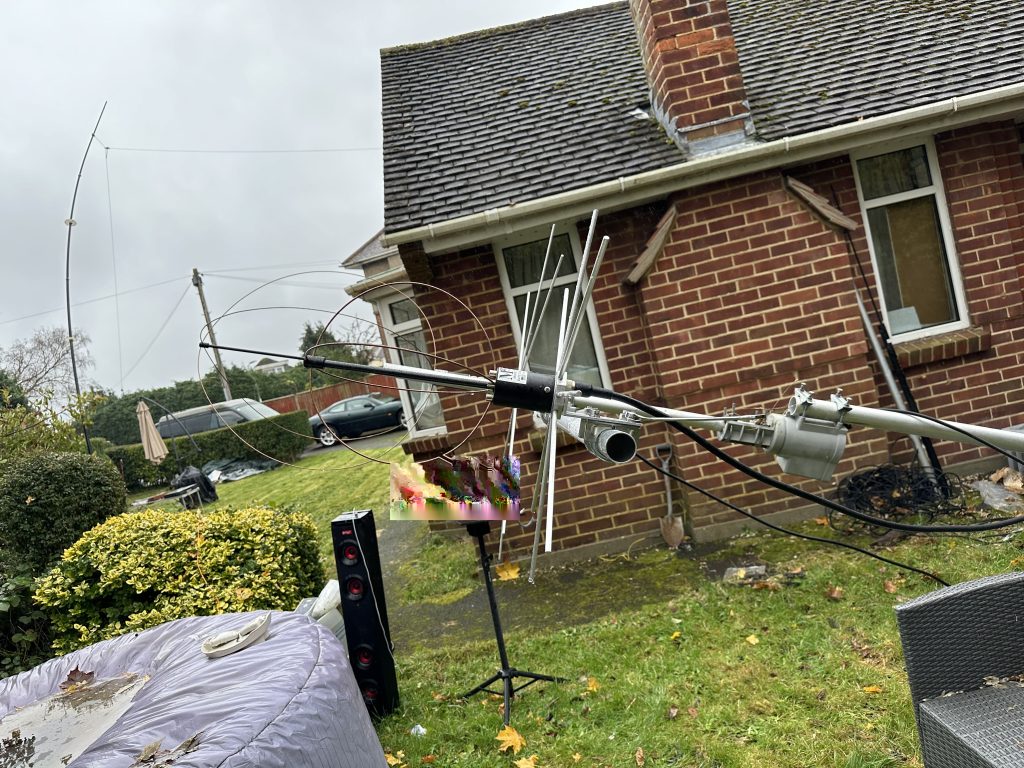
Having got the antennas down, it was time for some ‘fettling’ on the egg beaters – they was slightly off perfect vertical with the mast, so first thing was to straight them up with the rest of the mast. I also moved the 2m antenna further away from the mast so the radials didnt come into contact with the mast.
rotating and moving the eggbeatersbetter alignmentlooking good
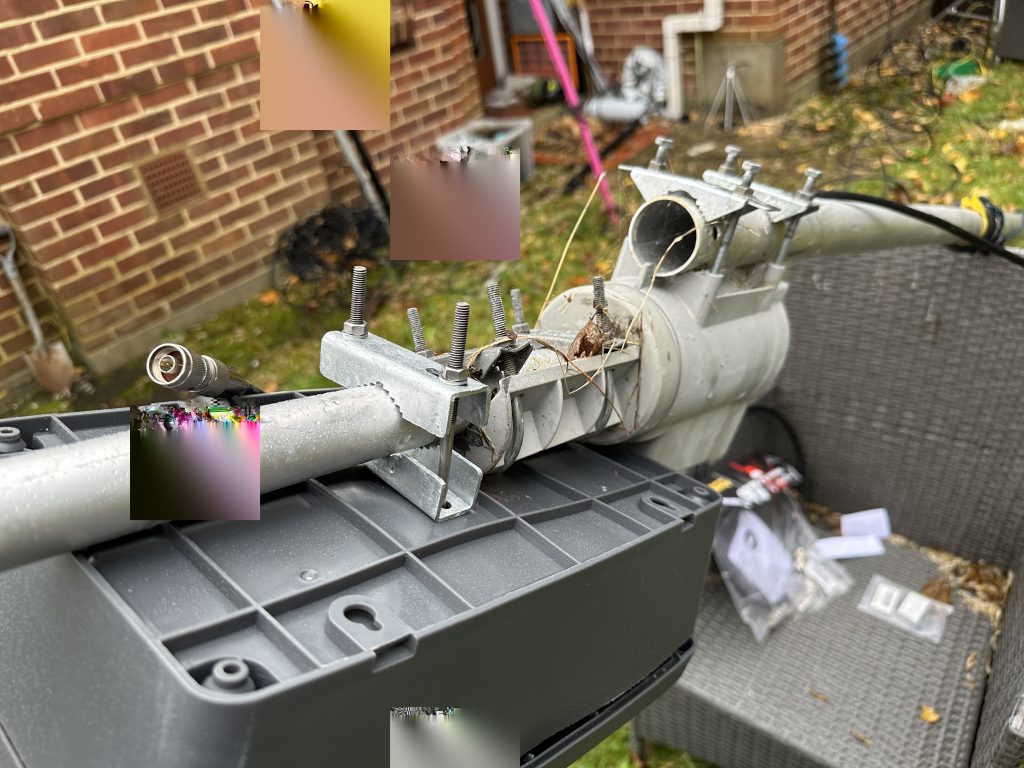
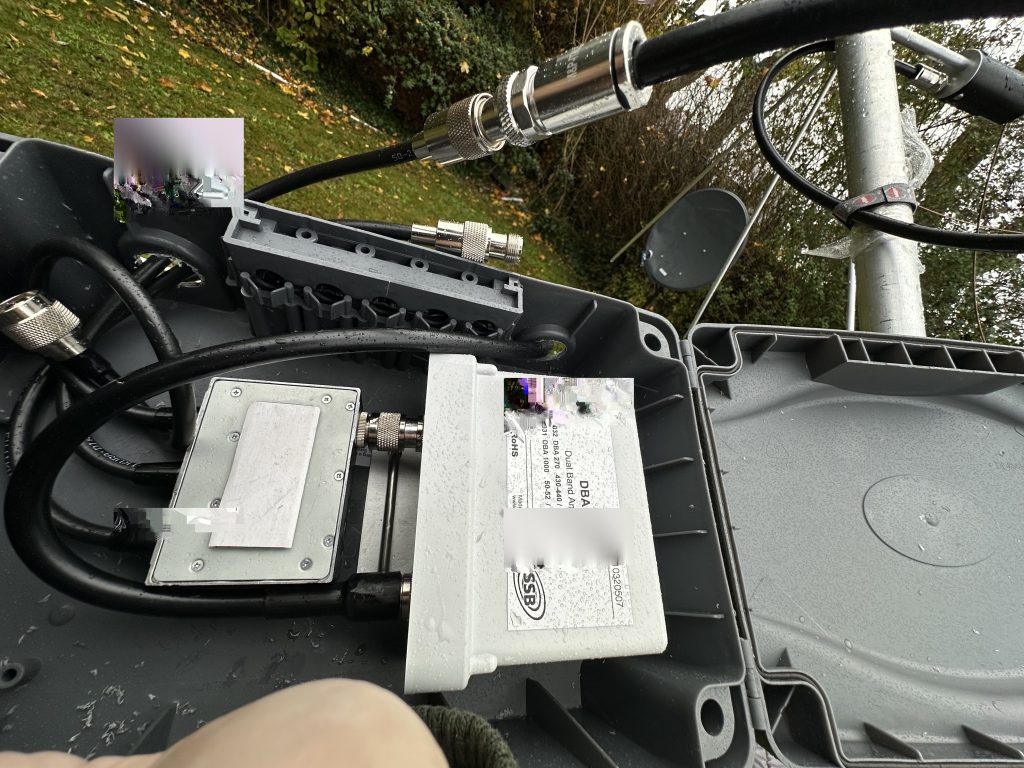
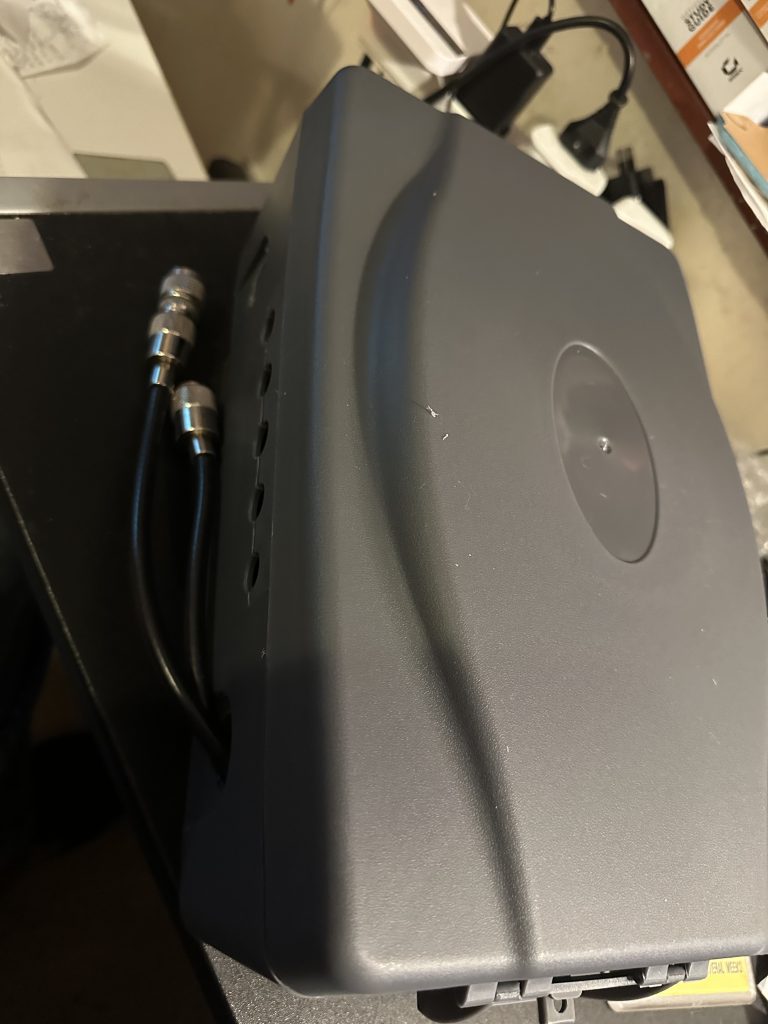
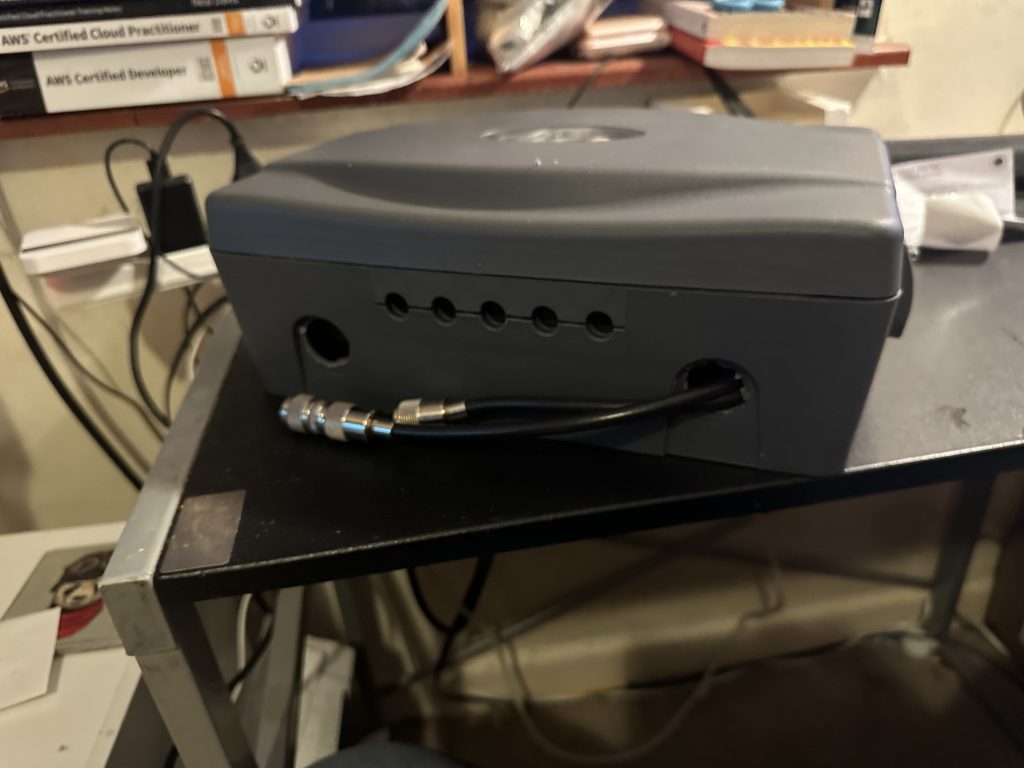
With the pre-amplifier installation work completed, I then set about attaching the amplifer to the mast head. I let gravity help here and attached the amp in a way i wasnt fighting it trying to drop off all the time – this worked pretty well. I had some issues with routing the cables internally, but otherwise got the feedline in nicely.
attaching the amp boxrequires some attentionM&P connector…
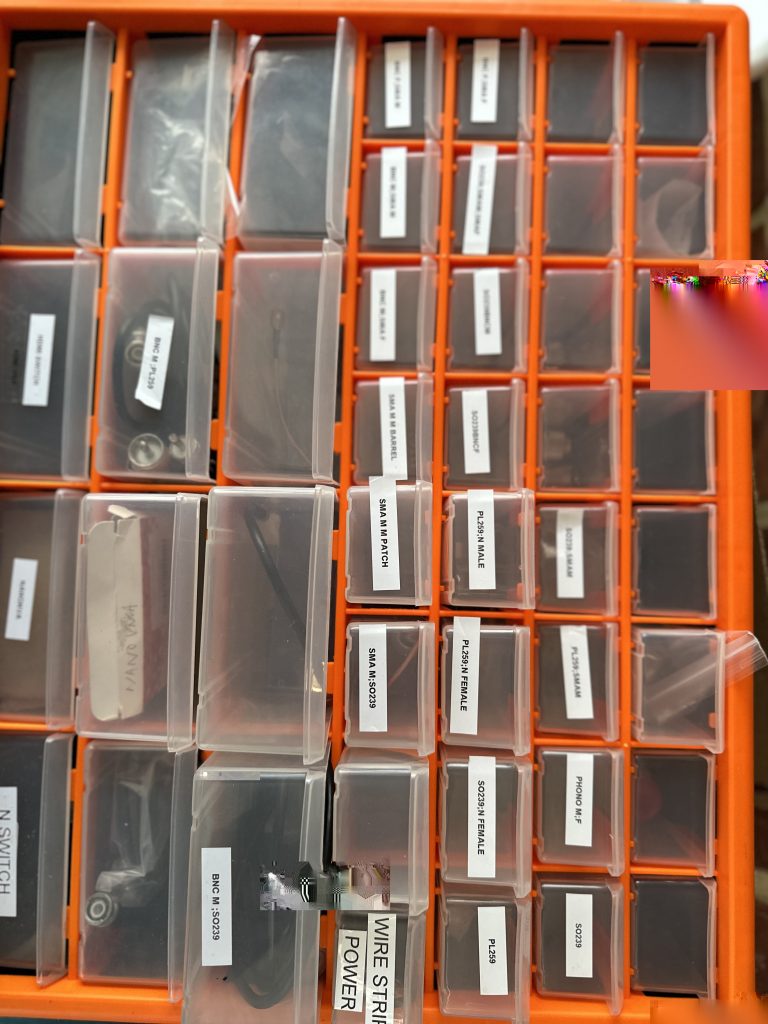
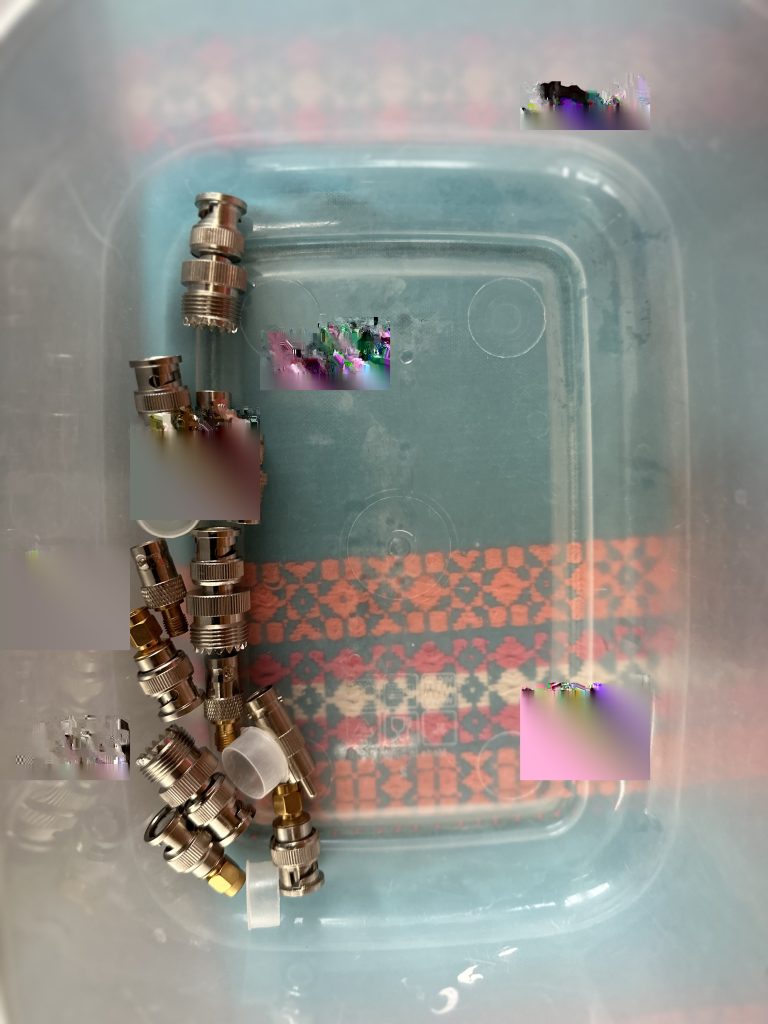
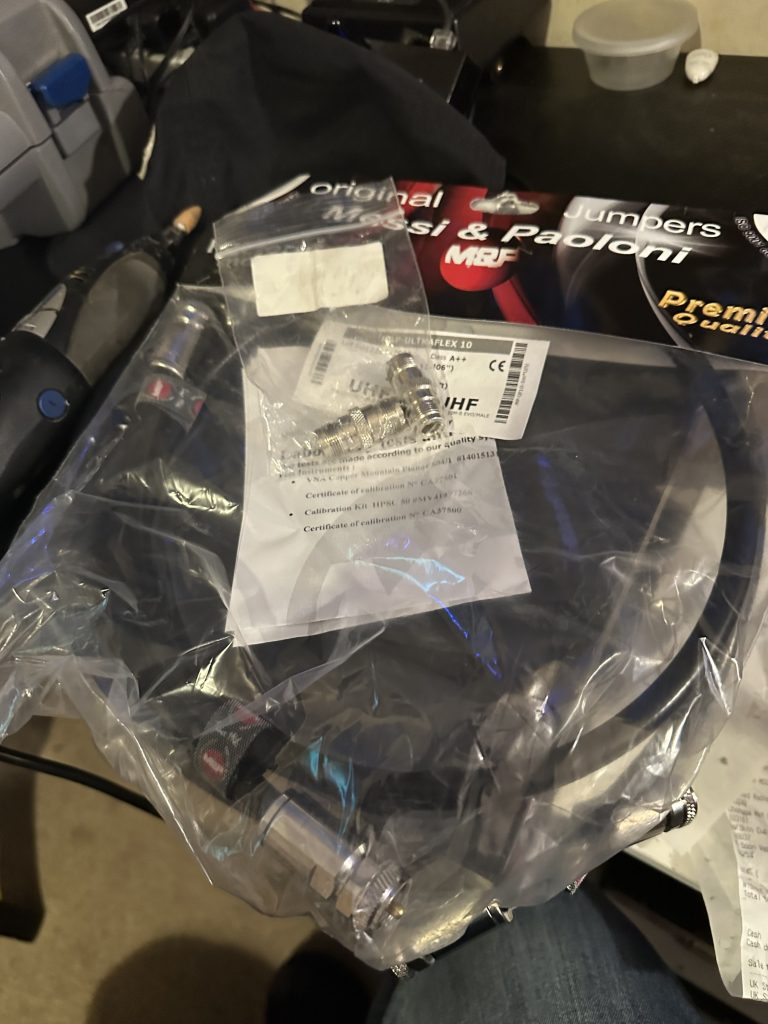
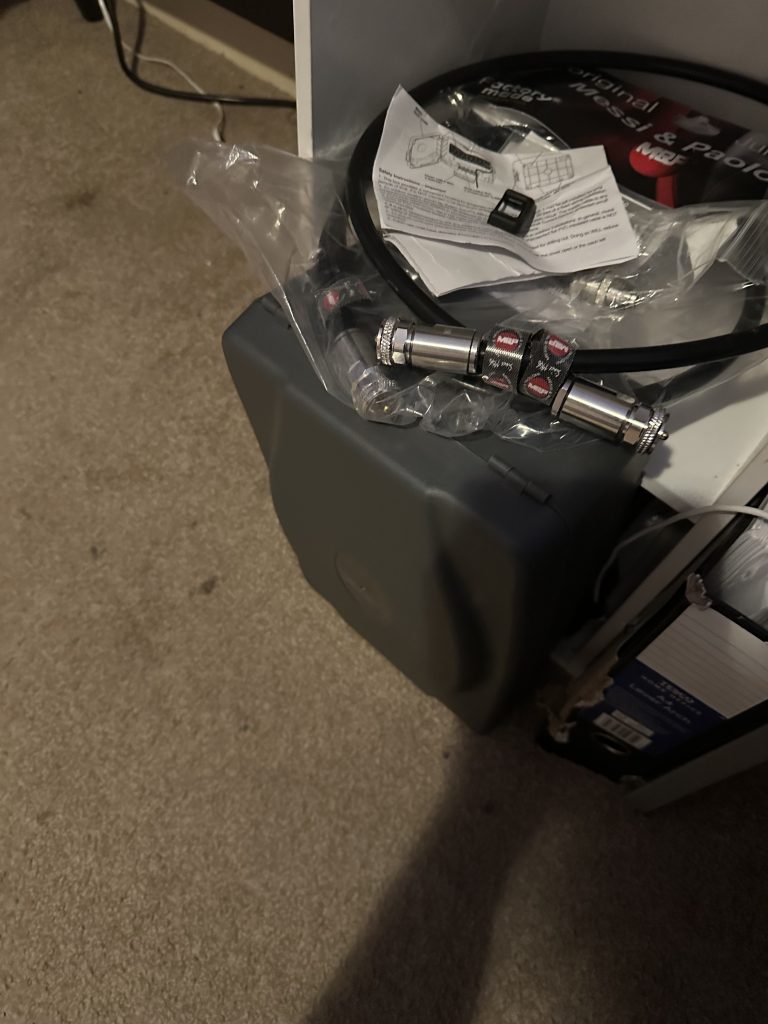
The Ultraflex 10 coax from M&P really looked the business, but it took some ‘convincing’ to go thru the egg beater base. Nothing too aggresive, just a firm push into the radial support, but it did go thru thankfully ! I then had to connect all the relevant ends up, I had pre-ordered some of the connectors I know I would needed but also had plenty to choose from in the shack.
connectors – lots ofi even tidied these awayin the field
After putting everything together and getting the egg beaters vertical it was time to beat a hasty retreat to the warth and a cup of tea in the shack. The rain wasn’t helping me today !
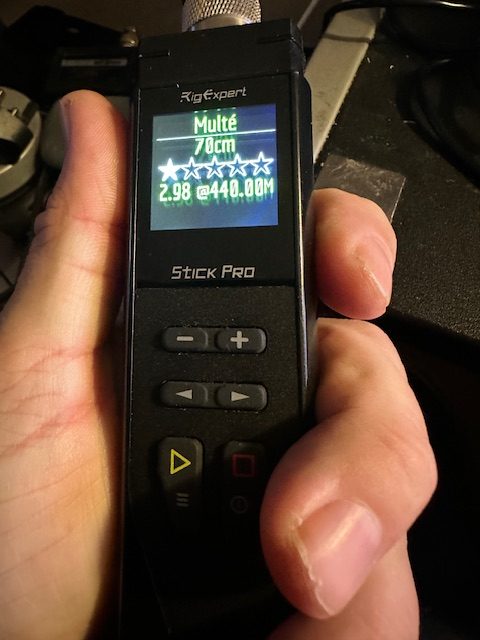
Once back in the shack I tested the SWR on the Rigexpert sitck, which does the majority of bands, alas today wasn’t to be my day as the SWR reports were not looking good.
yikes, thats not good !
With the WX not improving any time soon and a plethora of other things to do (XYL computer upgrades being one of them) I satisifed myself with at least getting the amp on the mast, I willl have to spend some time in investigating and correcting the connectors to find where the issue is !
Still, I’m exicted to be able to start using the egg beaters with an amp, the work will no doubt be worth the effort to pull out those weak signals.
It has been a splendid sunny day down here in Bournemouth, whilst the tempretures have been dropping, it was nethertheless a fine day. My original plan was to get essential bits-and-bobs done and out the way, so i could spend the afternoon working on the antennas outside, however the week had caught up with me and a much needed afternoon rest resulted in 2-3 hours lost, but at least I felt better 😀
overnight temps from the now working weather station
Having had a rest I started work on the mast head amplifier, collecting all the parts I had stored away and the dremel, ready for making some holes. I had left my 9700 on 145.500 and was very surprised to hear a call out for a radio check ! Funnily this would be my first ‘ground’ QSO via the egg beater antennas and a good way to check that everything was working as expected. I had a great QSO with M0ABI who was portable in Barton on Sea, given I was using an eggbeater antenna for satellitle comms I was very happy to make this contact, and Mike had alot of history/knowledge of Satellites as well, it was a great QSO and I got back to work on my mast head amp.
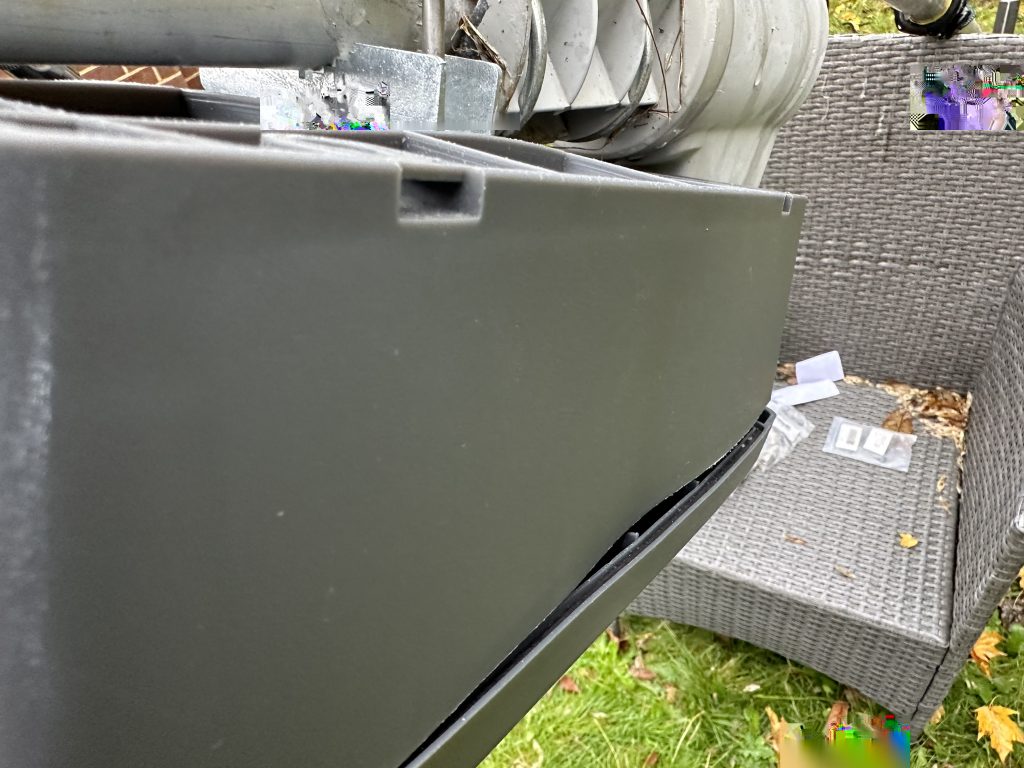
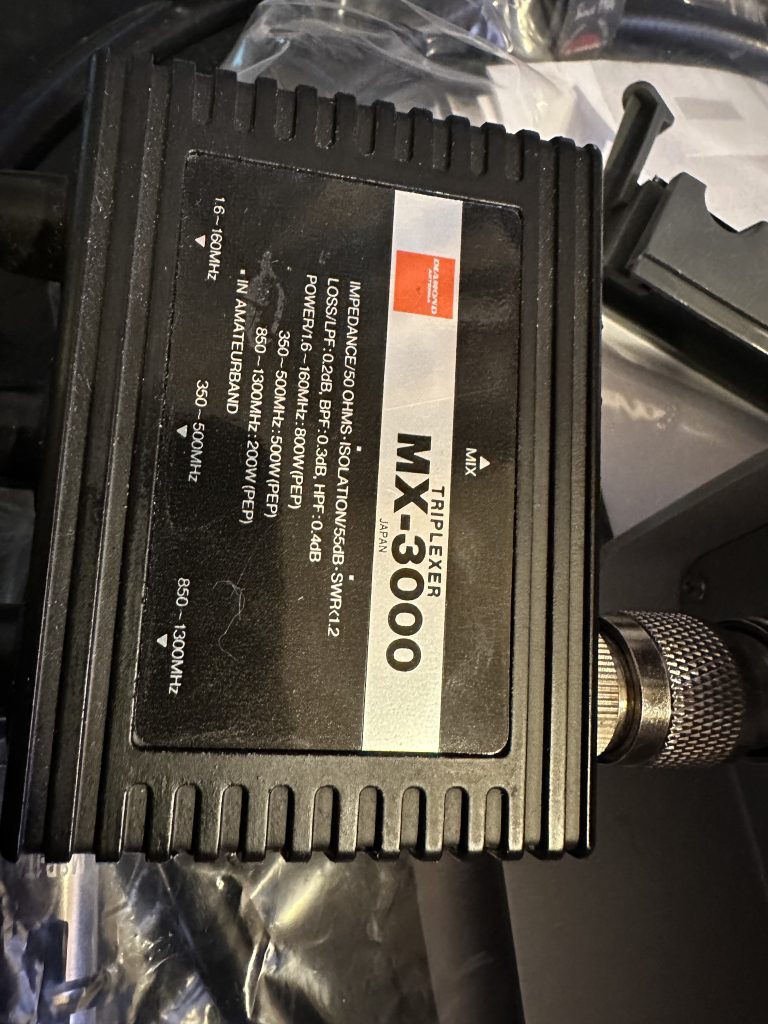
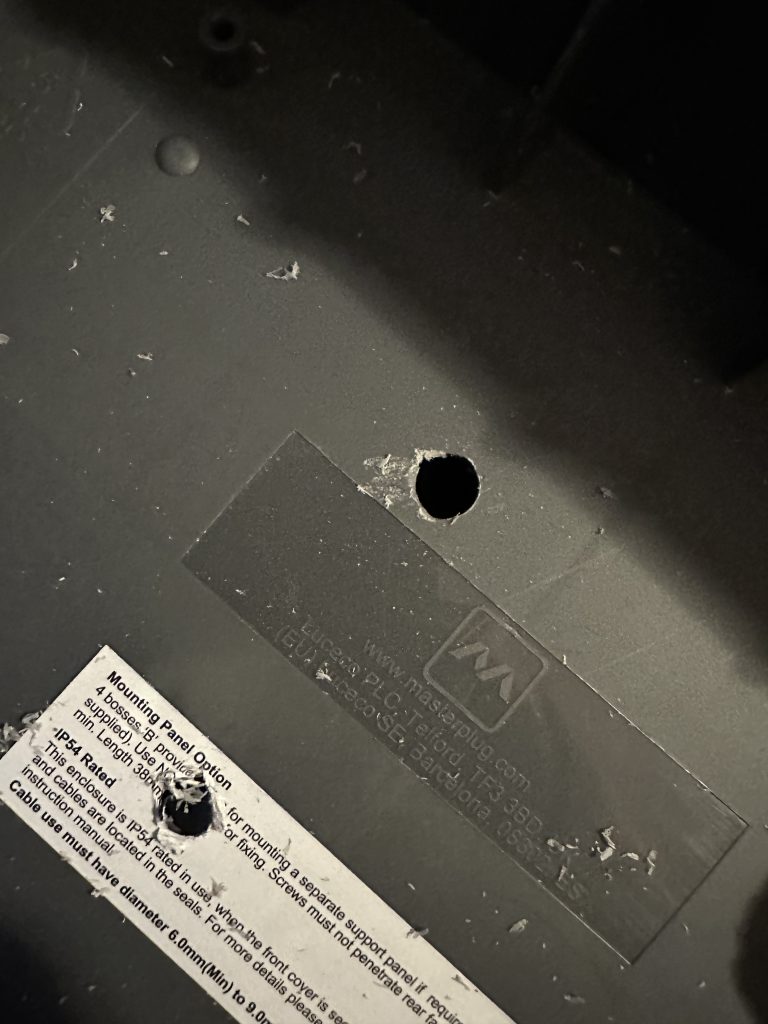
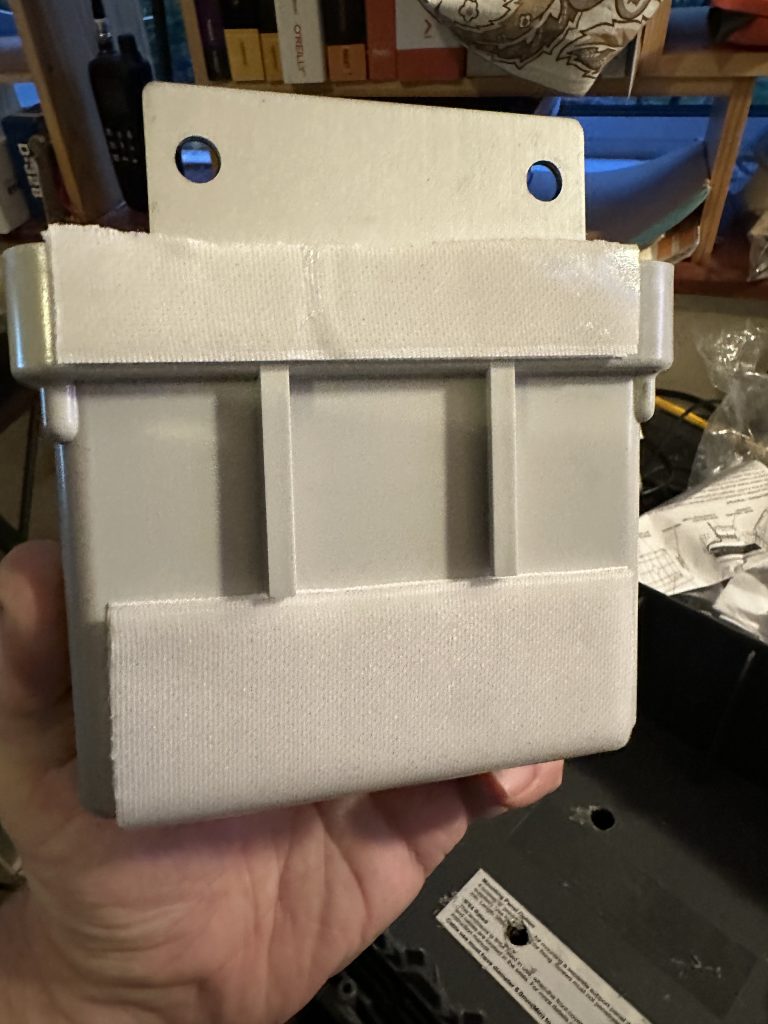
MX-3000 TriplexerElectrical box housingMast head amp velcro
Having place the mast-head amp in the ellectrial box housing and marking out where the bolts to attach it to the beam/scaffold would go, i then drilled two small holes with a dremel do it would line up nicely once in the box. I attached velcro supplied with the box to the back of the masthead amp. Its incredbly strong stuff and affixed the amp to the box nicely. I then screwed on the triplexer via a N-Type barrel connector.
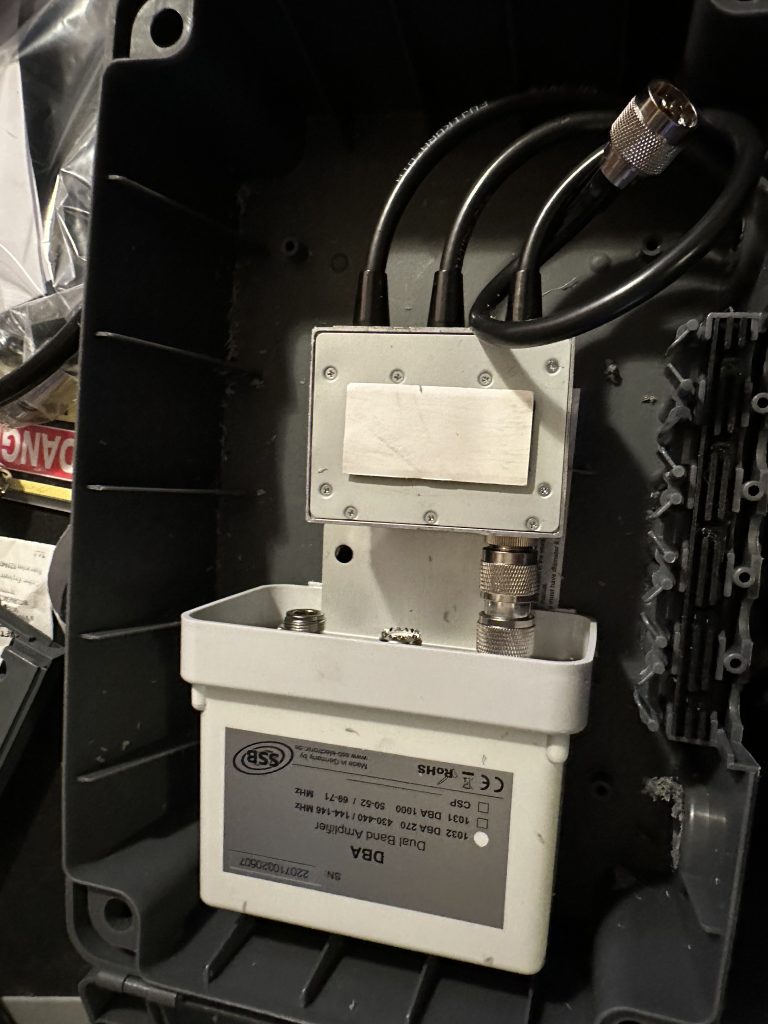
triplexer and ampwiring loom internaltriplexer external
With the triplexer and amp connected, i dremelled out the side-holes for where the feed line from the radio will come and the outputs of the triplexer, I stowed the 23cm output and kept a N-Type barellel connector on the 70cm output of the triplexer, as these are all PL259, hopefully this will make attaching the correct antenna to the triplexer easier once outside.
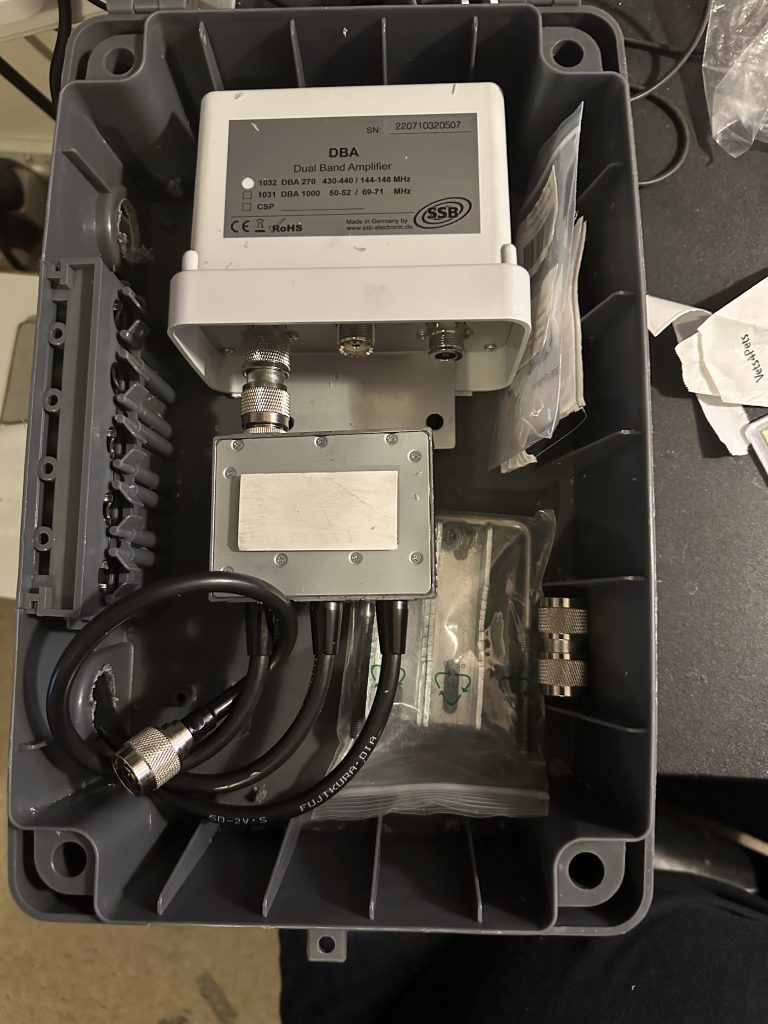
WIPM&P Coaxready for tomorrow
I checked out the feedline holes and am quitely confident the LMR coax I have will fit in there quite nicely. I have M&P Ultraflex10 for the feedlines to the eggbeaters between the multiplexer, to minimize the loss as mch as possible. I’m hopng tomorrows weather is at least dry so I can get outside and get the amp on the mast, then see if I can hear those birds just a little bit better….
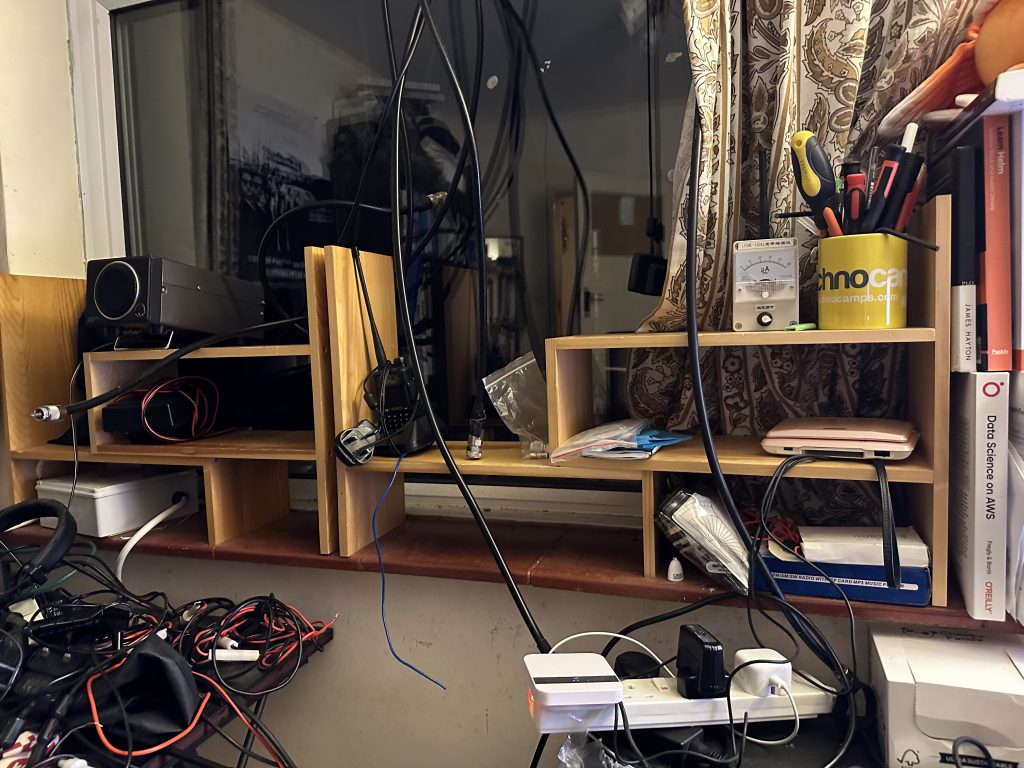
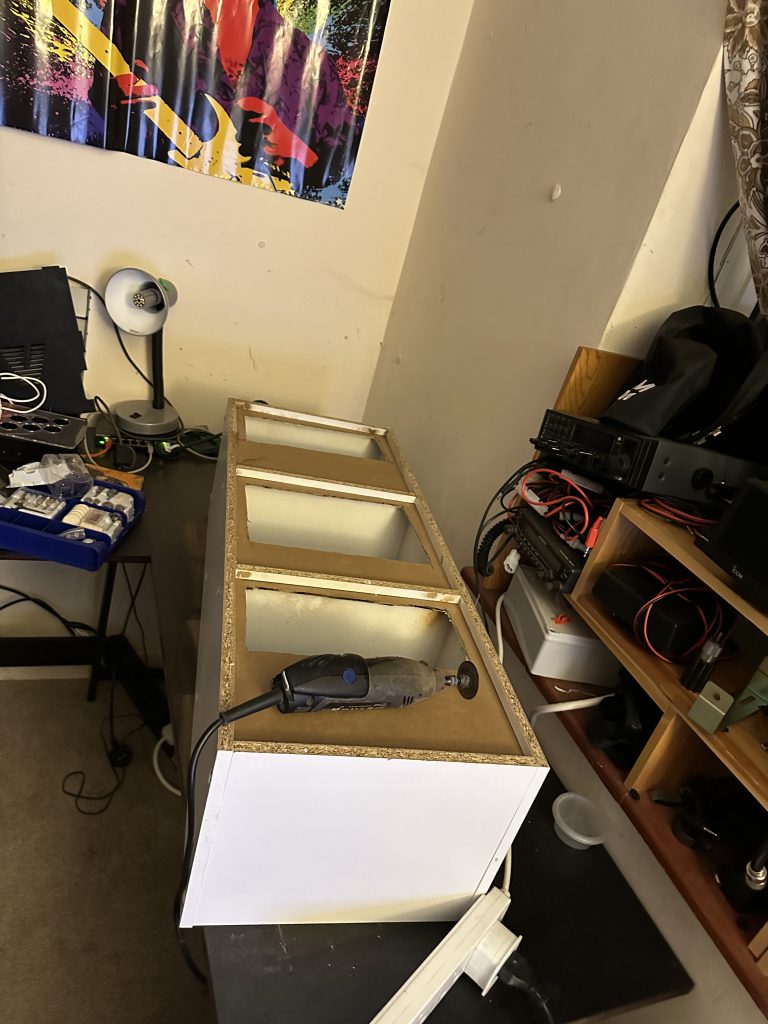
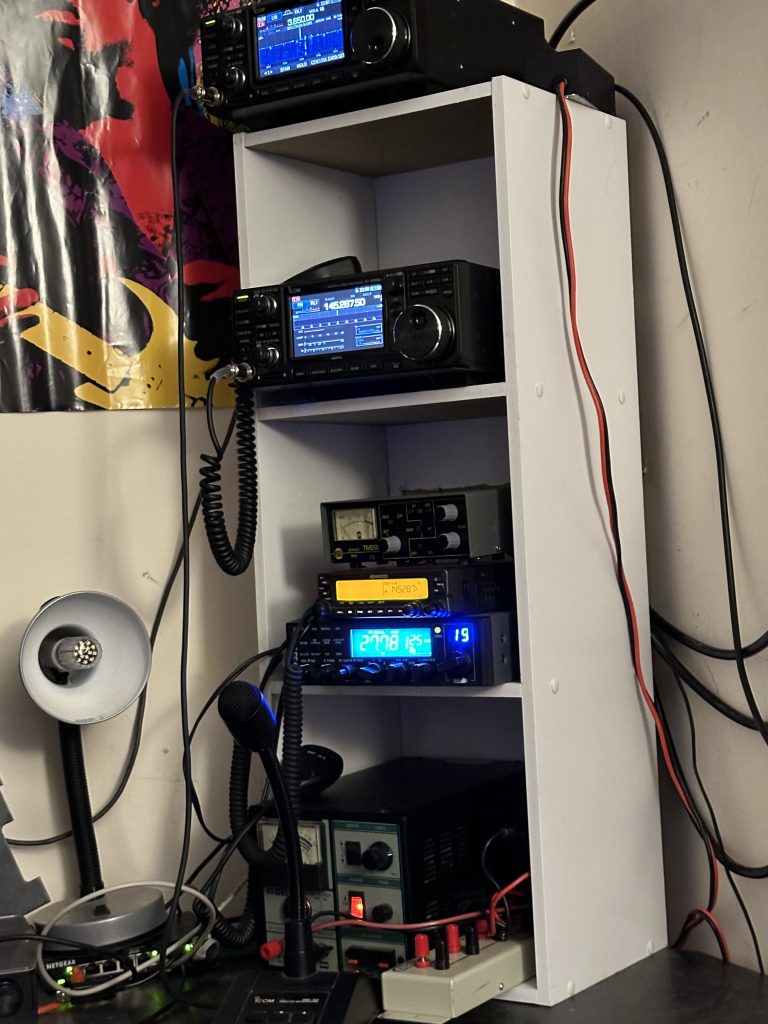
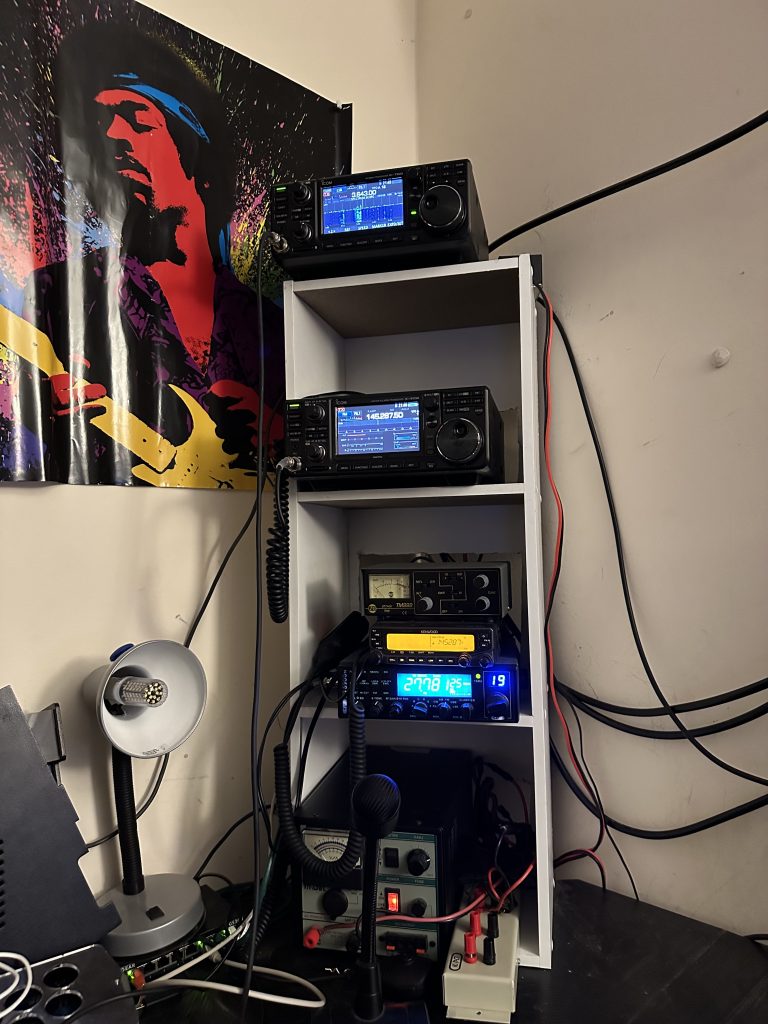
With my shack getting some actual usage of late, as well as the G4PRS 2M call on Monday nights, it felt like a good time to tidy things up. I’d not been particualy happy with the layout of the radios in the window, in particular it was susceptiable to any rain/water ingress. With that I orderd a budget 3 tier book shelf, having measured the dimensions, it was a nice foot print and my radios should all fit…
cleaning out the shelvesinitial configuration testhow to fix them cables…
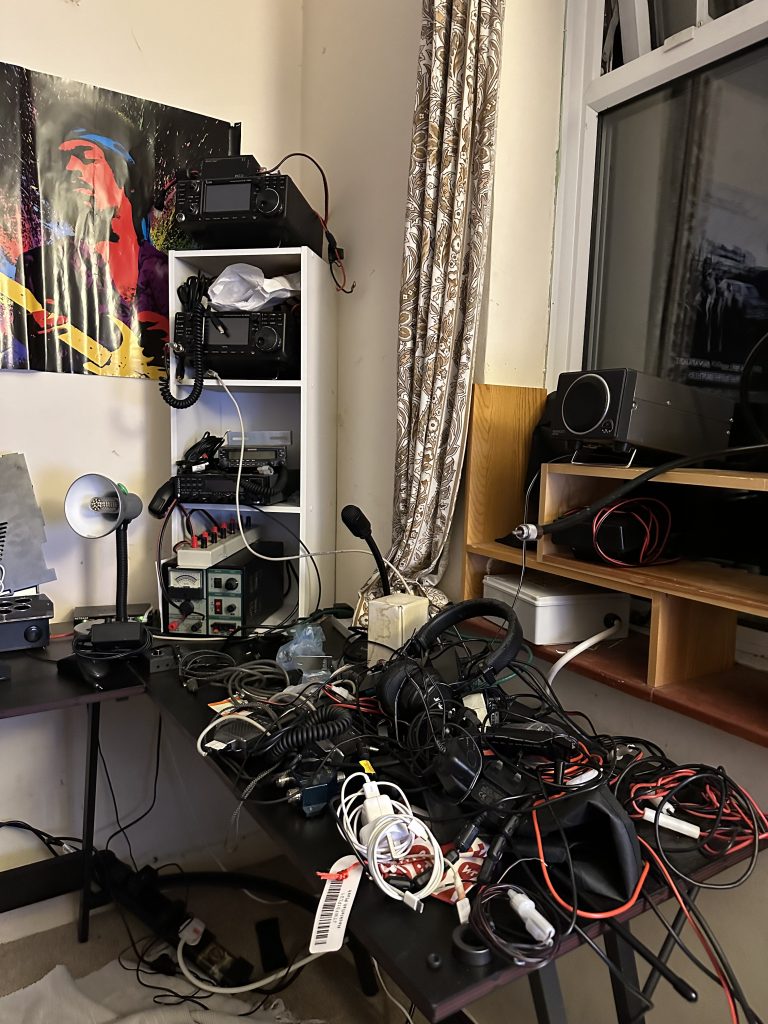
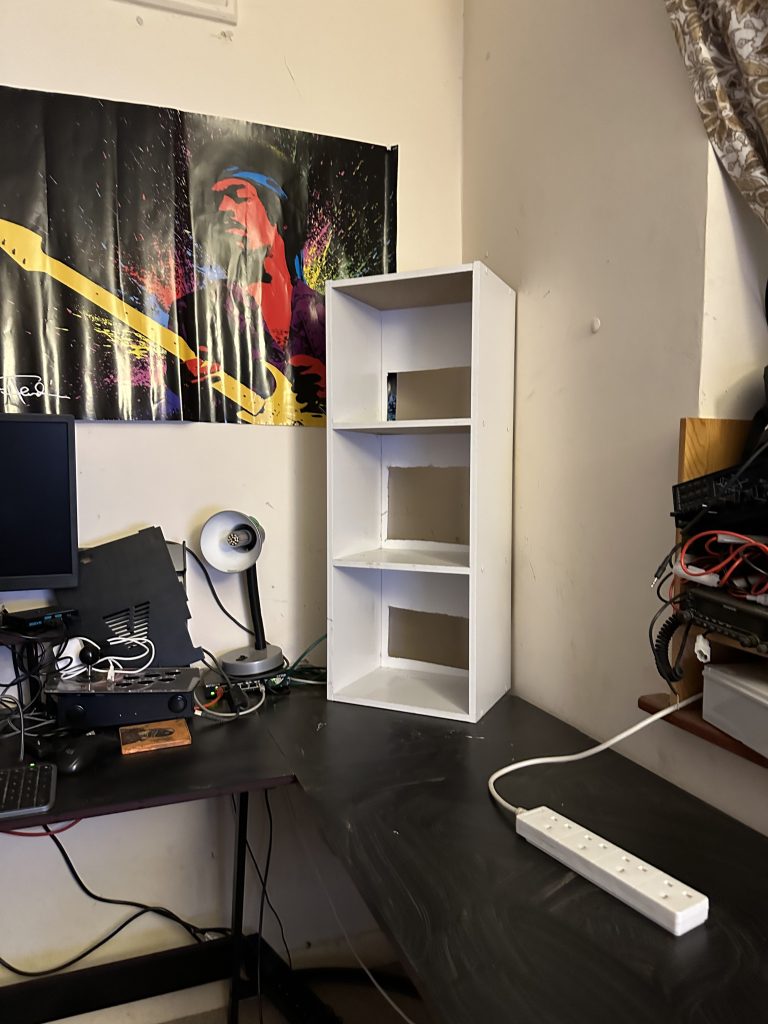
Having move the radios from the shelving, I then set about putting them in-situ to see how it worked out – i wasnt 100% sure where I was going to put the book-case radio shack, but the corner seemed a good idea, and put the Apple iPad that was there back into the Alex Loop pack ready for my next /P or /M use. The position worked well, but there was a clear issue of routing power and coax to the radios, so Ihad to do some ‘DIY’ on the shelves. Here goes my warranty…
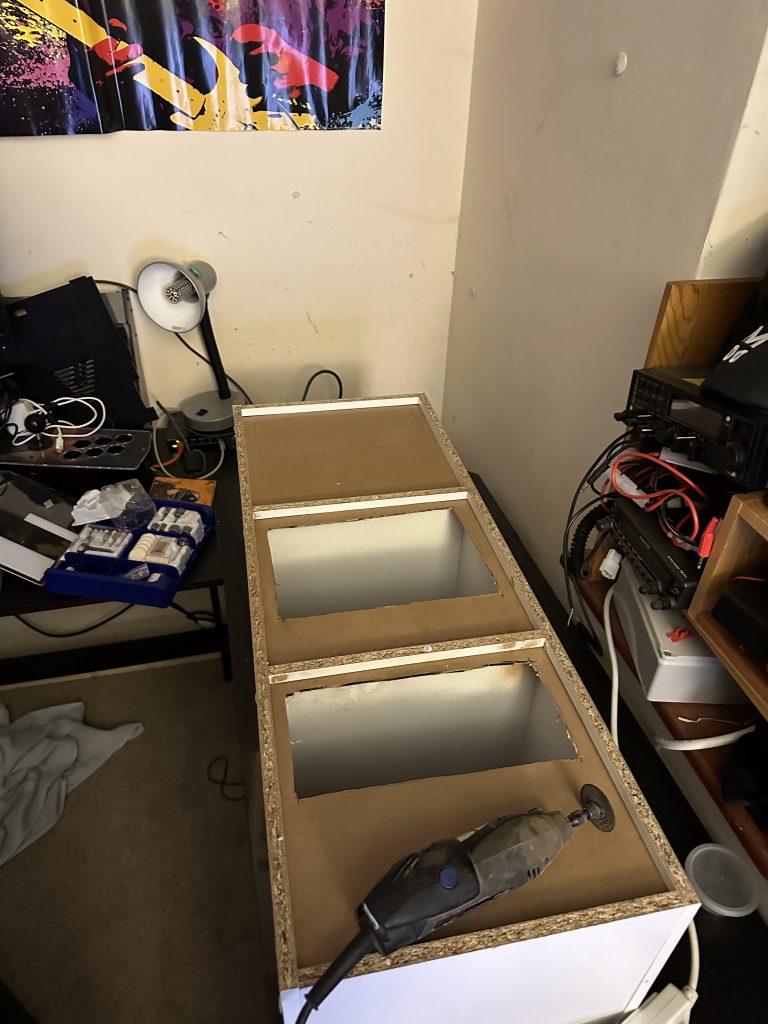
cutting with dremelaccess holes completenow those cables will fit
The cheapness of the bookcase meant the back-walls of the compatments didnt present much work for the dremel, if it was earlier in the day, I would of done this outside tho, it generate a fair amount of dust and smoke, but I kept the windows wide open and also took my time with each section. I didnt need ‘perfectly square’ holes, just enough so that I can route the coax and other cables thru, and as can be seen in the last photo, this worked out pretty well !
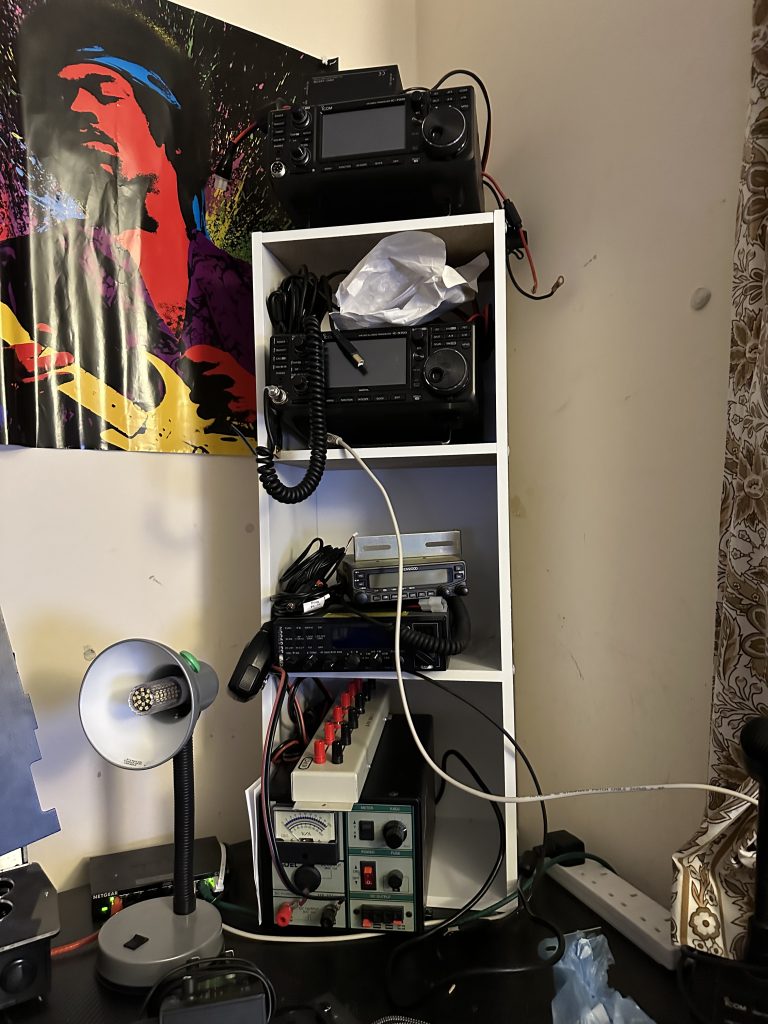
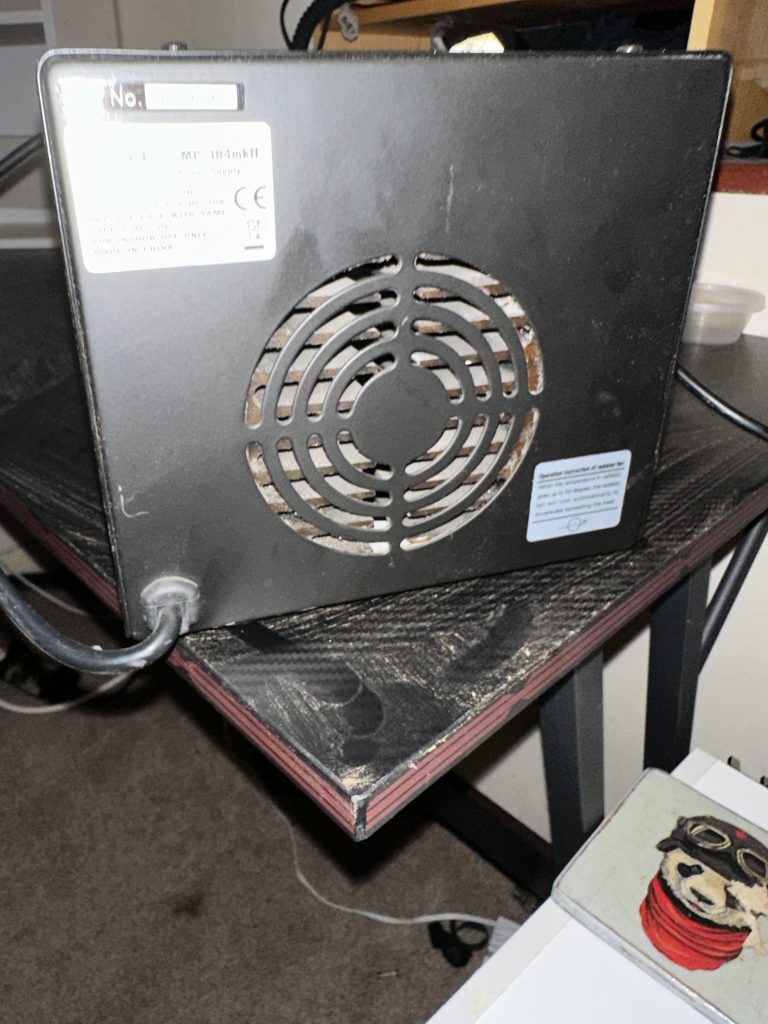
clearance for the PSU fanstart placing the radios
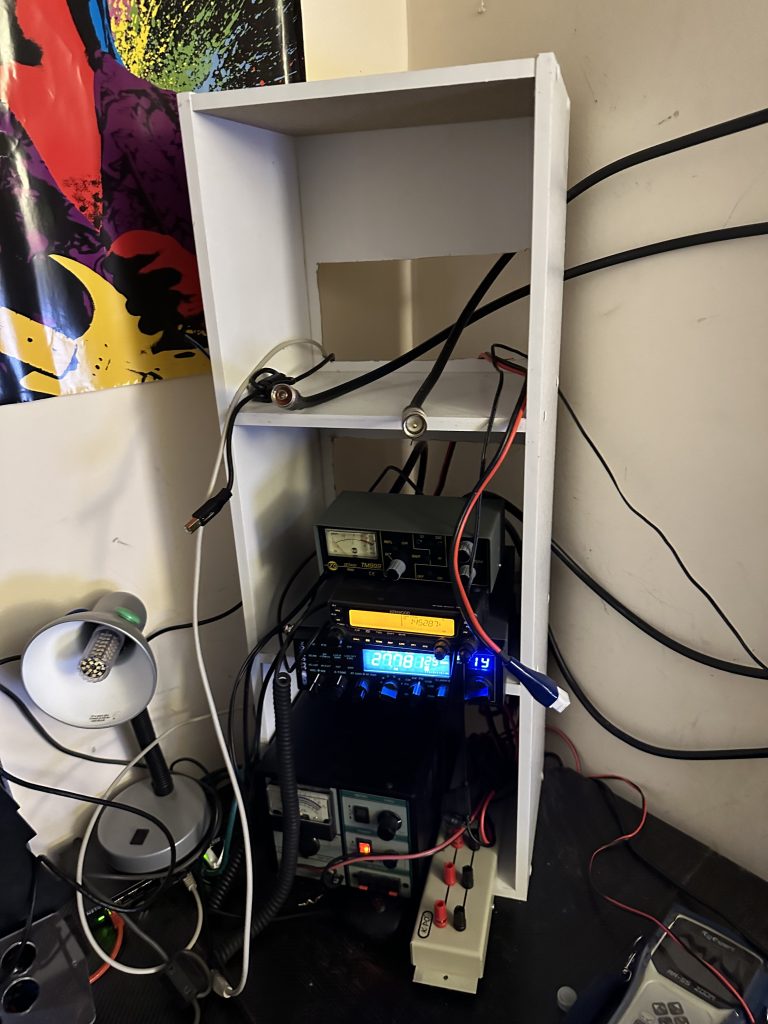
The main transformer now had a nice clearance for its rather noisey fan (my only complain of this transformer, its otherwise done an excellent job) then can start placing the radios in place. I started with my 11m CB+manual antenna matcher, this went in easily enough, and then I placed the Kenwood TH-V71E on top of that. I put all the necessary data/audio cables in place in case I choose to use them, but I’m going to be using this as my main 2m/70cms rig. At the moment its using the Diamond X-9000 which has excellent gain on the 2m and 70cm bands. I am looking forward to trying it out on the G4PRS net on Monday night.
I fed in the very chunky cables for the IC9700. Currently I am running a very simple setup, with no mast head amplifier and direct to the satellite egg-beater antennas. This should become a single feed with a splitter both ends once I put the mast-head amp in place.
9700 and 2M/11M radiosAll the radiosAwaiting the iSS pass
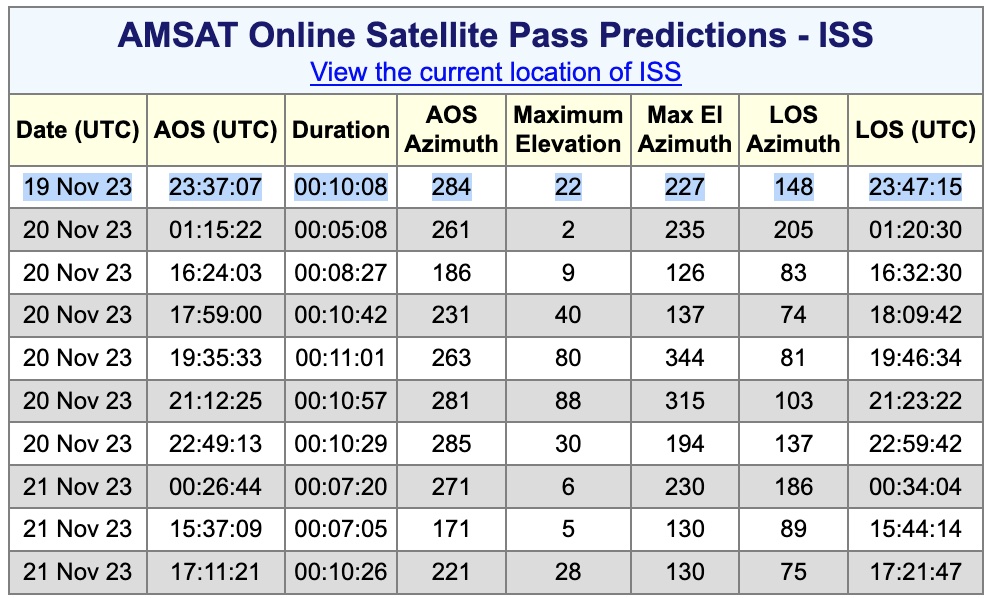
With the radios all connected and the basic setup up and running, I then set about using the IC9700 for what it was really designed, operating satellites. Luck would have it that the ISS would be passing over, not a particularly high elevantion at 22 degrees, but worth a try. I waited for an hour and was pleased to hear QSO’s from all over europe going into and out of the ISS repeater. I manually controlled the doppler, but there was no need to rotate the yagis liked what I used to have to do. First impressions of the non-amplified eggbeaters is very encouraging and I look forward to continue to setup the annteas and systems in the coming weeks.