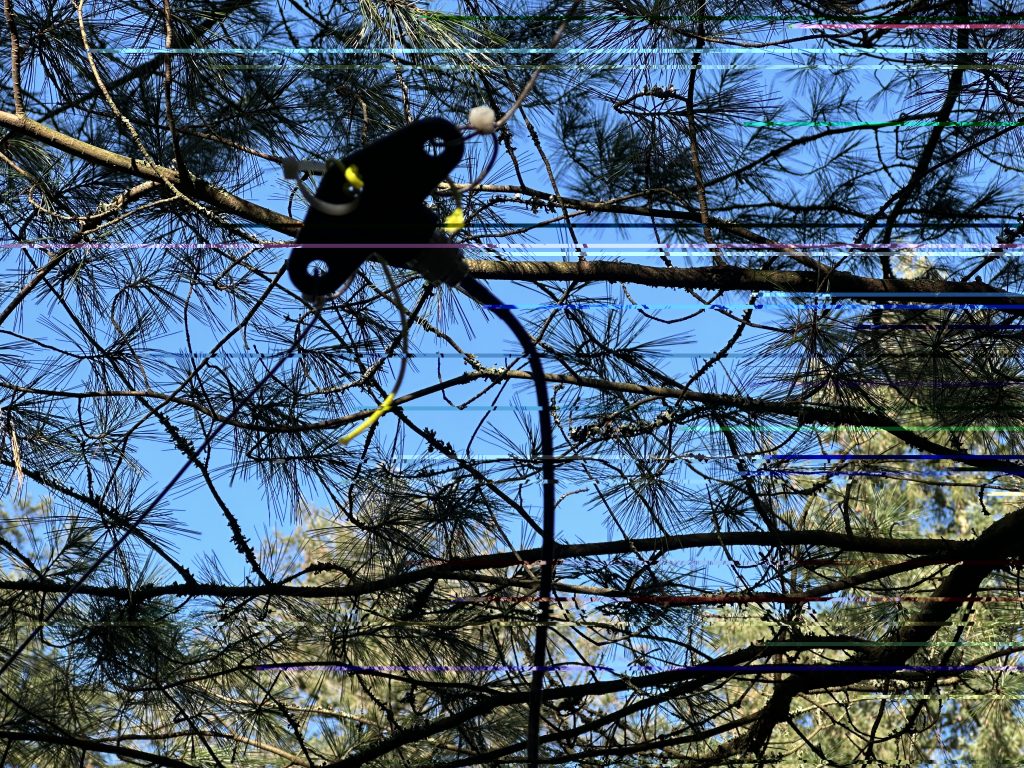
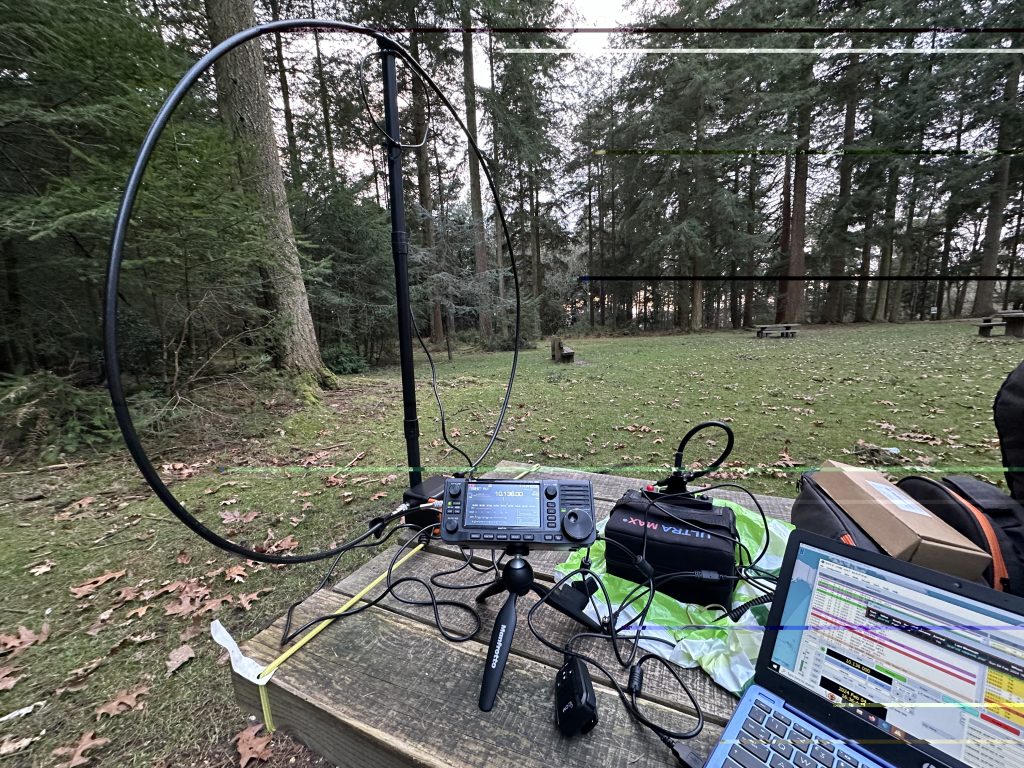
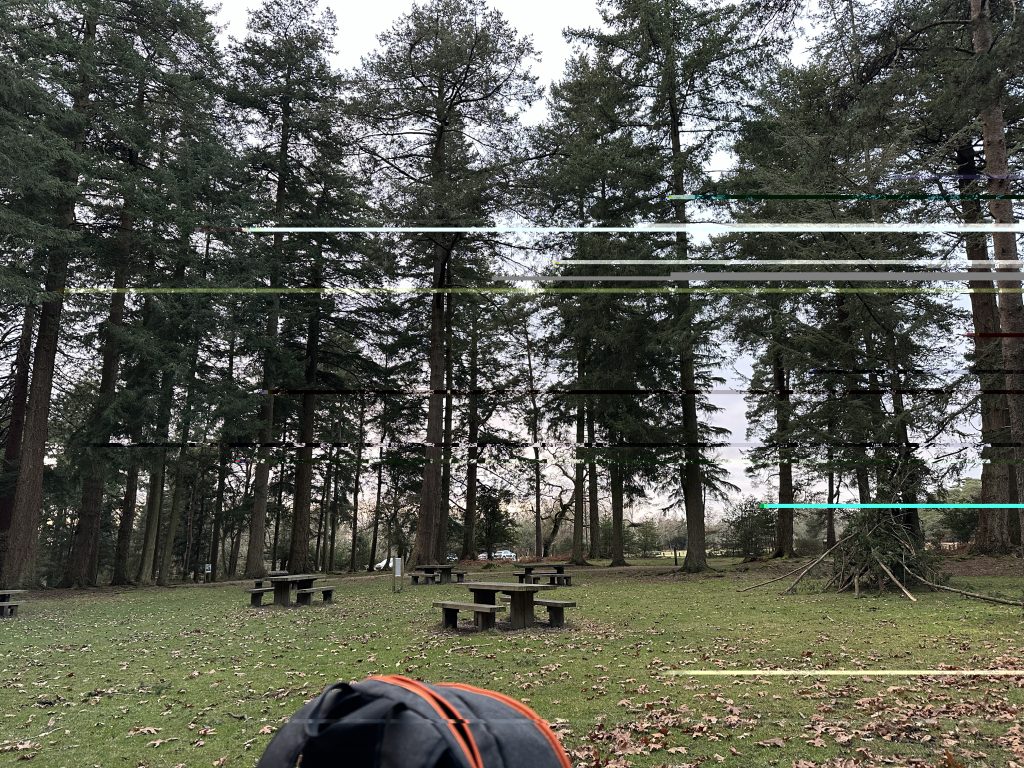
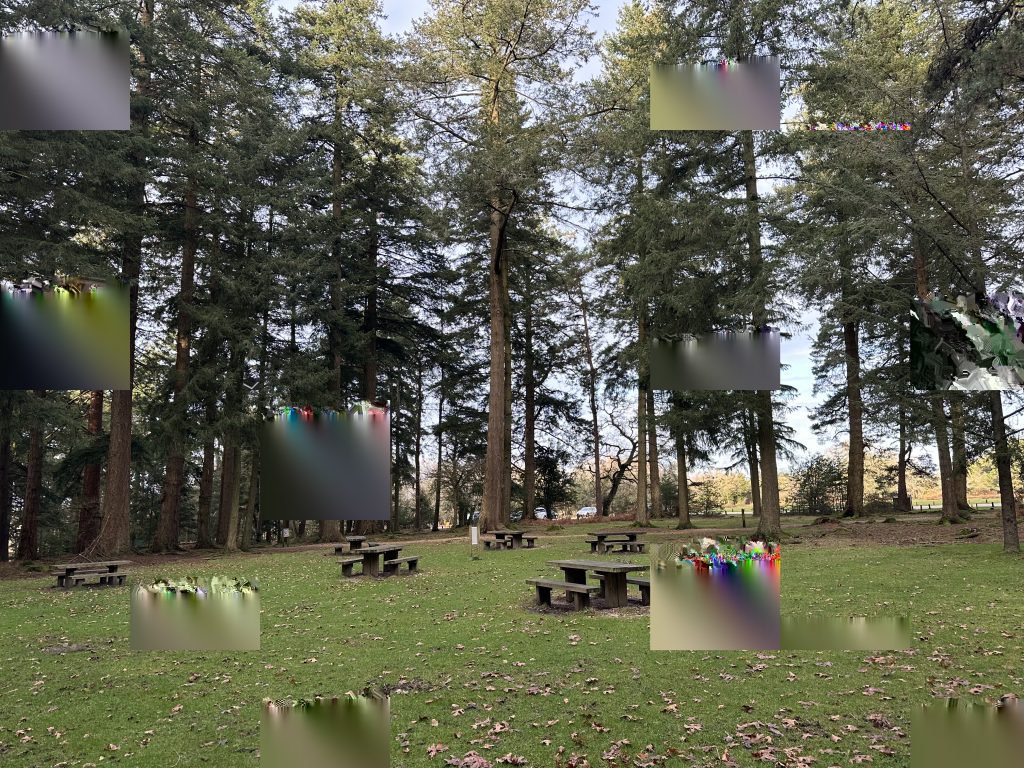
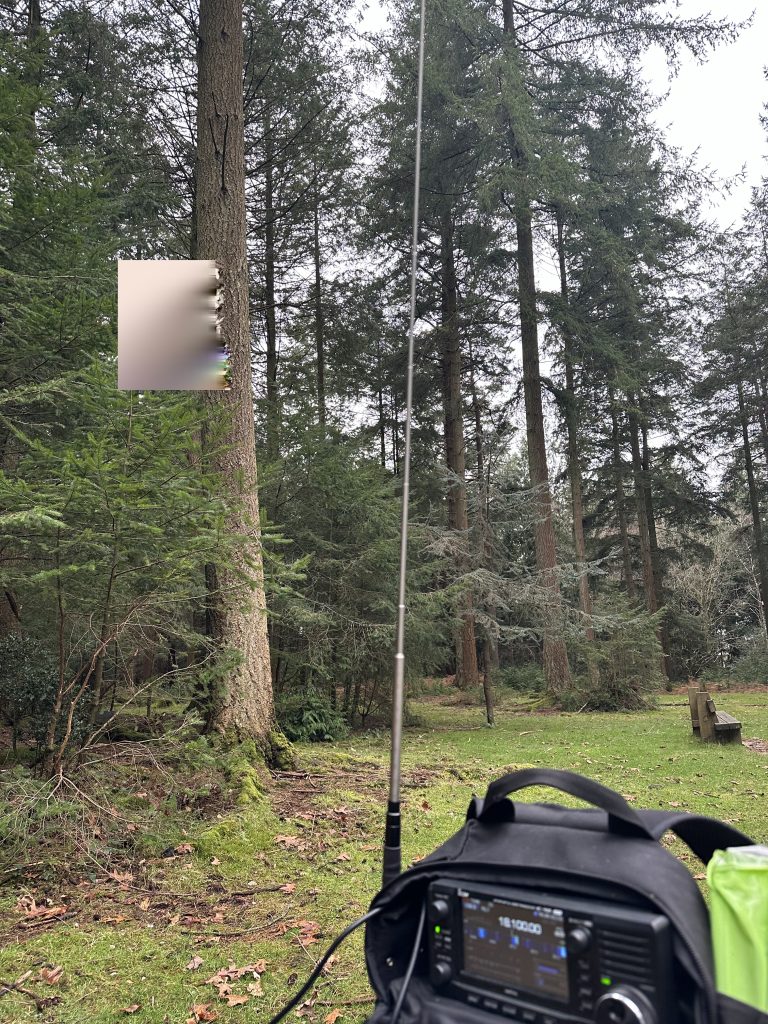
With good weather and wanting to get out to test out the ‘unknown dipole’ I headed out to Bolderwood park in the New Forest. I setup the dipole, first I tried with the mast, but the ground in / around the New Forest is very rocky, so improvised and put the antenna in the trees !
Dipole was still in action in the trees !
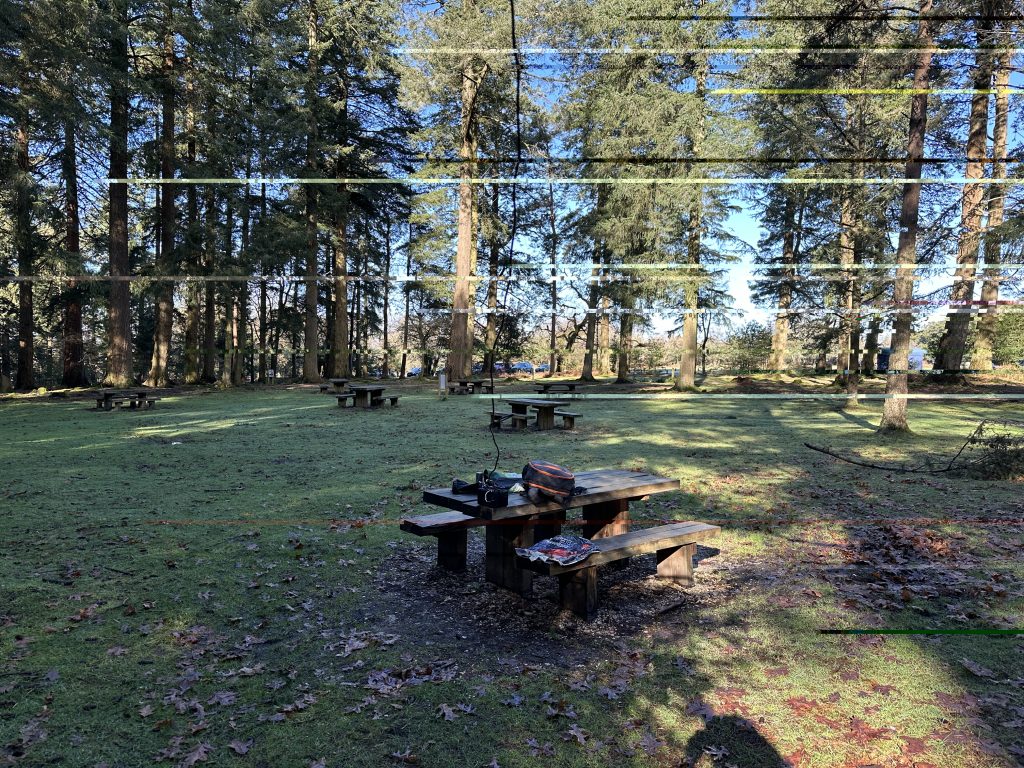
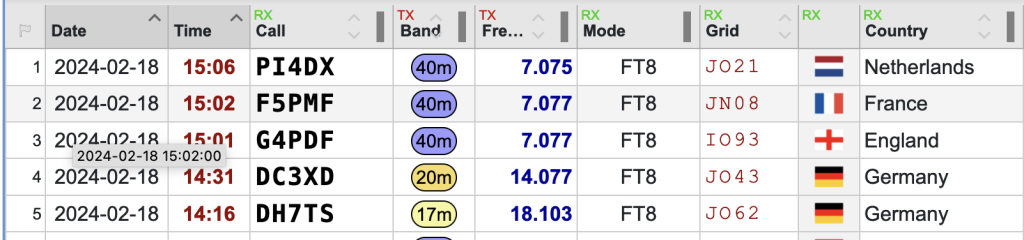
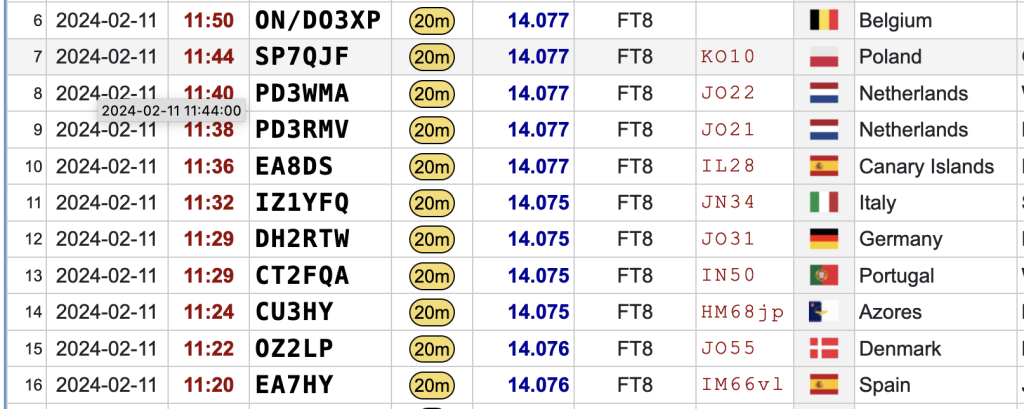
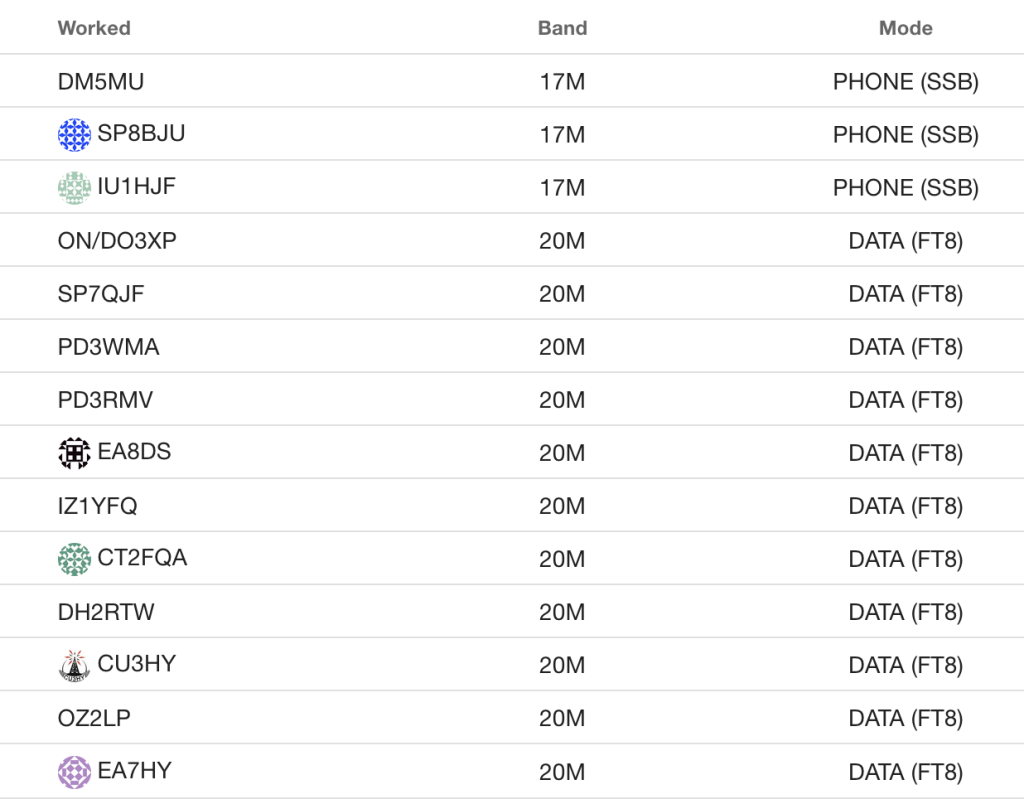
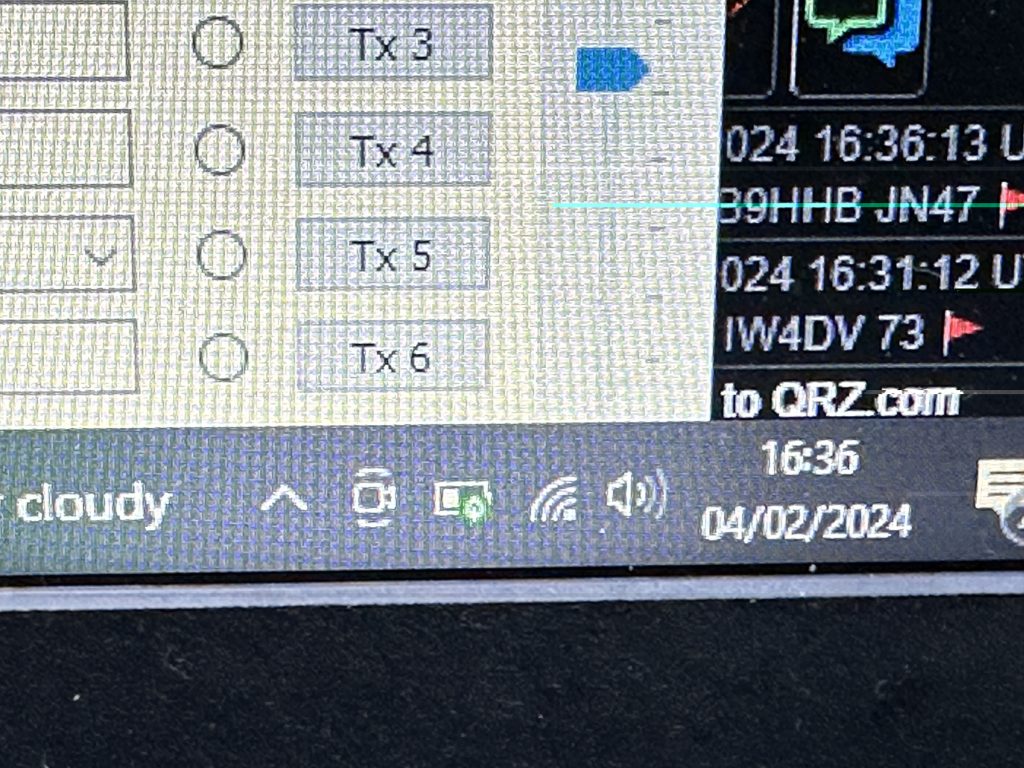
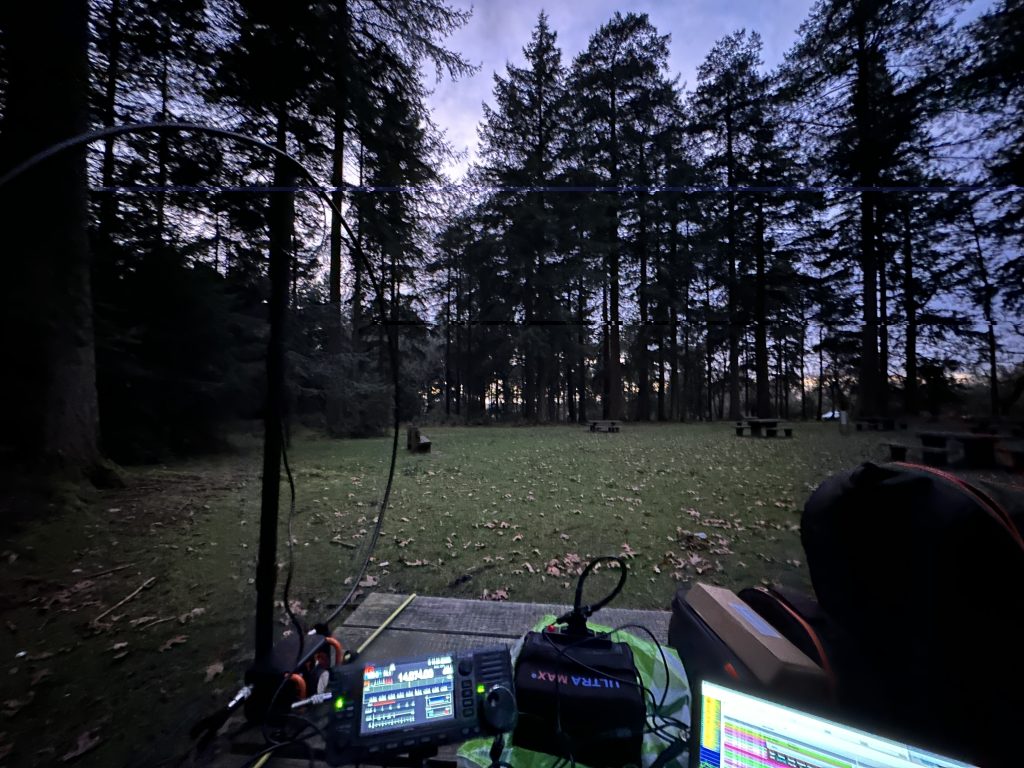
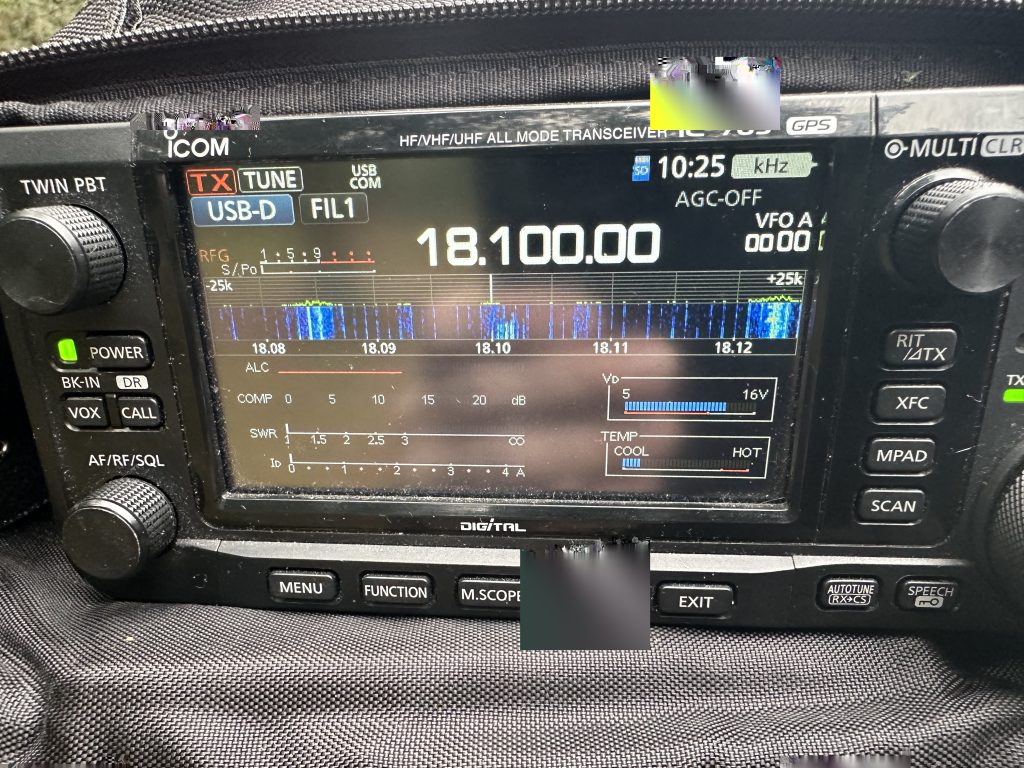
This took longer than setting up the Alexloop Hampack mag-loop antenna, but I was keen to see what improvements using a dipole in the forest would bring compared to the Alexloop. I was soon setup on my ‘regular’ bench and on the air, making contacts on FT8 on 17m in no time at all !
Bench with the dipoloe feedline going up into the tree
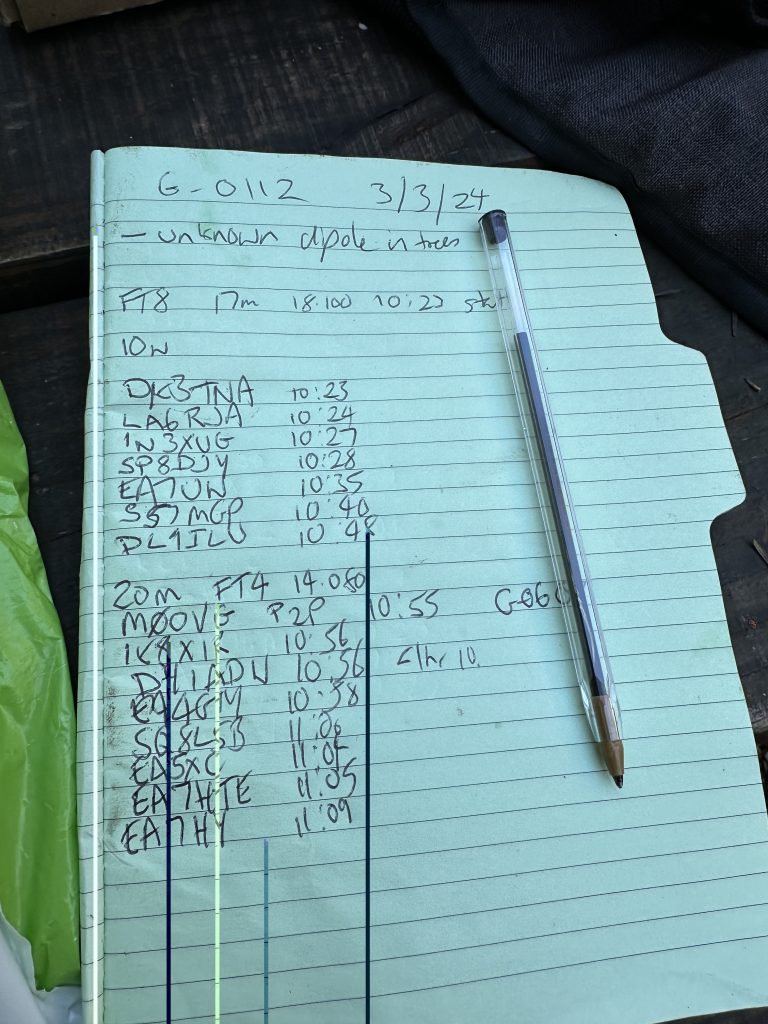
I was amazed at how quickly I was having FT8 QSO’s, it was one after the other, and changing bands with the MAT tuner, made it very easy. I could hardly write down the backup log for FT4 as the contacts rolled in !
the contacts just kept coming and coming !
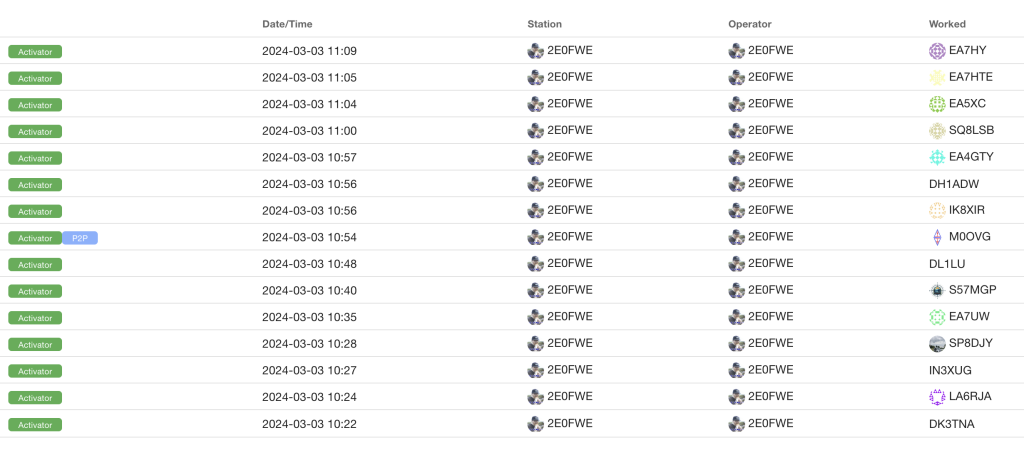
I also managed a Park-to-Park with M0OVE on FT4 – a real treat and was really excited. It took no time at all to get enough contacts (< 50 minutes) on FT8 and FT4, the antenna and radio was doing a great job. In terms of operation, I found the dipole much easier to use than the magloop as it didnt require me to re-tune each time.
Having made more than enough contacts, I tried SSTV, whilst reception was excellent, getting out on the busy ARRL contest weekend and a busy SSTV CoA was proving difficult, nethertheless I enjoyjed trying !
a busy SSTV SOA – if it was nt SSTV it was ‘CQ Contest’
I tried for some telephony contacts, but the self-presribved midday cutoff was coming up and packing up would take a little while, so tided up and headed home.
Once home I had to work out how to update my ADIF file, which to the thanks of the excellent POTA website, was made easy, so I can add my P2P reference, sure enough,that uploaded without problem. I was really glad so many my digital mode QSO’s where fellow POTA hunters !
Hopefully i will get out again in March and I can enjoy using another antenna, I think its worth experiementing just to see how much a good antenna and 10W can really do !
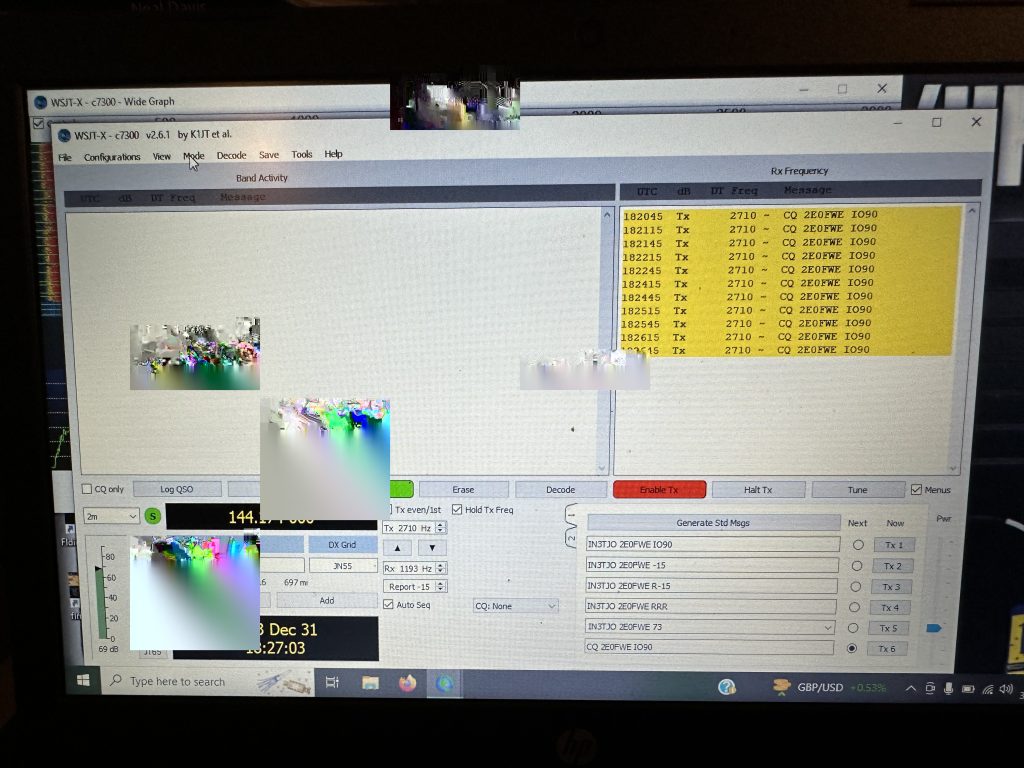
Having being able to do more work on the 9700 and its antennas recently, the ‘drift’ on frequency was getting more apparent, especially so with digital modes with the classic WSPR drift. As I want to do digital modes on the ‘birds’ having a stable frequency would seem like a good prerequisits to fix the drift issue.
WSPR Drift in WSJT-X from the IC9700
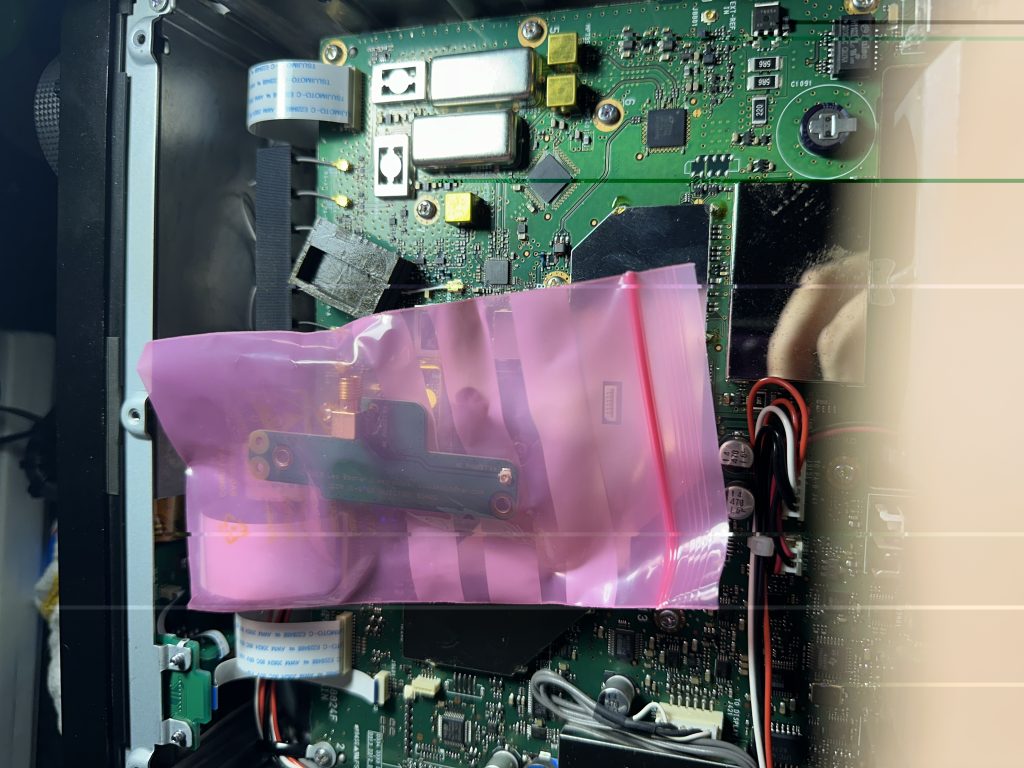
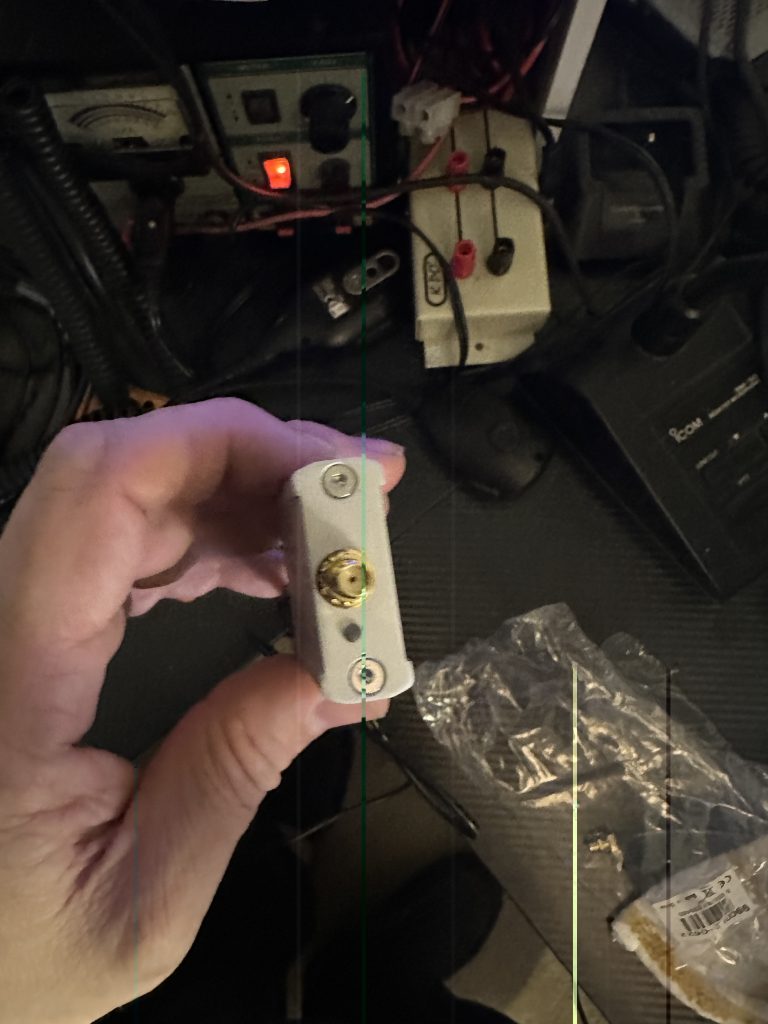
I’ve had the injection board for some time, but just never had the desire to open the 9700 until it was really necessary. I have to say that the idea of opening a radio with the price tag the 9700 has to fix an issue does seem somewhat bizzare, but equally I’m glad that leo bodnar solution requires no soldering but stil requires a good amount of care and attention.
I ordered the mini GPS clock and was pleased to see that it included a GPS Antenna and USB cable, its worth noting that you will need a SMA Cable for going between the GPS clock and the radio itself, thankfully I had several good length ones here in the shack thanks to my work on the chipwhispherer capture board.
My reference video, which is also linked from the Leo Bodnar site, is the ‘gps lock you icom ic-9700’, I watched this several times before even opening the radio.
The most excellent how-to video on fitting and tuning the GPS lock on the ic-9700
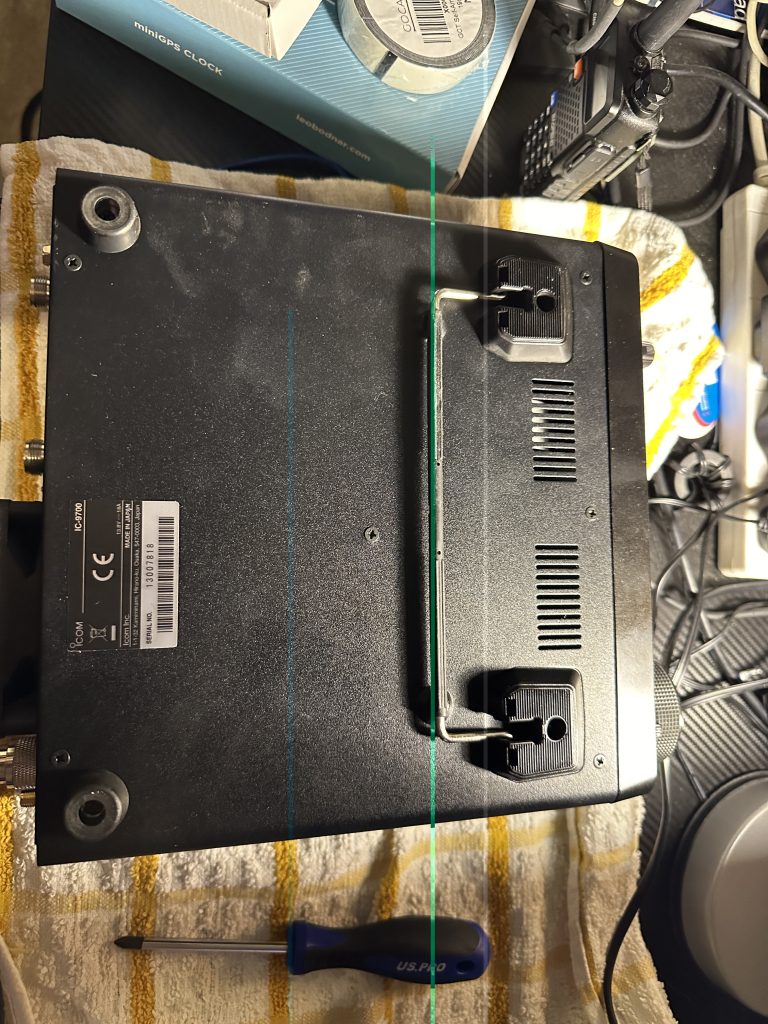
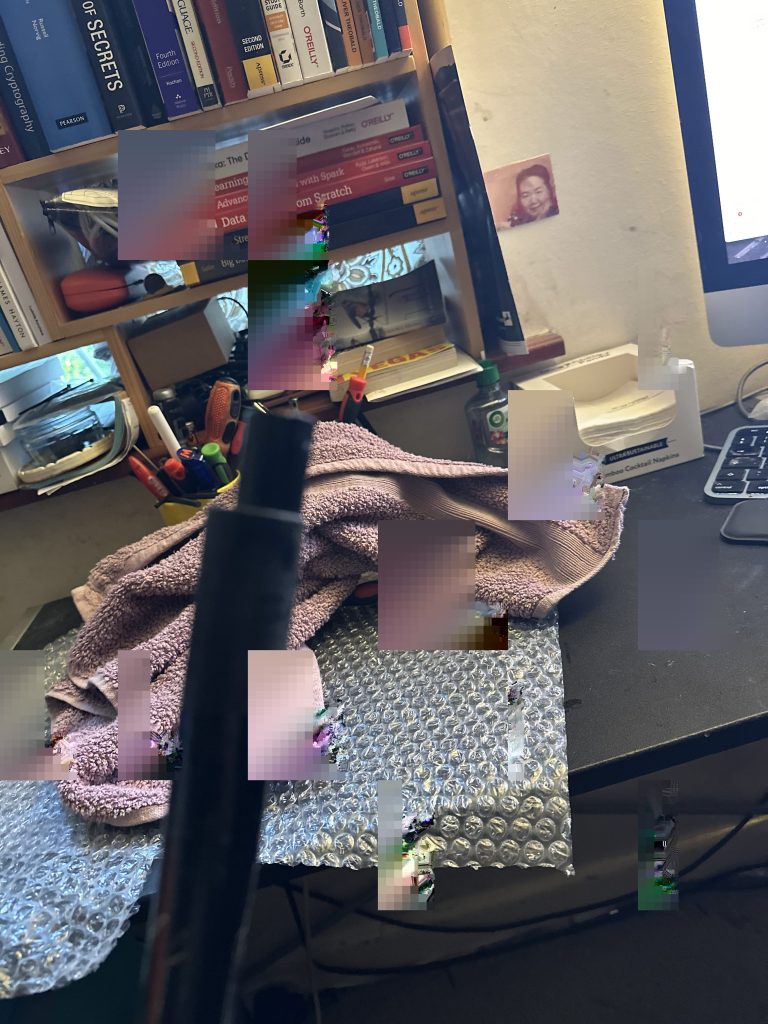
Having watched the video one last time, I set about opening the 9700.
use a towel to protect radioscrews removed and ready for fitting
I waited an extra day before opening the radio as I dont have any JIS screwdrivers and didnt want to wreck the screws on the 9700. I found a nice set for £12 on Amazon that done the job nicely, tho some screws may of been ‘locked’ in, a good strong ‘tap’ of the screwdriver ensured the screws came out easily.
JIS2 screwdriver for exterior screws on IC9700 base
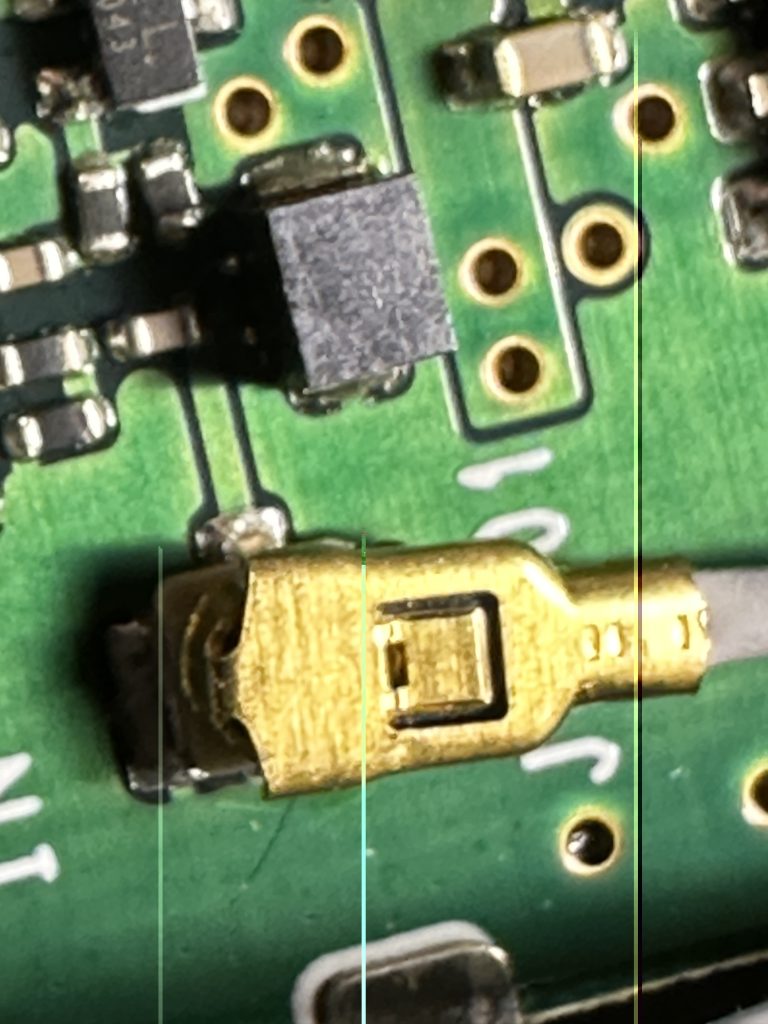
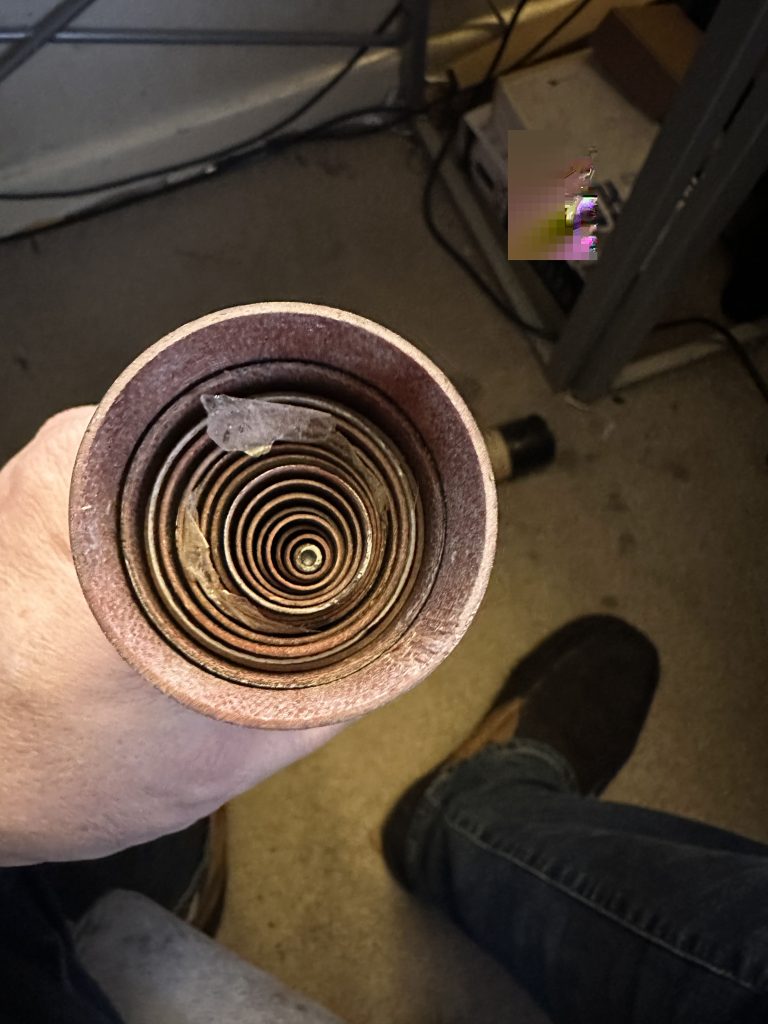
Having got the case open, i then set about removing the thermal protector and existing wire. I was trepidatious about removing the connector, its very small with alot of components around it, with a little ‘wiggle’ it was removed. I used a bike-kit socket set to remove the connector from the chassis and stored in the board box.
fiddlylight glue held this on
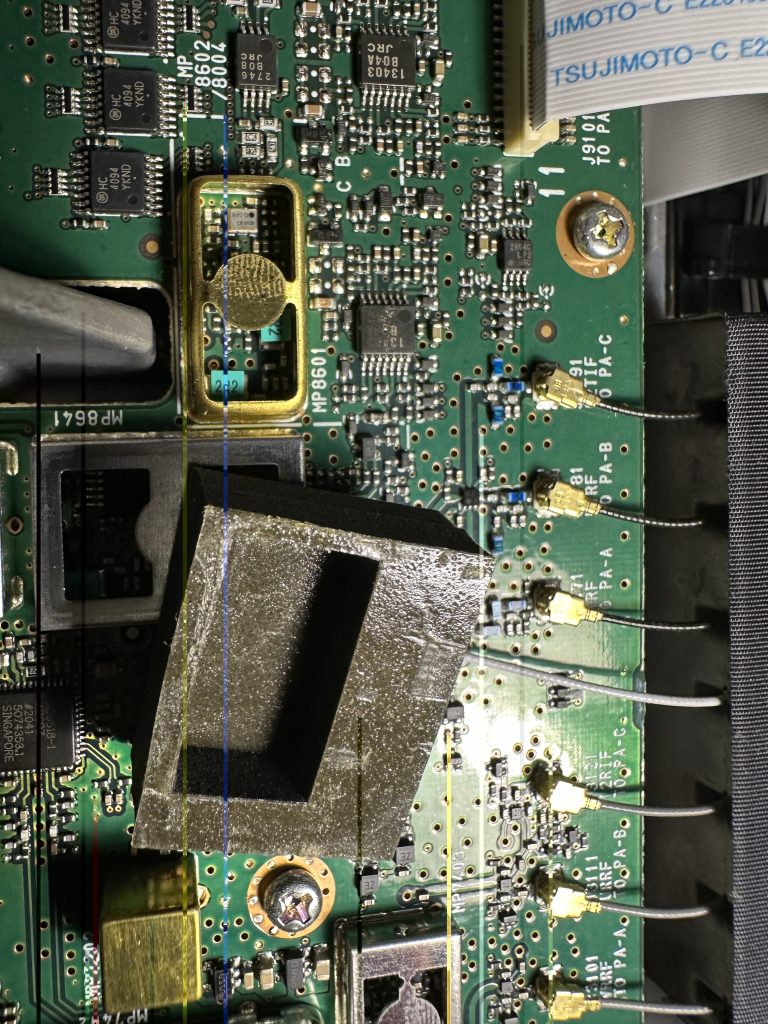
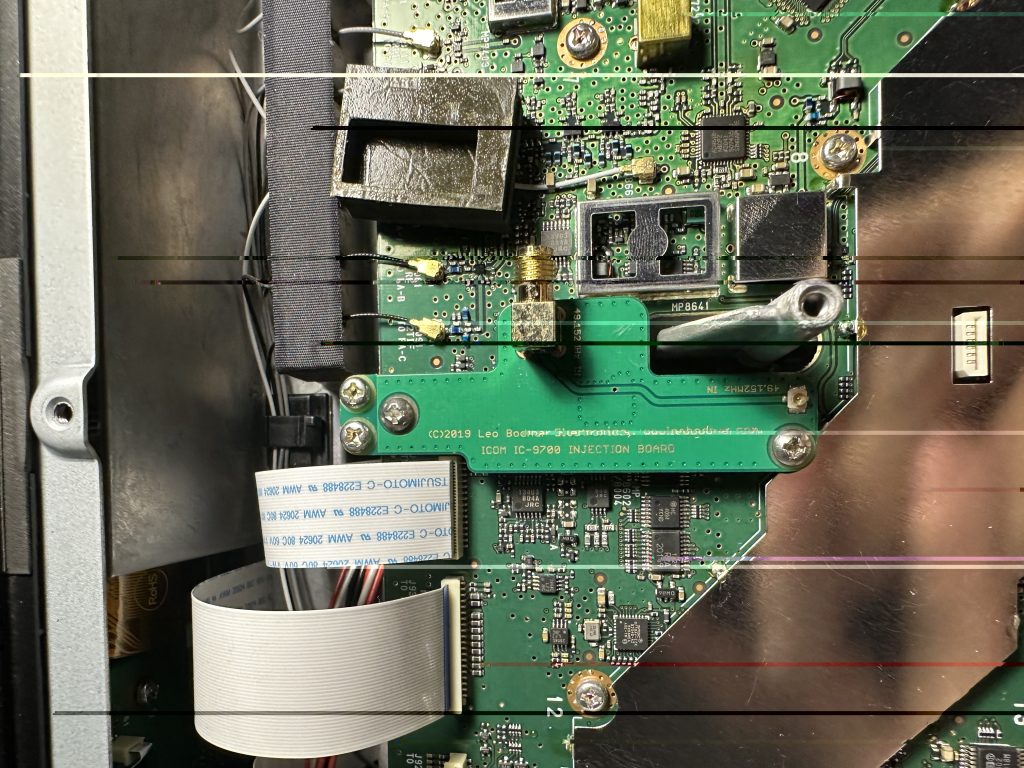
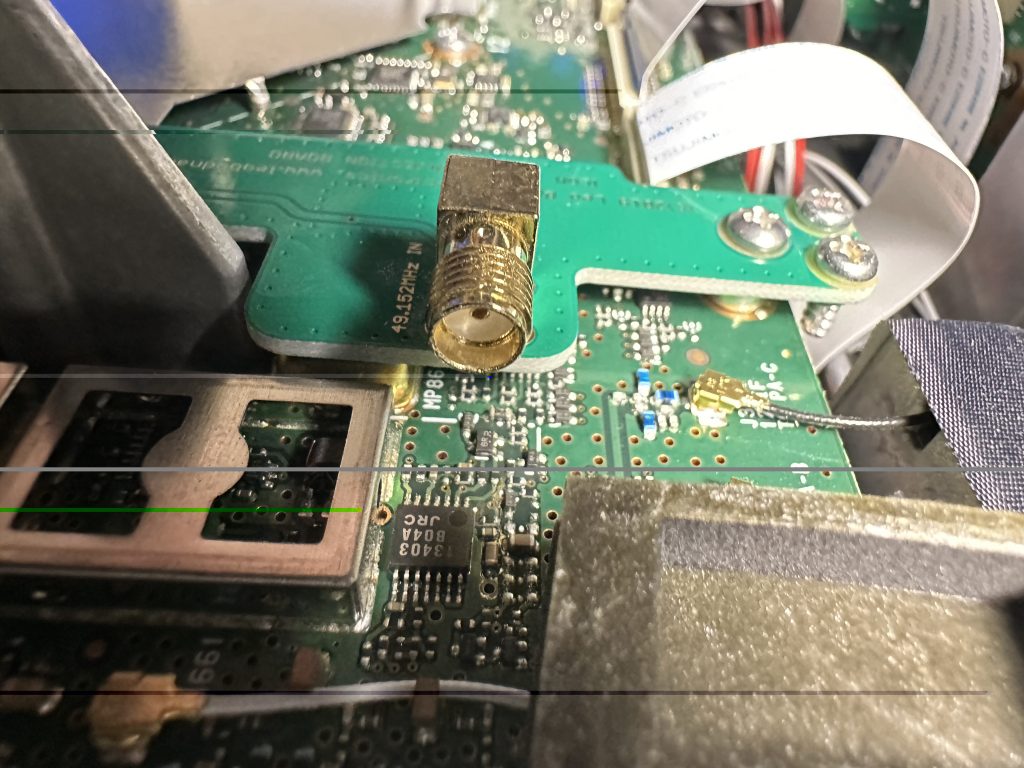
I then went about fitting the board, i first sized up exactly where it would go and what screws to use, there are two pairs in the box, I went with the longers set which done the job well of holding the injection board to existing screw holes. I made a visual inspection with my phone to make sure the board was fitted correctly and should work correctly.
making sure of placementlonger screws used for fittingvisual placement looks good
Once I had fitted the board, I put the power back and turned on just to ensure nothing had shorted/issues, then put the bottom case back on. I found getting the power connector on and off the 9700 really fiddly ! hopefully I wont have to remove it again ! 🙂
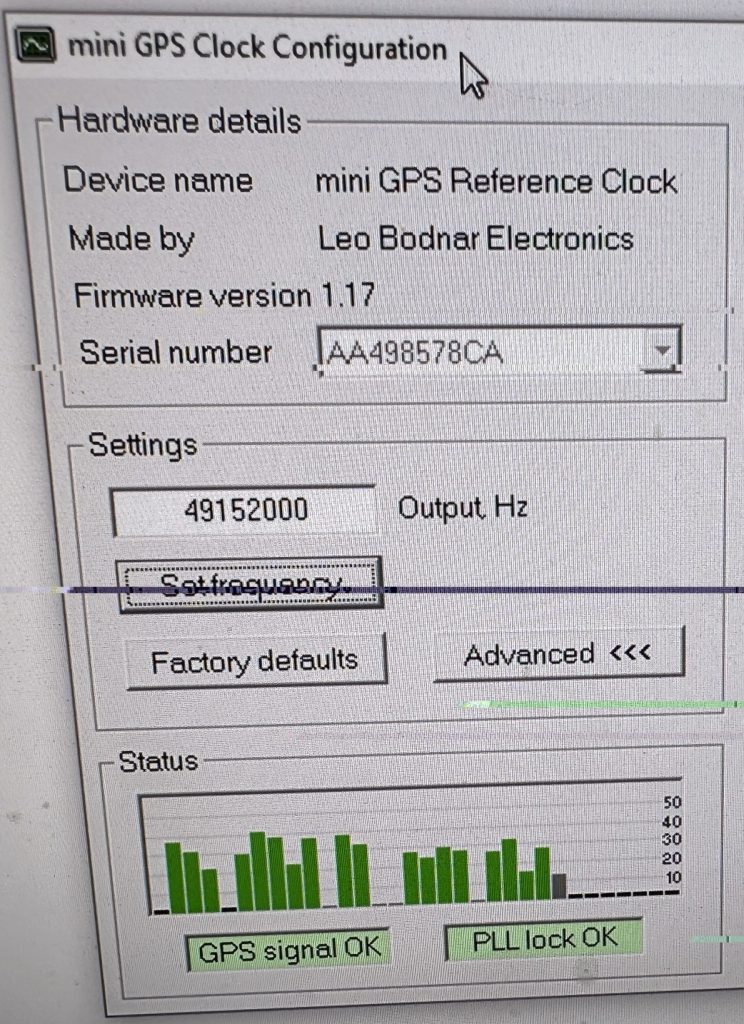
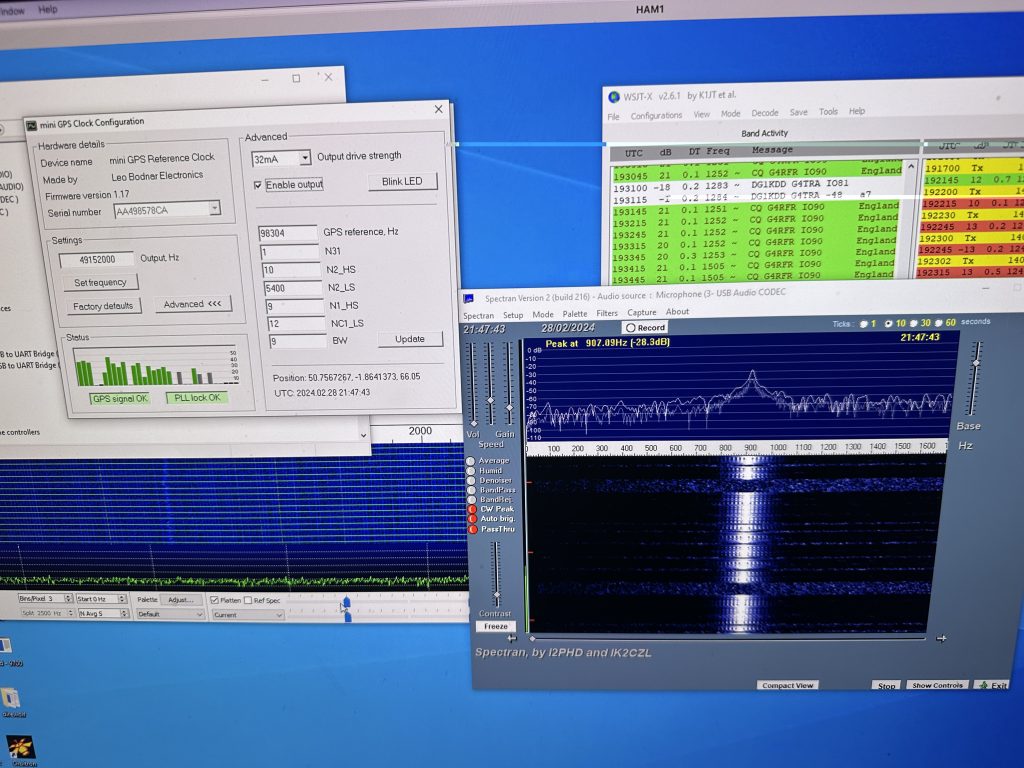
I then installed the software on the computer I use for the ic9700 that has PCSAT32 and HRD installed on it. I didnt see any Linux software for doing this, so was at advantage running Windows in this instance. I liked the GPS Clock had a blinking LED on it as well. I hooked up the external antenna and was soon picking up the GPS signal without issue.
GPS reception is great !LED is a good feature
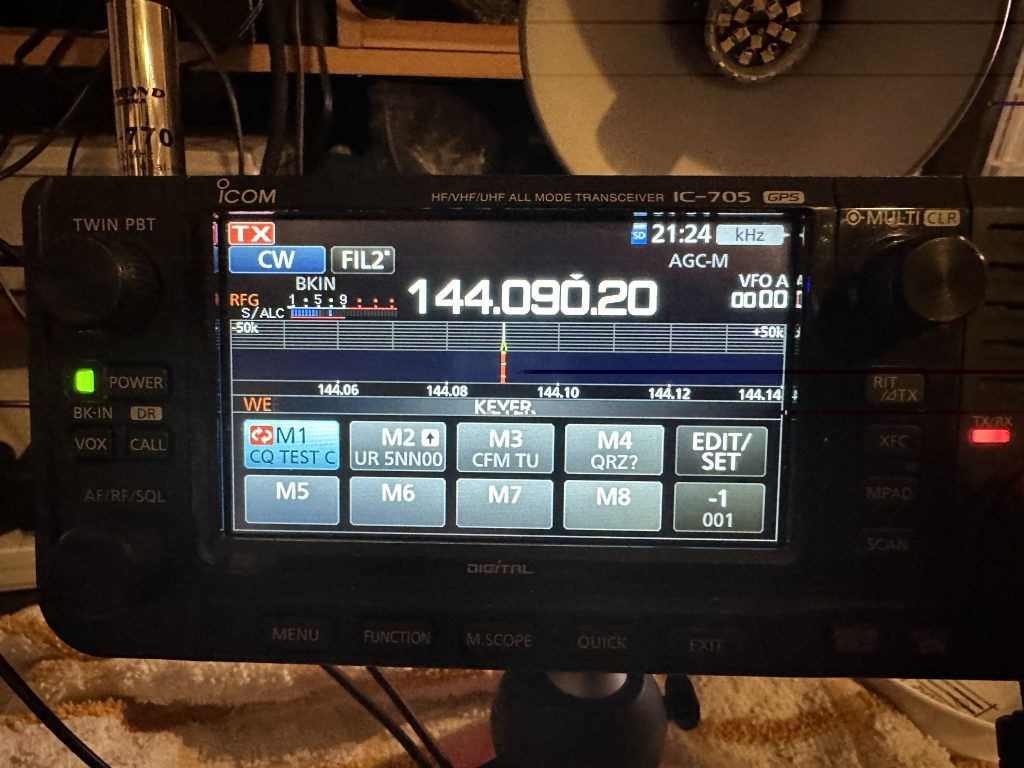
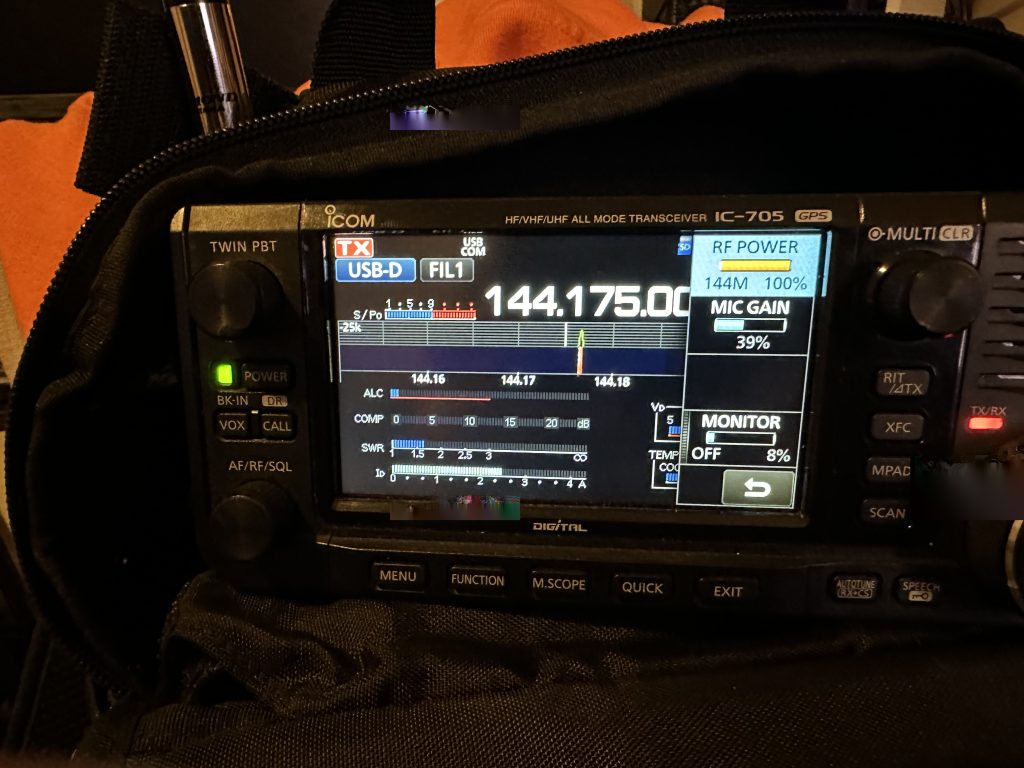
For signal generation I setup my IC-705 with a 2m/70cm whip antenna, and set the power output to 0, i was able to use the morse mode to generate a repeated CQ TEST 2E0FWE as my frequency marker, I could then use this to ensure the injection board was working correctly.
I was really impressed of how well the frequency locked and the stability of it. It only took me a couple of hours tops to watch the videos and fit everything to have a radio which will work well on digital modes.
Hopefully you will see more videos of me using the digital modes on the ‘birds’ soon, but am glad the radio is up and running !
When I’m working during the day, I’m using WSPR to test the antenna and even tho its an eggbeater its doing great with WSPR.
Whilst tidying up, I found an unknown dipole that was looking rather sorry for itself. All I needed was some good weather and I’ll be able to test it out – and today was to be that day, with plenty of glorious sunshine I was able to do some other work around the QTH and also then test out the ‘unknown dipole’.
the ‘unknown’ dipole
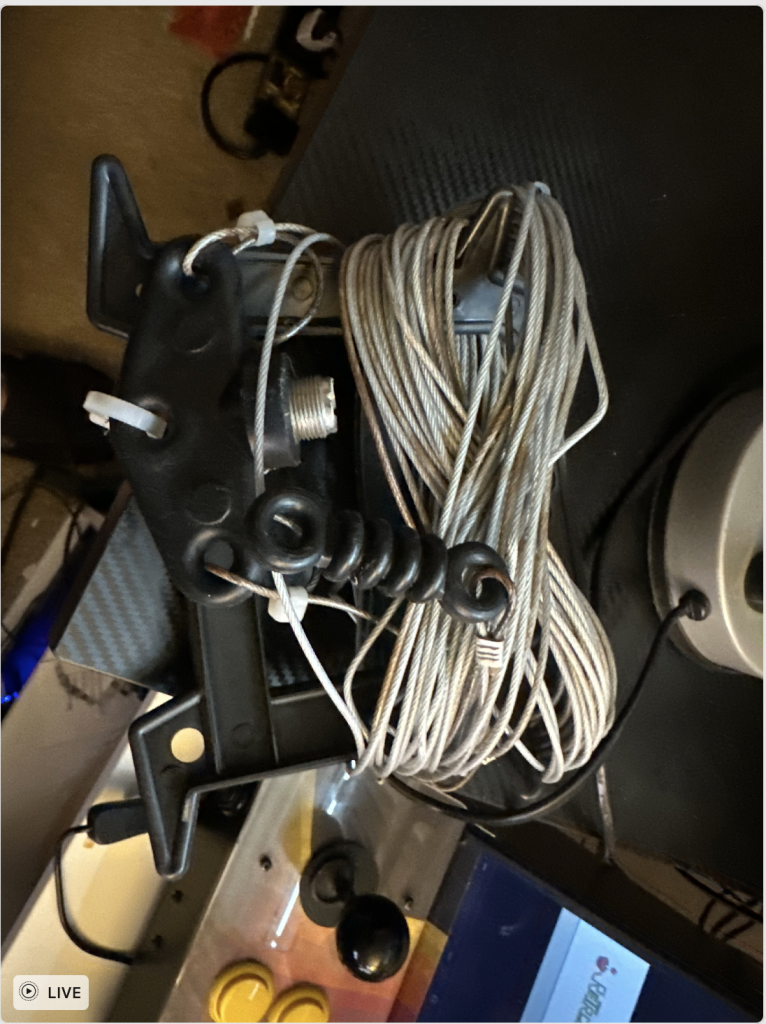
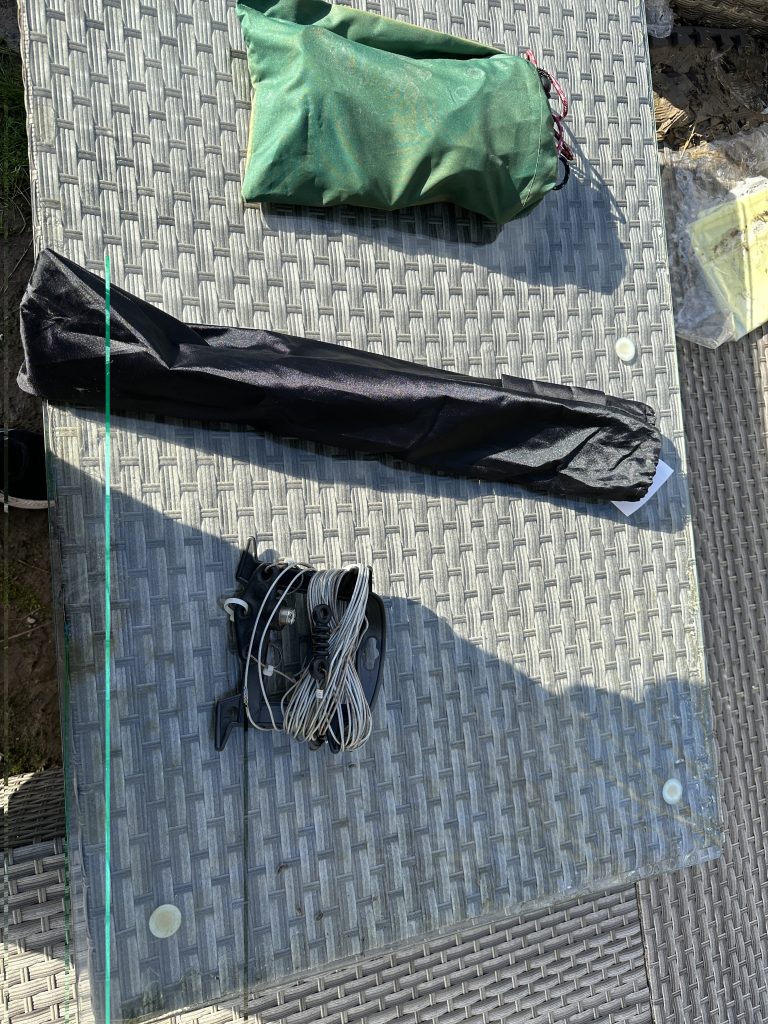
I purchased a ‘christmas string light reel organiser’ to wind the dipole onto once I had de-tangled it all. This worked well in keeping the antenna and insulators tidy. I then set about testing the mast having never used it before.
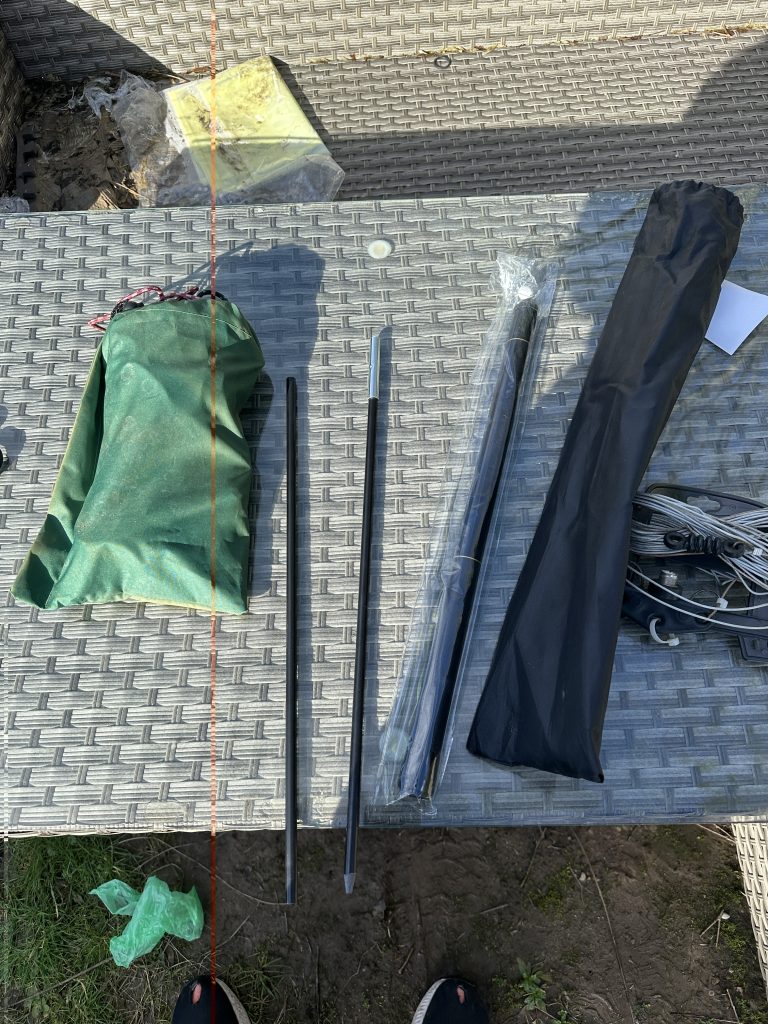
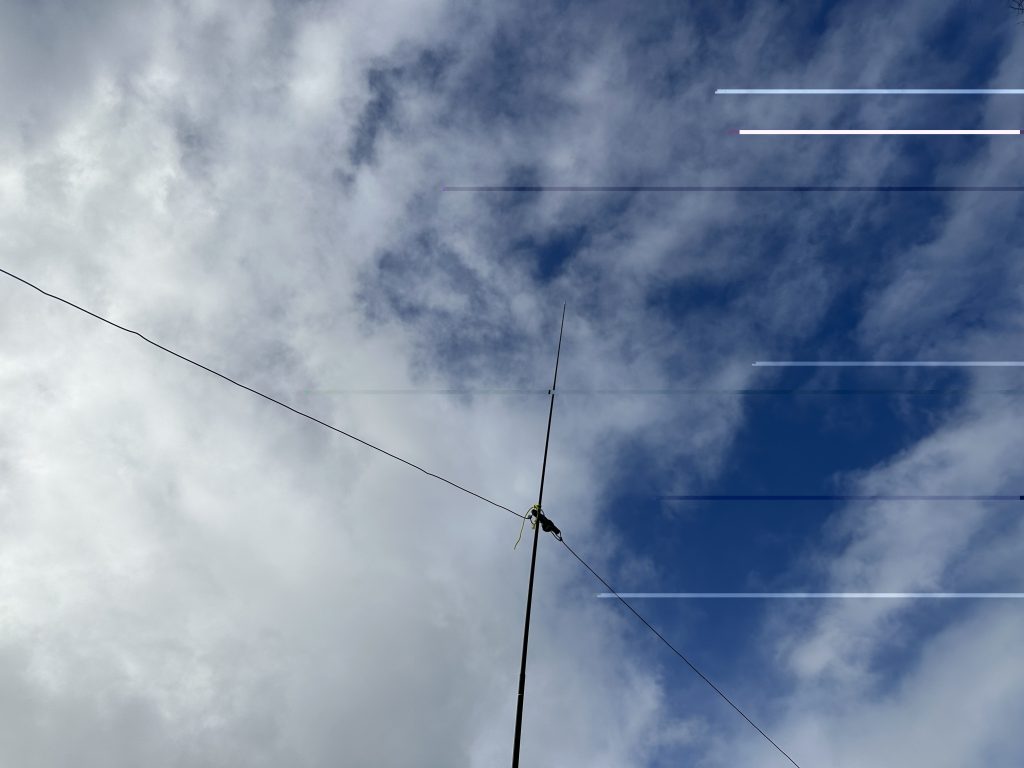
pocket antennathe ground spikesetup is easy
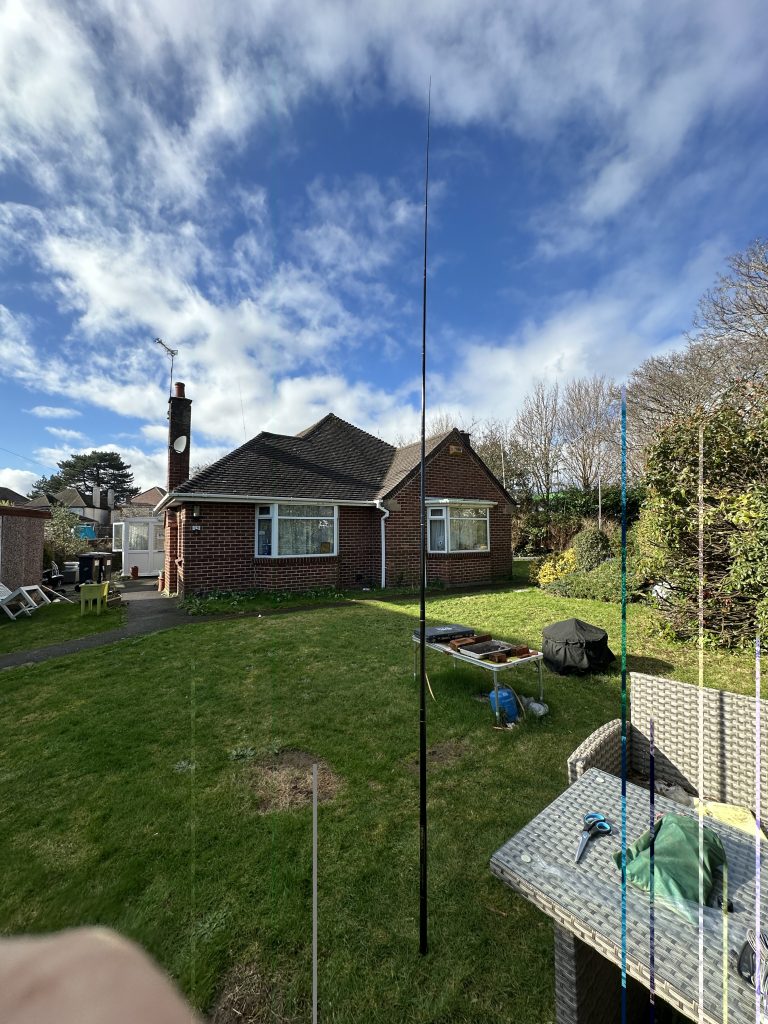
I was impressed how easy it was to get this ‘little’ mast setup, at just over 4m its a reasonable height off the ground, and very easy to pack away. I had the dipole attached and the wires attached to end-points in no time at all.
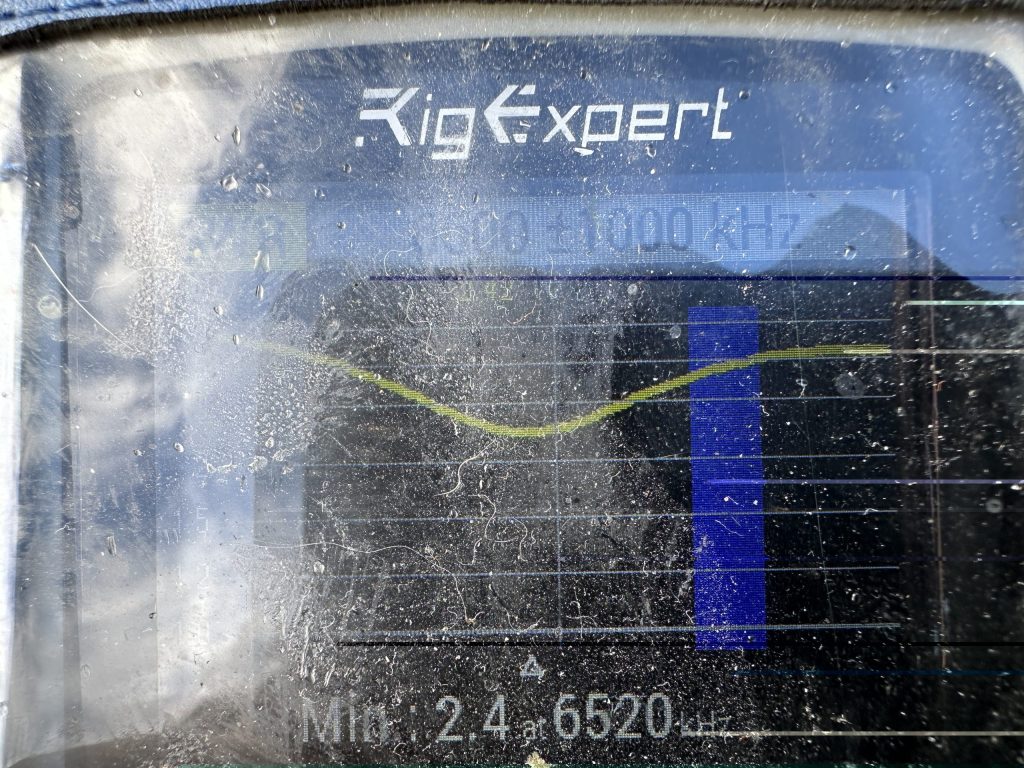
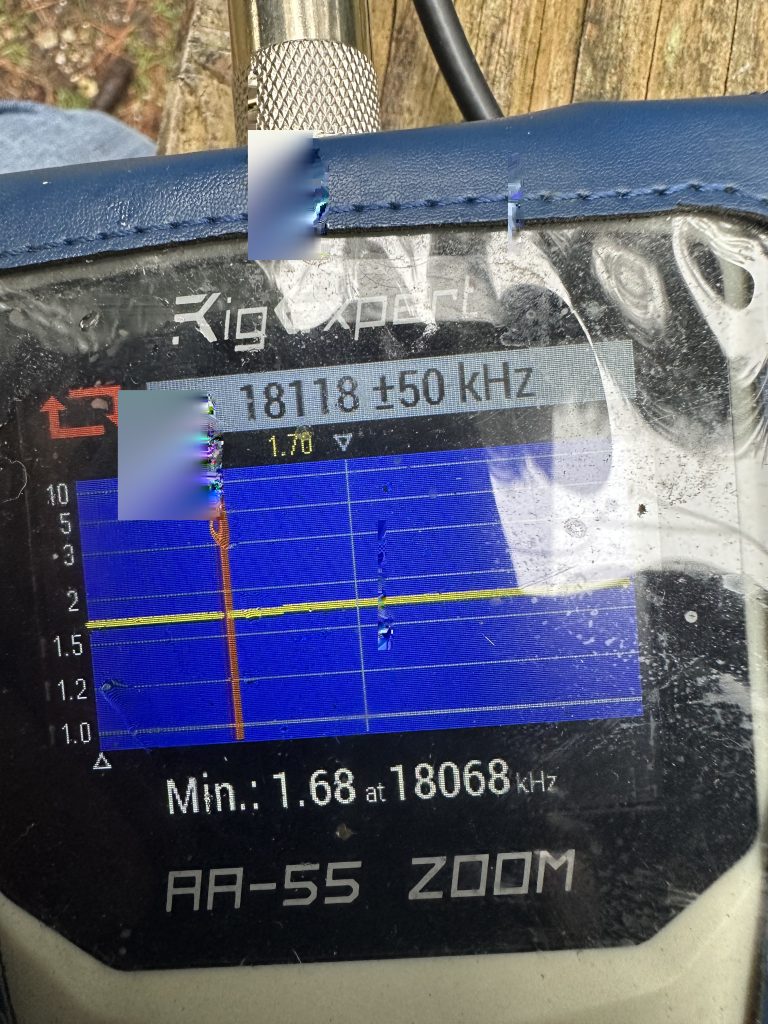
SWR 2.4 near 40m15m SWR 3.6up about 4m
The SWR of the antenna wasnt spot on 1:1 but at least in the range of being tunable for at least the 40m and 15m bands. I setup my laptop to try testing WSPR with 0.1W of power to see how the antenna would do without any tuner to start with.
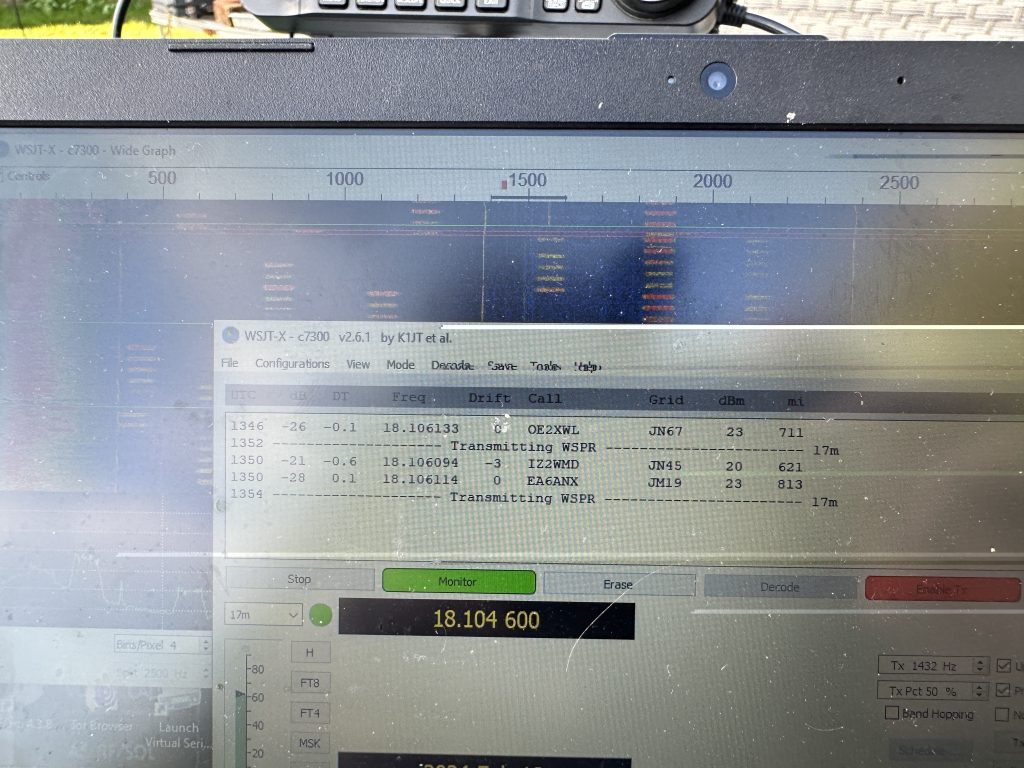
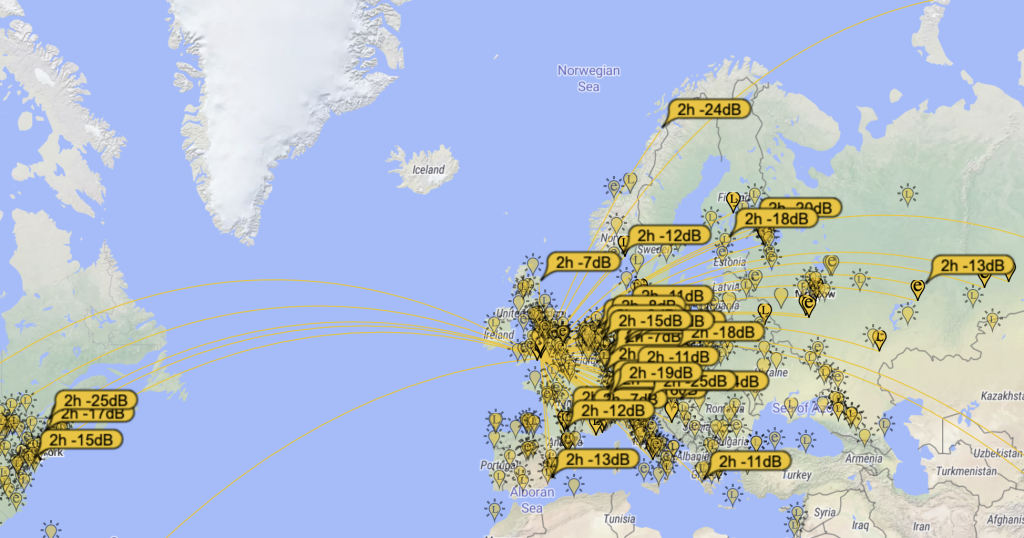
WSPR on 17M with 0.1W of power
I picked up serveral signals, so the antenna and 705 worked well together, I wasn’t to be disappointed with the reach on the 705 with just .1W (milliwat) of power.
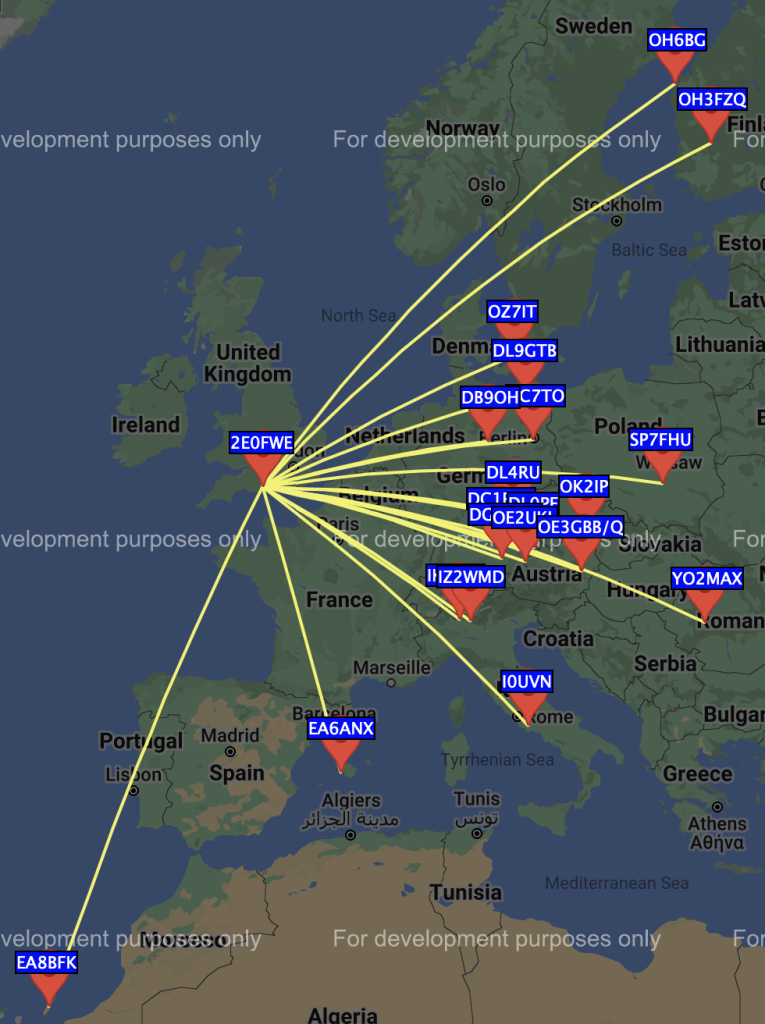
WSPR reception on 17M with .1W into the dipole
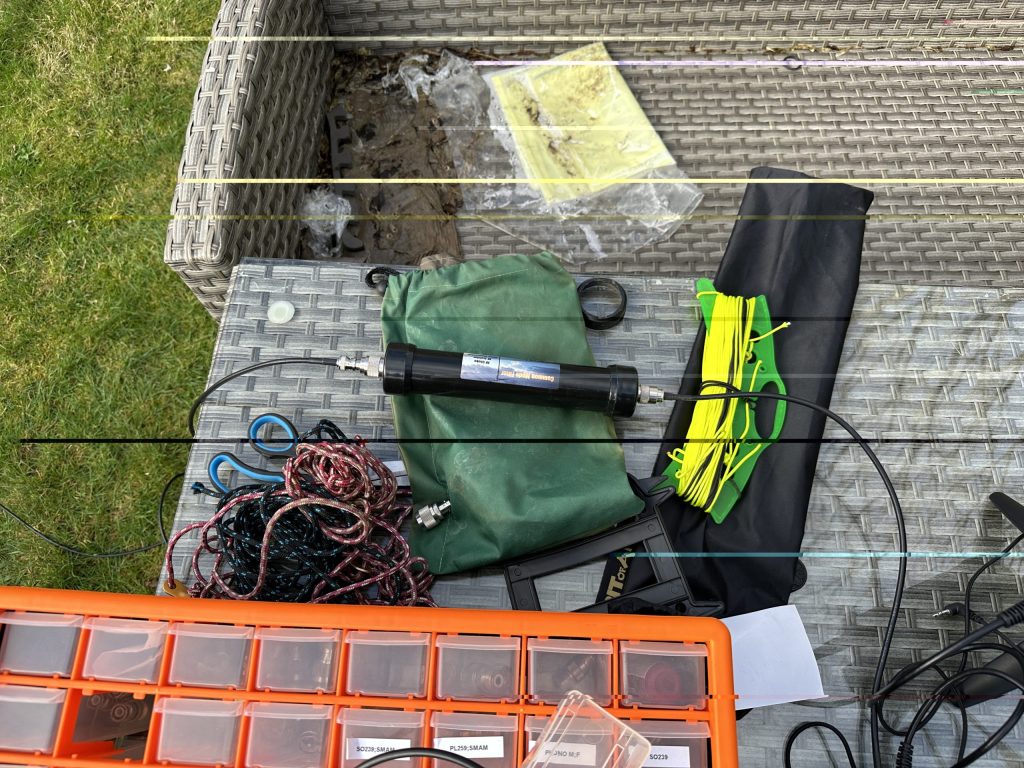
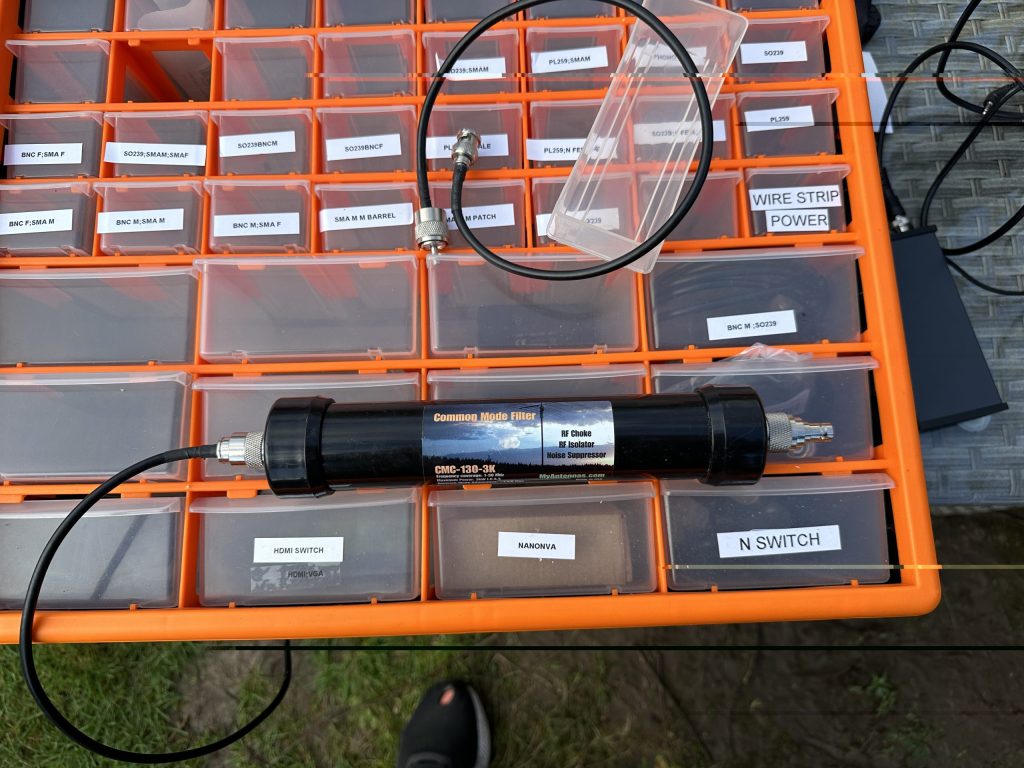
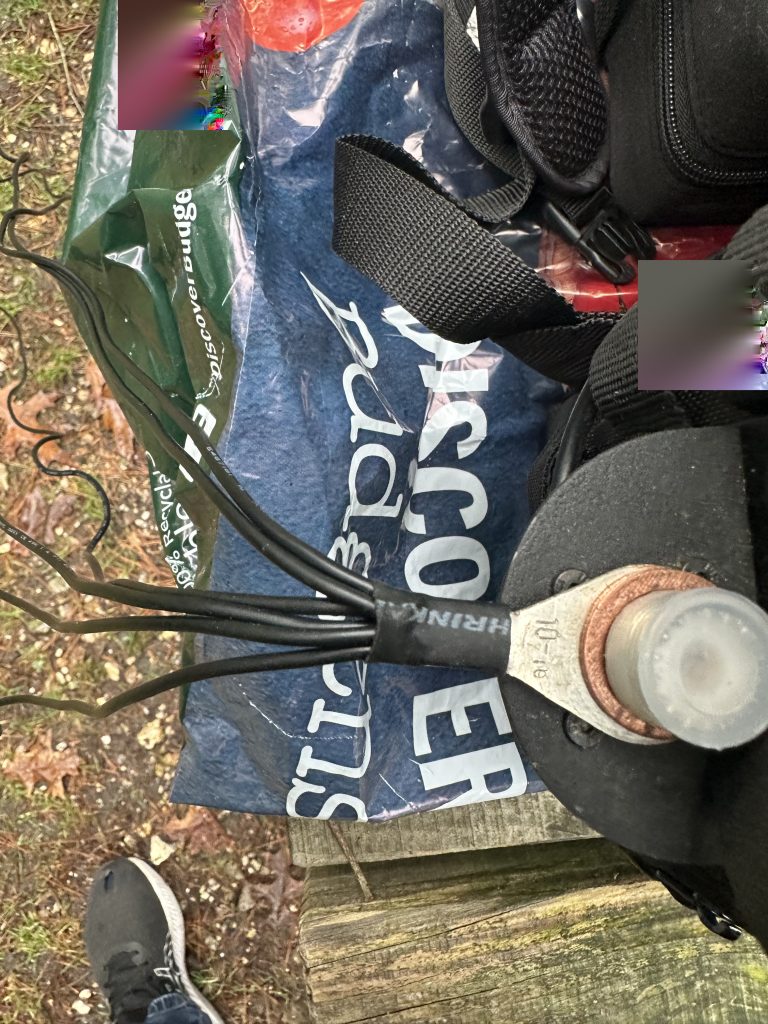
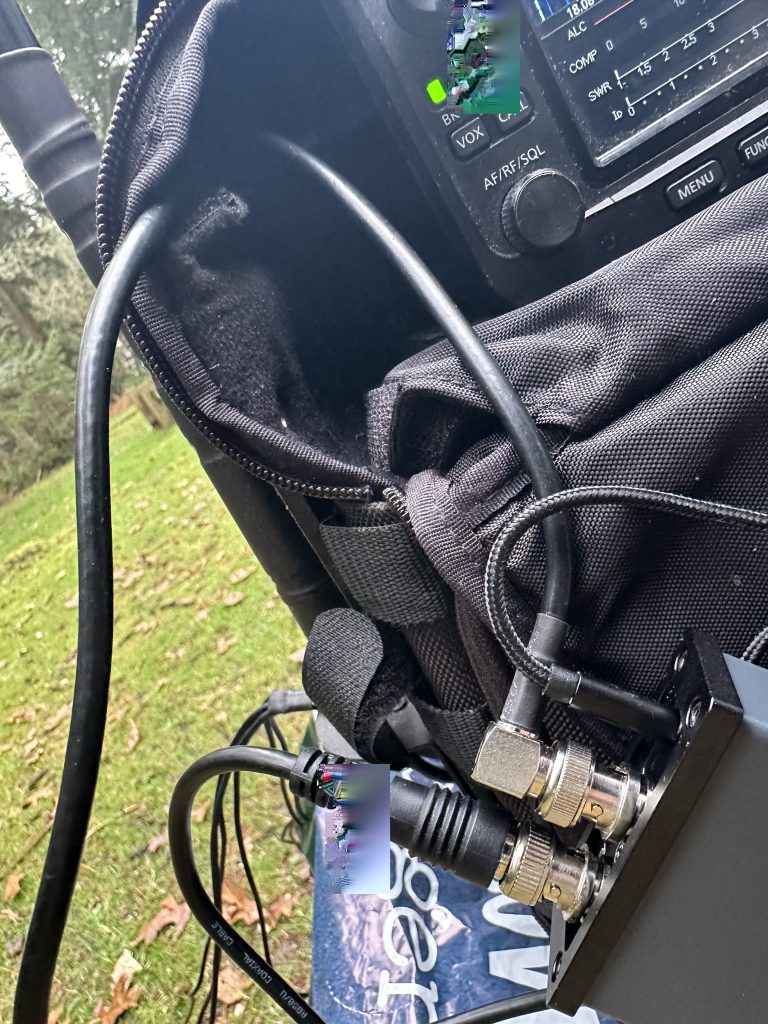
Having proved the antenna, I then wanted to test FT8, but encountered the same issues I had when using the whip antenna, the radio would cause the laptop to cut out. Thankfully with testing at home, I was able to return to the ‘shack’ and pick up a common mode choke to insert into the feed line between the antenna and the MAT 705 tuner. This did require a few adaptors on the choke, but it worked excellently with WSJTX working perfectly on the dipole antenna.
common mode chokePL259 to BNC adaptors
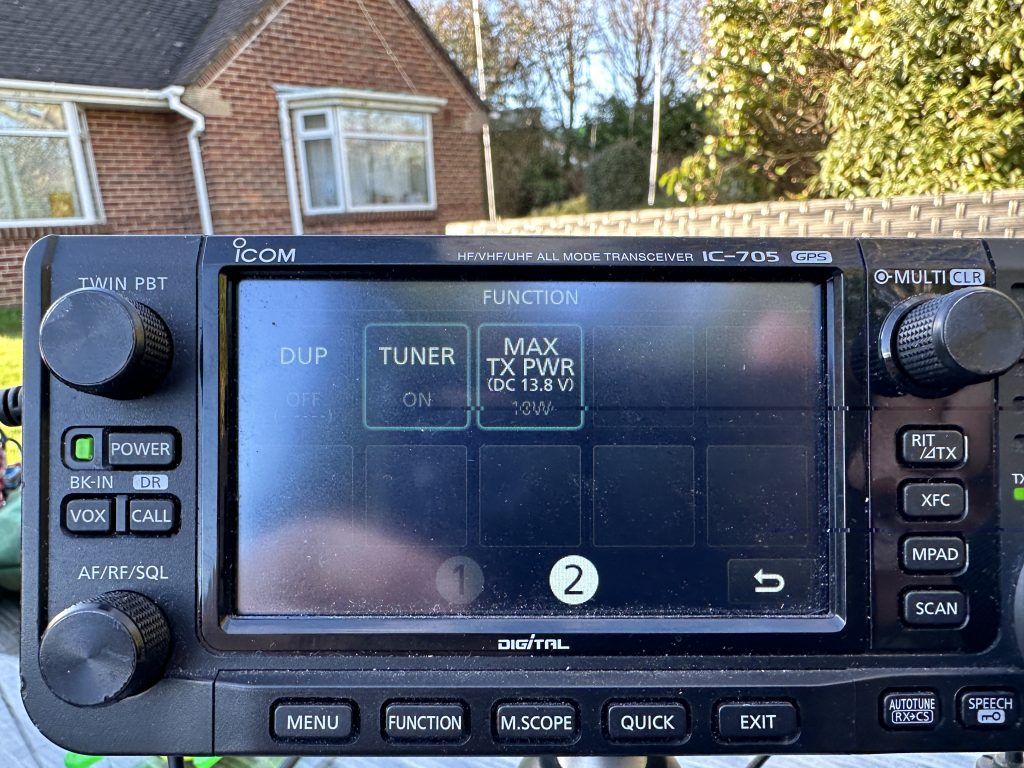
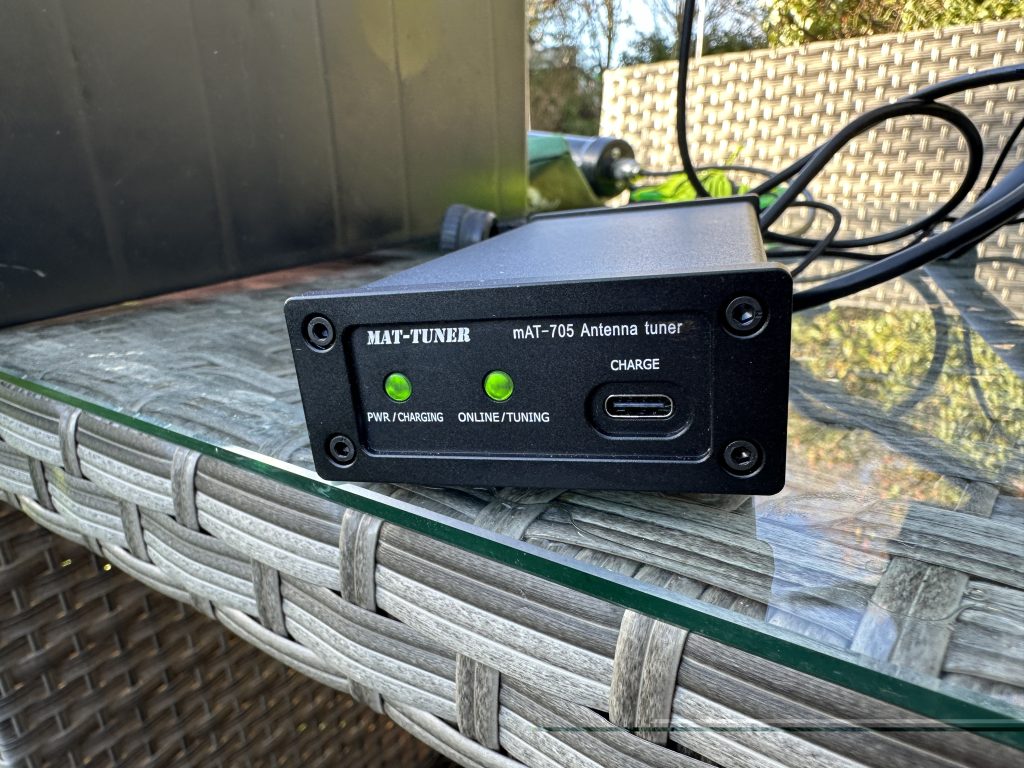
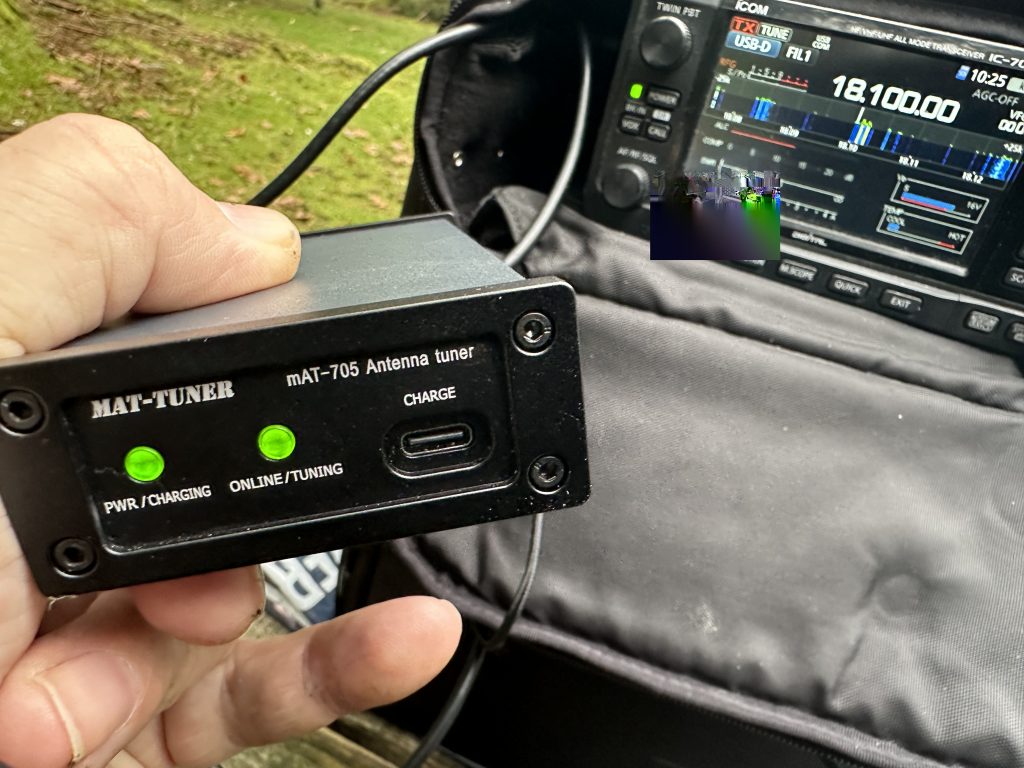
I was soon getting out on FT8 with no problems at all, using 5 and 10W into the dipole, the MAT Tuner, doing an excellent job whilst I hopped between bands, this was a distinct advantage to the AlexLoop which would require tuning each time, where as the MAT tuner coupled to the 705 took care of the tuning itself every time, which results being between good (<1.5) to acceptable (<2.5 SWR).
enable external tunerMAT tuner seeing some action
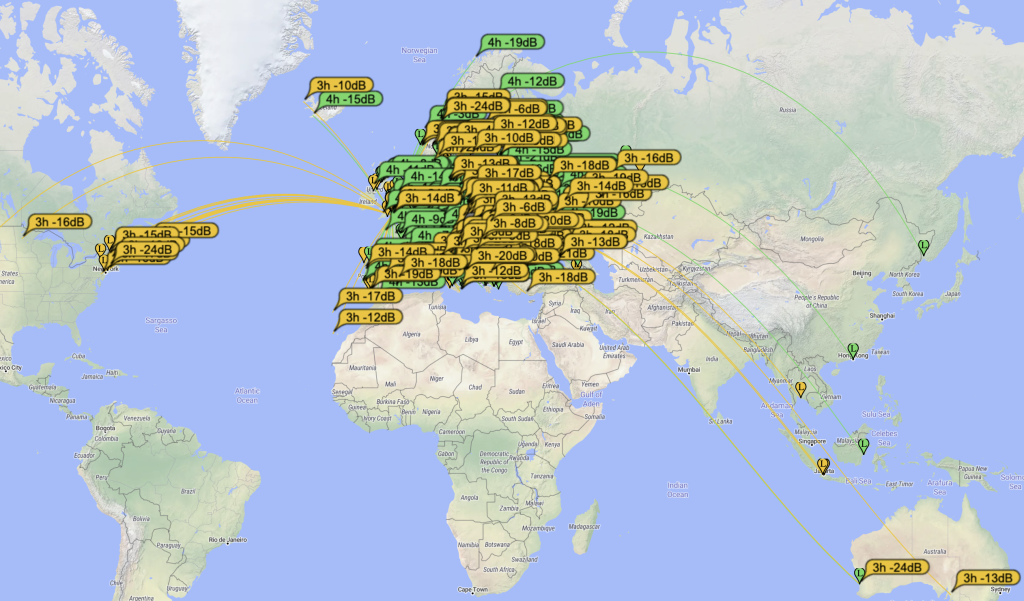
I was able to have several FT8 qso’s across the bands, and was really greatful for those that persisted in completing the contact with signal reports and 73. The bands, esp 20m, was very busy and getting out QRP it a challenge ! In a short period of time in ‘noisy’ RF environment I was able to make 5 contacts all across Europe and into the UK.
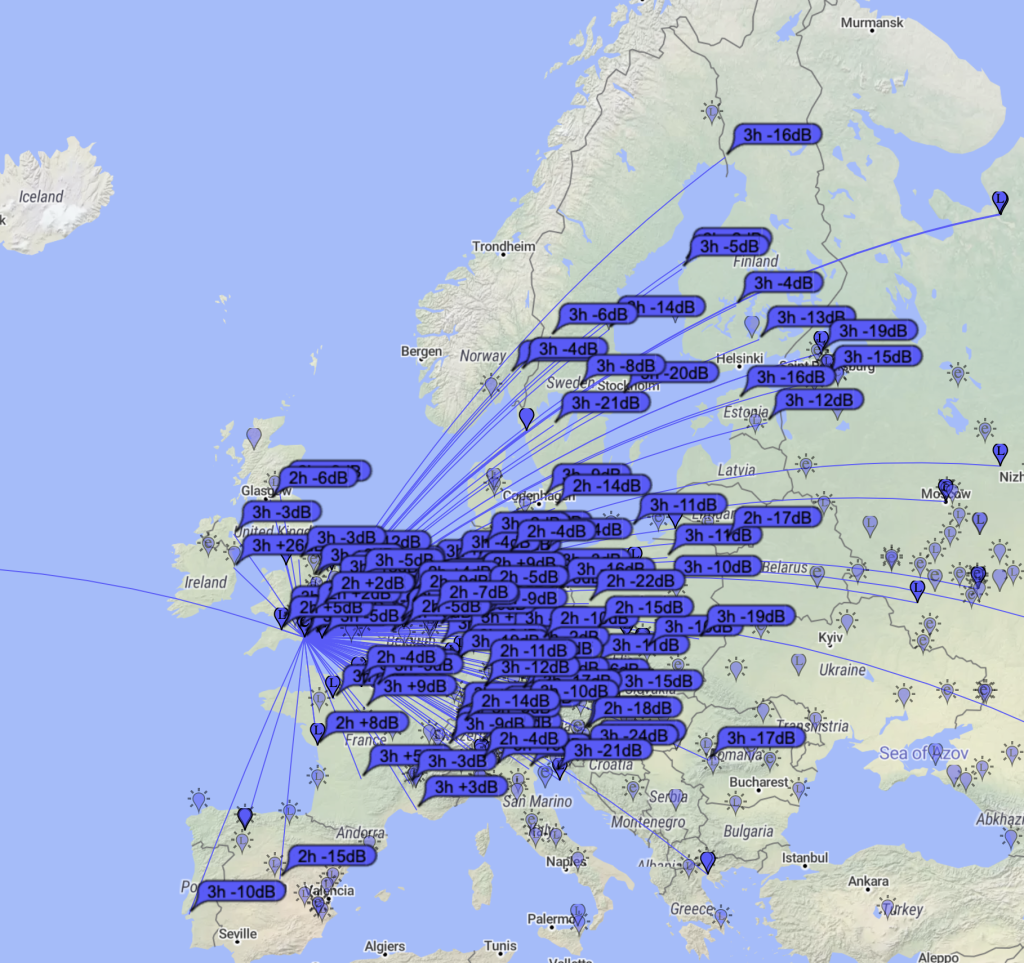
20m PSK Reporter17m PSK Reporter40m PSK Reporter
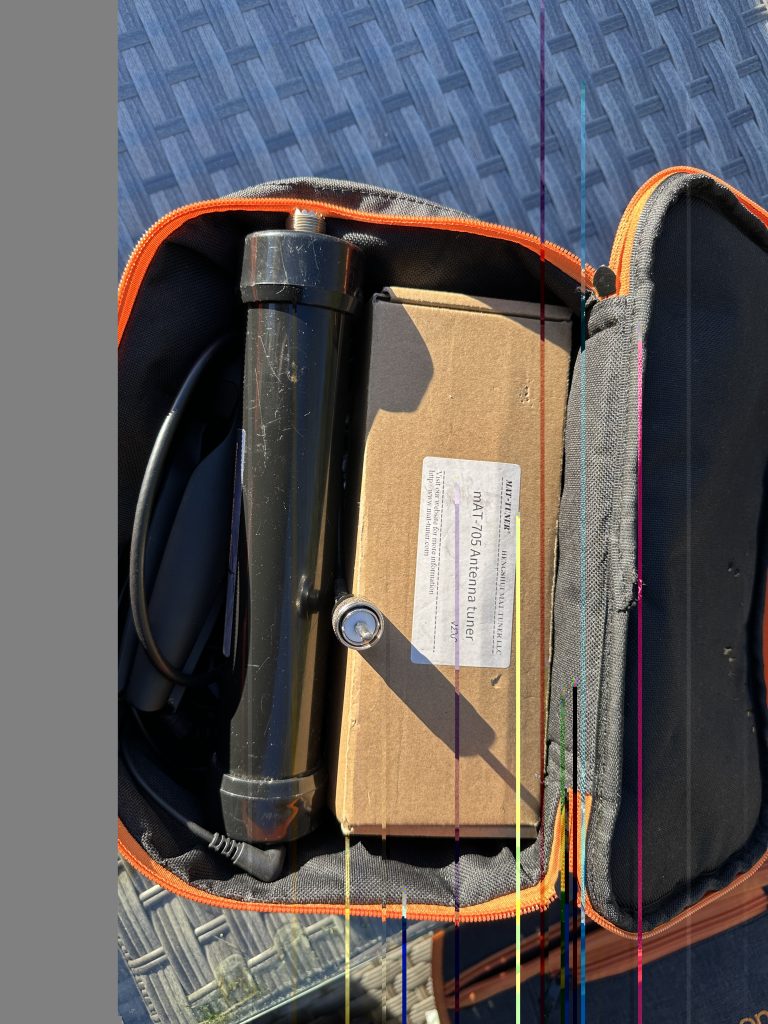
I was able to pack down the antenna and mast easily, whilst taking slightly longer than the Alex Loop, it did make for an antenna I can easily setup and use to jump between bands and seemingly do well having made several FT8 contacts. I was able to get the choek into the accessories bag, so its looking like I can take two antennas out with me when packing the dipole along with the alexloop.
common mode choke packs away nicely
I think I will always carry this antenna and mast with me, its so light and easy to setup/use, it gives the flexibility to operate around the bands without having to re-tune the antenna each time manually. I think it will feature on some PoTA activations soon !
Until then, 73s and hope to see you on the airwaves.
Having worked on antenna projects at home and with good weather the urge to get out and get on the air was strong ! This time it was an morning outing to the New Forest and Bolderwood, which was unsuprisingly busy with familes, dog walkers and folk enjoy the lovely surroundings of Bolderwood.
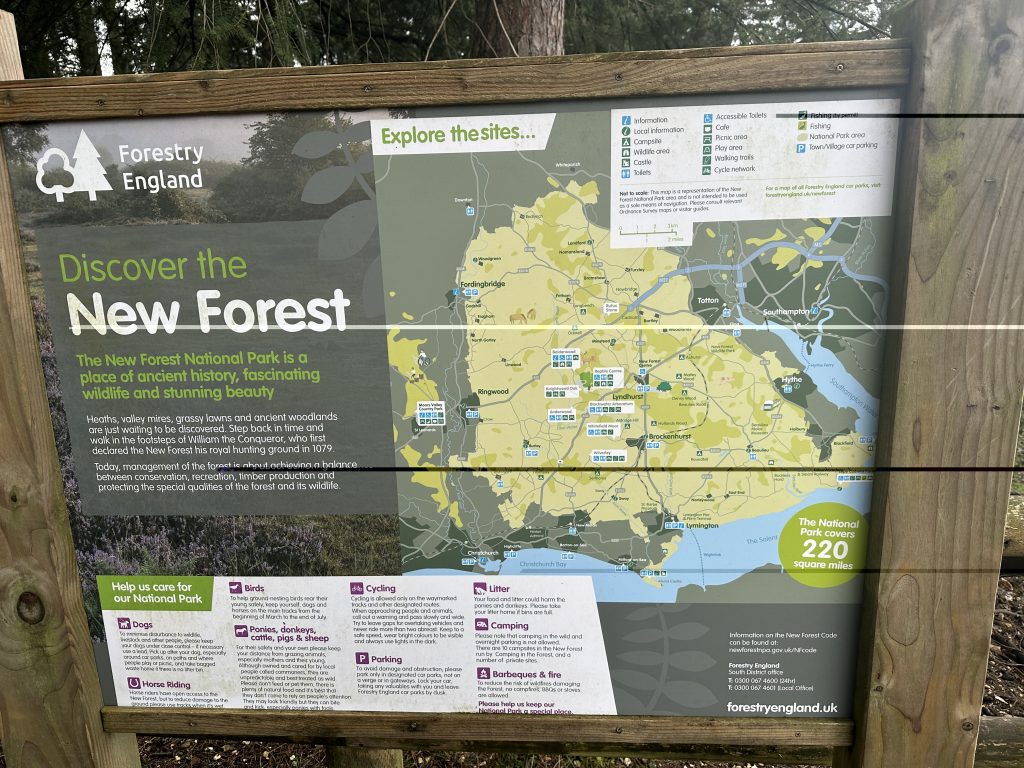
New Forest map in Bolderwood
I setup the 705 and Alexloop, although struggled with getting the loop on securely this time out, just figured it was a case of over familairity – sometimes it just goes ‘on’ but this time it was being a right rascal ! Still, i was on the air quick with the radio setup. I jumped on 20m and started with FT8. No sooner had I self spotted the flow of contacts coming in was amazing !
In no more than 30 minutes the 10 contacts to activate the park was complete – even with a pile up !
The FT8 contacts came in from all over Europe, I was making it into the west coast of the states, but no QSO’s that far today unlike last weeks greyline activation.
FT8 on 20m – great reach with the magloop and 10W of power.
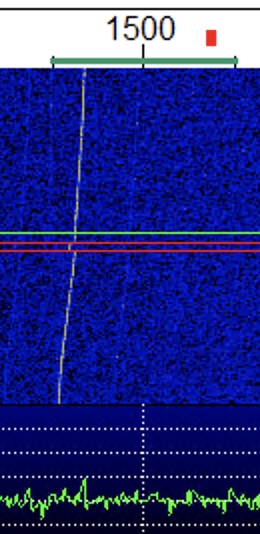
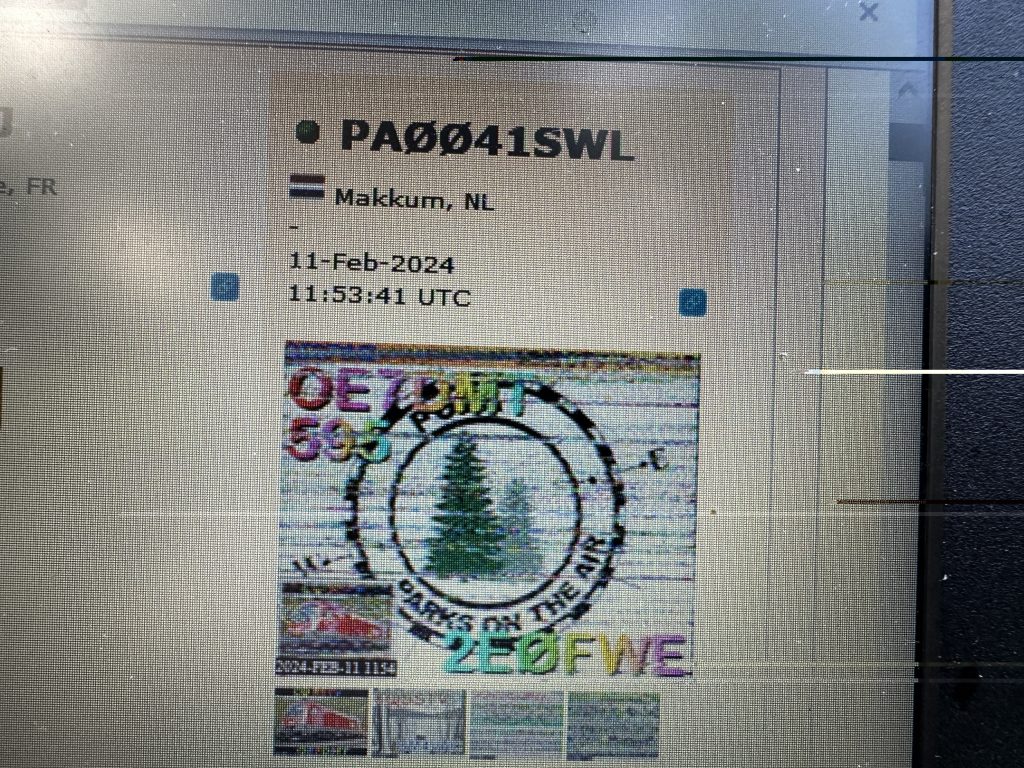
With the 10 contacts needed to activate the park and enough battery for both laptop and radio I tried SSTV, but it was very busy today. I found it slightly annoying that some people seem to serial transmit and dont leave a gap for a response. At least two times there was the same person calling CQ without leaving a gap and just retransmitting, I did however manage to capture a screenshot thanks to the cool CQ SSTV website which pulls in reception of SSTV sites.
received in NL on 10W
I tried a couple of times, but the QRM from interference on the band, as seen by the horiziontal lines on the image, was just getting stronger. I jumped over to 17M being a non contest band and generally good for QRP operations.
My first attempt on the QRP CoA resulted in a partial call sign and no signal report, so I moved further up the band to find a gap. I wasnt to be disappointed and made 3 great telephony contacts on 10W, it was a great experience mix up the PoTA activation with SSB phone contacts, with good reports.
3 Telephony contacts on 17m – DM5MU booming in on 3W
It was great that two of the phone contacts where made my PoTA hunters, showing that the app really worked well. Getting pulled out using low power is a challenge, but great when those signal repots come and the QSO’s are more than the FT8 signal report/ACK. A fine example of this was the SO with ‘Andy’ and DM5MU, who was happy to chat about his amazing Yagi which was running very low power but booming into the new forest with 59+10db! My signal reports was just as good with 5/9!
With all the fun and excitment of making rapid contacts on FT8 and Phone contacts on 17M I felt i had a great time on the radio, I was able to at least get a SSTV decode and enjoyed doing PoTA – one award is the ‘repeat offender’ which is 25 activations from the same location. As the new forest is quite big, its possible to goto other parts and use the same PoTA reference, so something I’m most deifneatly lookin at doing as the year goes on !
Thanks to the PoTA Hunters ! Esp on Telephony ! 🙂
A big thanks to the PoTA huters, esp those who work me whilst I’m only running 10W and patiently give me their callsign and signal reports, it really is a great time out !
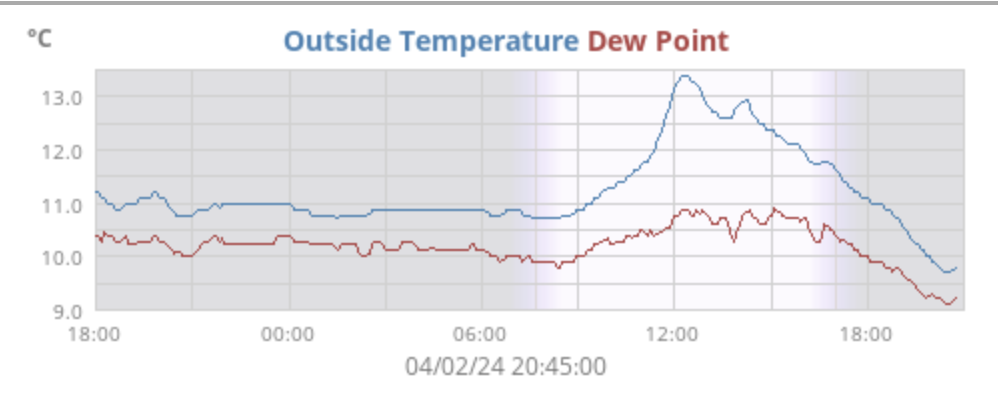
Some lovely sun kept the chills off today with flowers blooming and when it reach mid afternoon looked like turning into a great afternoon evening, I thought it would be great to make an impromptu visit to Bolderwood to try a PoTA activation.
compare to Janurary temptures, I was basking in the winter sunshin at a 12 celsisus !
I had everything packed away, i did one quick check for the power beiing packed, which it was, but had no idea on the battery level of the laptop, I knew I had used it recently so it shouldnt be too low. I headed off and it was great to to Bolderwood which whilst still pleasently busy, didnt feel over crowded. I’m sure this will change even by the end of the month !
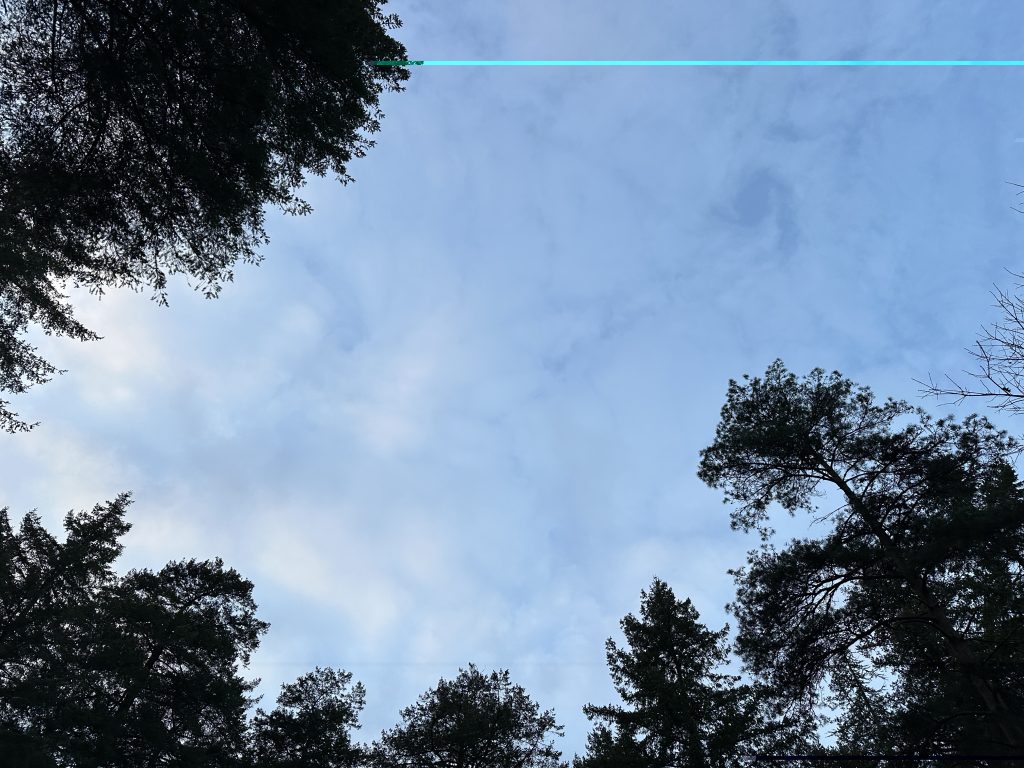
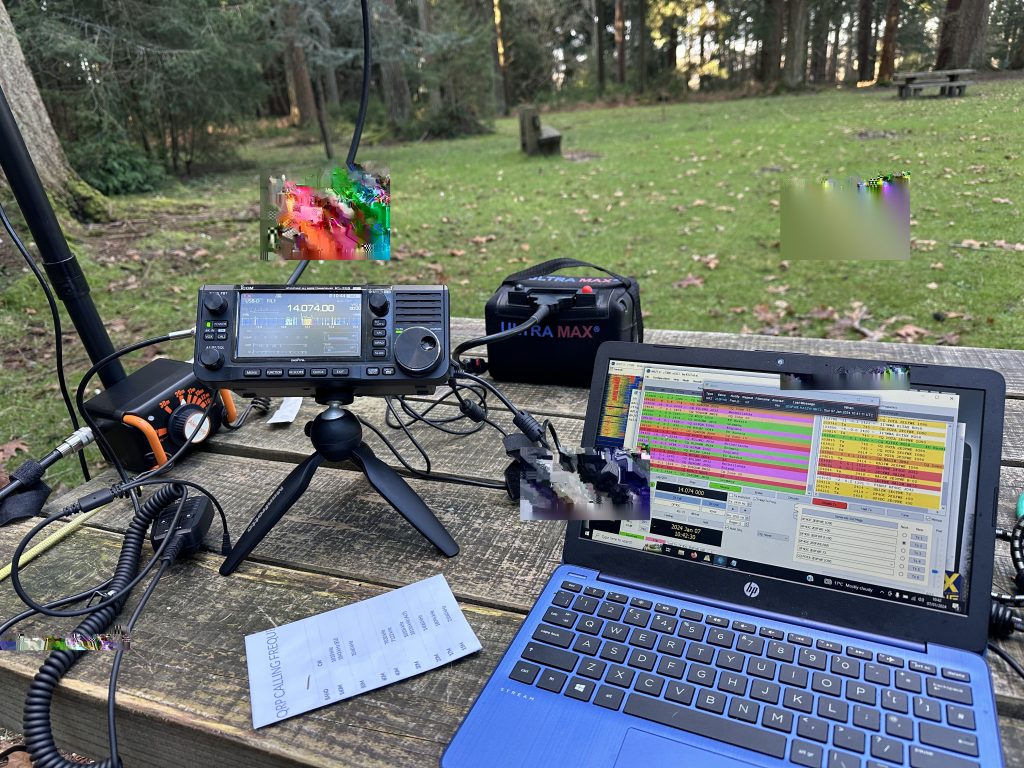
Setup in no timeblue skysa great place to do radio and relax
I was on the air in no time, with the Alexloop attached to the bench with a bungie and hooked into the IC705, it was easy to tune into 30m to start with for FT8. I chose 30m as I had alot of contacts at home and its not a band I used /P for POTA before, I made 4 contacts within 10 minutes, so wasnt disappointed. I then moved to FT4 on 20M – it was *busy* even finding a gap in FT4 was getting tricky, but I was glad to find a gap and get out. The laptop was down to 40% power by now, so I stuck it in energy efficent mode, which kept the battery going without issue and no adverse effect on the radio/USB connection.
using the laptop energy efficeint mode to extend the life the laptop
I was pleased with a series of rapid FT4 QSOs on 20m, i later learned these where all PoTA Hunters – whilst I’m amazed by them all in the distance, ranging from Austria and Spain in Europe, it was the DX contact with KC1MMC that blew me away – 3217 miles on 10W of power on a mag loop, I was really happy to say the least.
Sun went down and 20M opened up more
As the sun went down the volume of QSO’s on 20M just kept rolling in, from 17:17 to 17:25 I was having a QSO on FT8 every 2 minutes ! I had to call it a day as it was getting dark and wanted to get my equipment put away safely, but I think I enjoy coming out at dusk – maybe a small lamp or pen-light will be worth bringing next time.
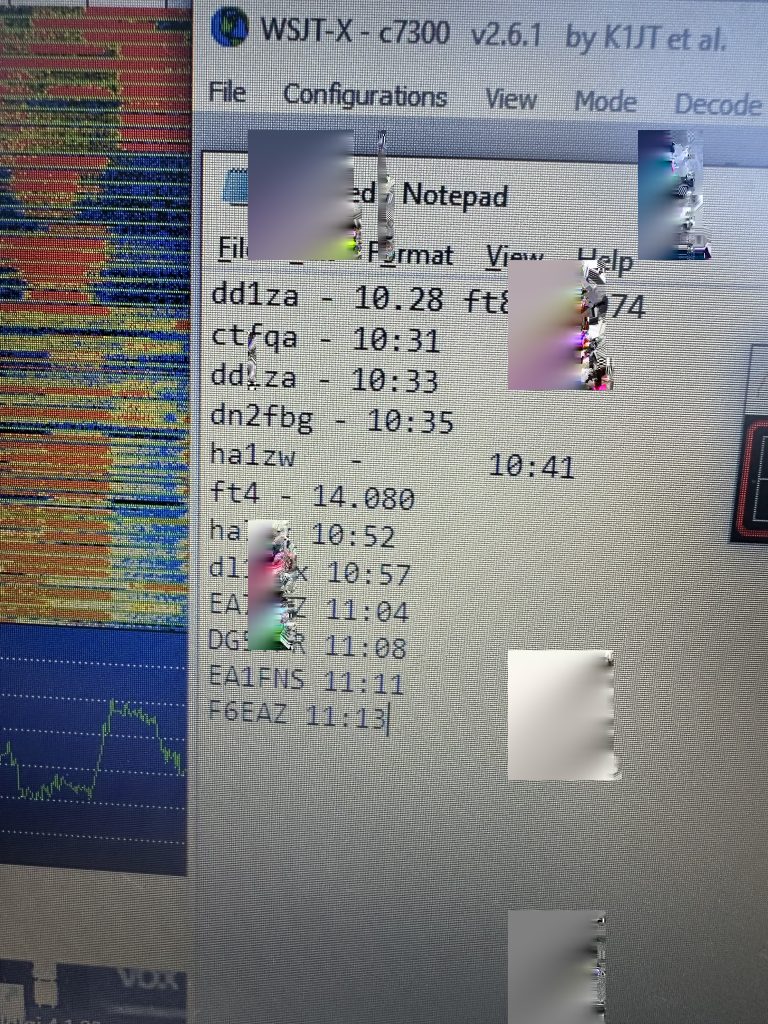
14 contacts, 5 POTA hunters made happy !
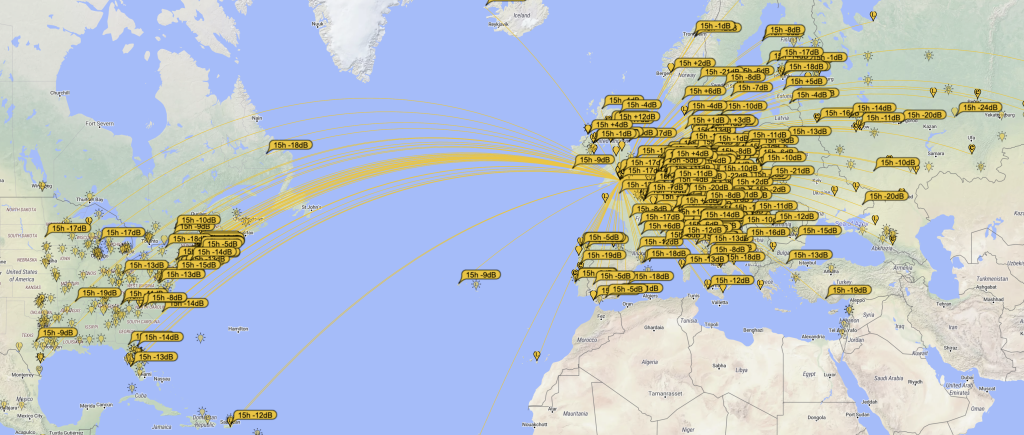
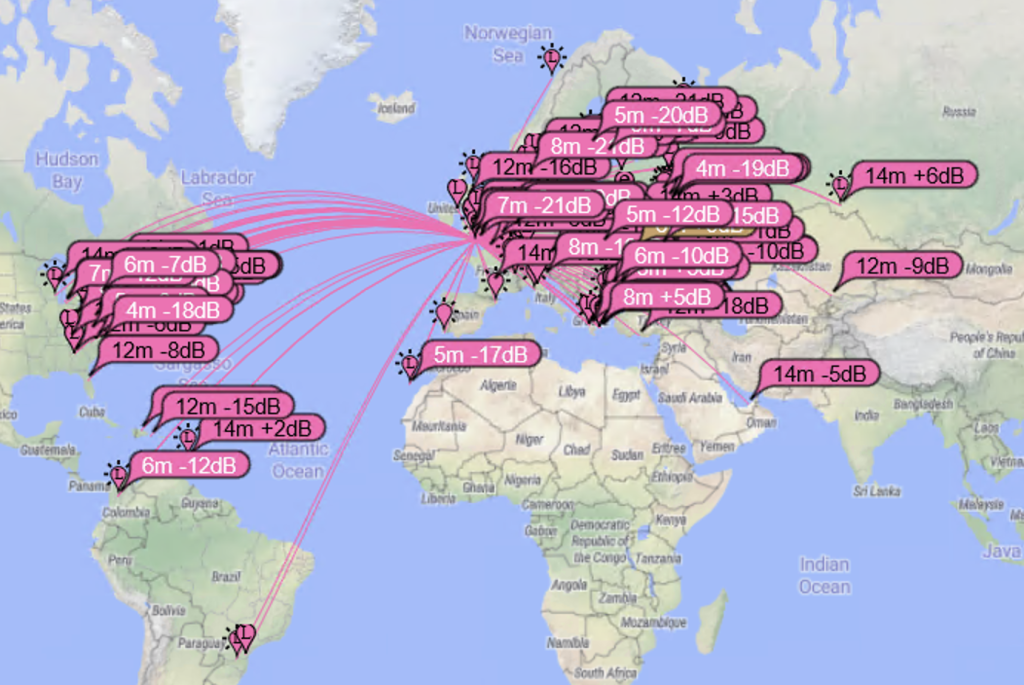
This was a really enjoyable PoTA outing with minimal planning, I was really impressed how well the antenna done and the PSK Reporter picture shows, it can really reach the entire planet !
Digital modes doing really on 10W of power
I have seen videos of great QRP Contacts and am wondering how well I would do, I really think I should give it a try the next time I am out as the setup really impresses me and think it should be good to make some telephony contacts.
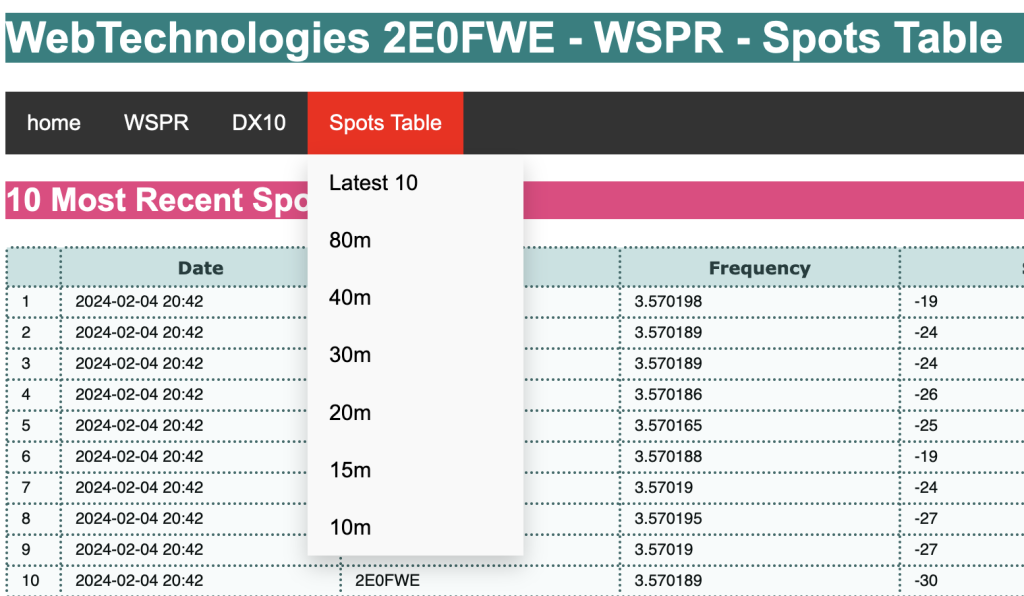
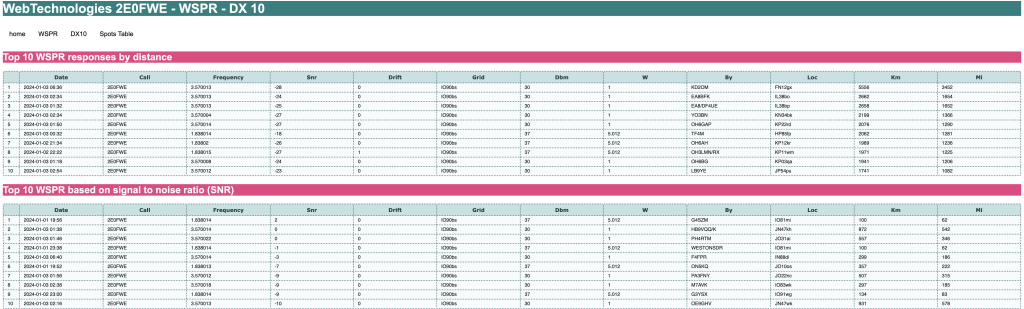
I’ve been making monthly updates to my webtechnologies site, which last month I got back up and running so the code would scrape the data from the ‘updated’ WSPR old-db. I’ve now added sections that allow filtering by band. This is all transmitted via the 6BTV which is doing an excellent job of getting out on all 6 bands it is setup for.
Webtechnologies site – now with spots per band functionality.
I’m aiming to keep building more features for the website each month, just small incremental changes, but I’m sure will keep adding making for a feature-rich site. There is so much that can be done with WSPR data, I really enjoy using this mode and its great ot use my programming skills for amateur radio also. Check it out at the webtechnologies site.
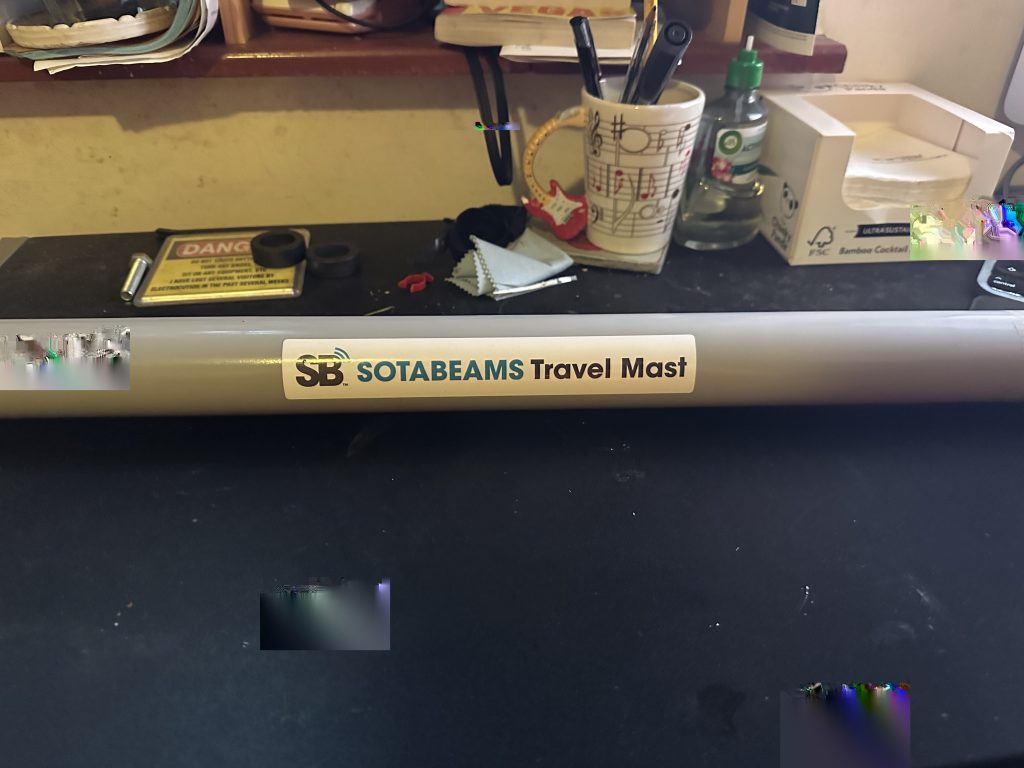
With some rather nice weather and available time, I was able to get to work on putting up the SOTABeams Travel Mast as a repacement of the DX Commander classic mast which has done me so well for serveral years, and one of the guying rings finally sucumbbing to the storms we had at the start of the month.
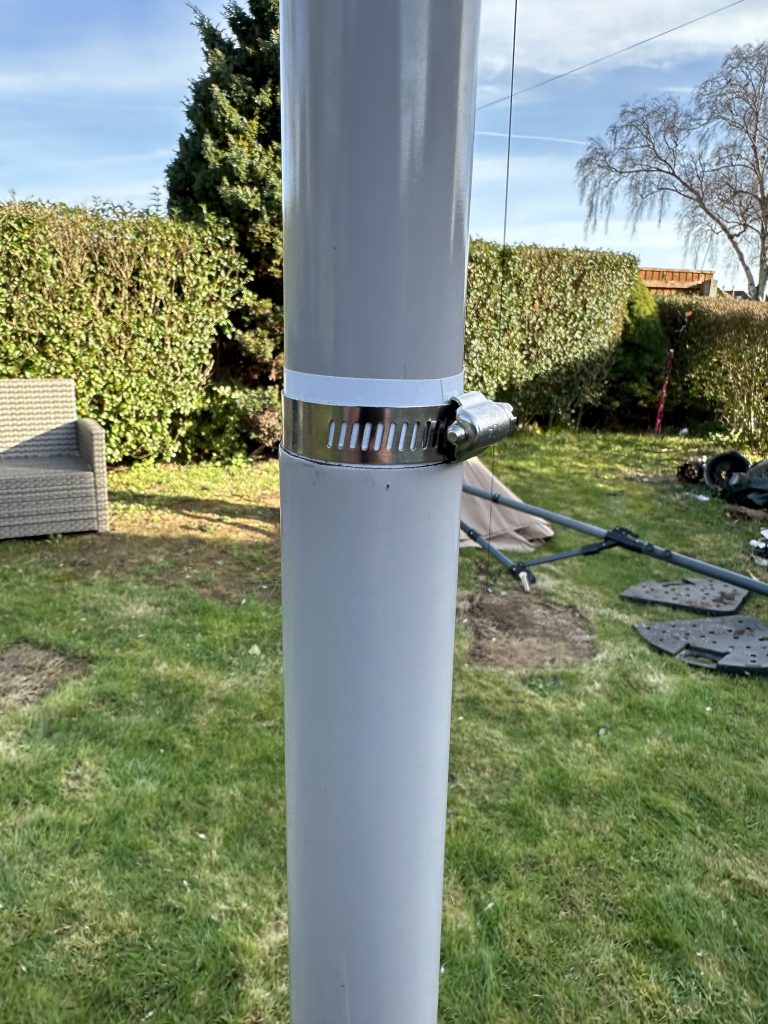
Use of electrical tape and jubilee clip to secure mast sections vertically
I put electrical tape and a jubiliee clip on each section to secure and make vertical slipping less of a possiblity. The same method worked very well for the DX Commander in keeping the sections up and those had to take a considerable strain when used in the way to use the split-dipole that the DX Commander is.
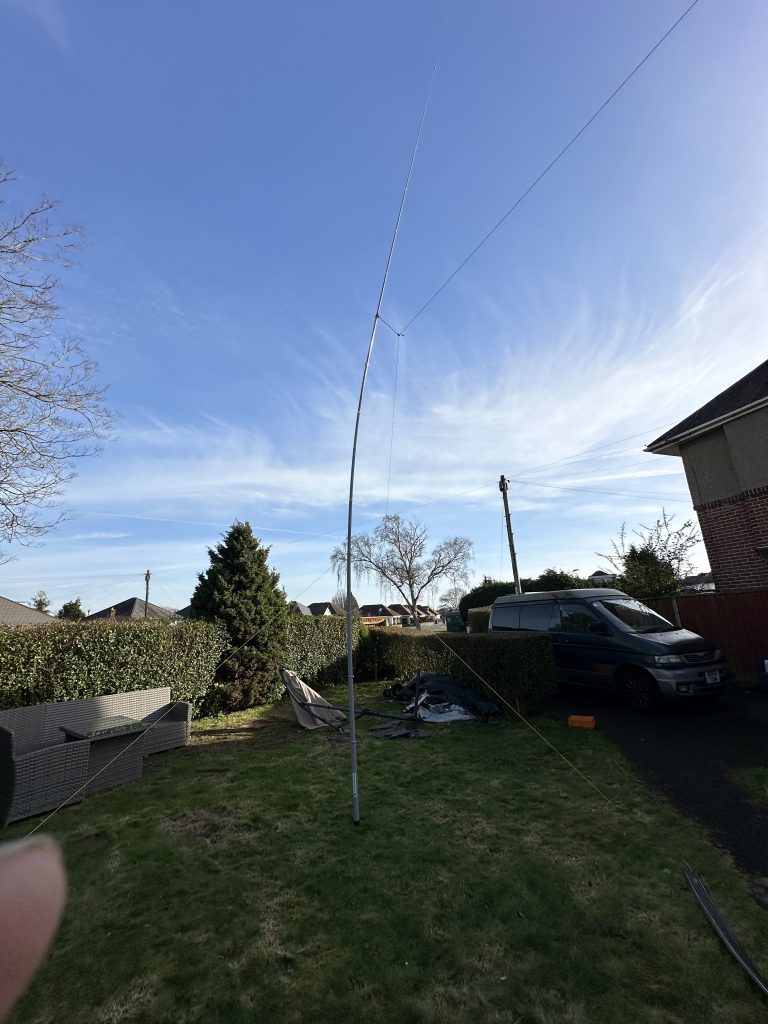
Wire up about 2/3s of the full mast height
I attached the wire to the mast via a piece of guying rope about 2/3’s up the mast. I may make this higher the next time I move the antenna, but as is, it clears the house nicely and is a good distance from the ground, I think more height will allow a full half-wave on 20m so something I want to do very much, given I enjoy SSTV on the 20M band alot.
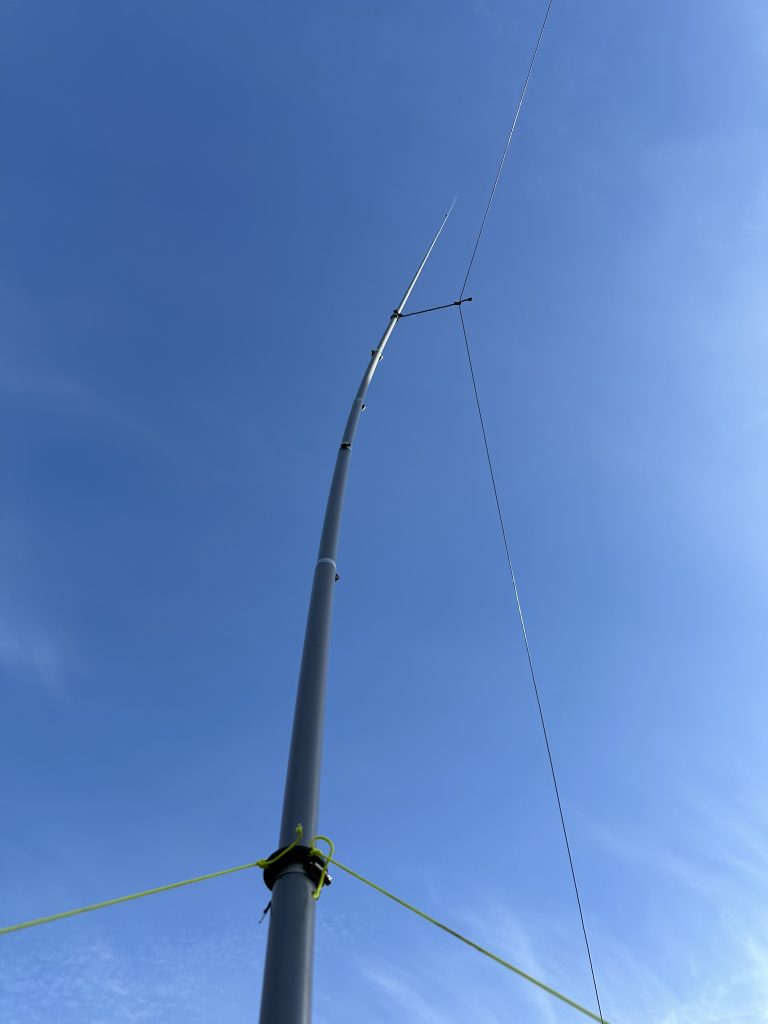
guying and little strain
There is very little strain on the mast and a good level of taughtness to keep the wire from drooping and touching the house, the one set of guying wires are holding the mast very well, combined with some decent ground stakes.
I went into test the mast, 20M SSTV was simply flooded with QSOs – unable to get a QSO in as the band was so buys, but I guess thats a good thing showing that the reception was doing well. I jumped on FT4 on 10M as the band was well open.
FT4 on 10M doing very well on the EFHW antenna
I was very please to test the antenna and have a FT4 contact with JS9DS in St Lucia over 4000 miles away !
I’m very pleased with the mast and will improve upon it as the weather and mast moves to allow us to use the front garden more. Looking forward to catching you on the airwaves !
With another bright but cold day, it was a good time to get out and get on the air. This time I was packing my trust Alexloop Ham pack antenna along with the IC705, determined to make an activation on my 3rd attempt from Bolderwood.
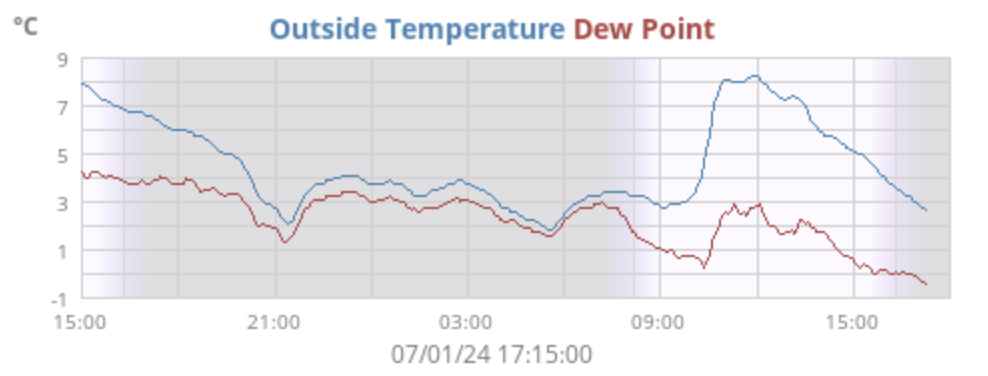
WX – I caught the ‘warmer’ part of the day at round 9 to 7 celsius
I was no sooner out the car and onto one of the many available benches and quickly setup. The alex loop was out the bag and with a bungee hook strapped pretty tightly to the bench. I tuned for 20m and got a great SWR of between 1.3 and 1.4 but no more than 1.5 and 10W of power. The FT8 contacts came rolling in, and with a busy 20m FT8 was then onto FT4, for even quicker overs.
Alexloop SetupManual Logging
It was great to get a mobile phone signal as I tethered my laptop to the phone wifi and could upload my contacts directly to QRZ via the excellent grid tracker application, I still kept a manual log so it would be easy to confirm the order and QSO’s I had today. The Reverse Beacon Network and POTA app was doing me a great service, as quite a few of my contact were POTA hunters. Getting 10 contacts in under an hour was great given just how cold it was, it was nice to see 5 of the contacts are POTA hunters.
I gave SSTV a go, but the signal where coming in thick and fast, I started to see a response to my transmission, but another station came in over the top. I try to use Robot72 and BW12 to keep my over time on 14.2300 short, but most people dont QSY on SSTV, and even then we tend to get other people talking over the SSTV CoA on 20m as well..
Still, having uploaded my ADIF file from WSJTX to POTA I was soon awarded my 2024 activation. Just in the nick of time ! A good start to POTA in 2024 !
POTA 2024 Award – a good start to the year
I am really excited about getting out and do more POTA – its a great start to the year !
Good news on several fronts today – the replacement parts I ordered just days ago from Sotabeams have arrived, and amazingly I ordered the correct parts. I now have a fully functioning Sotabeams Travelmast again !
Sotabeams travelmast restored to operational !
Previous testing of Sotabeams travel mast at home, before I went out and snapped it 🙁
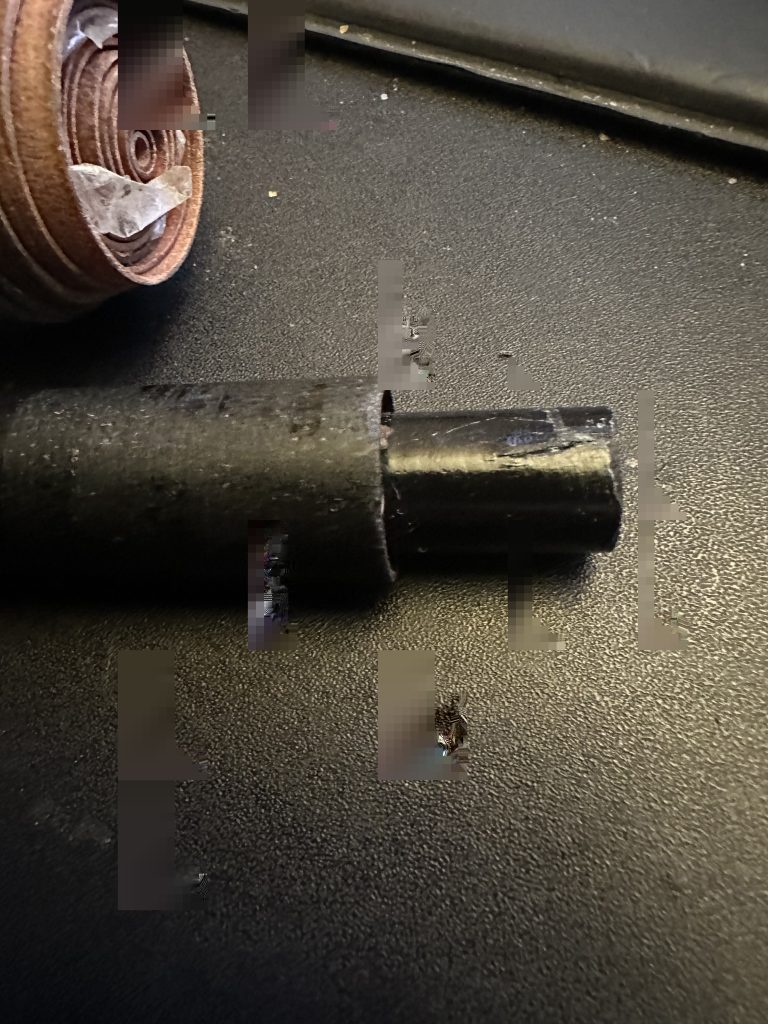
I found another Sotabeams mast in the garden, in this case a Whip10000, its probably been sat outside in all weathers for at least a year, if not two ! upon cleaning it up, I managed to get all the parts apart from one, which has stuck fast ! How do i get this unstuck ?!
mast section wont budgestubborn section
I also planned over the holidays to get the WSPR scraping on the webtechnologies set up again, as since last year the format on the ‘old db’ changed, which caused my webscraping program to fail. I decided to re-write from scratch and use Python’s panda’s functions to scrape and sort the data. With a bit more Postgres changes I was then able to push data in again !
Webtechnologies WSPR scraper is back !
As time and interest allow I will add more functions as I enjoy the programming and representations of data in different formats from actual transmissions. When I’m 100% sure the code is working correctly, I’ll post the updates to github.
So a quick update and am looking forward to using the SOTA Masts for at the QTH and for POTA activations !
So with new choke packed away and bringing the battery pack, i headed out to Bolderwood in the New Forest, arriving at around 10:15, it was still pretty quiet and I had pick of parking spaces and benches.
bolderwood on New Years Day 2024
I then setup the IC705 with the Toybox antenna and radials, which I found getting the radials out much easier this time. I was able to get the SWR down on 17m to a 1.6~1.7.
SWR less todayradial spreadmuch easier than yesterday
With the antenna setup I then connected the 705 without the MAT Tuner to start with, having the large battery with me was really good as it support the LC IC705 bag nicely keeping the antenna and bag vertical. I then went about attachign the choke-wound usb cable to the laptop.
Uh oh.. this doesnt look good
As soon as the USB cable was attached, the QRM returned ! I could hear the FT8 stations coming into WSJTX without problem, but again when hitting transmit, the audio disconnected. Whilst the QRM was much reduced, there was no doubt it USB cable and laptop was still effecting the radio. I went ahead and the MAT autotuner, to see if that improve the situation, i.e. would it act as any kind of choke between the radio and antenna.
MAT Tuner working greatcould I try a choke hereWill I ever make a contact ?
The introduction of the MAT Tuner had no effect on the QRM, although I could see that with the longer coax between the tuner and antenna, I could potentially try putting chokes on here also. I disconnected the radio and just tried calling CQ on 17m QRP frequency, but to no avail. I could pull in signals and I tried jumping on the back on other QSO’s but think I wasnt getting out at all with the little whip antenna.
So I think whilst I have other options, I will explore those as well, I have always done well with the magloop, and its a great antenna, but the one I really want to try is the UK Antenna 40M EFHW, but currently my SOTA Beams mast is damaged from its first and only outing. I explored the website and was able to order the 3 replacement broken parts, which only cost £17.28 with 1st class postage.
The 40M EFHW UK Antenna – the next one to try when the replacement mast parts arrive…
I will continue experimenting with chokes and the Toybox antenna at the QTH before going back out with it again, I think with enough power, it would work well as a portable antenna, with QRP/10W,its giong to be hard work to get on the air with it…
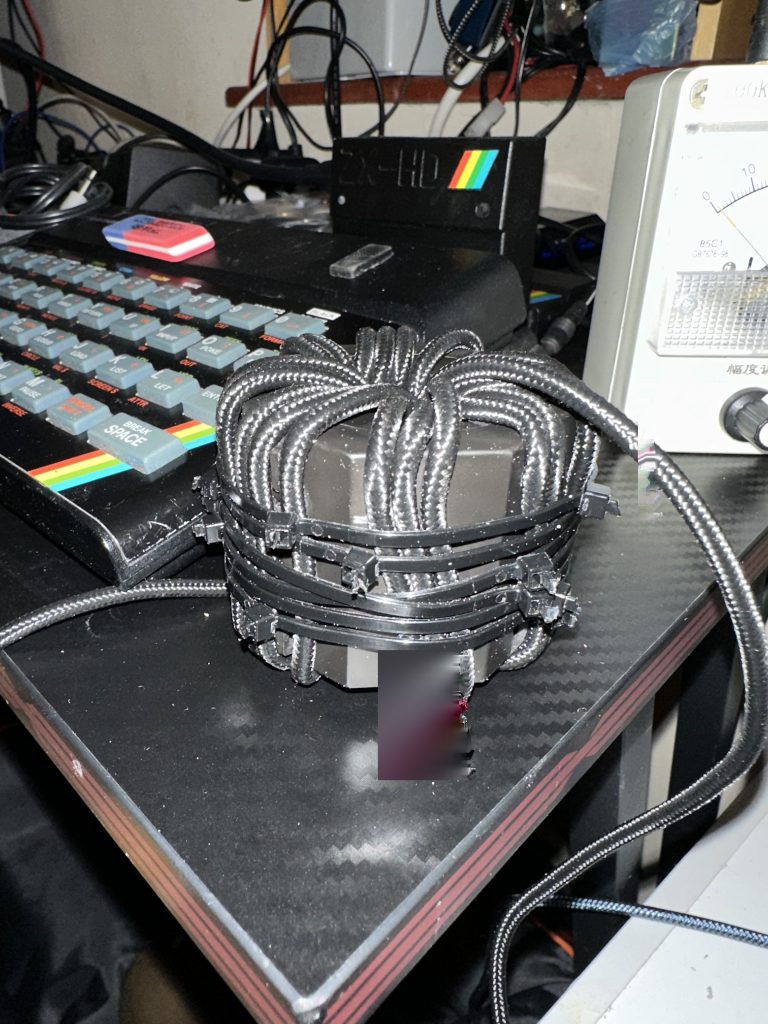
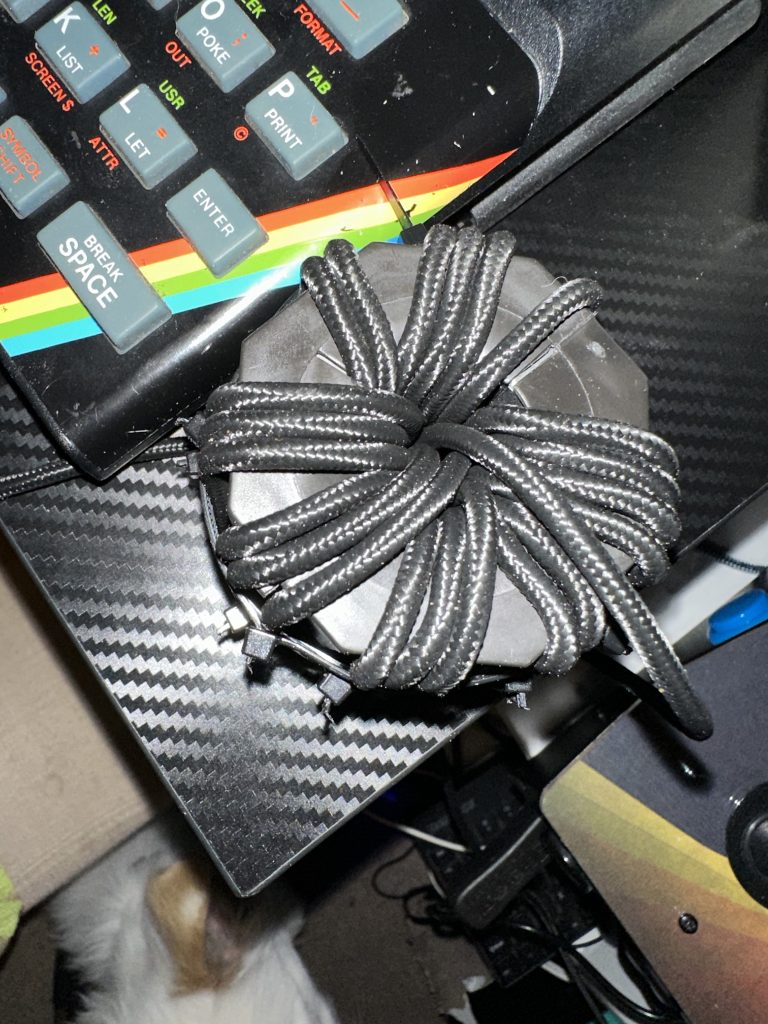
So a quick update, having received the 5M USB cable and cable ties, i then went on to test out the choke method to reduce/remove the inteference from the IC705 as shown by Temporarily Offline Ham Radio video included yesterday.
toride and USB cable wrapquite a few turnsNo interference on IC705
The RF Choke comes from here, as I dont suffer RF back into the shack thanks to the EFHW and RF Choke on the feedline, the PSU Choke was not being used. Winding the toride was made quite easy by the fact the choke can be opened up and wound up, once secured with a a couple of cable ties it was easier to put the turns into specifc locations, tighten the cable wraps up, then cut off the excess.
WSJTX in action – no sign of disconnects or loss of audio
I tested MMSTV and WSJTX into the 2M Comet Whip antenna, everything worked fine with no issue of disconnected audio or interference into the radio or the computer. I’m looking forward to taking the setup out and trying again with the Toybox whip antenna to see how it does this time out.
Testing the IC705 with the RF Choke USB cable and laptop with MMSTV and WSJTX