Been off the radio for the last week or so for exam revision (passed, if your interested its for IAC Terraform). Am waiting for the Nebula to arrive, so not been able to post about making cables, etc. I dont really want to use the new cable for the existing antennas, will see what is left after the nebula arrives.
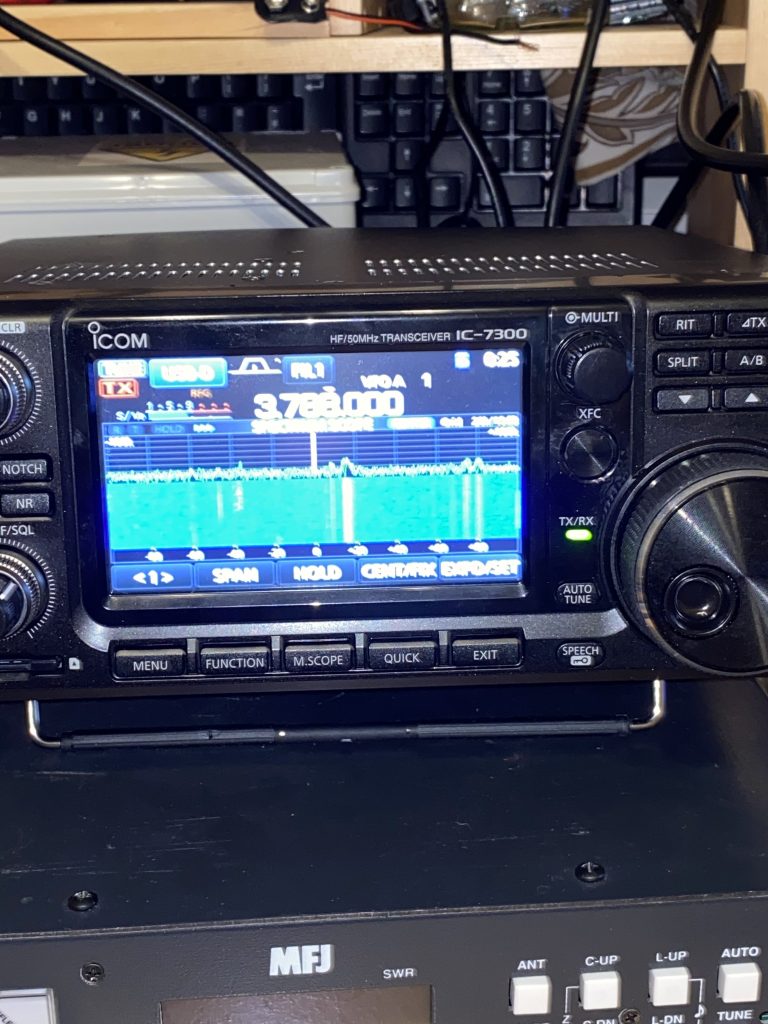
I’ve only just today re-plugged my antennas back in the very late evening around midnight. Am thoroughly enjoying listening to a ‘net’ on 3.767, its coming thru crystal clear, its really nice to hear all ends of the conversation. Not caught any call signs yet, but I’m only half paying attention, but the banters good.
I’ve ordered a rotator from Farnell for the MFJ1886, being a VH226E. I didnt want anythign very expensive for a heavier Yagi or any other setup, i’ve got enough, probalby too many, antennas up, and just want to rotate my MFJ1886.
I’ve not really done a review on it yet, just not had the time… Uni work and work-work are just keeping me so busy, and absence of antennas..
Anyhow, good news on the C19 front today, lets hope that we can all stay safe and keep well.
So will make this a quick one. I follow Tim (G5TM) on Youtube and he published this video on coax.
G5TM – Coax Cable and Why It is so Important
Long and the short of it is basically is treat your antenna as a ‘unit’, i.e. the antenna itself (wire/beam/loop), the connectors and the coax, and in your budget the antenna system is as crucial as the transceiver.
I also asked my long-term mentor and friend PA2TG his advice – guess what the recommendations of both G5TM and PA2`TG recommending the same coax to me for my needs (HF)!
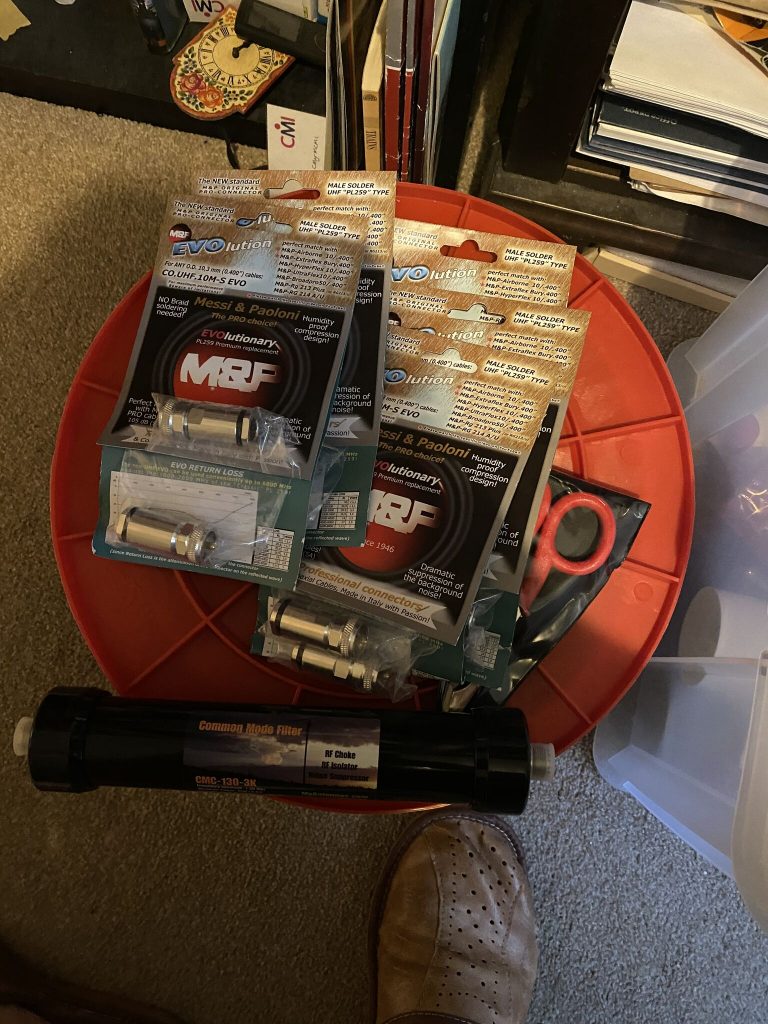
100m
connectors and scissors
With that I have ordered and now received some UltraFlex 10 and connectors from W&S, plus the scissors to help me make a good job of it. There is this excellent video on how to put the connectors on the coax.
How to install M&P Connectors
Having received an email from M0MCX that the “Nebula” will be here any time soon I am naturally very excited to see how it all operates !
Having seen the video on splitting the audio source from the main antenna and using a secondary ‘receive only’ antenna for the MFJ-1028 I thought this was an excelllent idea to deal with the QRM I have.
IC-7300 and RX7300 – no ATU tho
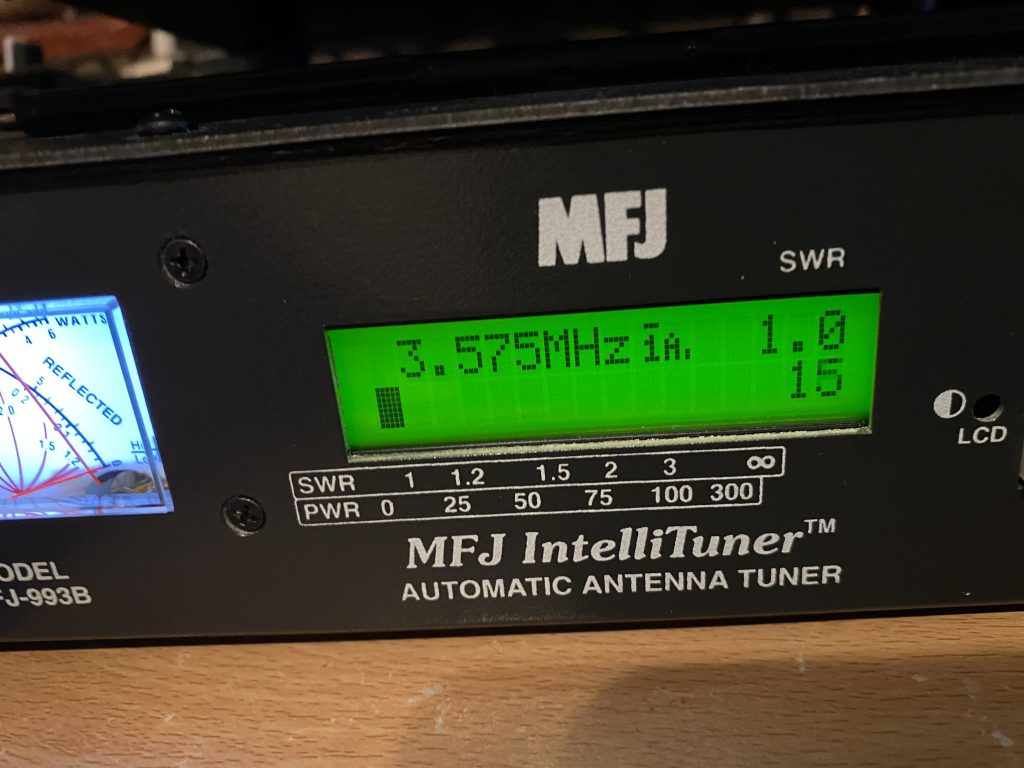
This video gives an excellent example of how to install the RX7300 and all the necessary connections. However, I use an MFJ-993B on 160m although my end-fed antenna is only designed to goto 80m. The internal ATU is good upto SWR of 3.0 approx, so an external ATU becomes essential.
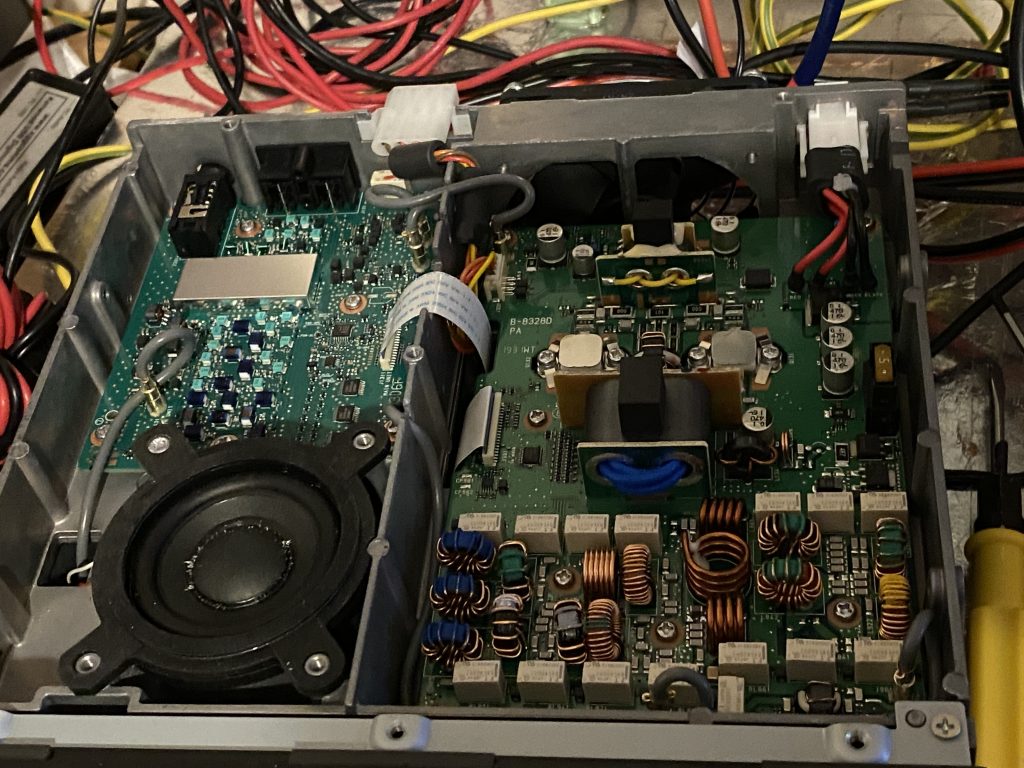
My first ‘issue’ was getting the case off. I read comments that others had suffered this as well, beit from overight screws, or using the wrong screwdriver. I found a screwdriver that worked perfectly, but one screw (speaker screw, top left from the rfront) wouldn’t budge. In the end i relcutantly used a dremel and a small drill bit to remove the screw.
I do not understand why manufactures put screws in so tight. I wasnt happy about using a dremel on such a new piece of equipment.
how to route the ATU
is the fan an option ?
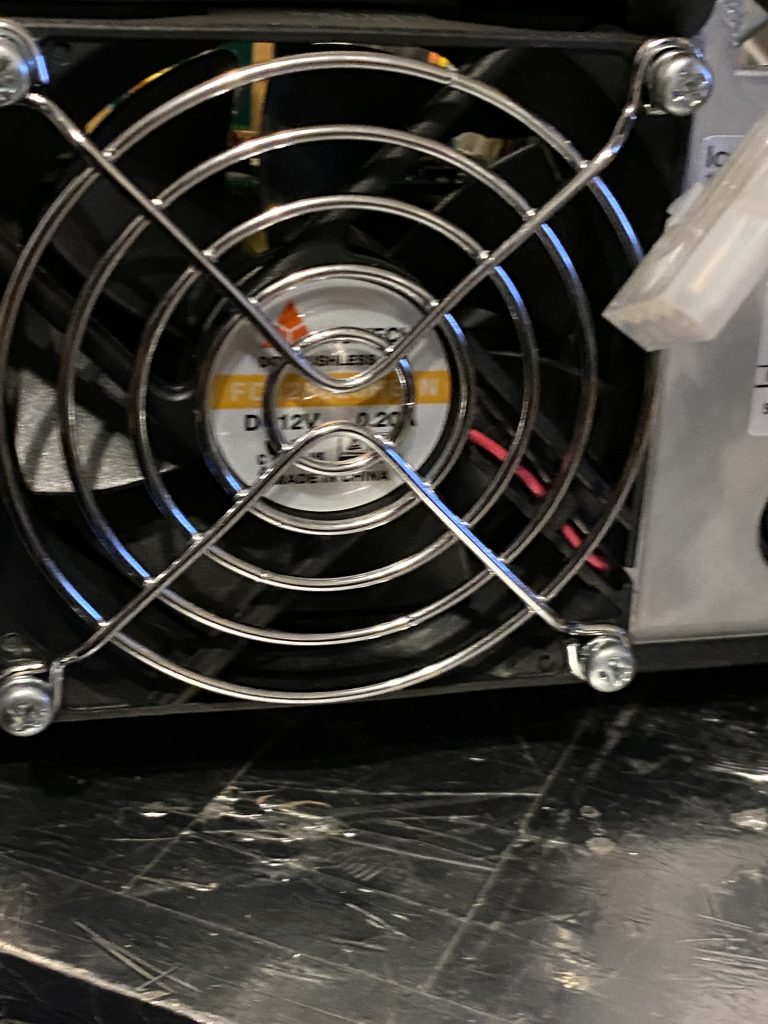
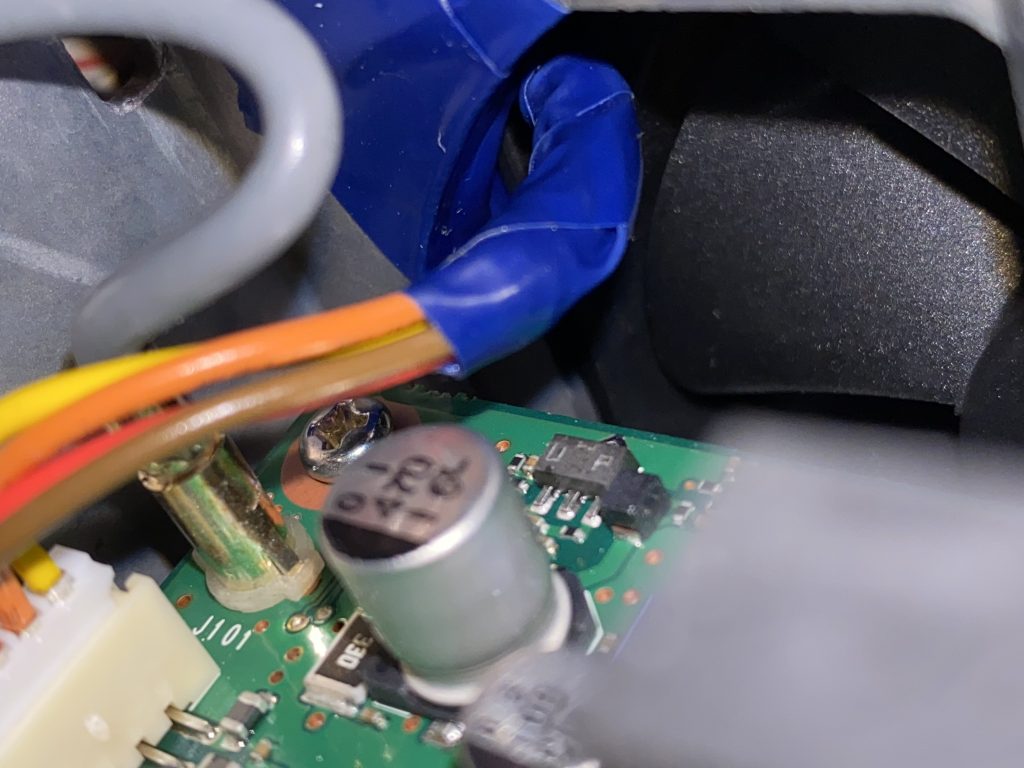
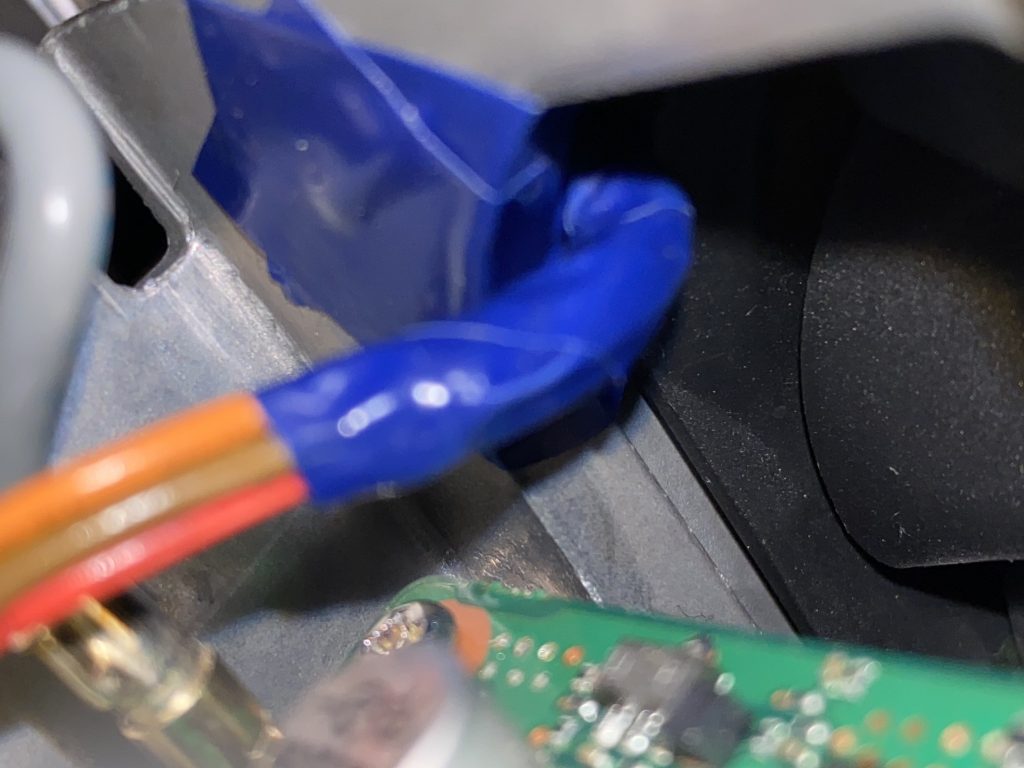
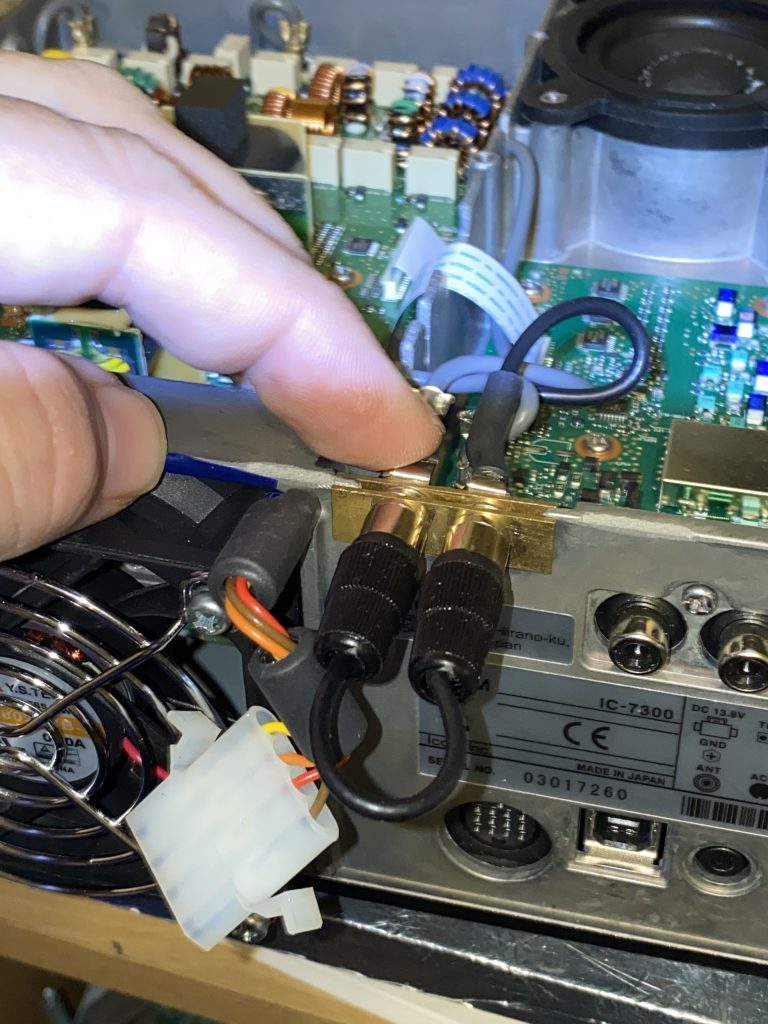
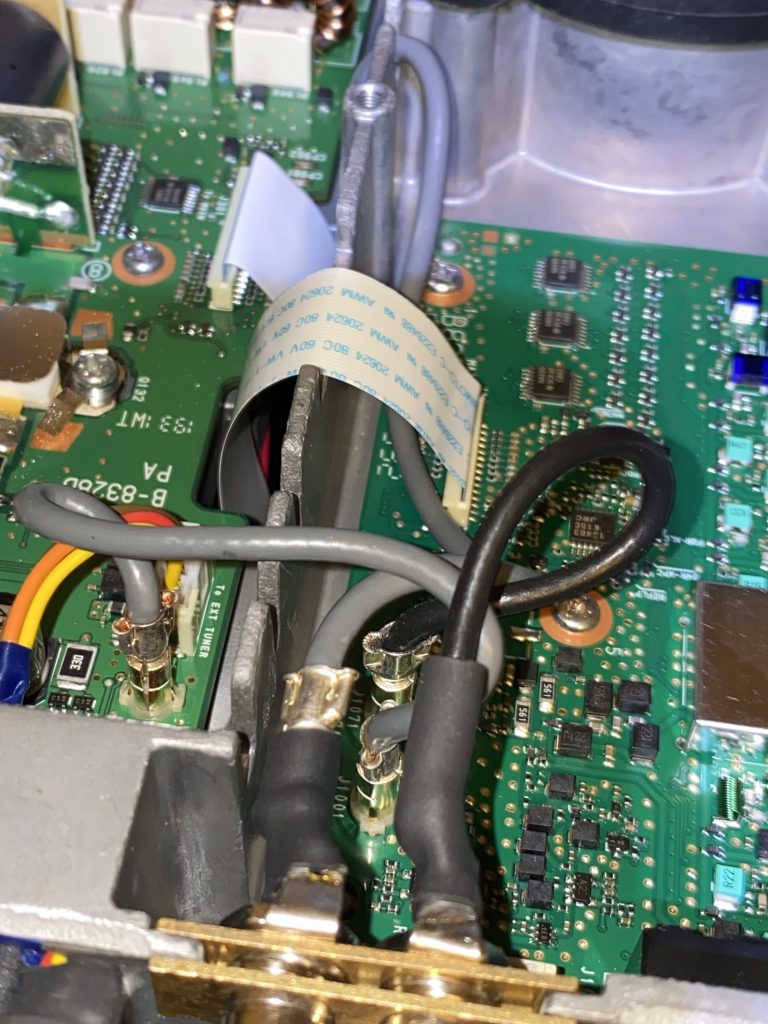
I looked at the ATU cable and where it could fit. I wasn’t going to cut the case, thats for sure, and whilst i dont use the other sockets at the moment, i may do in the future. It felt like i was gaining one feature, i.e. to tap the RX circuit but had to lose another. The Instructions for the tap kit specify that the ATU cable be tucked away and kept away from the fan. However, this gave me an idea to look at could I route the cable around the fan enclouser and not-tighten the screws quite so much ?
electrical tape around the ATU feed wires
out of the case via the fan, but not thru it
magnifying glasses to the ready
making safe the ATU feed wiring
I carefully fed the ATU wiring around the fan enclousre, not thru it, but between the fan case and the chasiss of the transceiver. I put on electrical tape onto the wire and the chassis to provide a degree of protection to the cable.
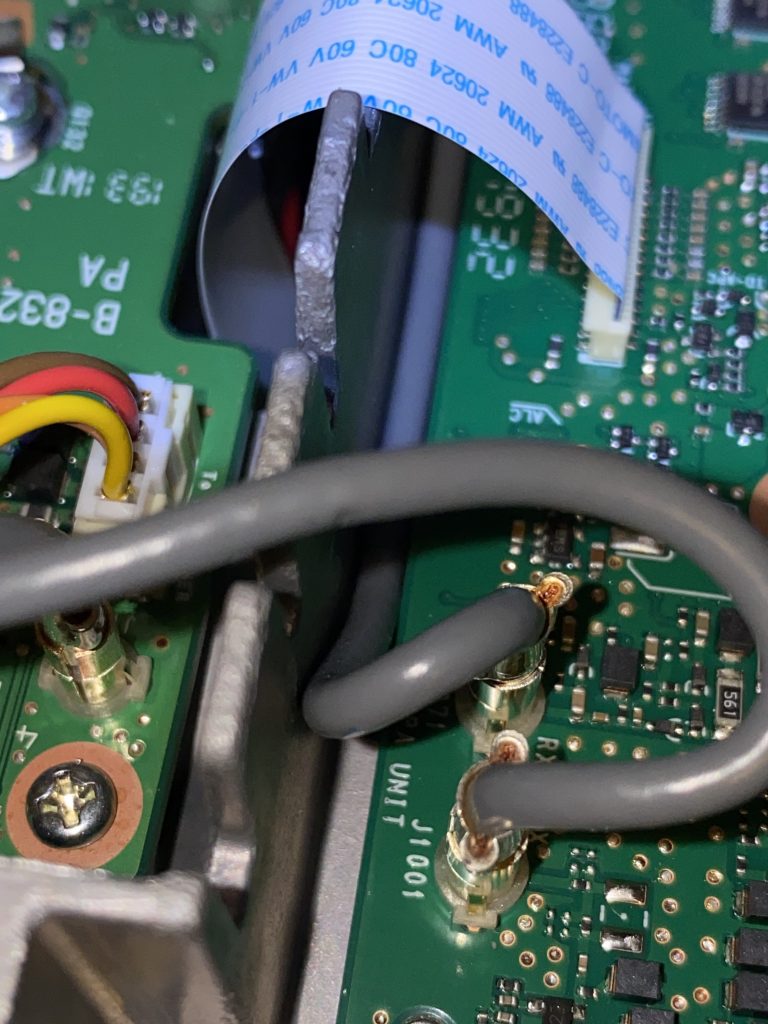
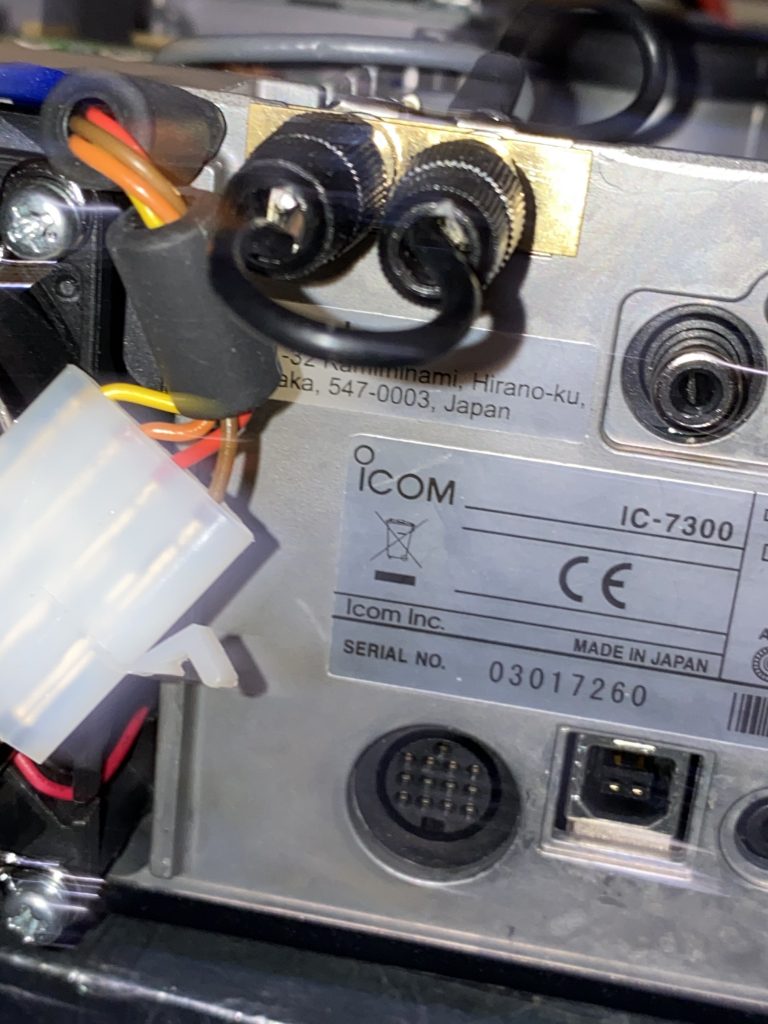
remove the front most cable
attach into the jack
mount the tap, in this case loopback fitted
route the cabling tidly
ATU + Tap available !
ATU+Tap available
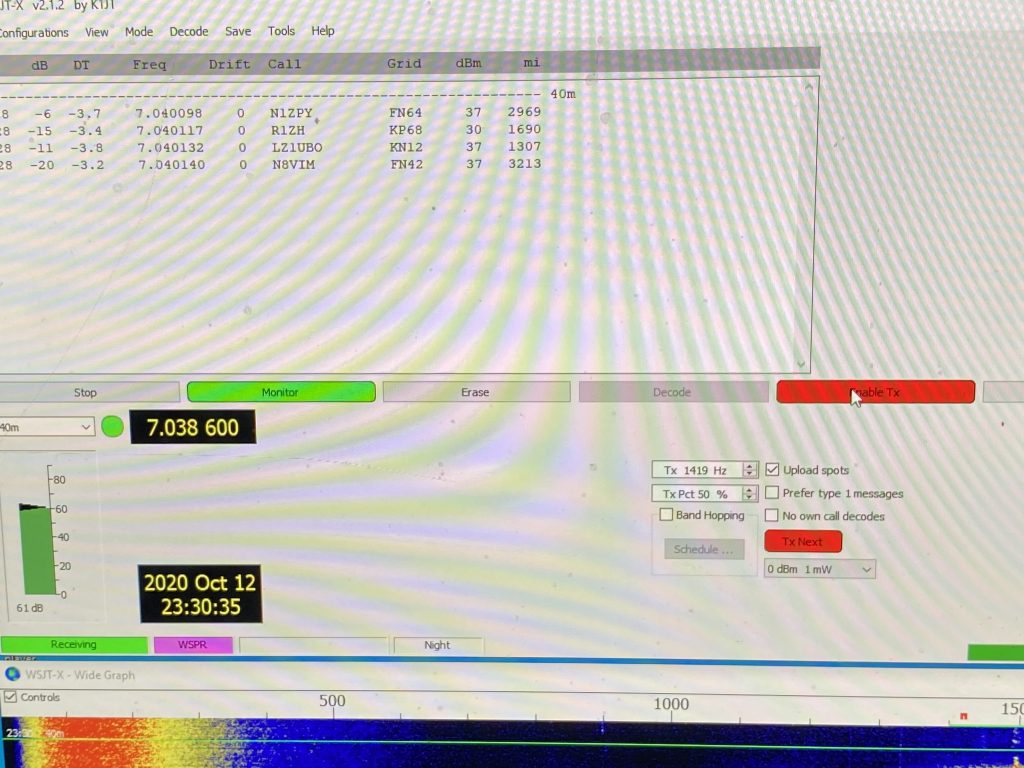
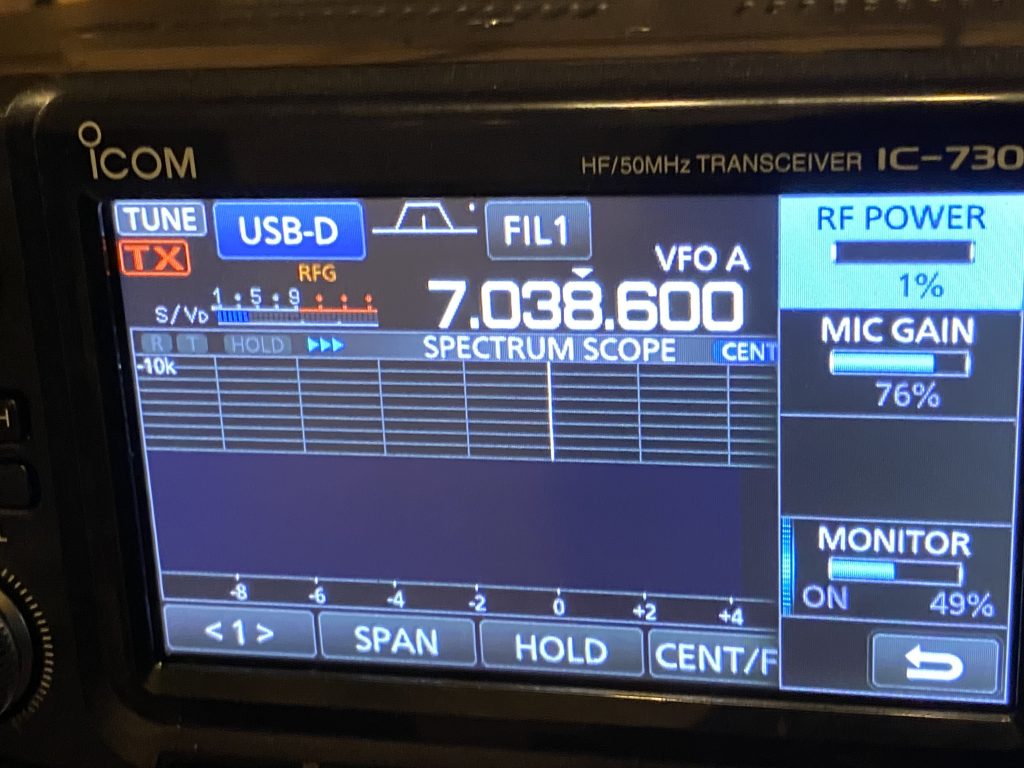
I was able to get te ATU cable and the RX Tap out of the casing nicely. The next step was to do some basic testing of the transcevier, firstly without the ATU to ensure receive was working correctly, then to test some low-wattage (WSPR) and then higher (FT8) transmissions.
80m
WSPR
40M FT8
testing – transceiver only
I was able to receive WSPR no problem and also transmit and see my transmissions were being received via WSPR.net map. This was on 1W of power. I then proceeded to FT8 on 40m, as this is a popular frequency any time of day with generally good propergation. With 20W I was quickly able to make contacts and confirm my RX tap was working correctly and my TX was working correctly.
Attach ATU
SWR Readings good
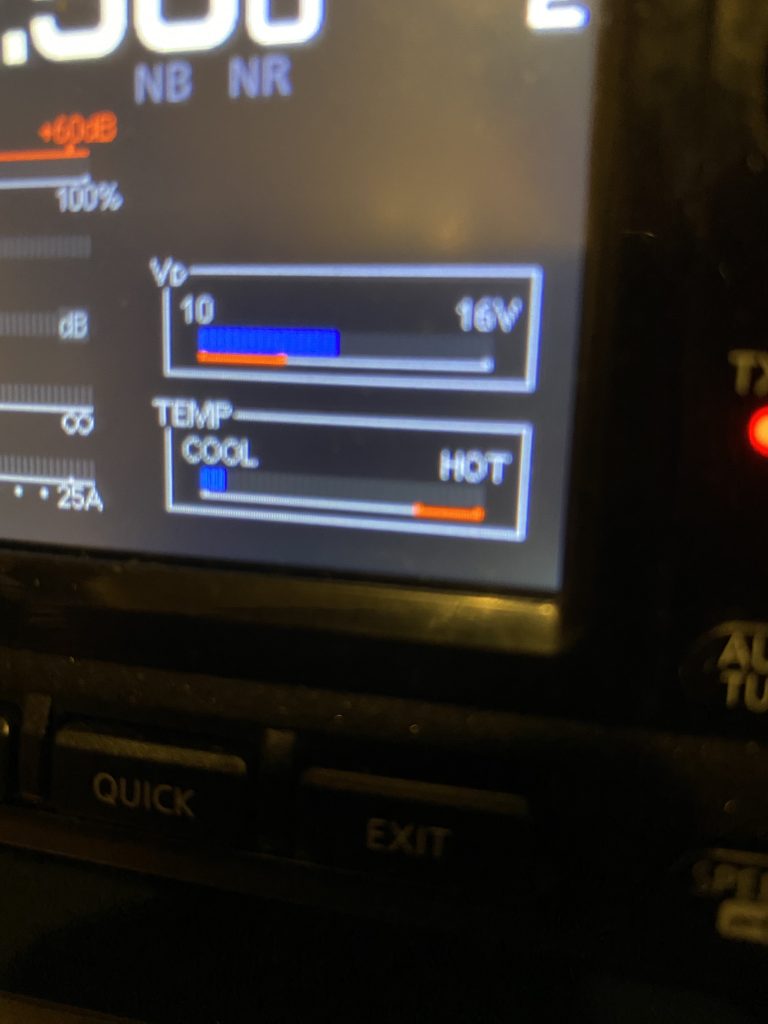
Temp and Power good
1:1 via ATU
No increase in temp = fan good
Testing ATU + Fan
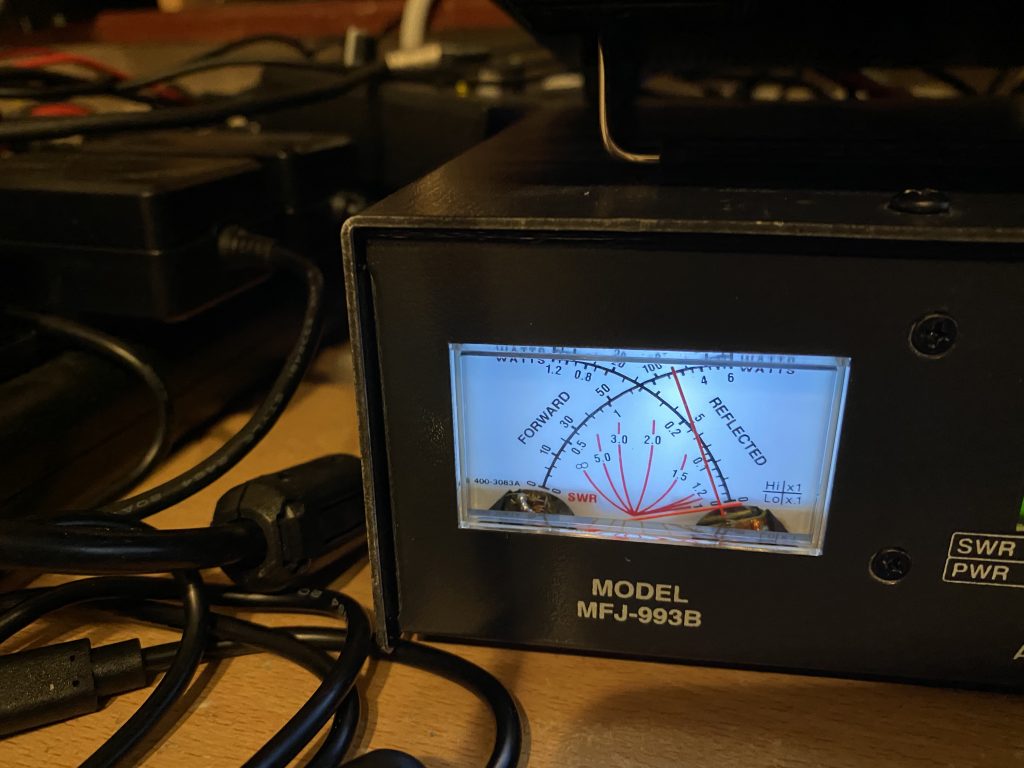
I attached the external ATU via the power and re-routed the antenna feeds to go via the ATU. I kept the RX tap still in a close loop to ensure my previous setup was working correctly.
I was pleased to see that I was reaching Europe on 80m and low SWR, so the transceiver was working well.
I will monitor the fan on the IC-7300 to ensure the the wire between the PCB and the ATU are not being ‘clipped’ or any other damage. Next step is to fit my receive only antenna and test the phasing/nulling of the MFJ-1026.
I can report that all the rigging and daily inspections insured that the end-fed antenna stayed up well despite storm alex lashing down wind and rain of epic proportion !
storm alex
storm alex
storm alex
storm alex – METEOR capture
Storm Alex hits the qth in southwest england
Whilst I have been enjoy several QSO’s on other digital modes (SSTV, BSPK) other than FT8, id thought I do an update on the next steps for the End-Fed antenna.
Whilst my signals are not bad, there is a noise floor present. Whilst I have largely removed alot of sources of QRM from ‘the shack’ (see earlier posts on QRM) my end-fed antenna seems particuarly good at picking up ‘noise’. Maybe its good to state what I think noise is as well.
When I tune the radio, I should be able to, ideally, hear all stations on that frequency (and mode). What noise brings is either man-made or remote interference to a weak signal. For noise that is ‘local’ the weak signals hide in a ‘noise’ band, this can be upto S9 for thinks like washing machines/VDSL/construction equipment.
With the ‘local’ noise its possible to use the an external antenna (lets call that a receive antenna) and transmit on the existing antenna, then between the two ‘phase’ the noise until it is no longer present.
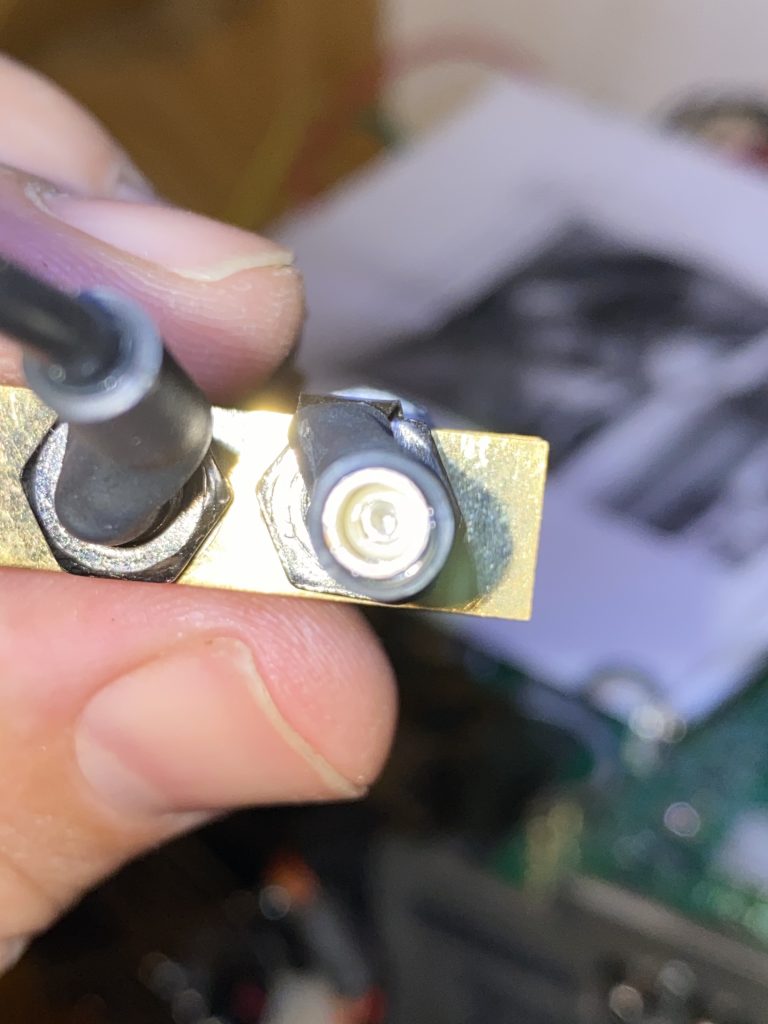
I am going to use the MFJ-1028 noise canceller as I was using this already with my Kenwood and DX-Commander multi-band vertical, but as both a send and receive antenna making using of the ‘T/R Delay’ – The Icom 7300 doesnt come with its own ‘receive only’ port unlike its ‘bigger brothers’ in the Icom range, but is easily adapater to have one via the a plug-in kit from Inrad.
The installation looks simple enough as shown in the video below. I face the challenge that I am also using an external ATU (MFJ-993B) so getting both ports in will mean doing the install slightly differenty.
INRAD RX7300 mod
I have a number of antennas i could use as a receive only, but a recommended ‘noise gather’ is the ‘mini-whip’. I picked mine up off ebay and it arrived in a bout a week.
I have yet to install the miniwhip, but have all the necessary parts, including a rather impressive 4th ground pole ! I will be following the guidance from the following video
I will first try using the mini-whipa and end-fed combo and feedback on results !
Hopefully there will be less bad weather in the coming week allowing more ‘build’ work outside, for now i’m glad my masts have stayed up and we are all staying safe at home !
As i have been doing more ‘re-arranging’ in the QTH, I thought I would revisit the snippet from the previous weeks posting on NOAA & METEOR decoding. I have evolved from ‘home brew’ antenna and tools on OS-X to fully automated and a specialist NOAA/METEOR antenna.
Hopefully by the end of the post, you will get a feel and and idea of where you would like to start or explore further !
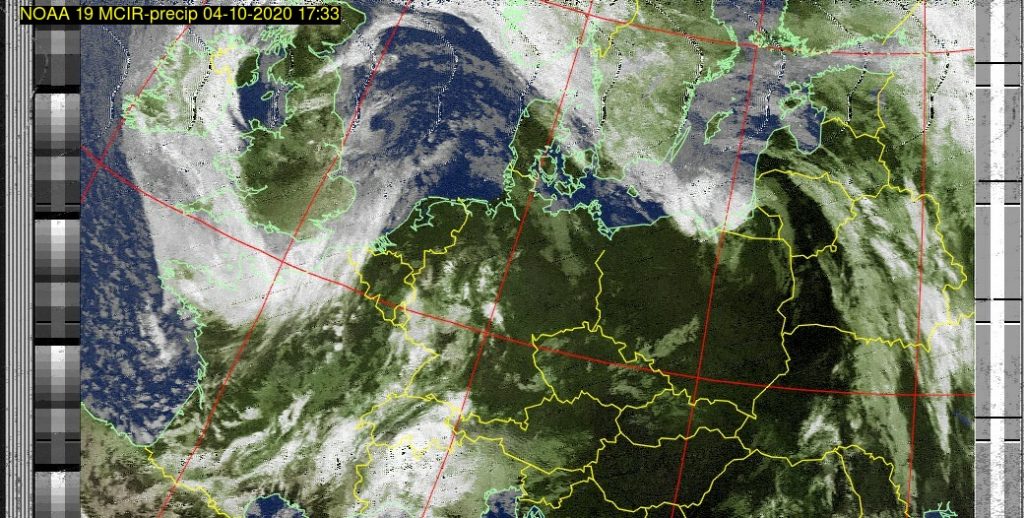
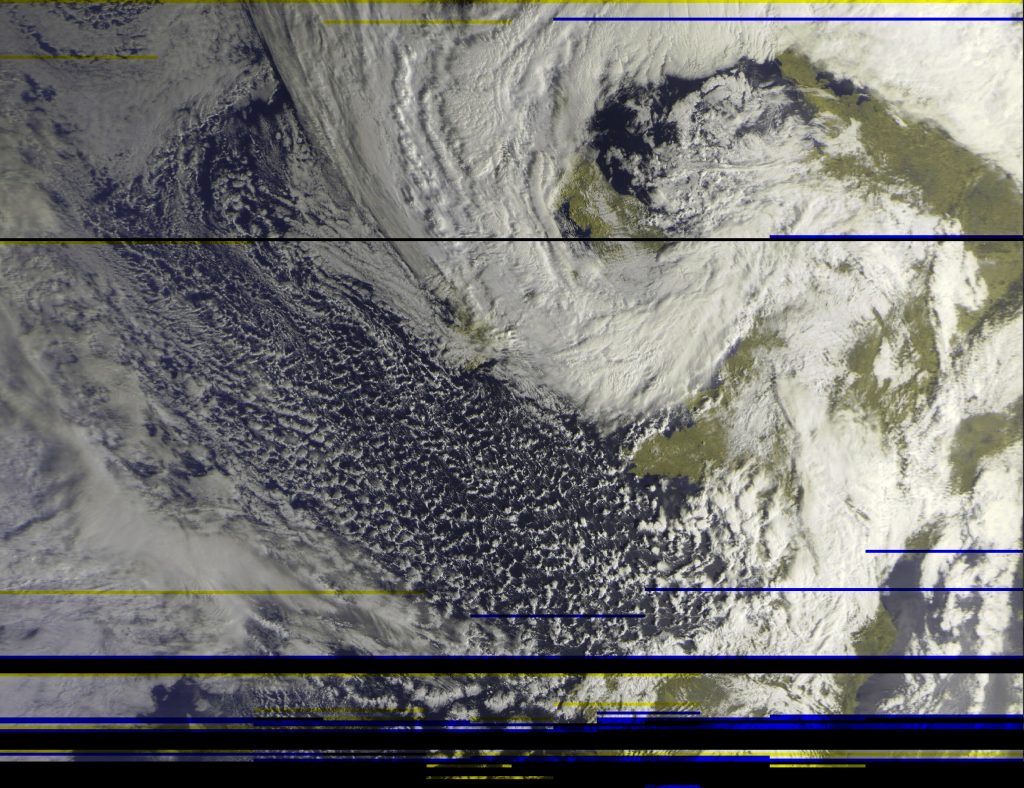
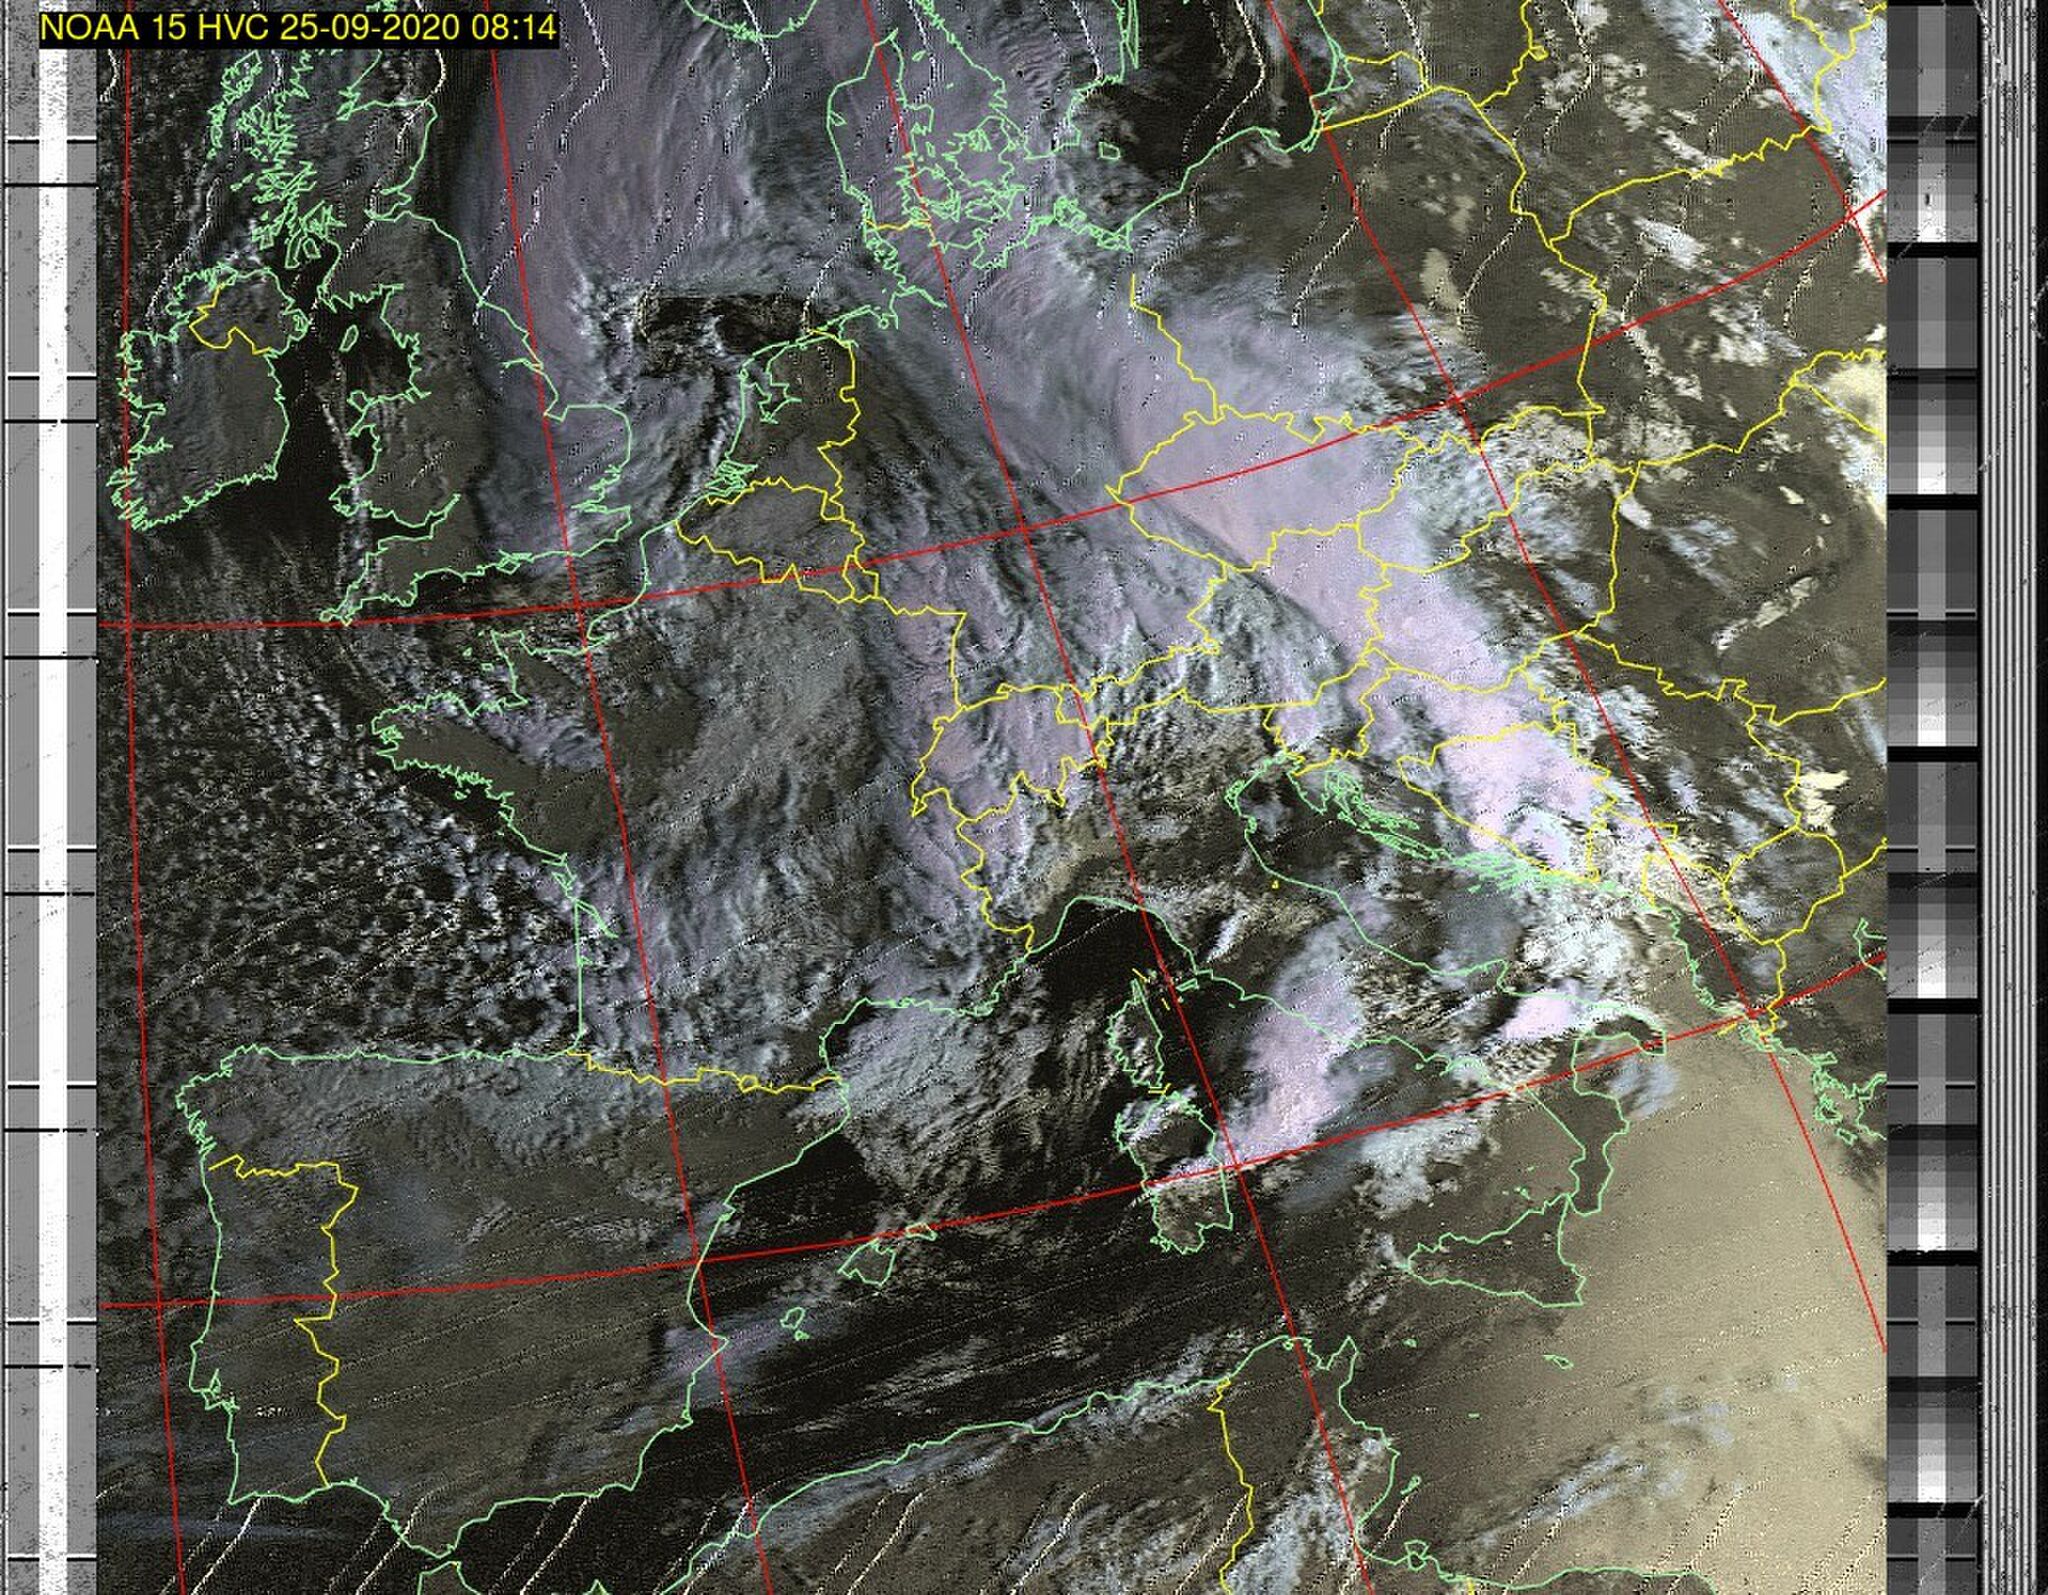
My first interest in weather and amateur radio came from receving Wefax images. I still do this as it complements and also gives me some idea of interference/reception issues as i can usually clearly see any issues in the fax.
My favourtie charts are the UK ones available from on 4608 Khz trasmitted by Northwood.
<insert pic>
I find the detail and various types of graph really satisfying to read and decode via HF.
Following on, i found on youtube about a simple antenna and using SDR receiver to decode ‘NOAA’ satellites
where it started
The audience here is very clearly windows users, and whilst I have a Windows 10 machine for HF Digital modes, i wanted to keep the SDR seperate from that system.
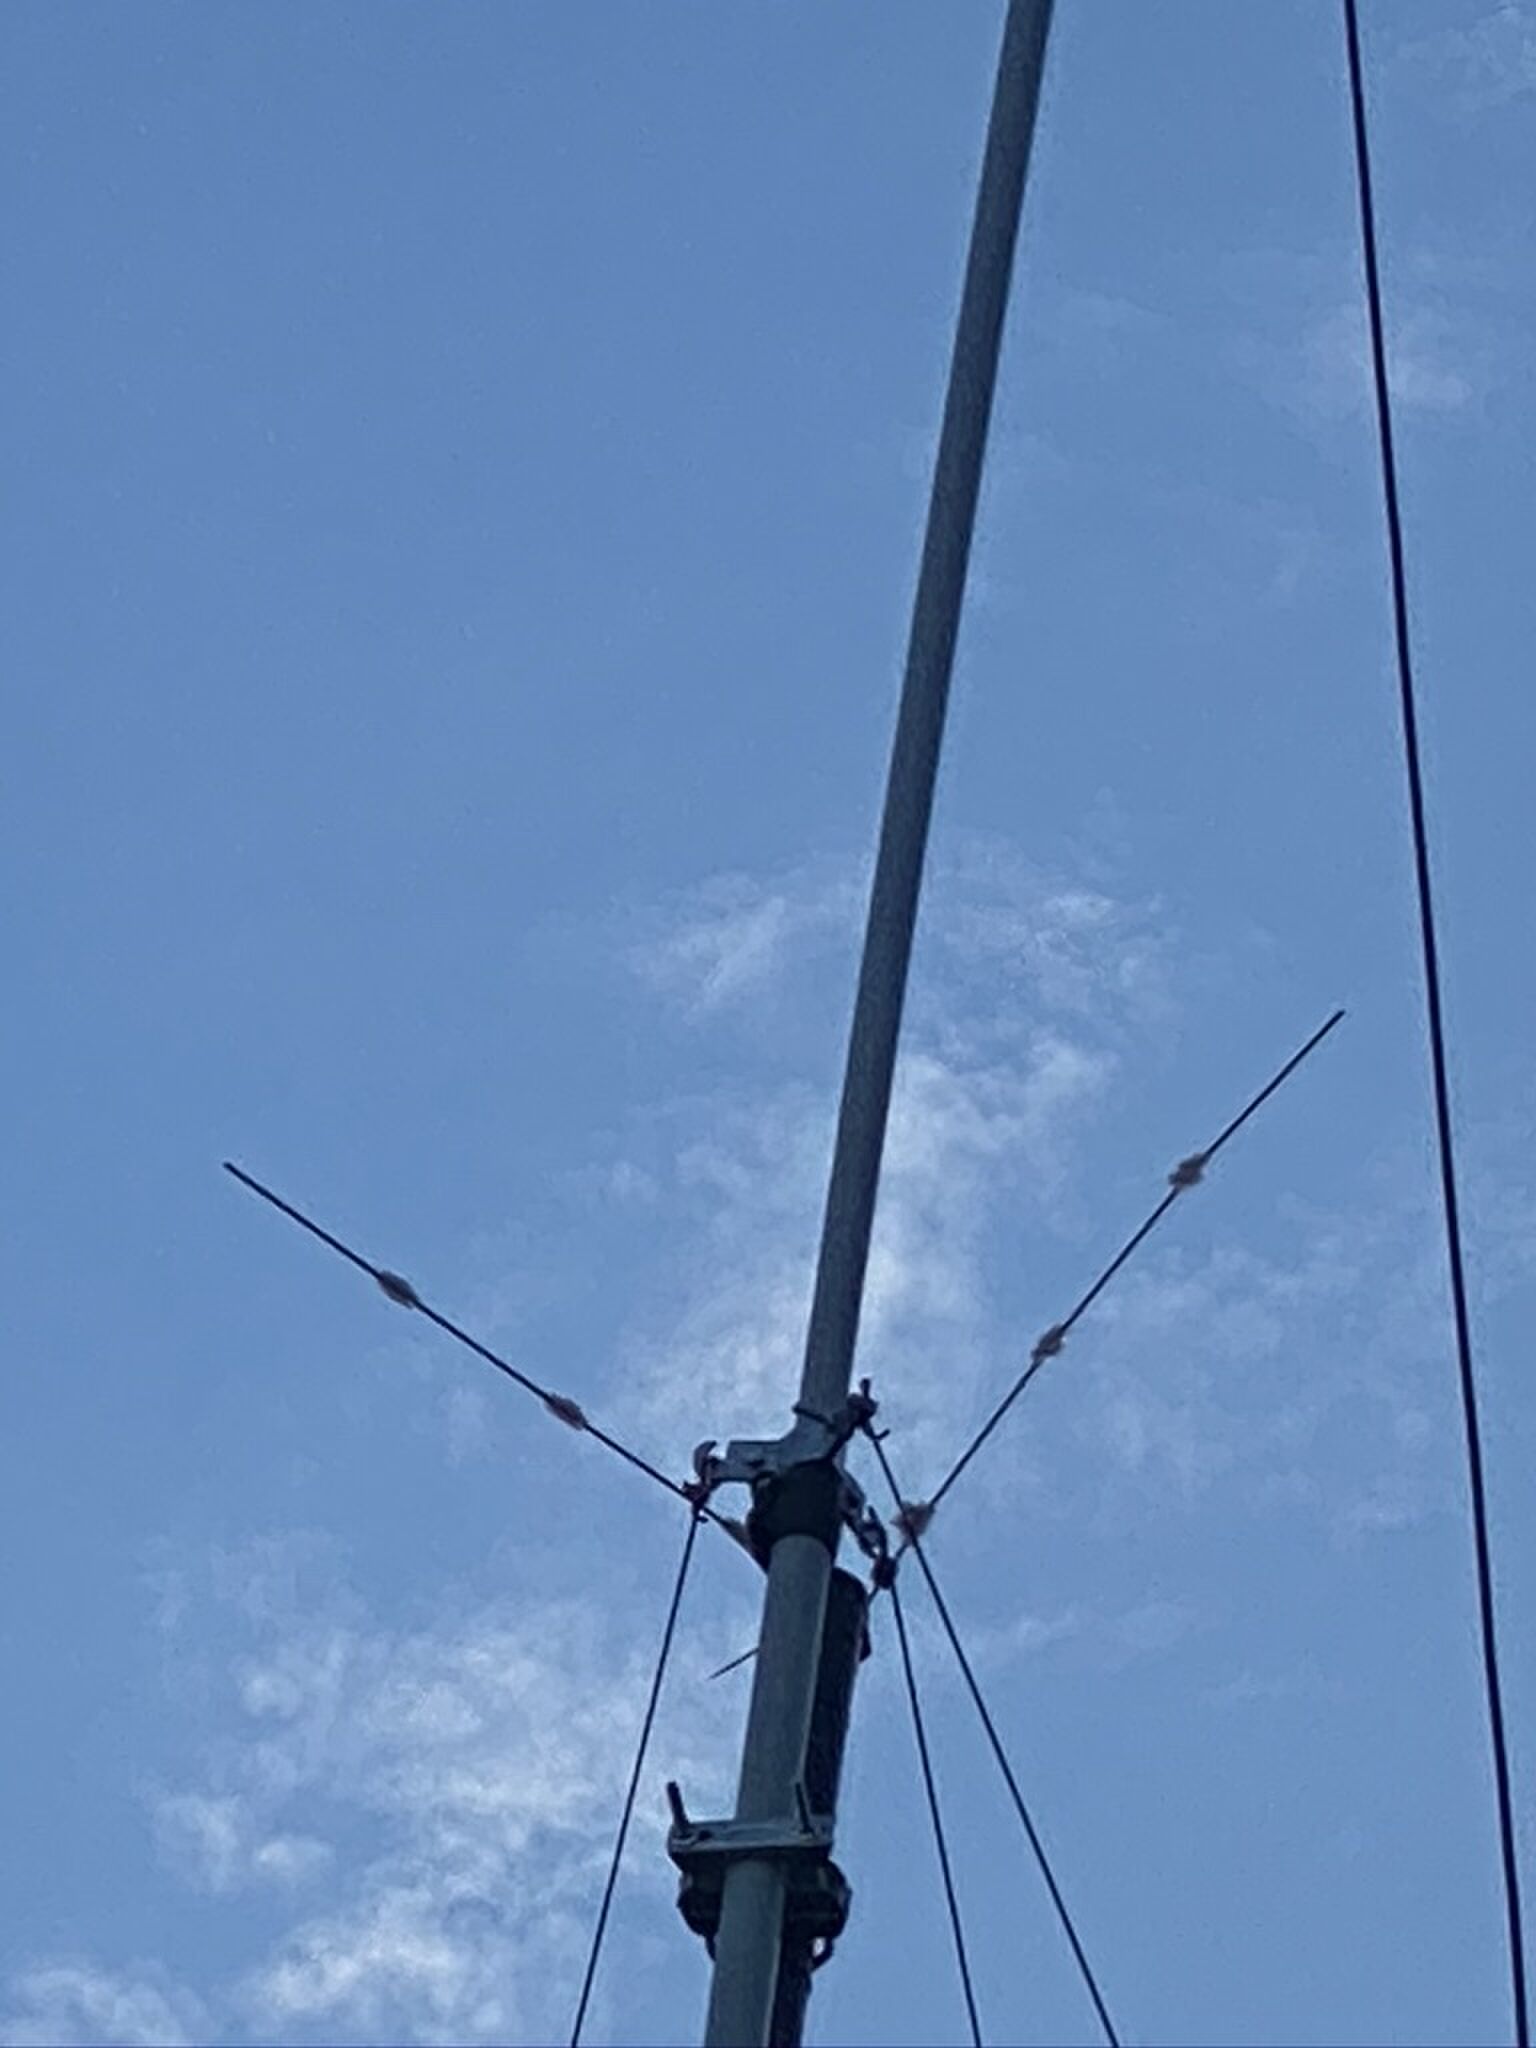
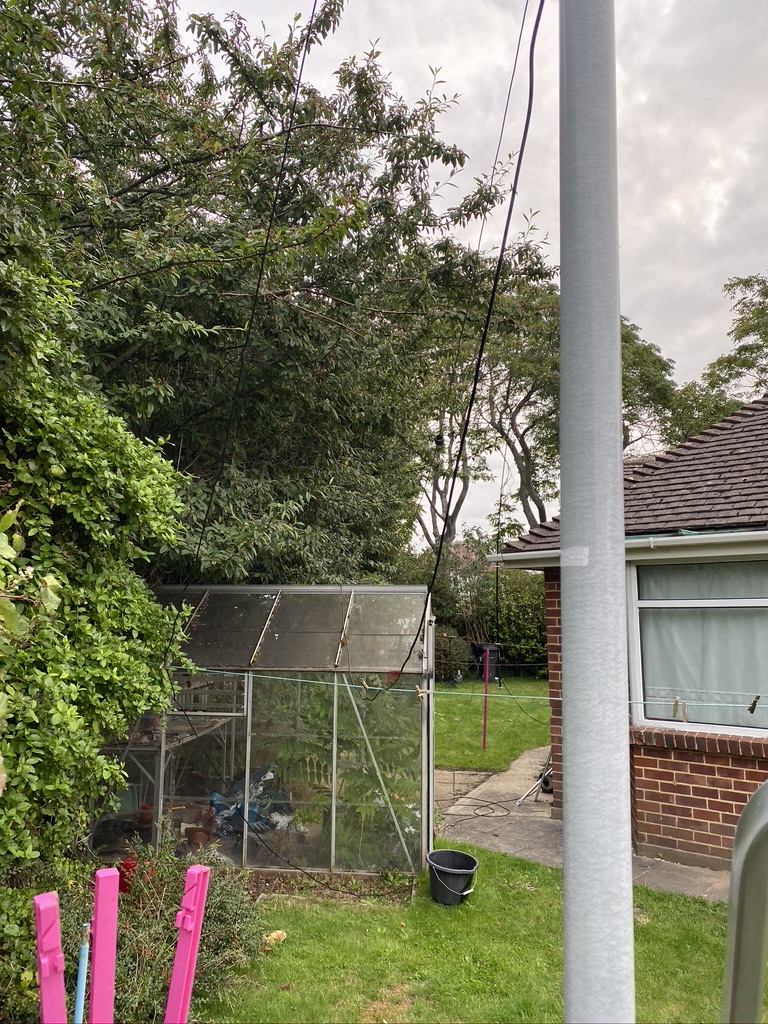
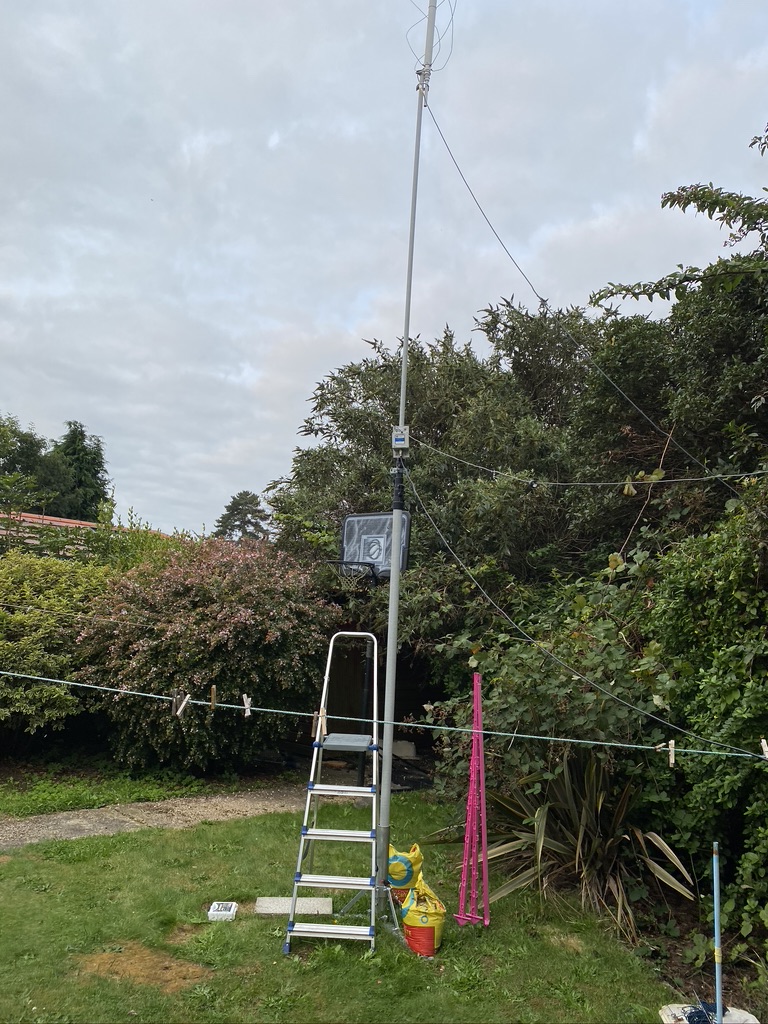
I built the antenna from bits I had around, although it did take up quite a bit of decent low-loss coax to get it up a reasonable height.
Original home-brew NOAA antenna
Get the antenna orientated well North-South effected the signals the most. Whilst heigh was important, gettign the polarization brought about the best results.
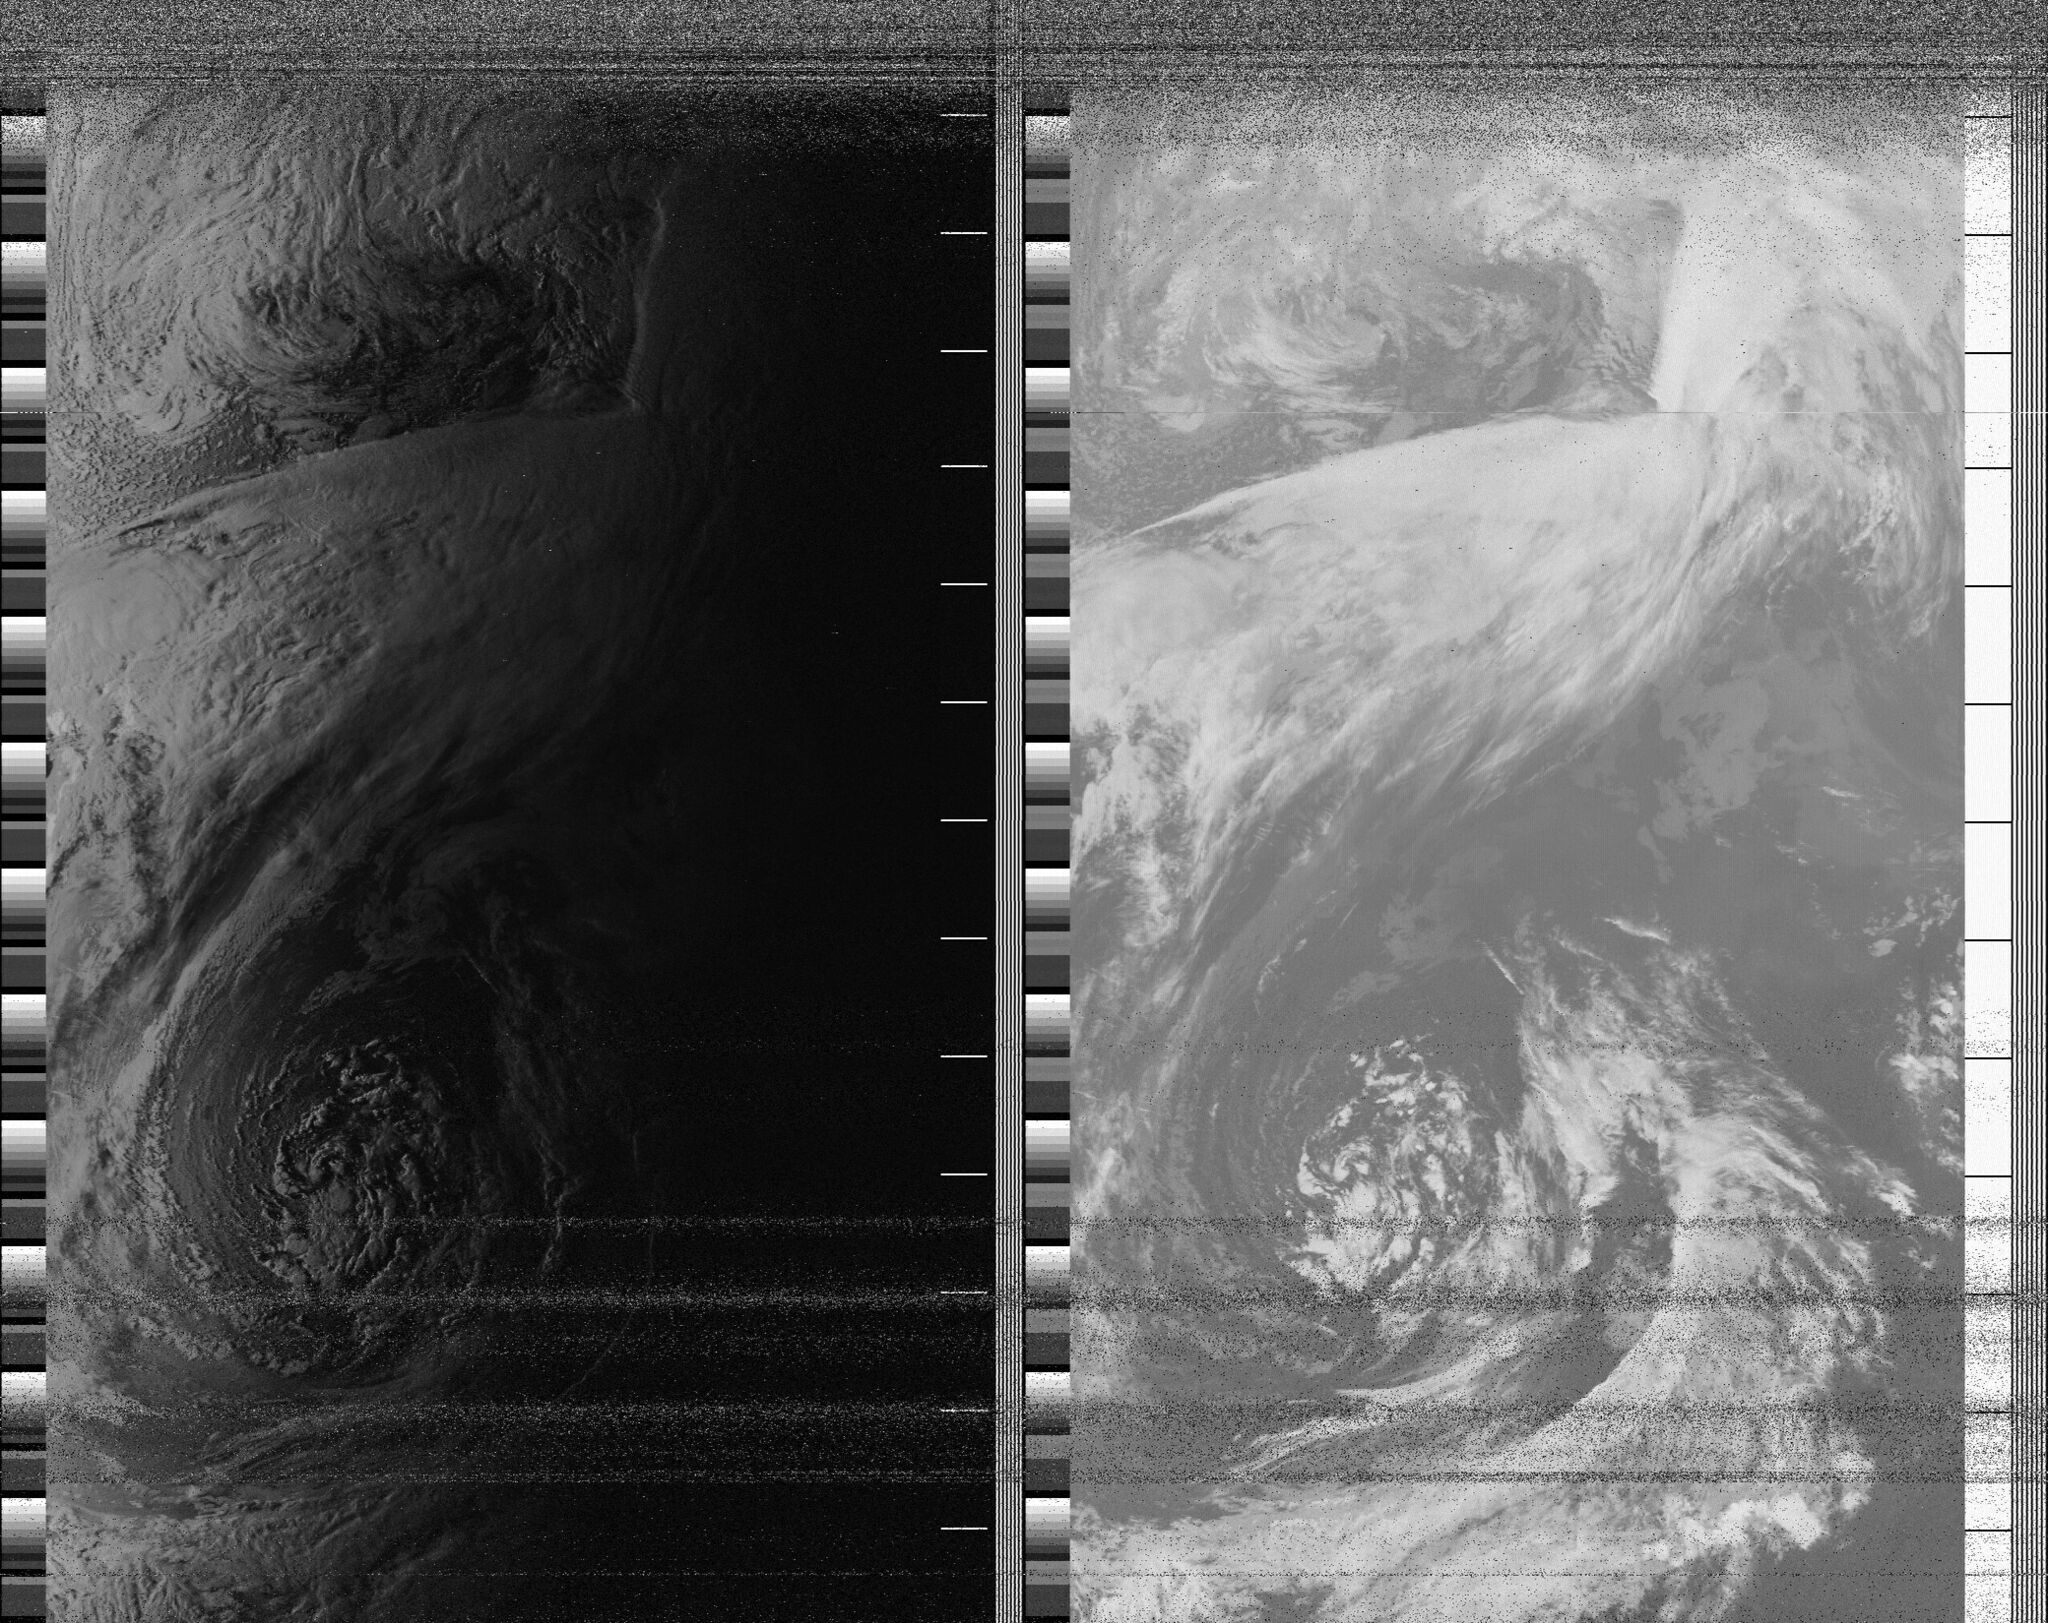
first NOAA decodes via standard SDR, gqrx and
My first reception pics, whilst not amazing, really pleased me as the technology was at least working correctly. On a mac the missing component was being able to decode the ‘wavs’ to images, for this i used https://github.com/artlav/meteor_decoder which was easy enough to build via homebrew.
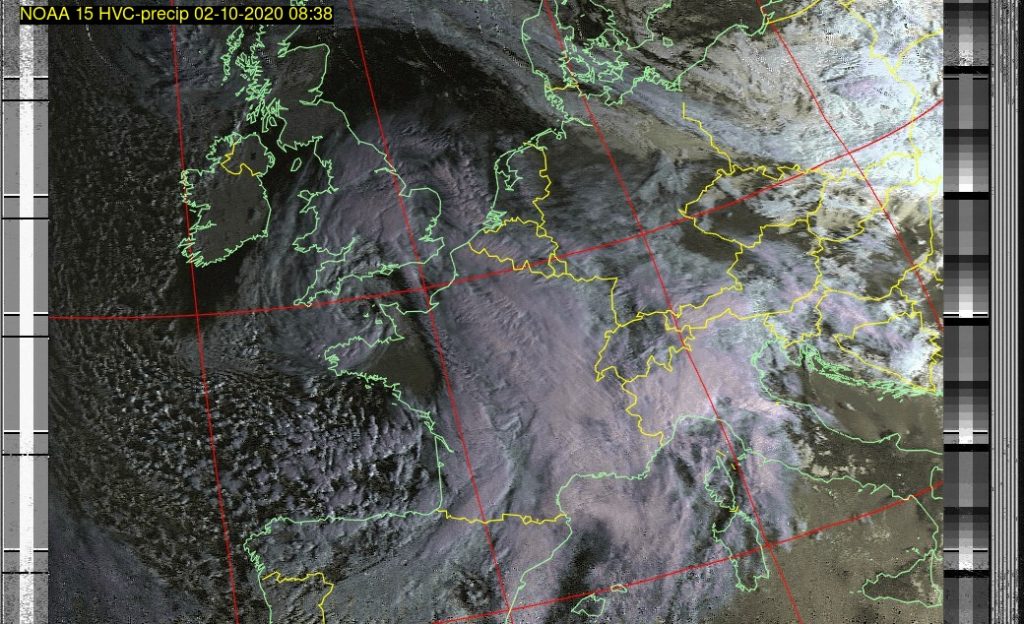
I monitored https://github.com/csete/gpredict where i could manually and getting the direct overpasses with the V antenna produced very good results.
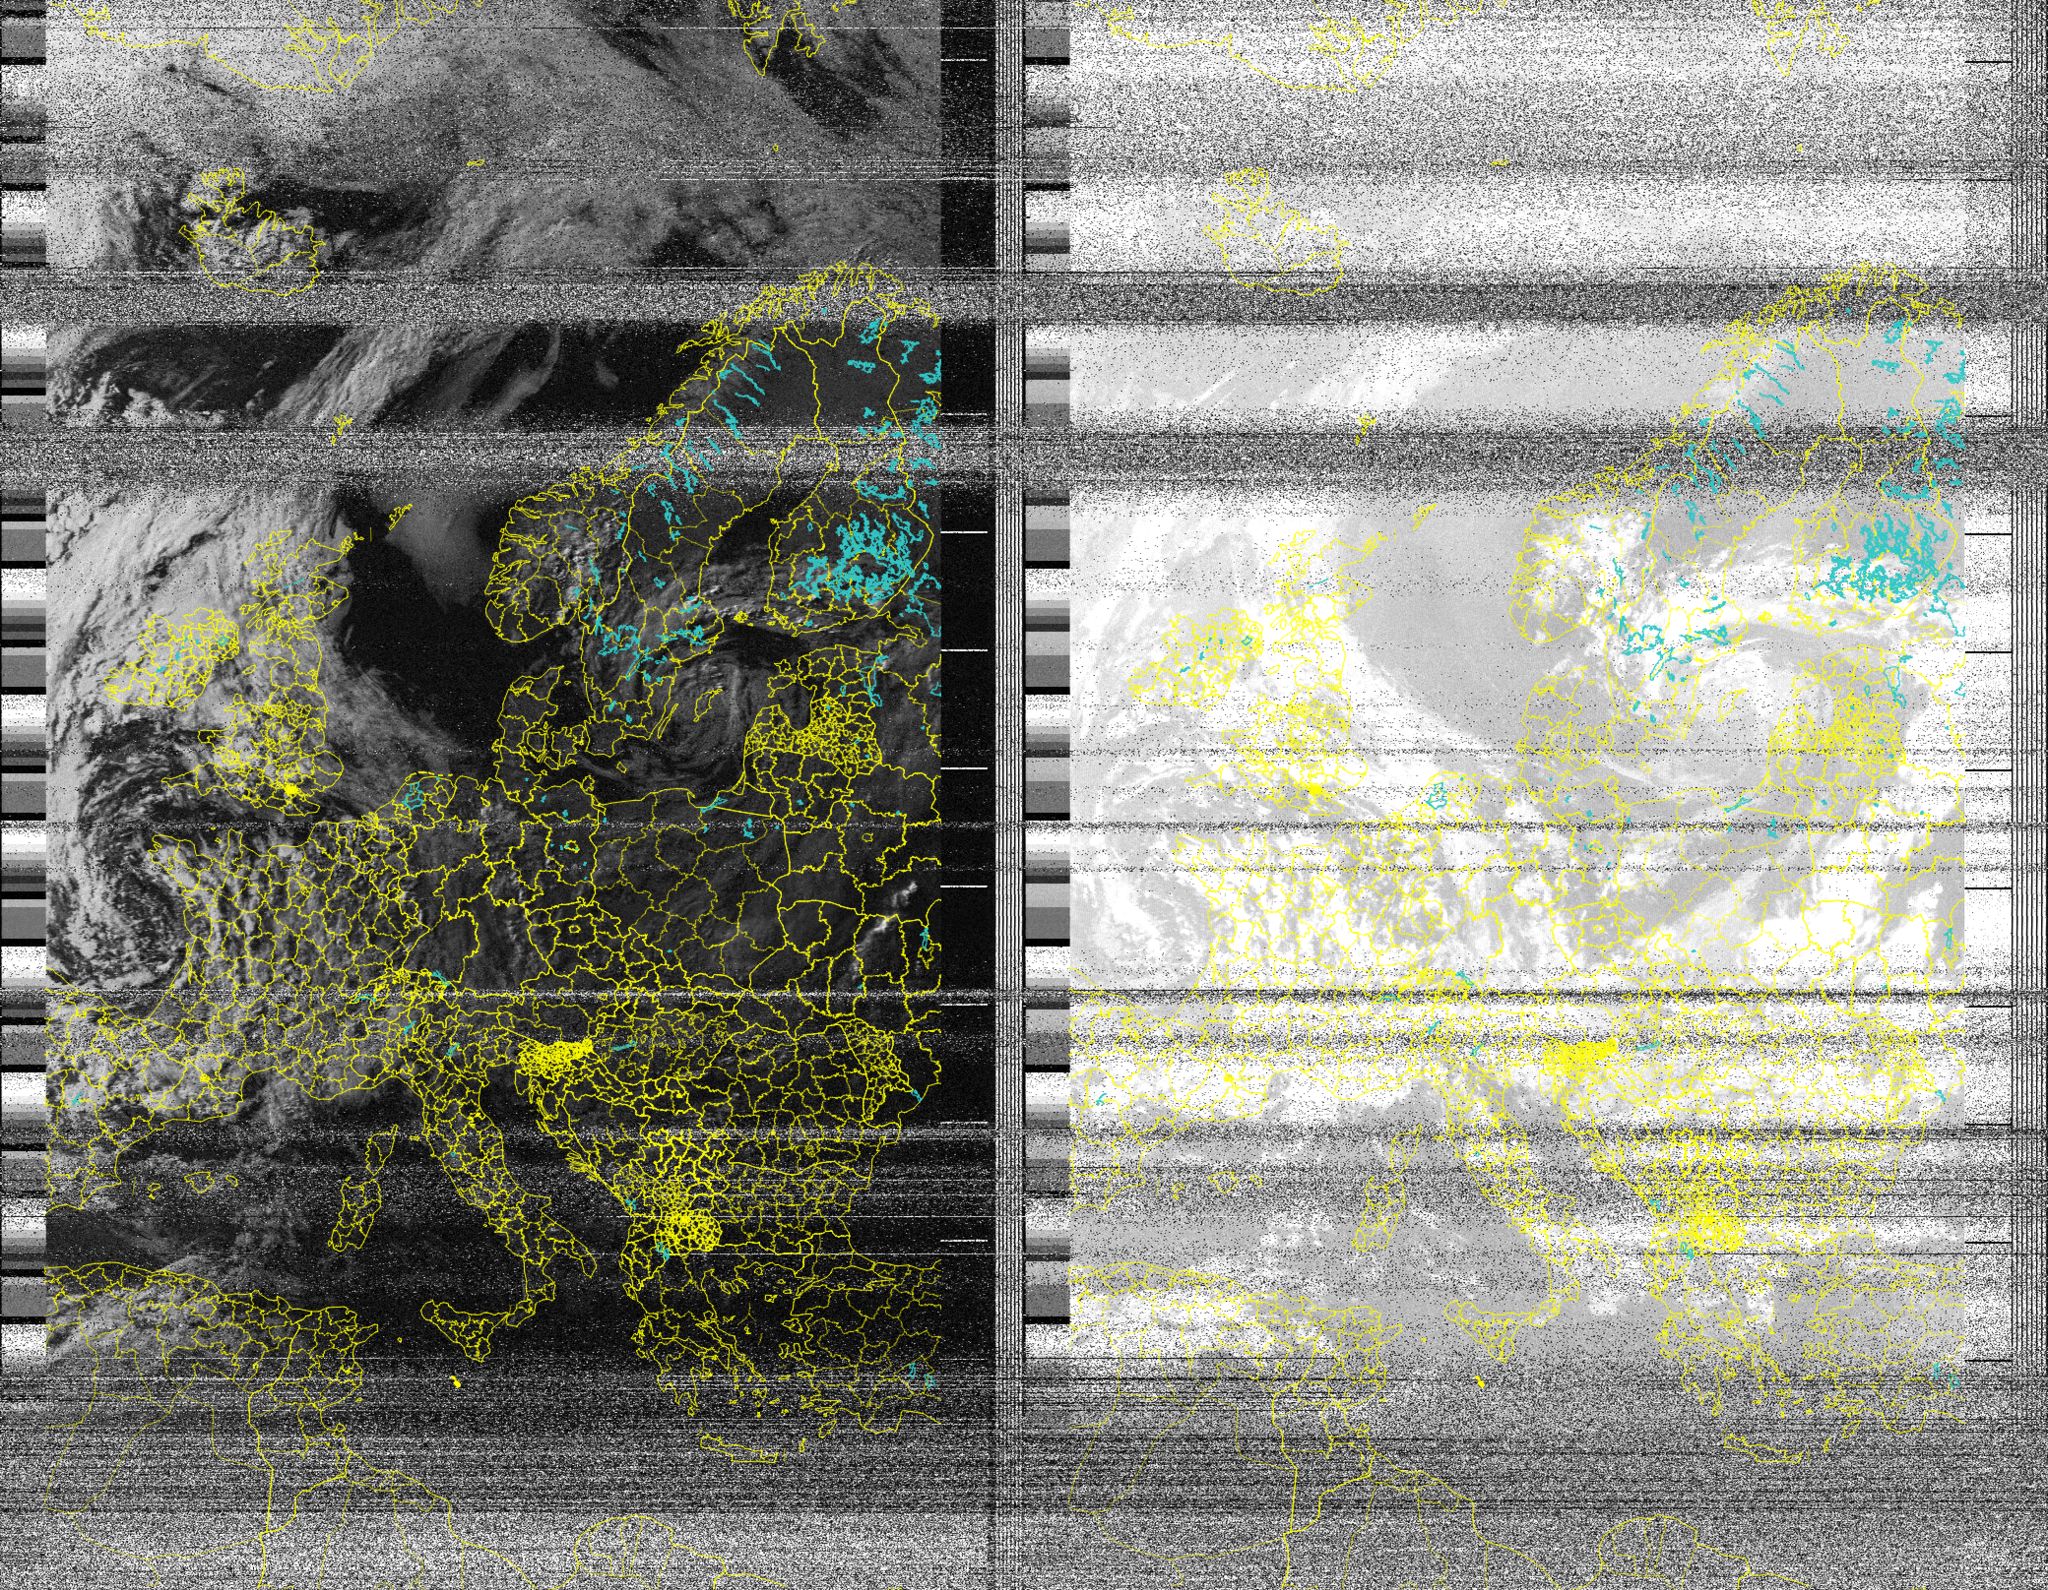
results when following a direct pass over, still some interference, but clearly visible UK and well defined cloud structures
I continued to do this for some weeks and built up my collection of NOAA pictures. I had still yet to sucssfully decode METEOR-2 as that was a digital signal and passing times were not in favour of a day-time working schedule.
We are still currently in a Covid-19 situation as time of writing and since Feburary 2020 here in the UK, so whilst many designs of NOAA antennas exist, I very much avoid supermarkets/large DIY outlets,etc unless absolutely essential, and usually for ‘click and collect; (Order online, pick u pin store, no wandering around).
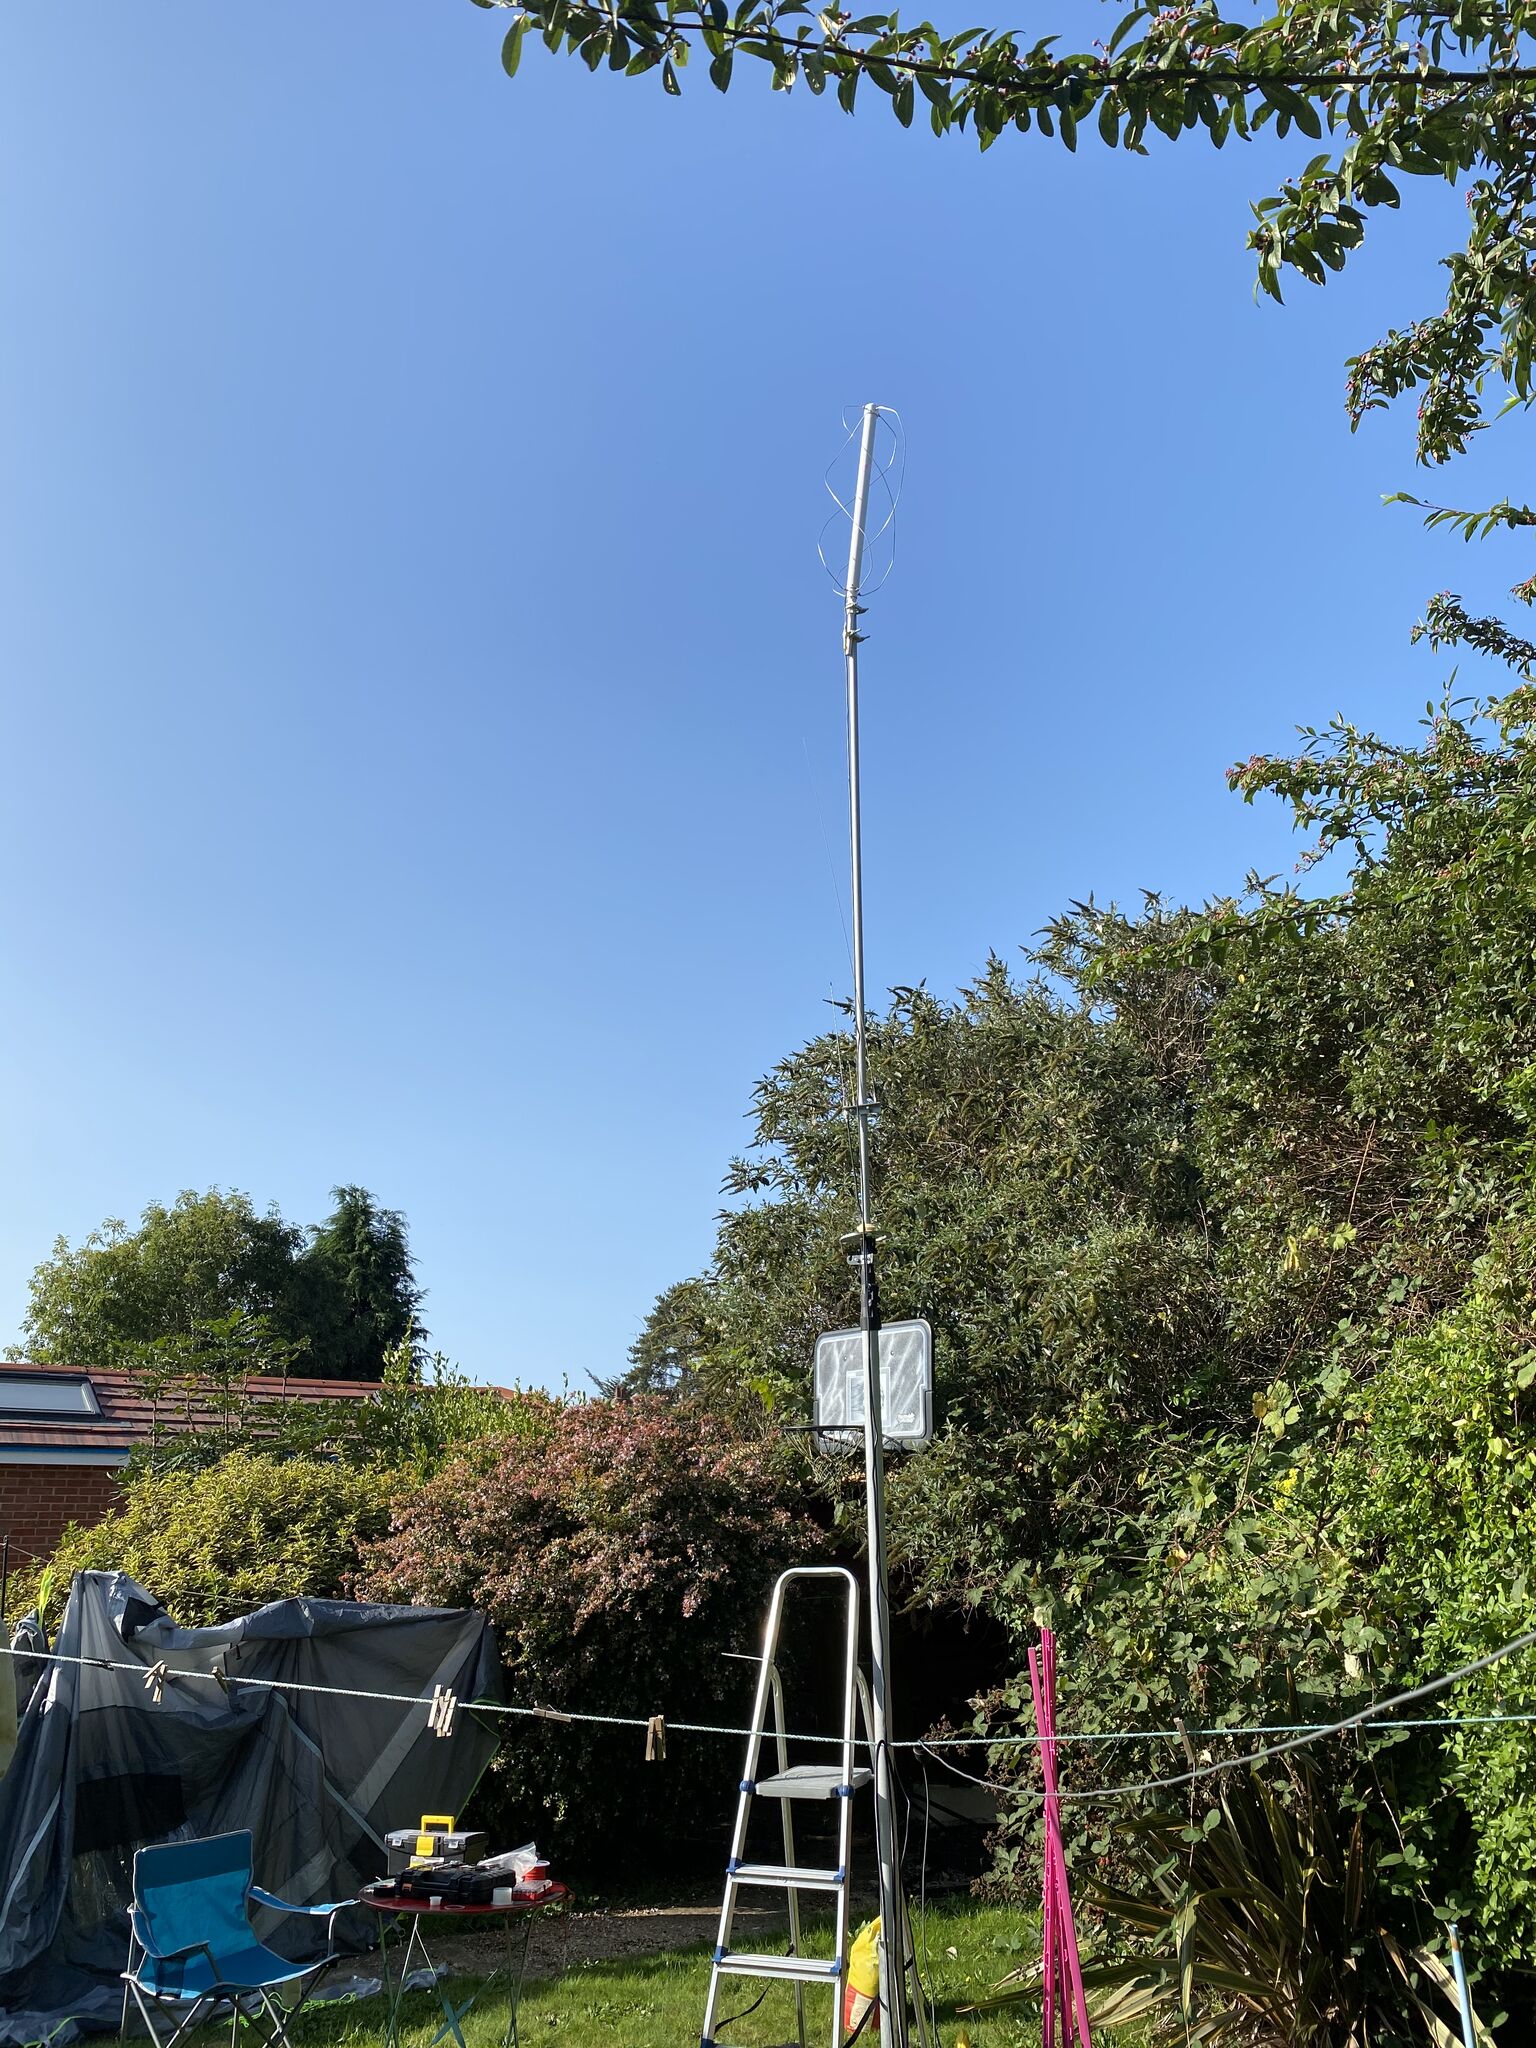
With that in mind i reached out to Dr Google to find pre-made NOAA antennas. This thread on reddit https://www.reddit.com/r/RTLSDR/comments/8biful/is_there_any_place_to_buy_a_decent_137_mhz_noaa/ gave me the link to the National RF antena http://www.nationalrf.com/satellite-tenna.htm. These are built to order, so there is a wait time, but it is well worth it. I was kept fully informed of progress and still had my V antenna to keep me going. Packaging from the US was fantastic, very well protected and assembly was very easy. I did have to get some PVC pipe to use a ‘mount’ to the mast and a BNC to SO39 adaptor, but these are very easy to come by and have no real loss to the to the receive-only antenna.
National RF antenna up approx 2.5m
I used my VHF mast, replacing my 2m/70cm antenna with the NOAA antenna. Whilst the mast can go up 30ft, it requires careful observation and maintenance to keep that high. Instead, i opoted for just over roof height of 2m and a clear line of sight to the horizion.
The antenna greatly improved the reception of signals as later pictures show, albeit I am still using the mac and GQRX and a simple SDR at this time.
the helical antenna greatly reduced interference and improved the length of received signals
I continued with the Mac, SDR, GQRX, Gpredict and meteor decode for quite some time, but as i got busier with work i had no time even to manually decode, as much as I enjoyed it !
The next step was to further improve reception and automate. This was accomplished by purchasing filters and amplifiers specifically for the NOAA RCPT frequencys in VHF and then re-cycling a Raspberry PI3.
The original video gives the necessary filters, but for a shortlist here they are
NooElec SAWbird+ NOAA
Flamingo+ FM – Broadcast FM Bandstop Filter v2
NooElec NESDR SMArTee XTR SDR
As I wanted to automate this and provide a simple way to just look at the received images i used https://github.com/reynico/raspberry-noaa repo, which was by far the easiest package to setup and use on my Raspberry pi.
If your not familar with linux/unix this could be a bit of a blocker, as you do need to manually edit some configuration files, so being familary with standard OS commands and a text editor like ‘vi’ i would say are the ‘essentials’ to being able to use this. I dont mind saying i had to refresh my memory on how ‘at’ the scheduling tool worked having always be a ‘cron’ person.
In practice once setup, there is very little to do, but what i have done is to alias ‘atq’ to make the list of tasks in date order.
This makes reading the scans far easier and i can still use gpredict on my mac to see which ones are the most interest to me. The software will automate, and try, every scan, but if rtl_sdre is already running, will not be able to run. In that case its always useful to ‘prune’ out the less interesting or scans which will suffer the greatest interference. I always priortize Meteor passes over NOAA passes as Meteor decodes seem to be. a maximum of 2 per day. This is easily managed by the combination of ‘at -c <job>’ to ensure no duplicate tasks are running.
I have been running on a PI now for just over 2 weeks, and as part of the QTH tidy up am moving the Pi from a ‘desk’ to a shelf where it will be safe and less prone to me knocking the amplifier and notch filter out.
I am amazed by all the scans i can receive and thoroughly enjoy understanding how it works, and being a recipient to the amazing images that both the NOAA and Meteor satellite send for free !
Example NOAA IR via the Linux Raspberry PI setup (some interference due to building work near QTH)Meteor decode – note the interference here is to a digital signal, so rather than static, its loss of pixels in the decode.
Overall i can say that investigating the weather satellites has really complemented by amateur radio activities. I’ve learned how important good antenna design is by the progression from a simple V dipole to a professionally built helical antenna, and the use of amplifiers, band filters and the right SDR unit to use for the hardware available.
I have since purchased 2*Pi4 as I would like to use a Raspberry PI more with the other SDR’s i have (Airspy, HackRF) to learn to program and enjoy the decoding more. Building good antennas will only help what i need for future amateur broadcasts as well.
Overall, i can really strongly recommend decoding weather satellites, if anything you get amazing images of your QTH and combined with WeFAX you can make your own weather predictions !
So apologies for the lack of posts – having passed my Intermediate, I then found myself with quite alot of work/other commitments, but heres a condensed update – i’ll do a lengthier one on each topic at a future date.
Antennas!
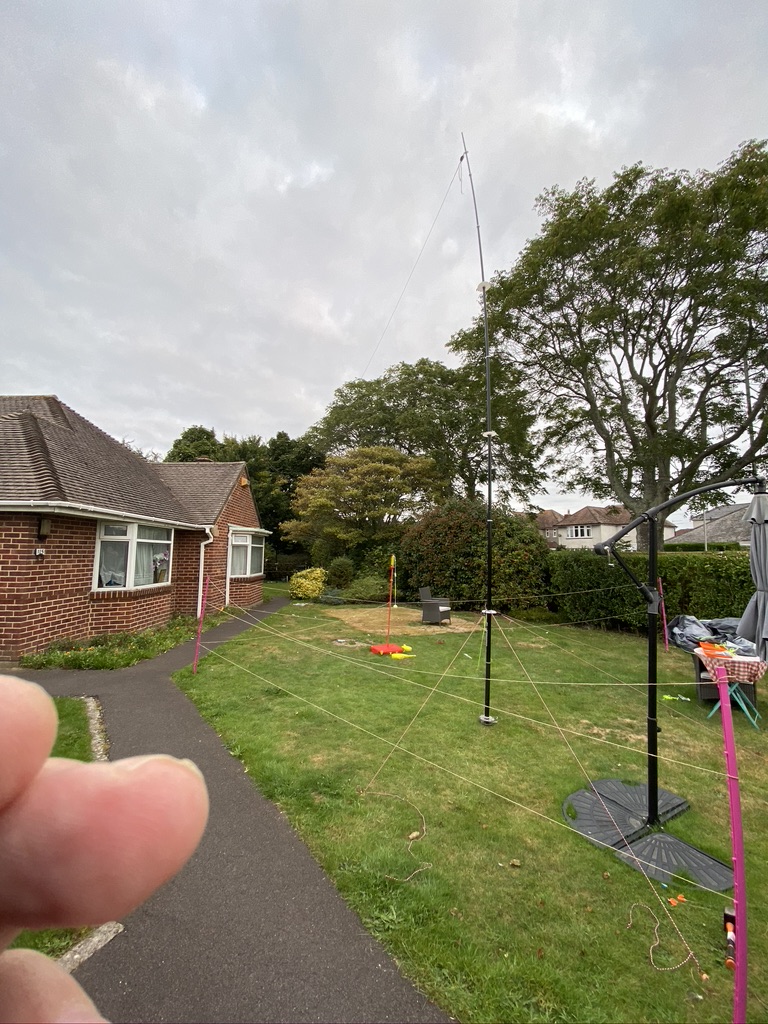
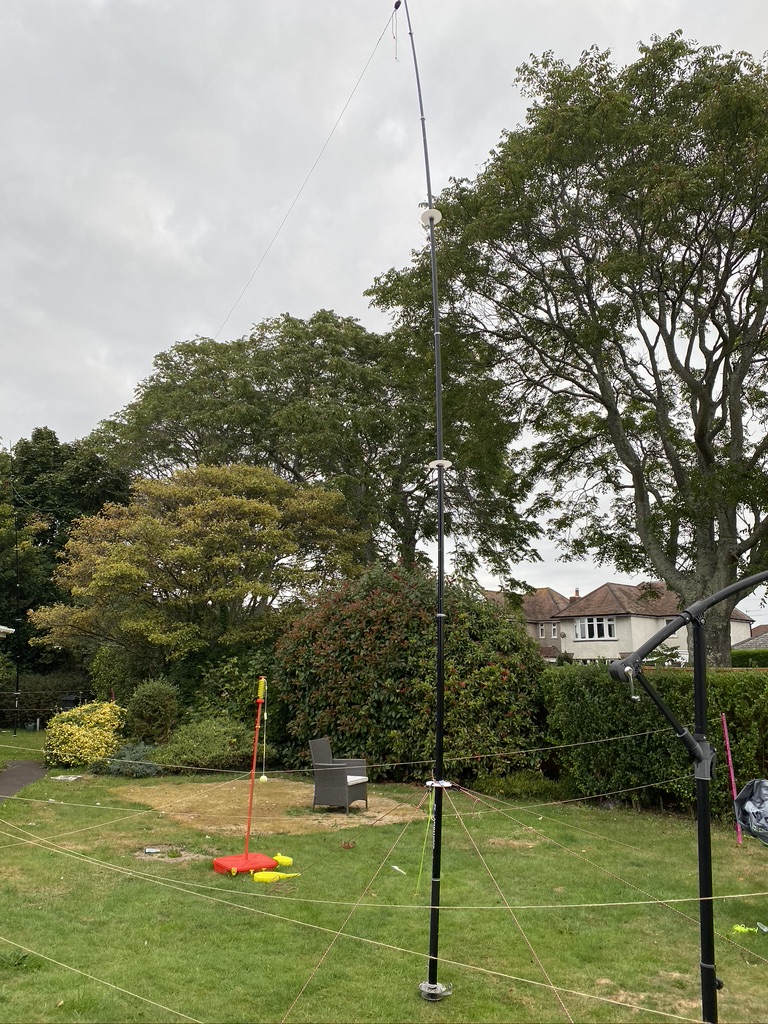
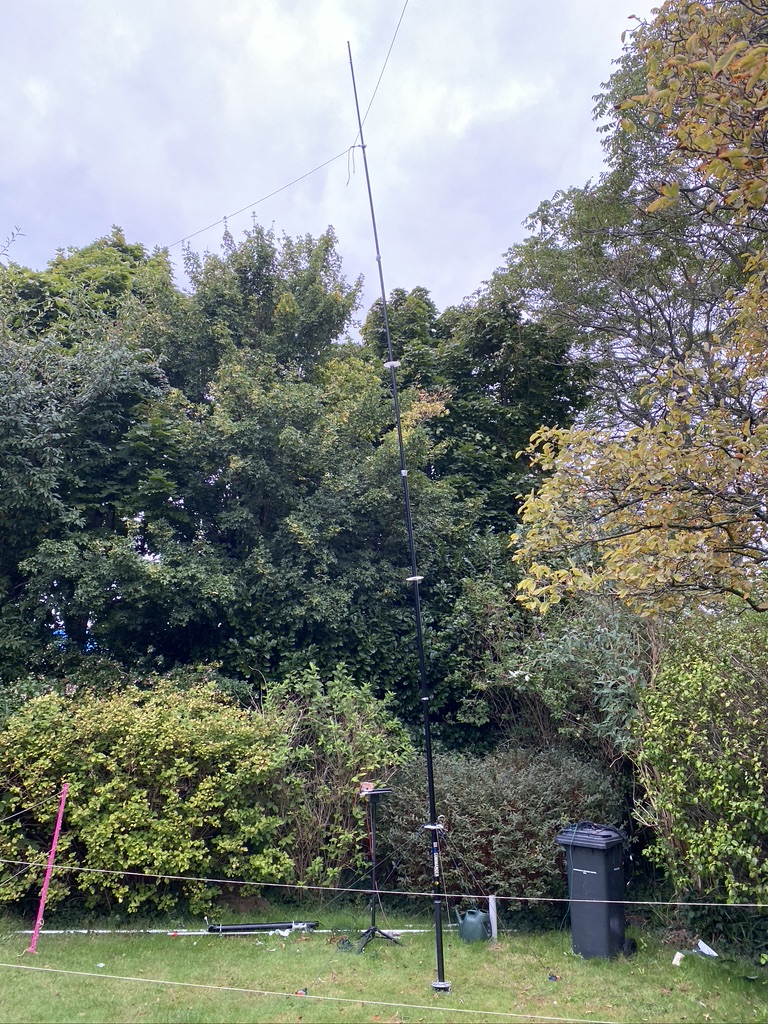
Up until recently I have been using a vertical di-pole, namely the DX Commander multibander. Whilst I’m happy with how good this antenna is, part of the hobby is learning and trying out new things ! After reading several very promising reports, I ordered the UK Antennas multiband end fed antenna. This product does deserve a write up of its own, which I will do in due course.
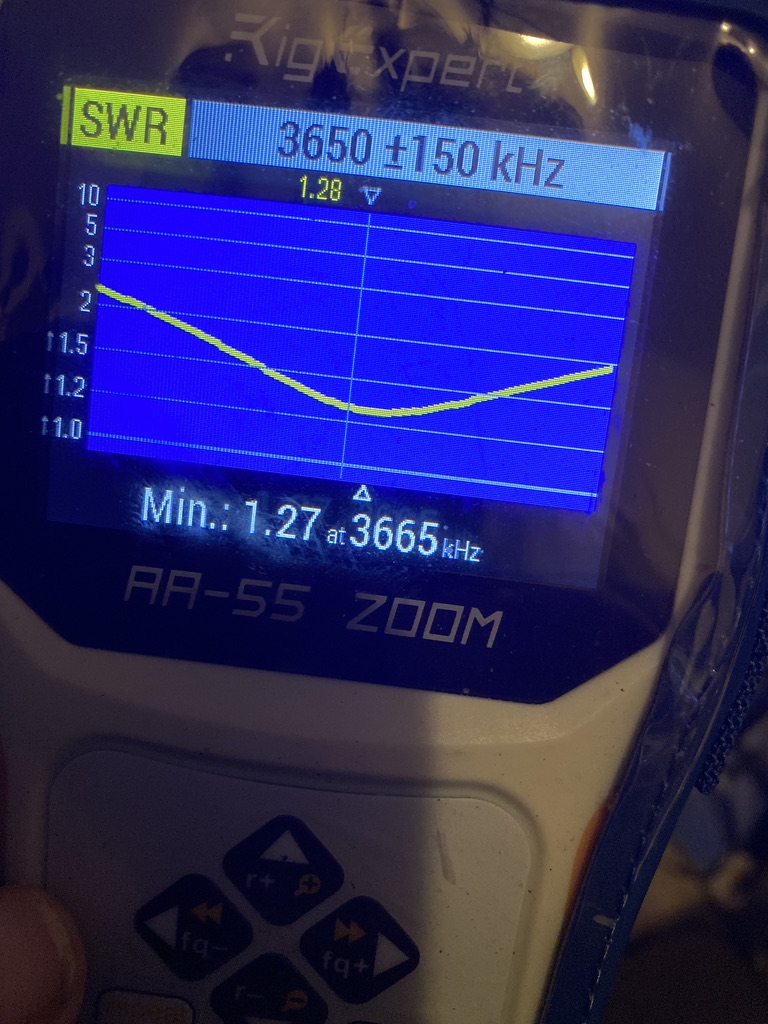
End-fed installation and 80M S.W.R graph
Needless to say, I am amazed at how well this antenna performs. It requires quite an extensive amount of space and I was able to re-use my DX-Commander masts as supports. I had ordered and tried to use Sotabeams, but for extended operation, they just didnt seem as stable and well built as the DX Commander. Good news is that I’ve ordered a DX Commander SOTA edition – looking forward to building and trying that out. The Sotabeams will probably stay in storage until i can go out /P /M and use them as ‘temporary’ mobile antennas.
Weather Sats
Having built and used my own ‘V’ dipole for NOAA and METEOR and was really happy with the results, i went to the next level and ordered a helical antenna for improved reception.
This came from the US and I think is hand built to order by National Antenna Whilst I could build a DIY version, I’m averse to going to large shops unless its essential at the moment, the reviews of this antenna are fantastic.
I setup the antenna and started on my mac to start with, and was impressed with the results, as this is somewhat manual and labour intensive, i then setup a raspberry pi running raspberry-noaa Whilst I looked and tried other installations, this was by the far the simplests and easiest to setup. The combination of an amazing antenna and good programming produced frankly astounding results, including my first ever METEOR-M2 decode – all full automated !
meteor, noaa reception via Raspberry pi and National Antenna
First HF QSOs with 2E – new Digital and Telephony
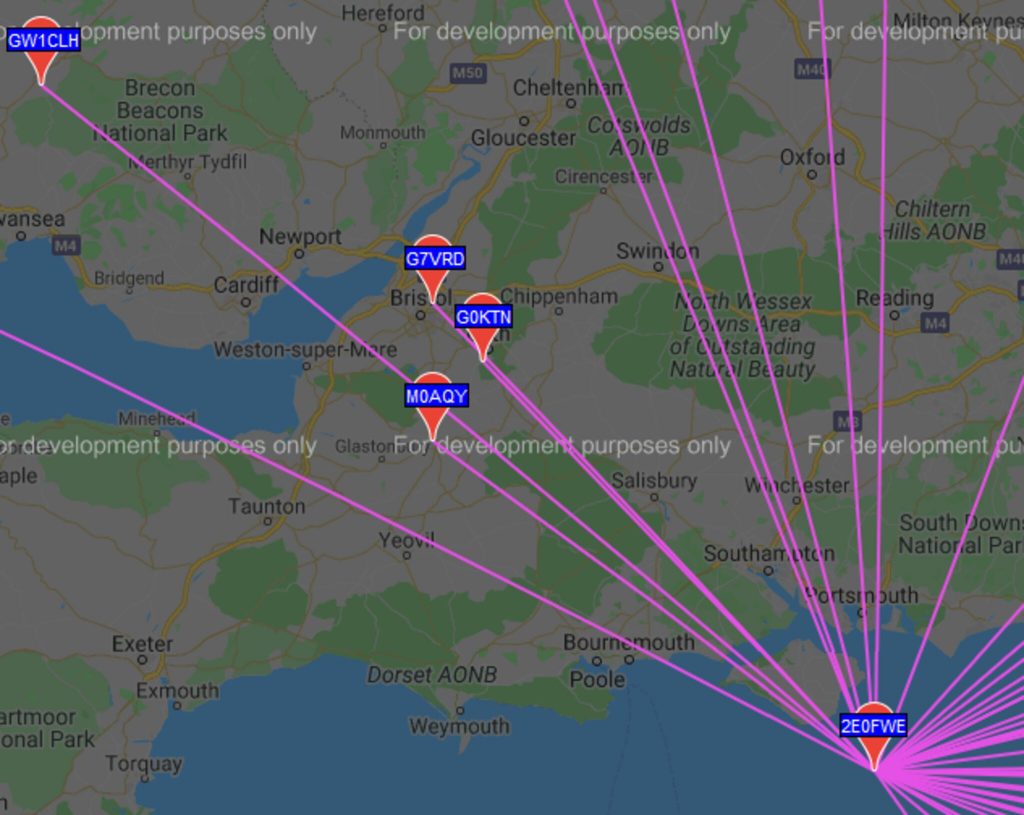
I was very happy to make a QSO with G7VRD. Having metup via the reddit talkgroup and being ‘local’ in terms of radio, we had never been able to reach each other. With the new installation of the end-fed, I was able to make contact on 80m via firstly WSPR then we tried out a variety of different modes. G7VRD was really great in helping me thru and testing various types, having varying degrees of successes across them.
Contact with G7VRD at last !
I was also able to make contacts for the first time via Telephony. I had a great QSO wtih G8MNY who gave me a very detailed signal report, including play back of how i sounded, which was really useful. The combination of end-fed and additonal power is really helping me more on HF.
Whats Next ?
So i have a couple of other immediate things I want to do and are in progress, probably the most important is getting a receive-only antenna setup to restore use of my MFJ-1026 which performed really well previously.
Here is the video from youtube which shows what I’m aiming for – with VDSL in the UK i’m hoping this will help eliminate the QRM in my urban setting.
excellent example of noise cancelling with IC-7300 and MFJ-1026
Now i can also run a beacon, i want to get my PI-WSPR station going on 40m, so will see if i can get the 40m inverted v dipole up !
Until next time (which will be sooner !) take care, stay safe and 73 !
Having originally booked the Intermediate course and exam back in March events stopped that happening.
Thankfully the RSGB started with the Foundation Level exam in starting on-line exams and rumours of the Intermediate being made available on-line soon started. I had been building my kit for assesement since earlier in the year, and not sure what would happen about the practical assesment carried on with it, albeit at a much slower pace !
In July it was announced that the exams for Intermediate would be on-line so I immediately booked mine. I wanted to give myself enough time to kick-start my learning and give myself the best chance of pasting, but also fit in with everything else I have going on. Post September alot of my time outside of work will be taken up with my MSc and I had already booked a holiday for the bank holiday at the end of August, so went for August 23, first thing in the morning !
All the participants of the exam were given an invite earlier in the week and hooked up. This was a great idea and we was given a nice introduction to our group. Vitally I learned i would need *two* webcams, one on my PC I was using and another to see me from behind. So i set that up via my ipad. I would say if you dont have 2 webcams, use your PC for your main camera and use your phone – you will need WebEx on your phone, but belive that is possible.
In the two weeks upto the exam I made myself a schedule and broke down the notes/exams questions into days. I found this really helped me understand where I need to focus my learning. I had no problem at all on anything related to licencing and safety, most of the challenges come from the maths and equations on theory.
Invaluable advice !
Although the video came out close to my exam and the revision was well underway, the video from Tim G5TM really helped ! I followed his techqnique and it made me much more at ease during the exam. I took my time and went thru the ones i knew for sure and left the ones i didnt until the end, and at worse could take an educated guess – but i was in control (or it seemed!)
In the week leading upto the exam i continsualy tested myself on both the RSGB provided Test Papers and the questions in ‘Exam Secrets’. I cant recall the questions word-for-word but for sure there were many that were very close to what were present, and probably doing the test exams in ‘rote’ method got me over the line to get a pass mark 🙂
The only negative side to the on-line experience was other people making a noise during an exam, as they finished or whilst they worked, there was a level of noise I wouldnt expect during an exam situation. For this i just removed my headphones and concentrated on my exam but listening for anythign that the invigulator might say (rather than just random noises).
I was told immediately of my score and I had passed, so am now just waiting notification from Ofcom so i can apply for my Intermediate licence ! I can wait to setup a working beacon and use 50W on HF, i think it will make a difference on the telephony contacts for sure.
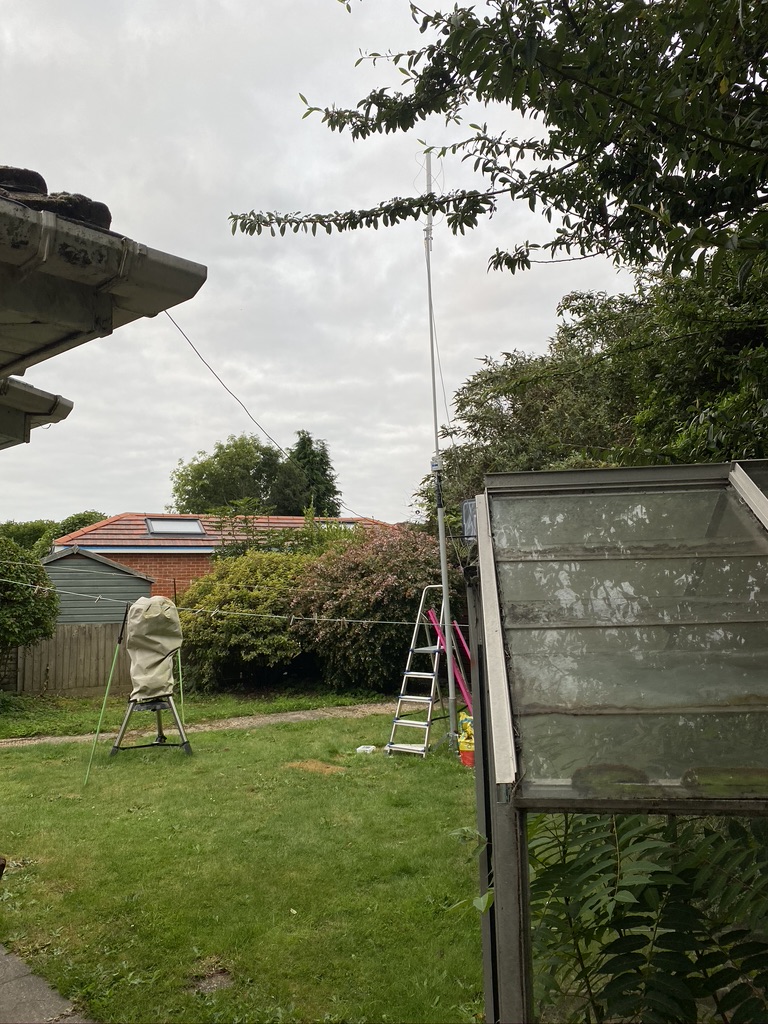
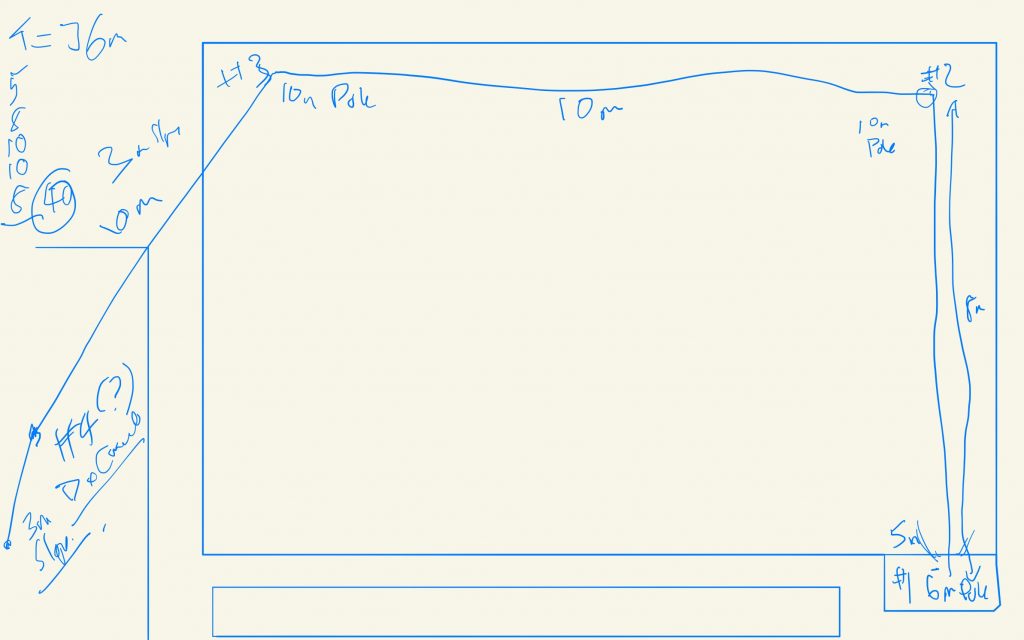
So in the QTH down in IO90 the met office issued their warning of bad weather. I brought my antennas down as a precaution of lightening strike. Following a couple of messages on the DX-Commander Discord channel the UK Antennas multiband end-fed was mentioned as a comparison. As such I’ve not had the time or opptunity to get it in place, and with the wire at 39 meters long would require some prep on how to get it in place !
planning the long wire across the garden
The advantage of the DX Commanderj is that all the bands are vertical each, even 80m can be done lengthening the wire. With the End-fed finding how to route 36m of wire into the space I have was a challenge.
I have made a draft and took some measurements, and in combination with some sorta beam poless and mast, think I have a working configuration !
Will post as soon as the good weather has passed, really excited to try out a new antenna
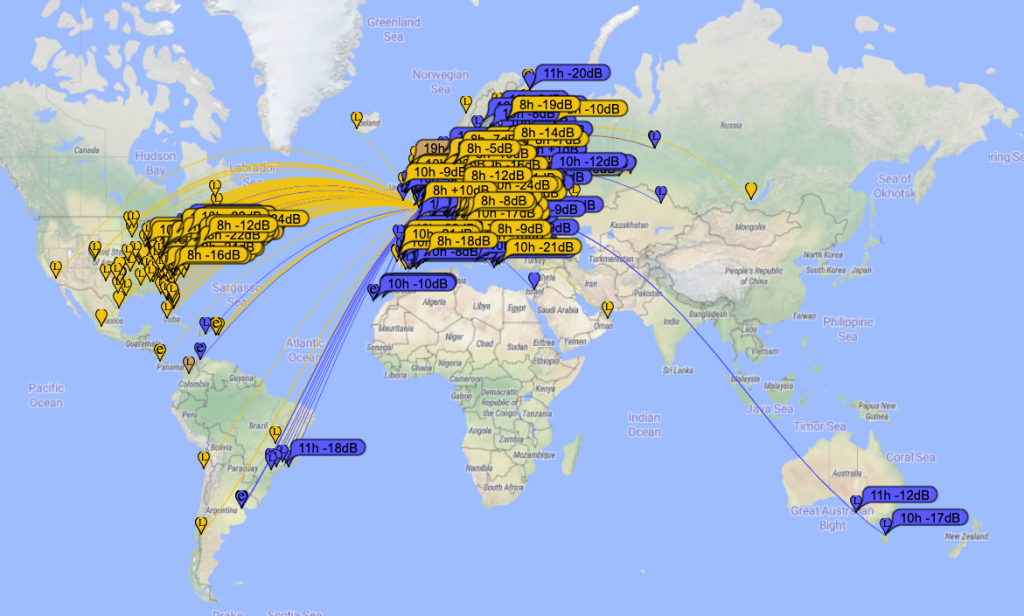
Have had a great weekend on the radio logging up QSO’s via FT8. I’m now also using LoTW and importing those into QRZ – this has helped with getting more awards. I dont think i will do any more ‘logging’ tho as managing two (and wanting to automate them) is getting enough !
Was really glad that I got another award via QRZ – the grid squared award !
Grid2 accomplished !
For the non amateur radio users what this means is that the globe is segmented into ‘grid locations’, the reference codes being ‘maidenhead locators’ – for this award there has to be 100 unique and confirmed grids. Was very happy to get this done on my foundation licence.
Also was very lucky and got a QSO in the Canary Islands – which is officially classified as being in Africa, which means I’m now only one continent away from the continents of the world award !
Whilst i have heard south america, i’ve never yet managed a confirmed QSO – so it will be quite a challenge but hopefully with the summer hear propergation will improve and i can make that QSO !