Good day all ! Making this a quick one as its interspersed with Univserity Assignments and Tidying the shack !
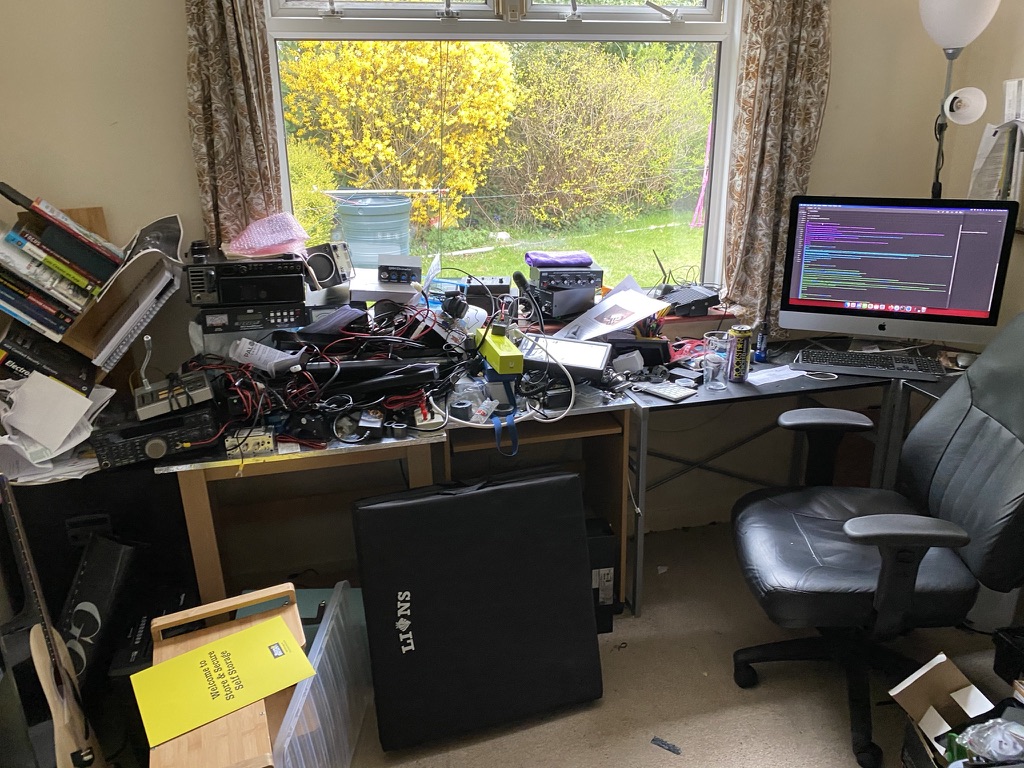
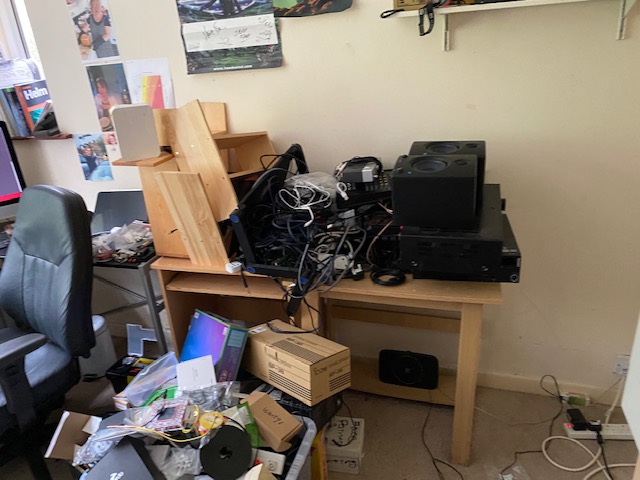
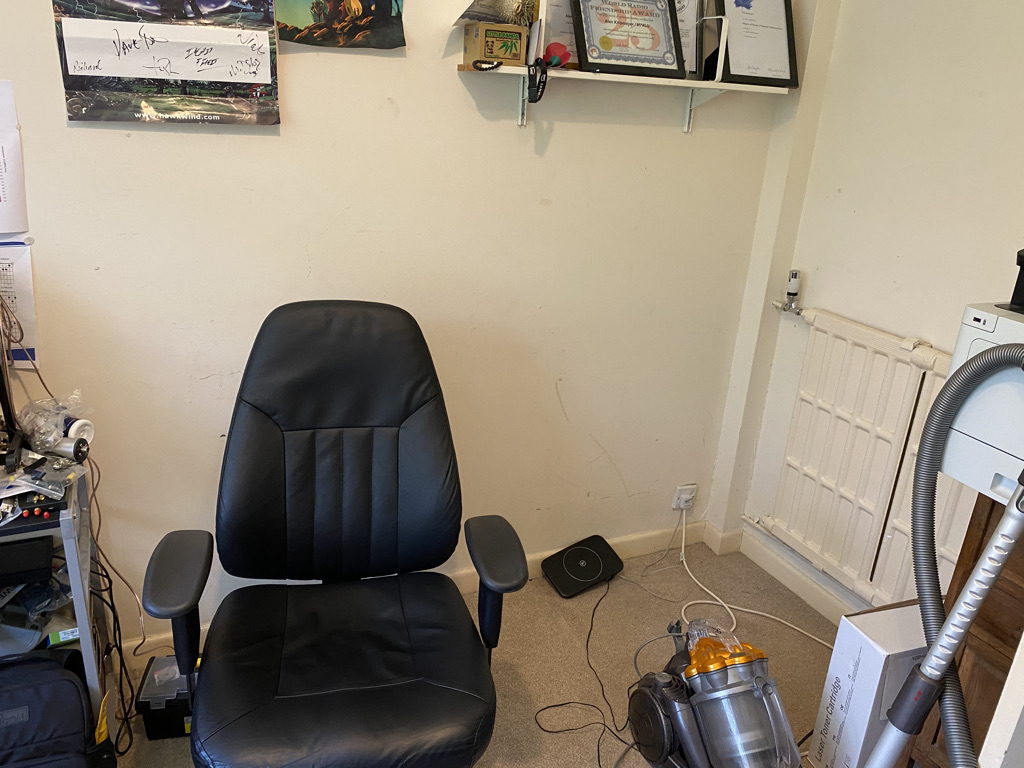
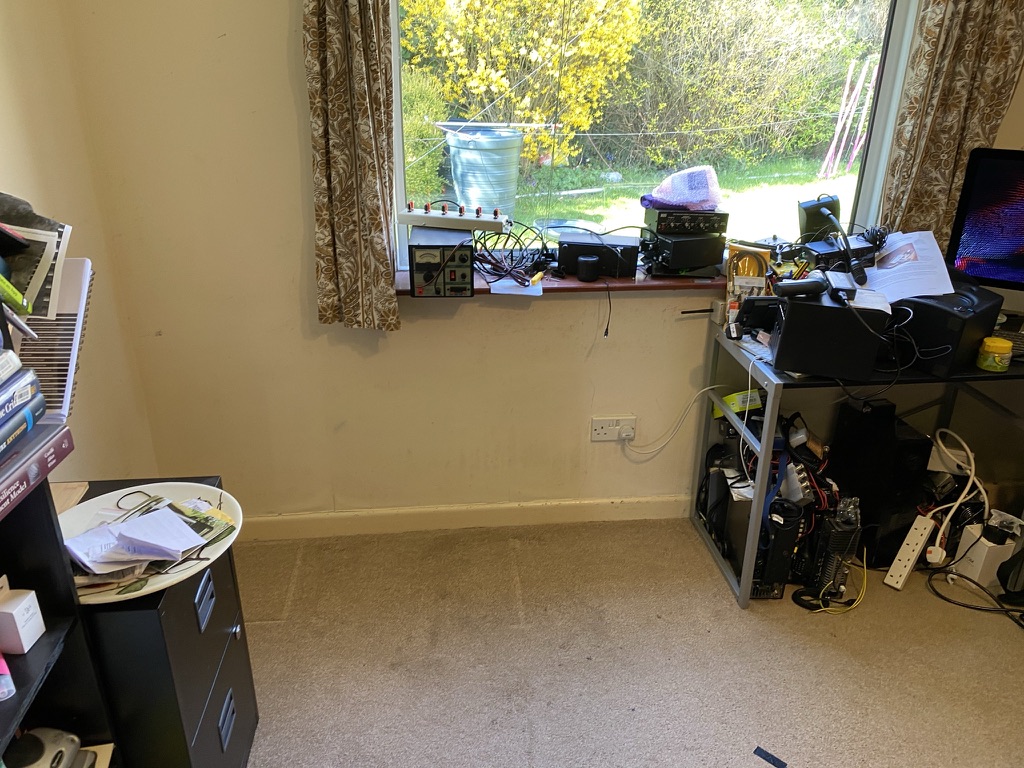
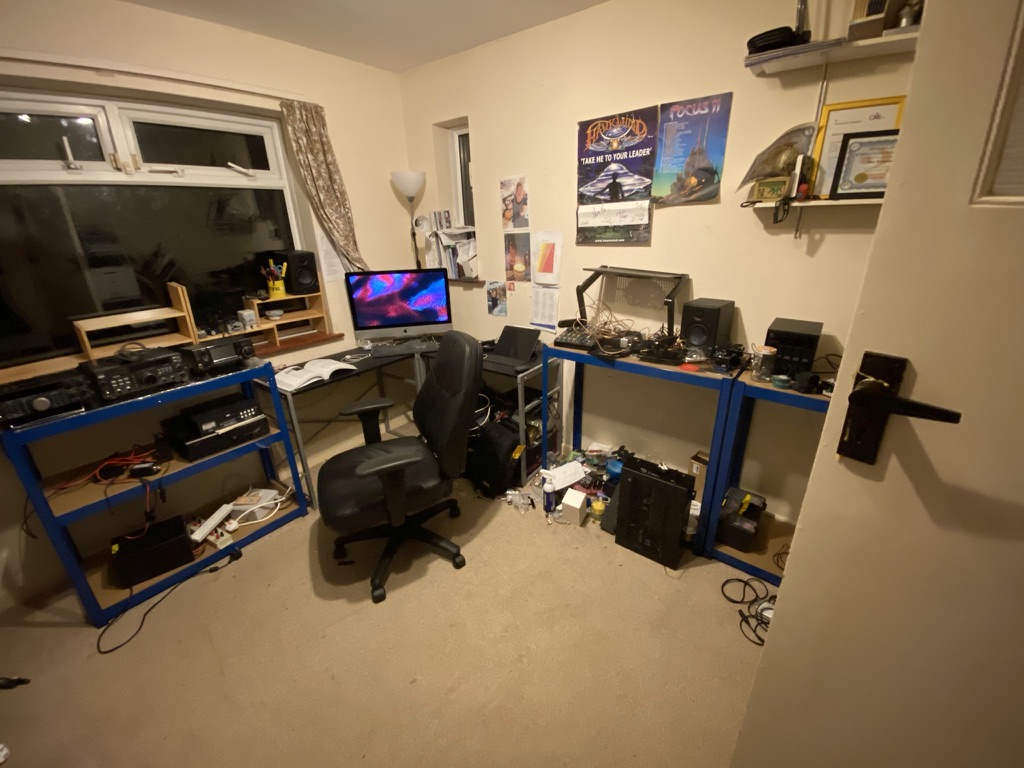
So I have made good progress on building racking and getting things ‘generally in place’ around the shack, its still a right old mess i dont mind saying, but its getting there, and better than it ever was with the old tables.
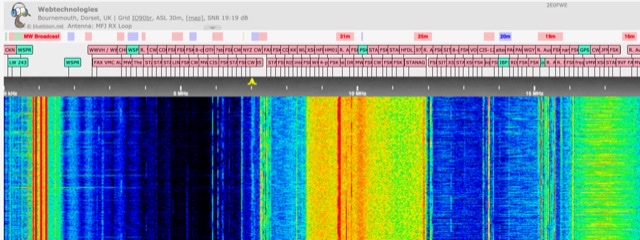
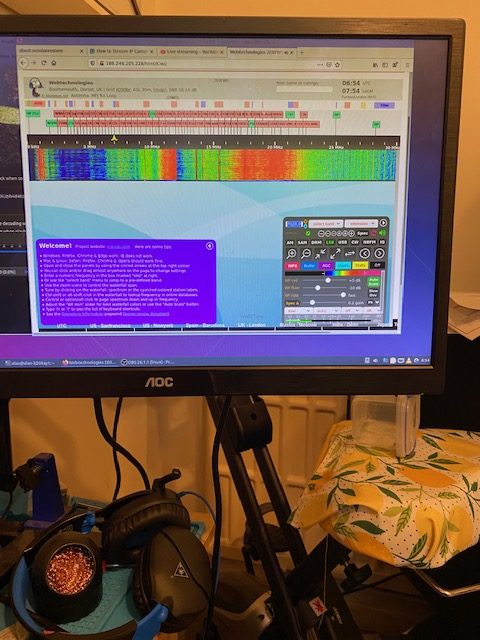
I had some valuable input from a fellow HAM on my WebSDR that the VDSL interference was plain to see, so after a few years away from Virgin Media, I’m resuming my Internet access from Virgin, once that is in place and all my ‘essentials’ proven to work, I’ll discontinue my IP/VDSL link, hopefully that will reduce the QRM.
QRM Visible via KiwiSDR
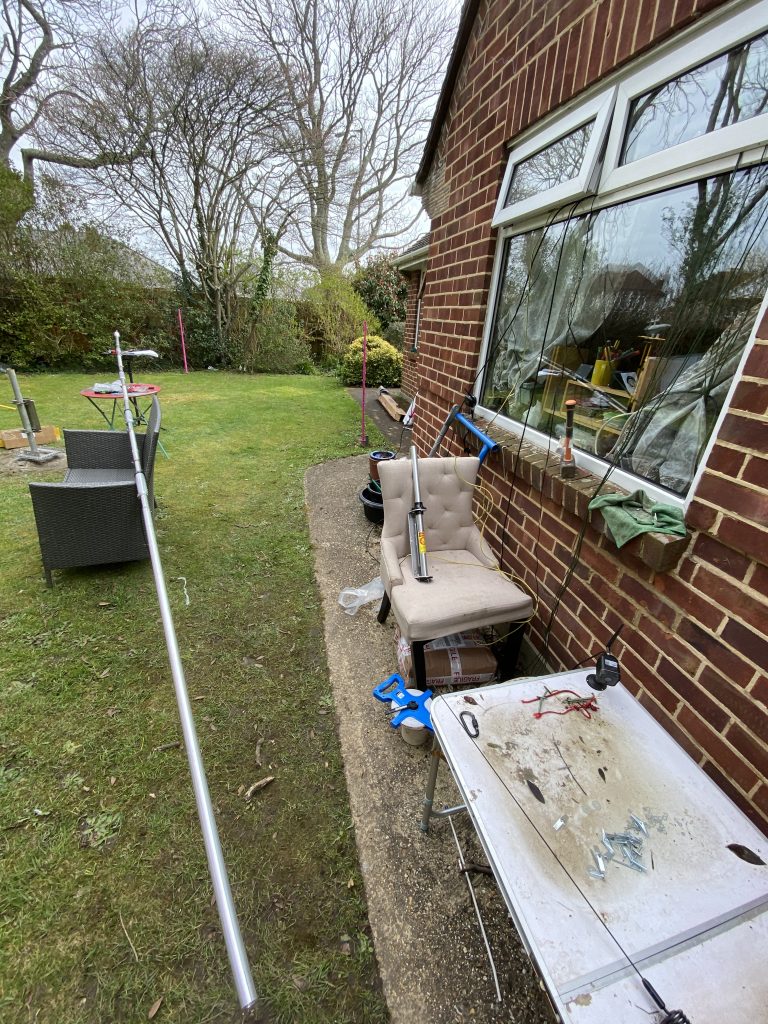
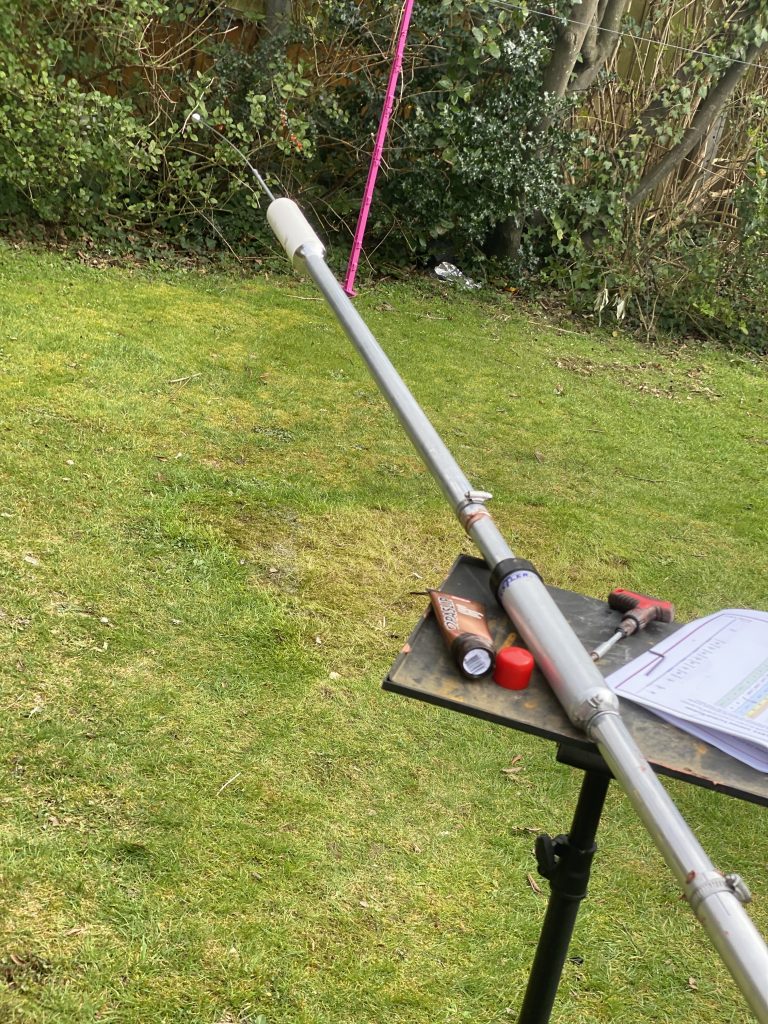
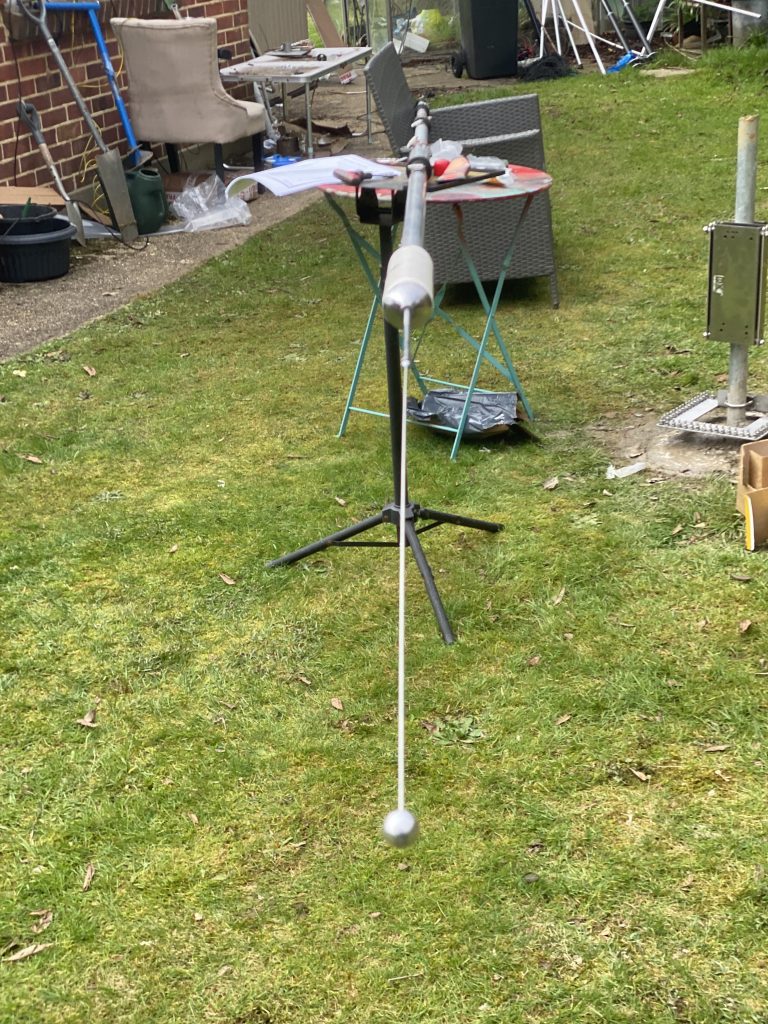
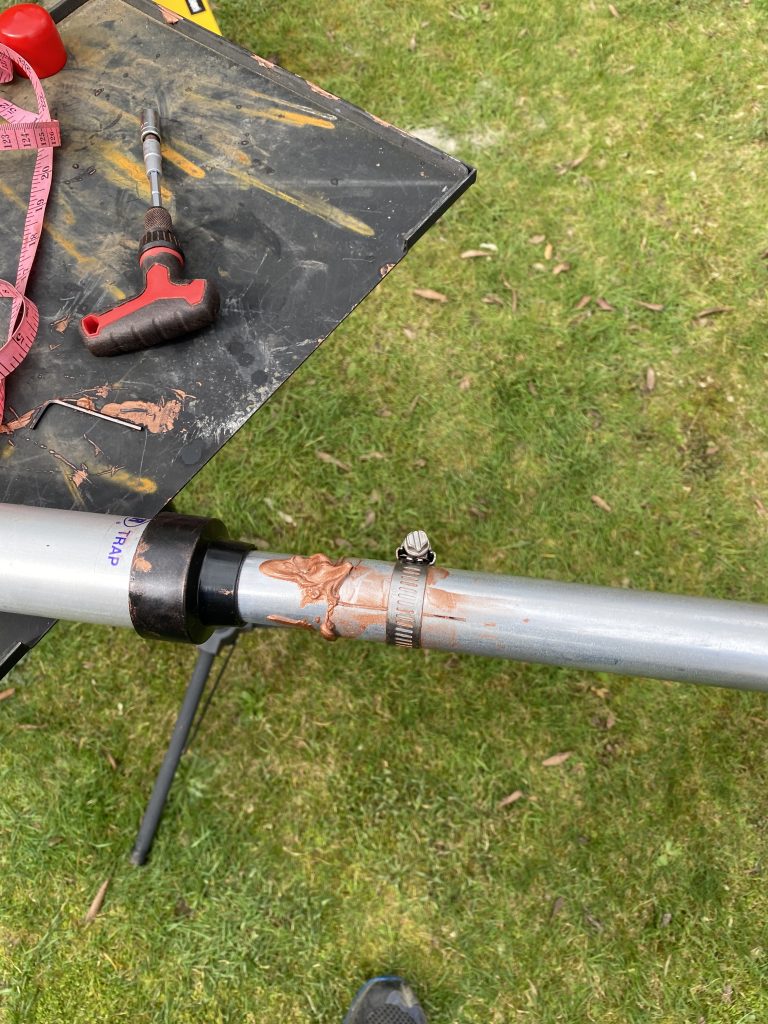
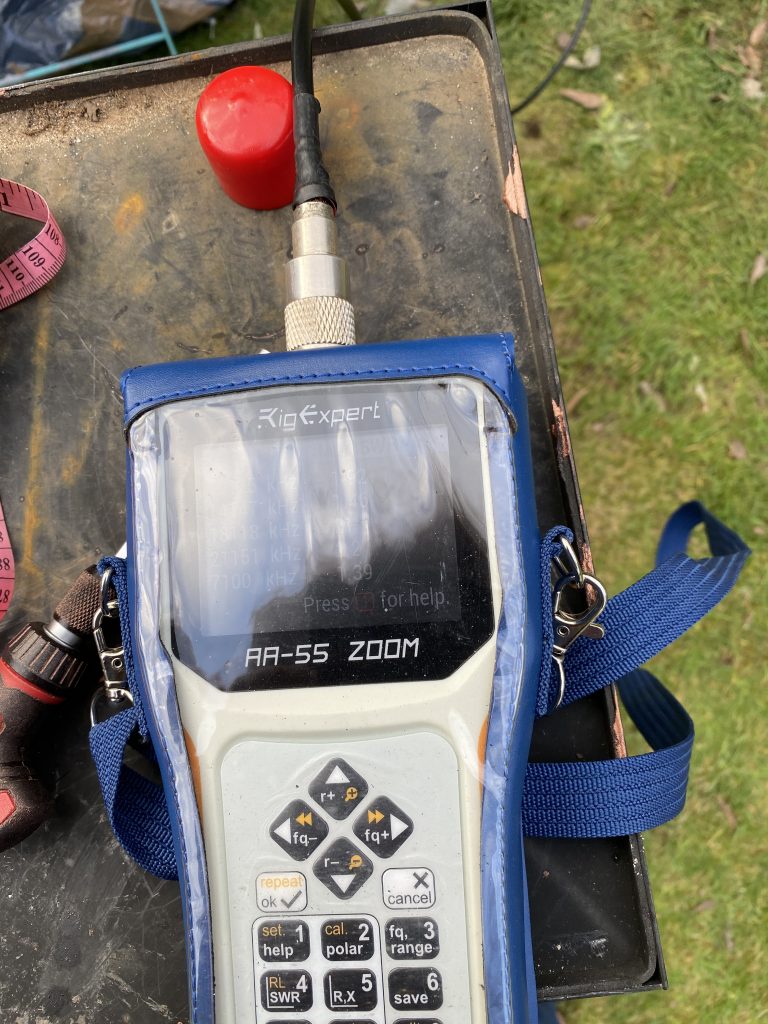
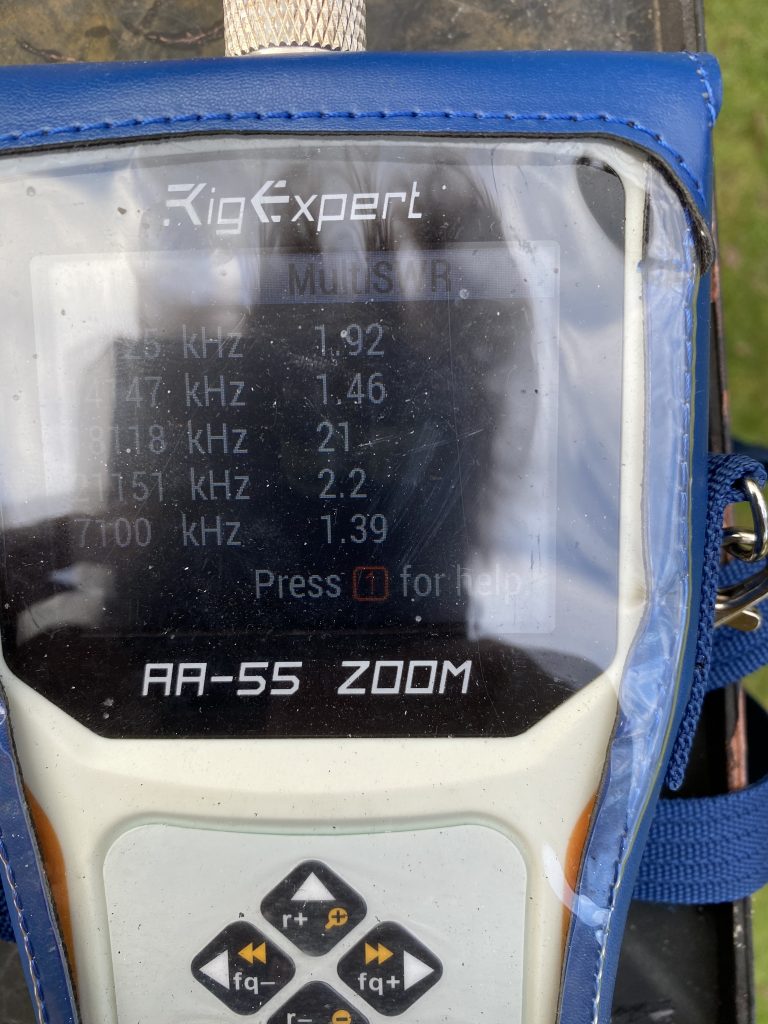
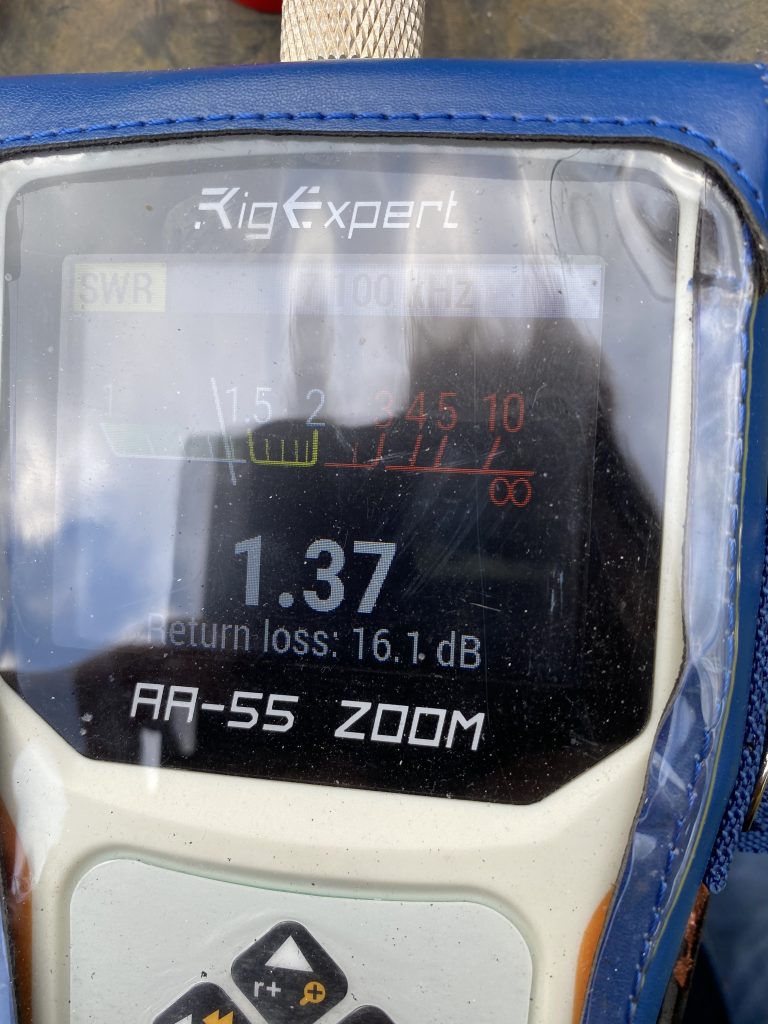
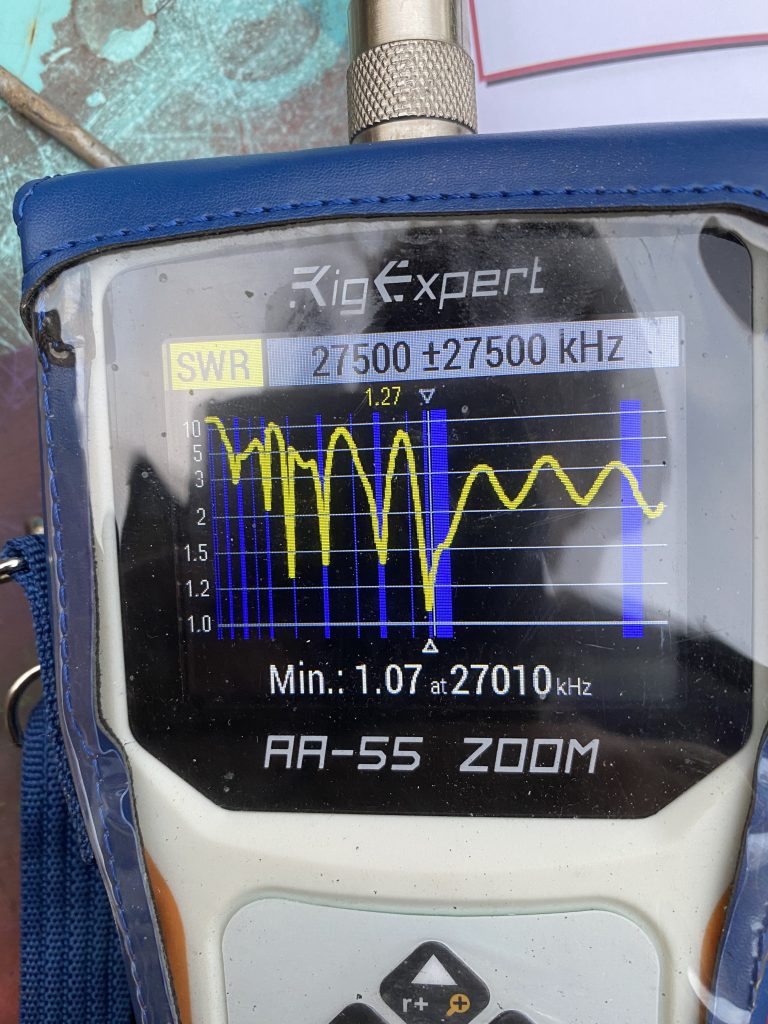
I did have a chance to play with the IC705 in the garden this weekend, but results on the portable antennas were slightly disappointing.
results from the ‘toybox’ antenna
I did put on a measured radial for 40m but the nearest resonate frequence was a massive 3kHz away ! If the weather holds up, i’ll try out my buddipole, as for temporary use its worked pretty well, whats more i can configure it for VHF/UHF as well by constructing a JPole, so it might be the best antenna for the IC705 without an additonal outlay on more antennas.
I’m going to be quite busy with a couple more Univeristy Assignments and work-work, but will do my best to keep the blog going !
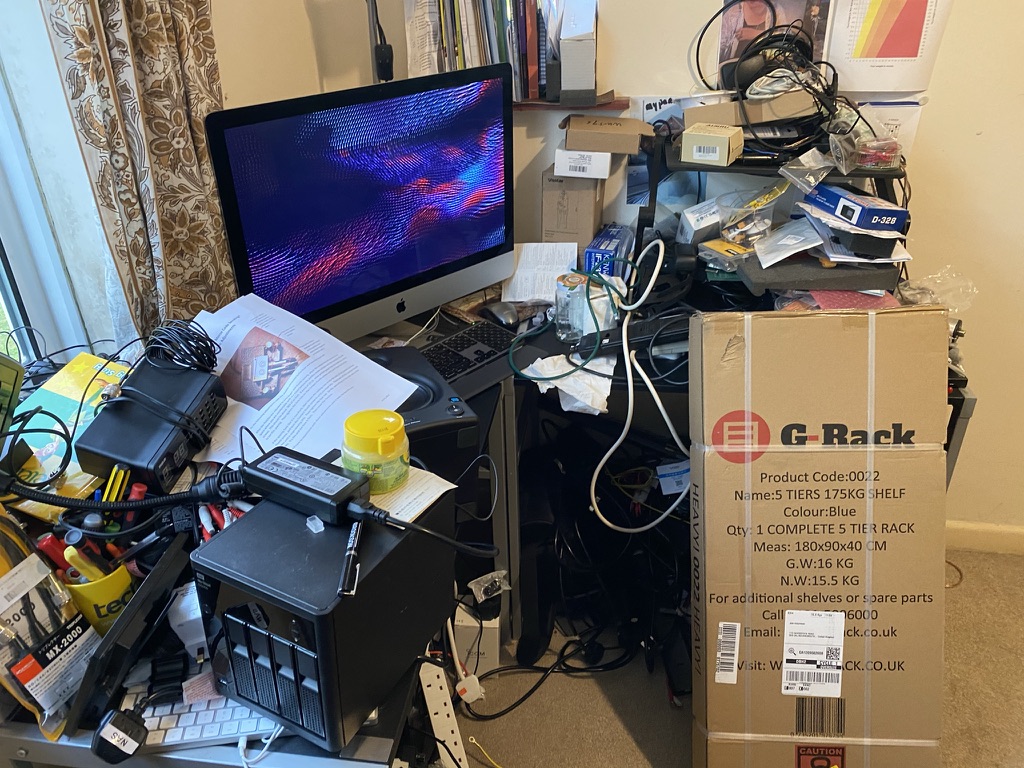
Its been a busy end of the week in the QTH – generally tidying up, or in the process of ! After doing a number of supporting activties, I continued to tidy the shack up !
The first task was to clear enough space for the new shelving. I used the static space where my current corner desk is to give enough clearance.
Tidy floor, messy old desks
Pile up !
Old desks taking the brunt
Shelves have arrived
Having got a nice clear space, i then set about hoovering – there was so much dust !
space to build into
router, no dust
space for the new racking
As on queue, the racking arrived from Amazon – time for both me and doggo to get some exercise before building the racking !
Sweety enjoying a sniff in the park
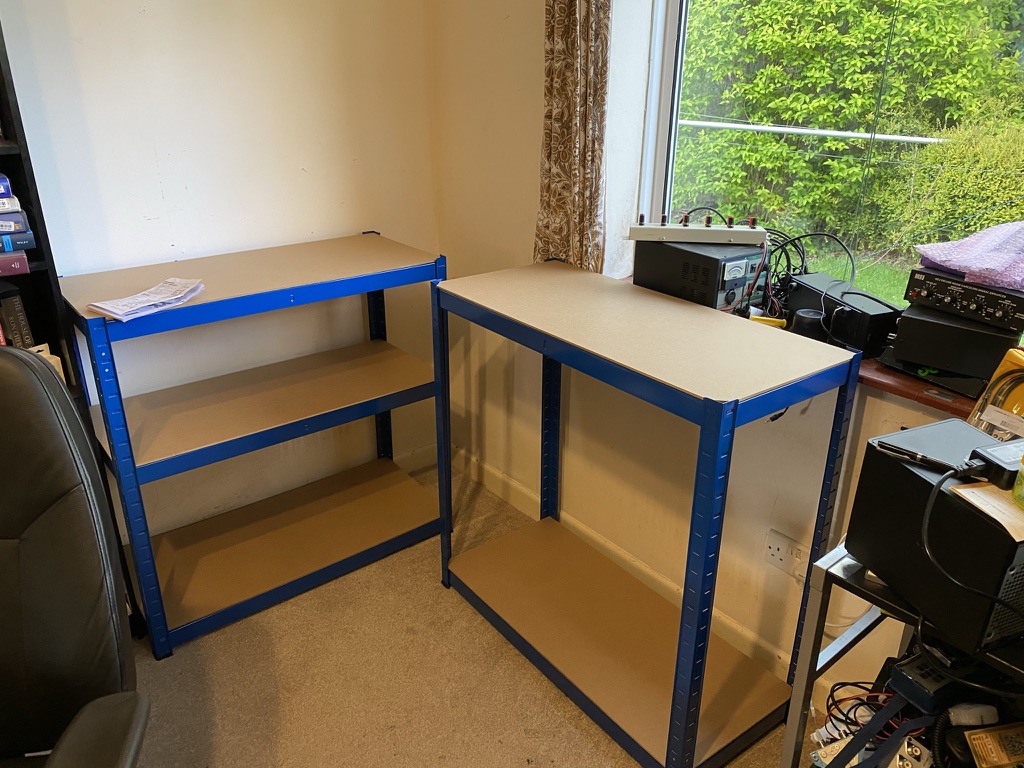
Having enojyed a break and a nice walk in the park with Sweety, i set about builidng the first set of racks. These a shelves/racks that can go 1.8m high, i used them in a half-form factor to create two desks. Having ordered two of these, I was able to create two ‘desks’ with middle shelves, and two others with a nice bit of capacity. The build was quite straight forward and was able to complete with just a rubber mallet.
1st shelves complete
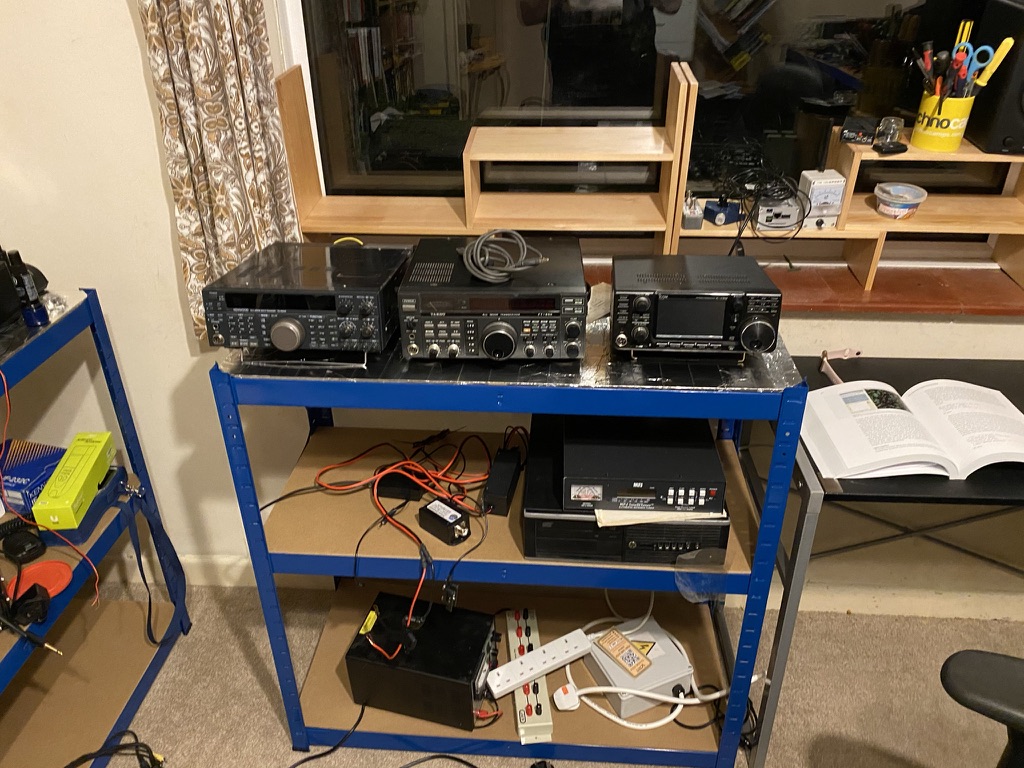
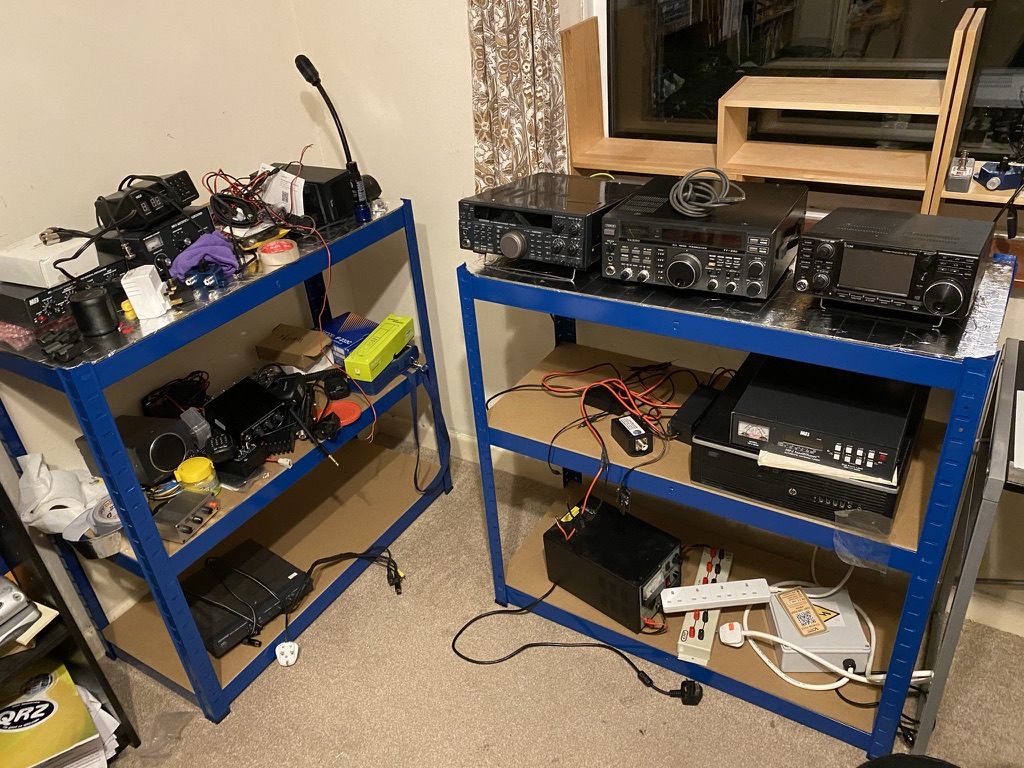
As time and the day drew on, it was time to start organizing the basic placement of where things will live, or thereabouts, freeing up the my desk and allowing me to continue working.
radios initial position
other components
wideview
initial placement
Having applied a number of layers of conductive tape to the top-most layer of the shelving to get started, i was able to return the radios and start placing the other items in their general locations. I was quite satisfied with the days work given the extent of how disorganized it was at the start of the day. I’m hoping I will get the cable management attached to the relevant loctions and hopefully be back on the air by Monday evening, with at least the 7300, WSPR Raspberry Pi and KiwiSDR.
So for the first time in a VERY long time (aka YEARS) I’ve had the luxury of a week off work. During the week I found a USB extender was producing a horrific amount of QRM. The offending item has since been disconnected.
I went on to survey my ‘shack’ and that I had ‘allowed’ QRM to ‘sneak’ back in. I was a bit disappointed in myself to be honest as I had spent allot of time and money on virtually eliminating interference, both man-made and natural when I had my TS690S setup as my only station. I was just not paying attention to what I was putting in the shack.
So to make up for my lack of attention, I wanted to understand why this had come about. Mostly the biggest problem is the ease to just add things in and not test them, only to find out they are ruining a hobby I really love.
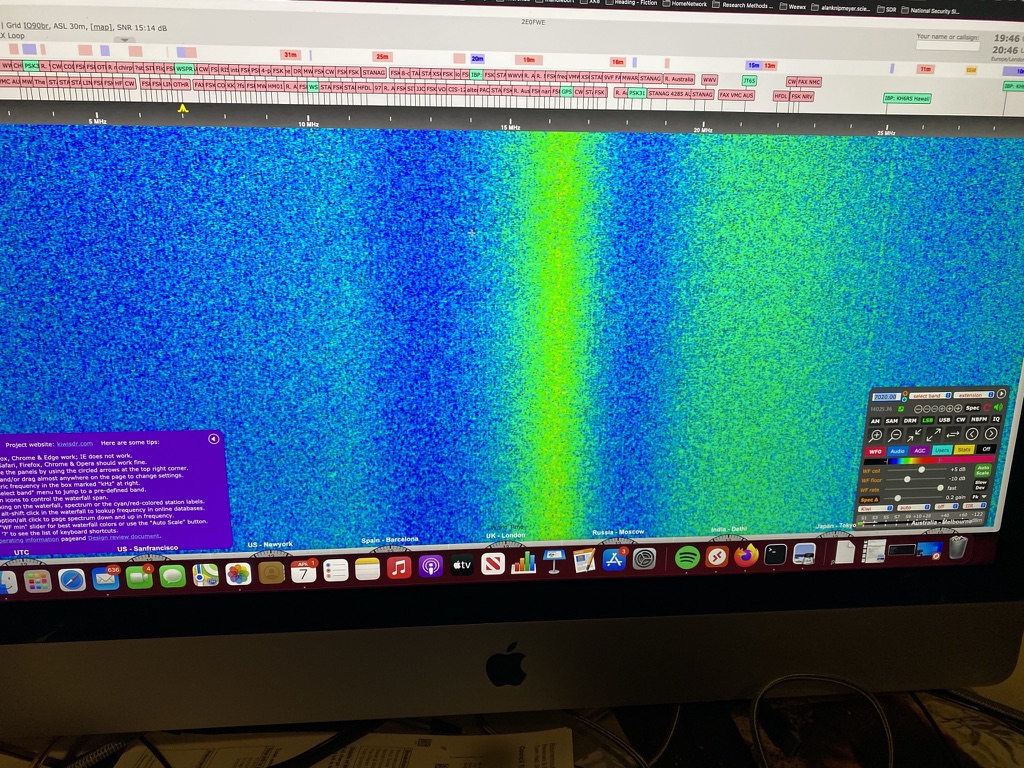
QRM Identified via KiwiSDR
Looking around the shack I really noticed how even tho I had moved much of the music equipment out, it was still as not as organised as I would like it. Did I need all these computers ? Do I use them regularly, is my setup optimal in terms of service ? For many of the computers, especially my older mac, i really no longer needed it and many smaller projects have come and past.
I looked around our whole house and many things had changed since we moved here, so maybe it was just as good to take a holistic look and think ‘how can i solve this’. With that I rented some storage space nearby.
Storage space not far from the QTH
I was really able to take a big “bite” out of all the things around the house and no longer using. I wont share the pictures on here as its not strictly radio related, but fair to say I made good use of the space and freed up alot of space around the QTH.
This in turn allowed me to think about back in the shack. How can I get desks/working areas tidy and serviceable. I’ve been using computer tables mostly that dont really have the best storage on them, leading to problems of not putting RF chokes on them and ensuring the QRM was reduced. I put too much trust in the power strip RF filter to think it would fix all my QRM issues – obviously it would not.
First call – Ferrite, lots of it and the right sort. Whilst I have VHF/UHF transceivers, allot of my work is on HF. I researched the best ‘general’ ferrite for HF, and think that FT140-43 will reduce/eliminate the RF from getting in and out of the devices. With that I ordered 40 FT140-43 from Qubits. Now *everything* that is in my shack will at least have these ferrites on the power supply/leads, if not more.
I then looked at the desks. I need them to be serviceable. The power-tray racking helped, but I was still having cable management issues, and as us radio operators know, having loops of wire here and there is a great way to introduce unwanted QRM into the shack.
I ordered these Garage Shelving Unit from Amazon which can be split to make a nice height desk and storage space, reducing the amount of ‘wire tangle’ and allowing me to have small boxes to tidy things away.
I’ve also got Aluminium Foil Tape to cover the working surfaces with to ‘bond’ transceivers to desks. This had worked really well when i done it with my TS690S and having the cables from the transceiver neatly on the metal conductive surface the cables was reduced loops massively.
The offending USB extender
everthing removed, QRP massively reduced
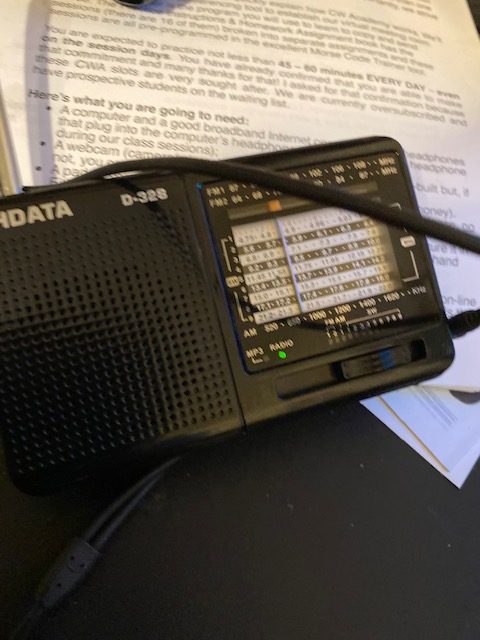
Portable radio great for hunting
QRP Hunting
So I will have a very busy weekend coming up to finish up my ‘week off’ but hopefully a shack that is not only free from QRM, but is also tidy and serviceable. I promise to upload pics 🙂
Was one of those nights when I couldn’t get my head down after a great Easter bank holiday weekend, so had a little play on FT8 in the small hours. Having used WSJT-X for quite some time I wanted to experiment with other FT8 software, and gave JTDX a try. I followed the setup documents and was soon transmitting and receiving. Some say JTDX has better decode than WSJT-X – I think time will tell.
Tonight (Or is that very early this morning) I had what must be the coolest FT8 contact yet tho
DT8A – 8482 mi on the South Shetland Islands
I have never heard of the “South Shetland Islands” until they appeared in the JTDX log – I was quick to click and respond, then patiently wait in the hope my call got responded to. Sure enough, with a few minutes and on 20 watts of power DT8A responded and my signal report was received. What I do with all FT8 contacts is to check the QRZ page and read up to add a little more ‘this is more than just a signal report’ to the QSO, I was amazed at DT8A’s page and the fantastic photos !
In particular as my good lady is South Korean, I found it very interesting that Mr Lee was stationed in such a remote part of the world !
So glad to have reached Mr Lee and I hope his work/research in the South Shetlands goes really well !
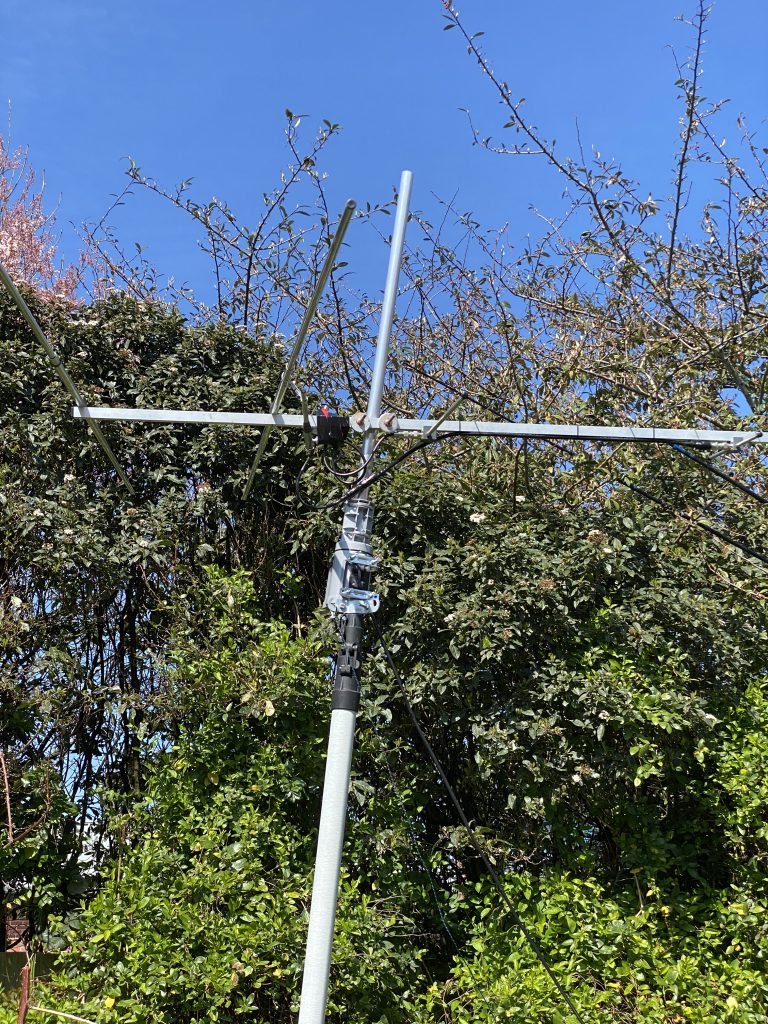
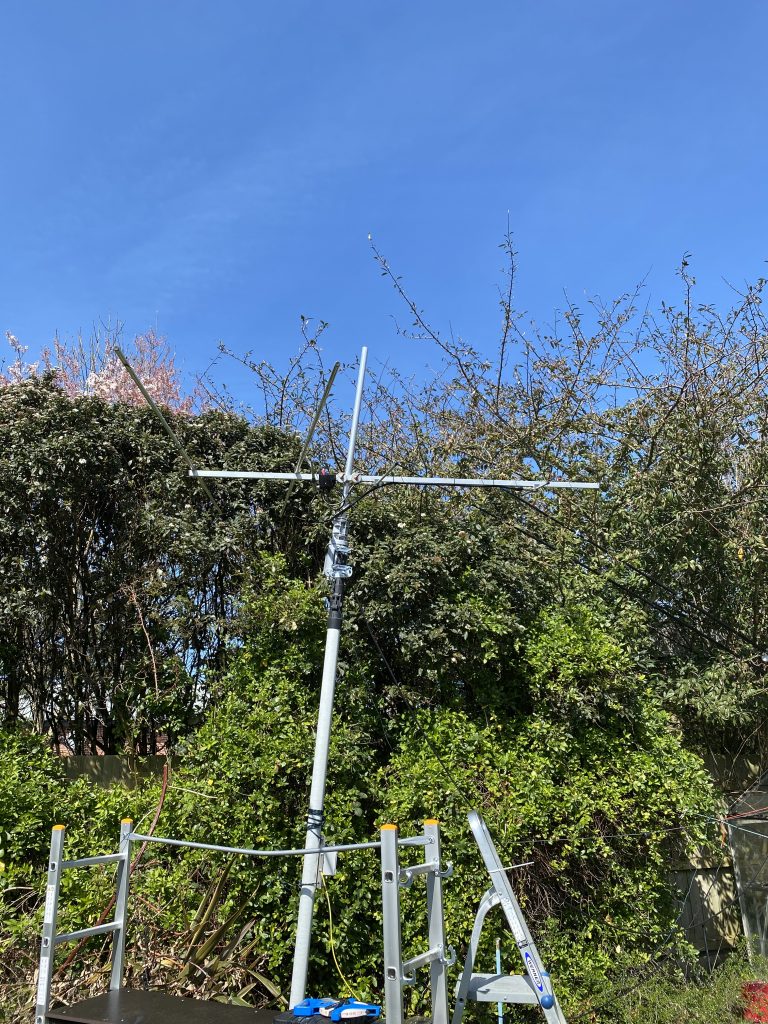
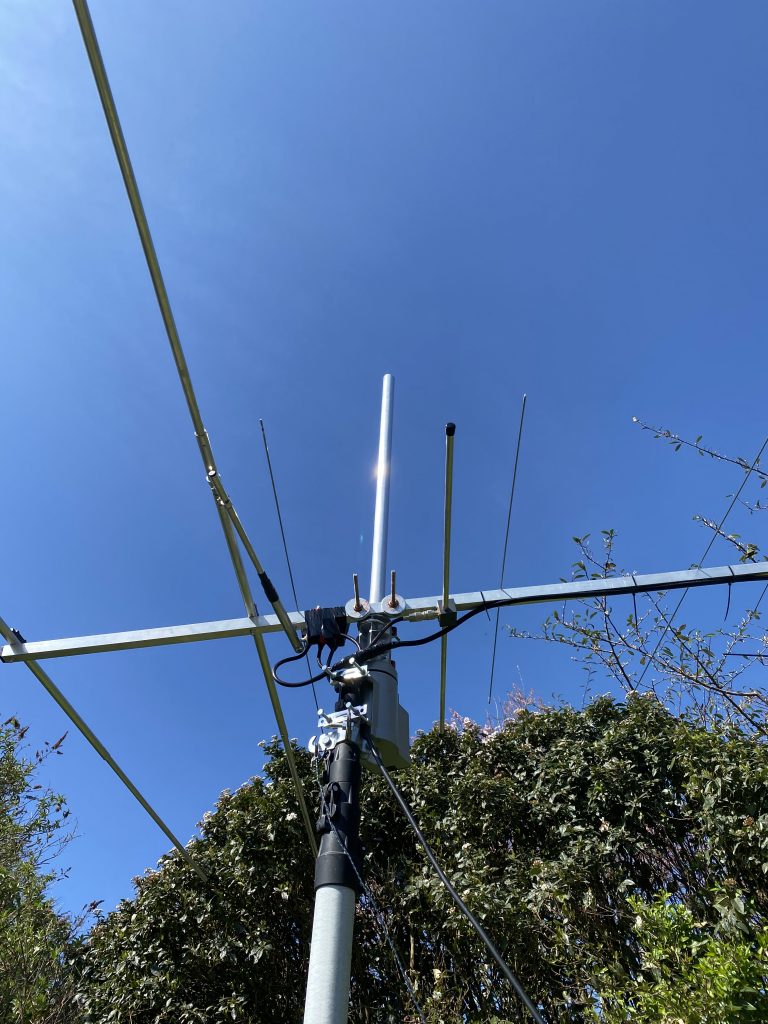
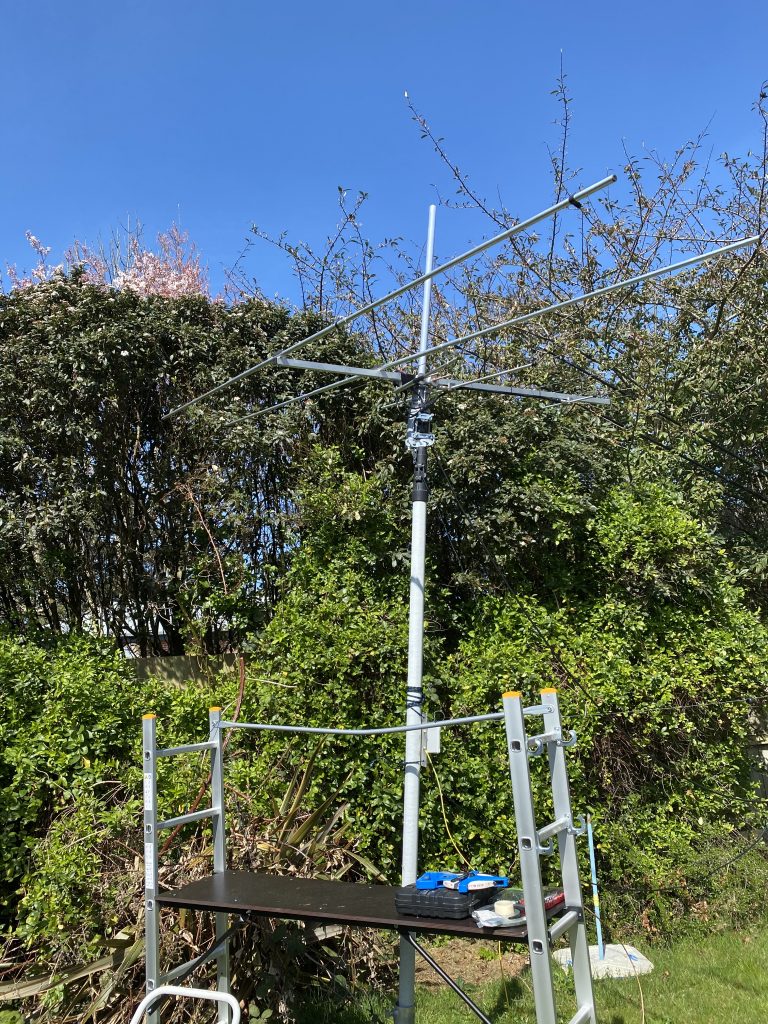
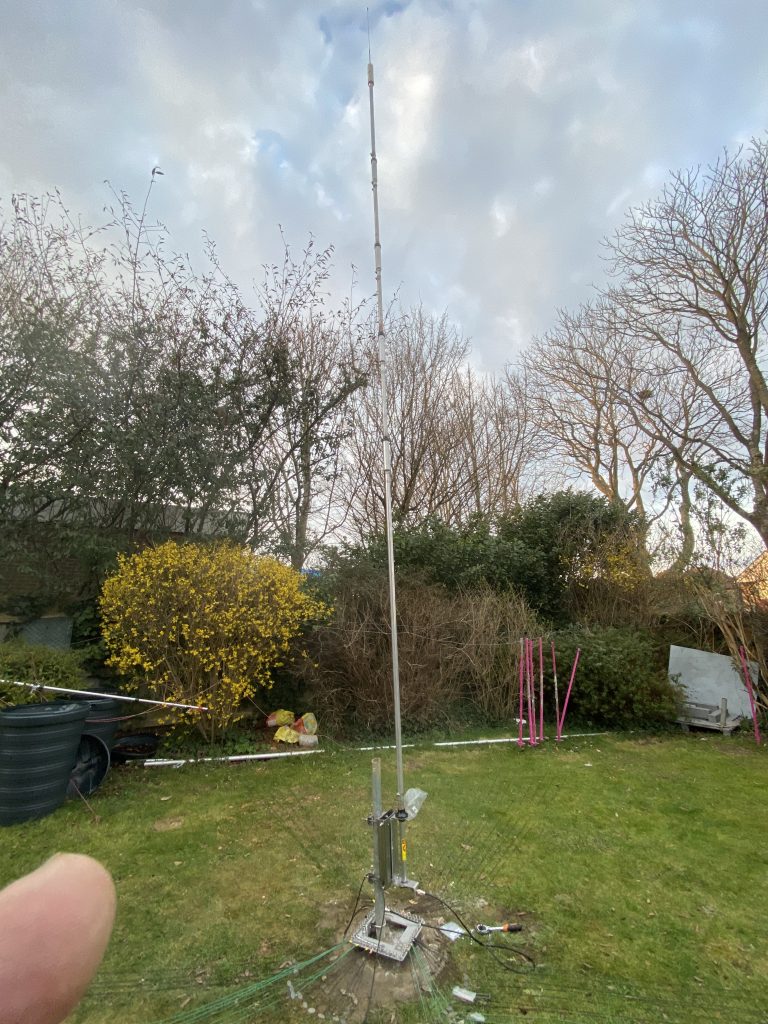
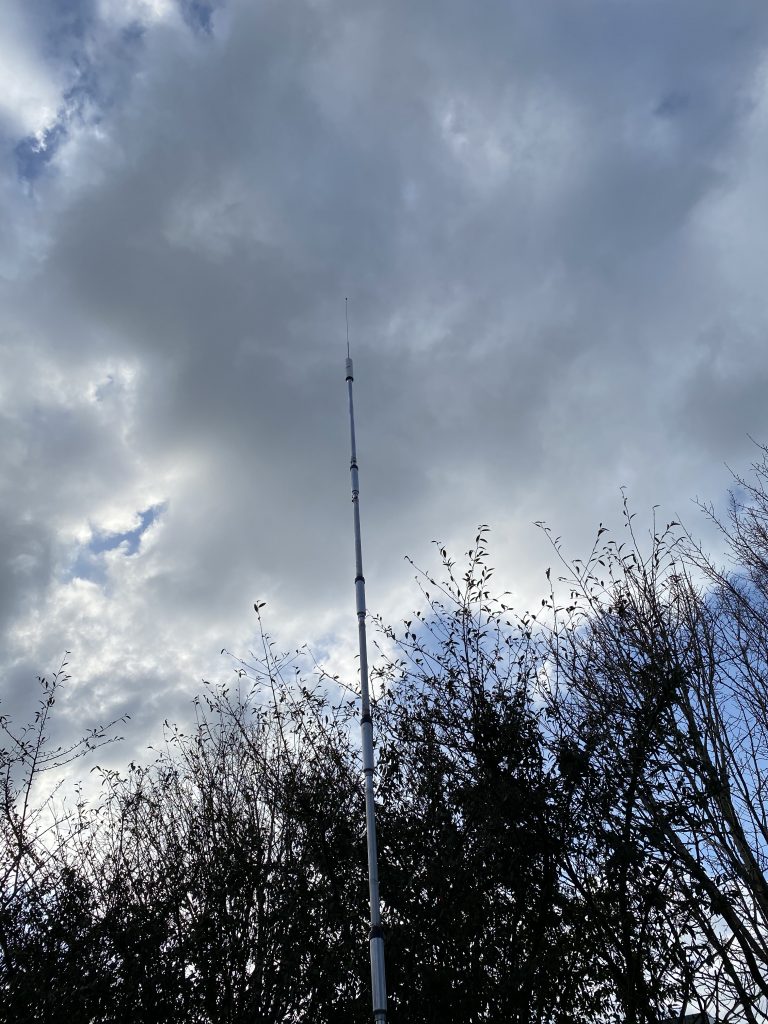
With the Easter weekend and good weather it was a good chance to get the multiband Yagi installed. It has been sitting in my garden since it was *missing parts* which then had to be ordered and paid for from the original supplier in the Netherlands.
I’ve had the rotator and coax for VHF/UHF for some time as well so was really looking forward to bringing it all together.
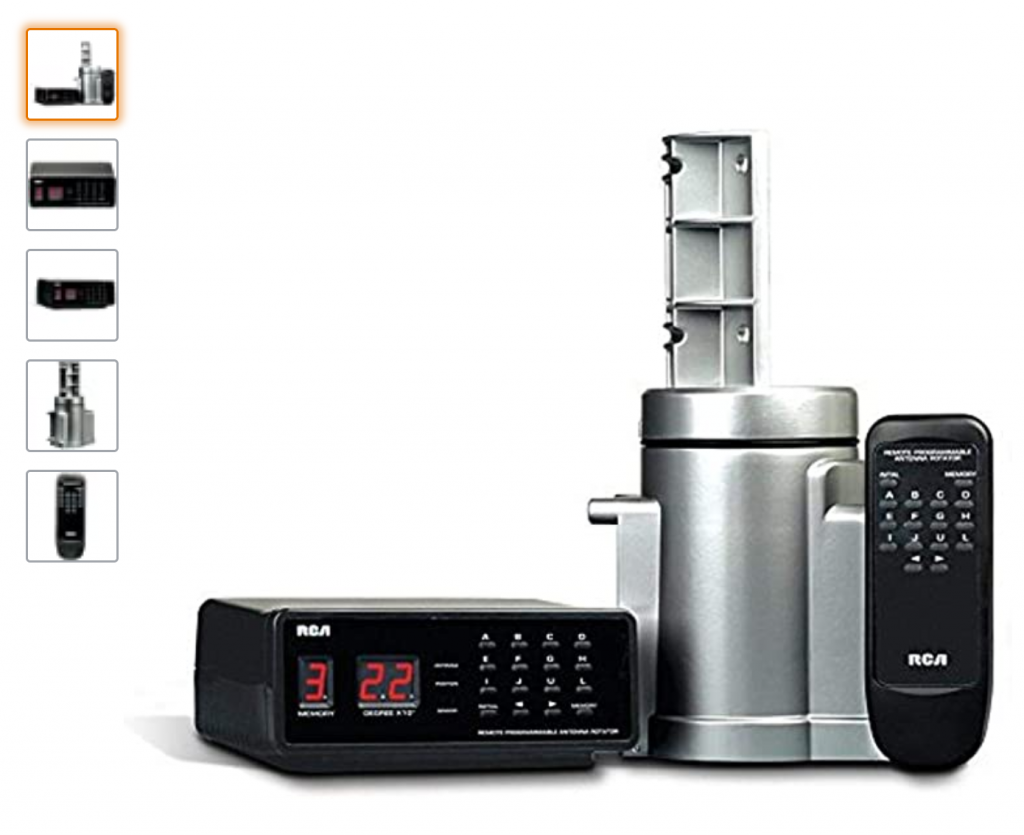
RCA Rotator
The rotator was purchased from Farnell, no longer available, but ‘RCA VJ226E’ may find some sources on the Internet. warning – my unit came from the US so requires a step convertor for UK usage for 240v -> 110v.
I really liked the instructions for the unit, clear and easy to follow, unlike the sketch-sheet of poorly presented documents that came with the GB-3 Yagi, which looked like something a DIY or student would put together. May the instructions from DX-Engineering on their Hustler just spoiled me..
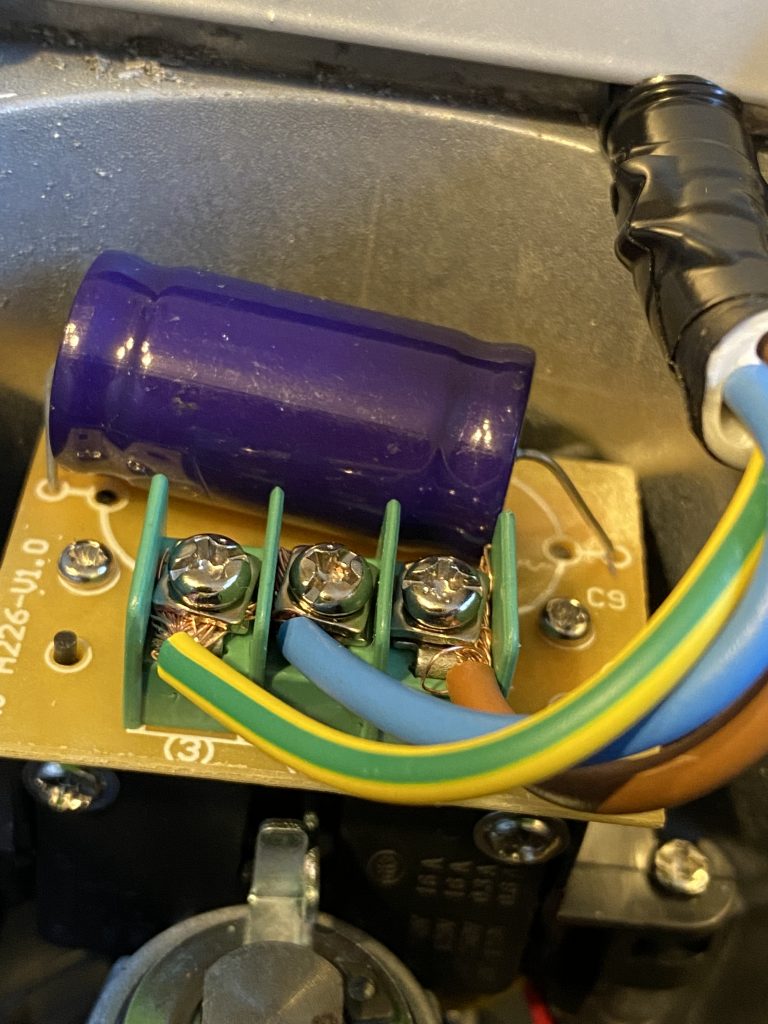
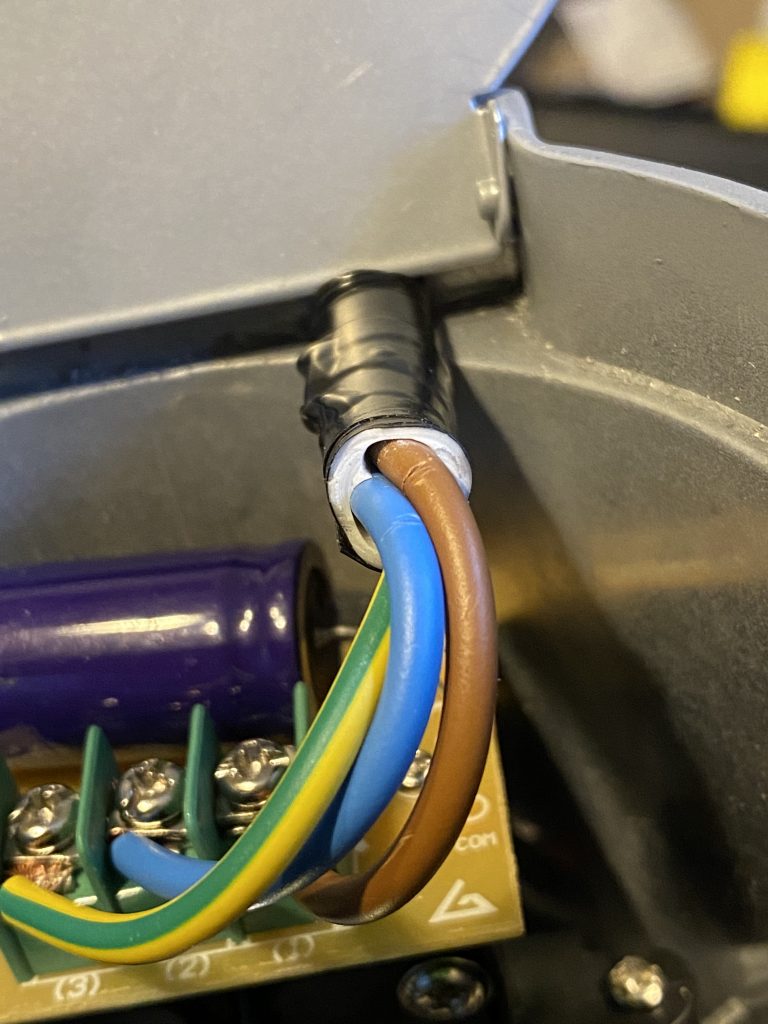
I started with assembling the rotator indoors and checking the necessary parts. I didnt have a long enough run of coax cable for the feed line, but was quickly sorted out by a local dash to B&Q for “Time Black 3 core Multi-core cable 1.5mm² x 50m” – this is meeting or exceeding the specification required for the unit. I’m approximatting 10 meters of ground-feed and about the same going vertical.
terminals 1, 2,3
Whilst the instructions used black/red/green, i swapped out for ‘live/netural/earth’ but the thing to ensure is that the colours both ends are the same.
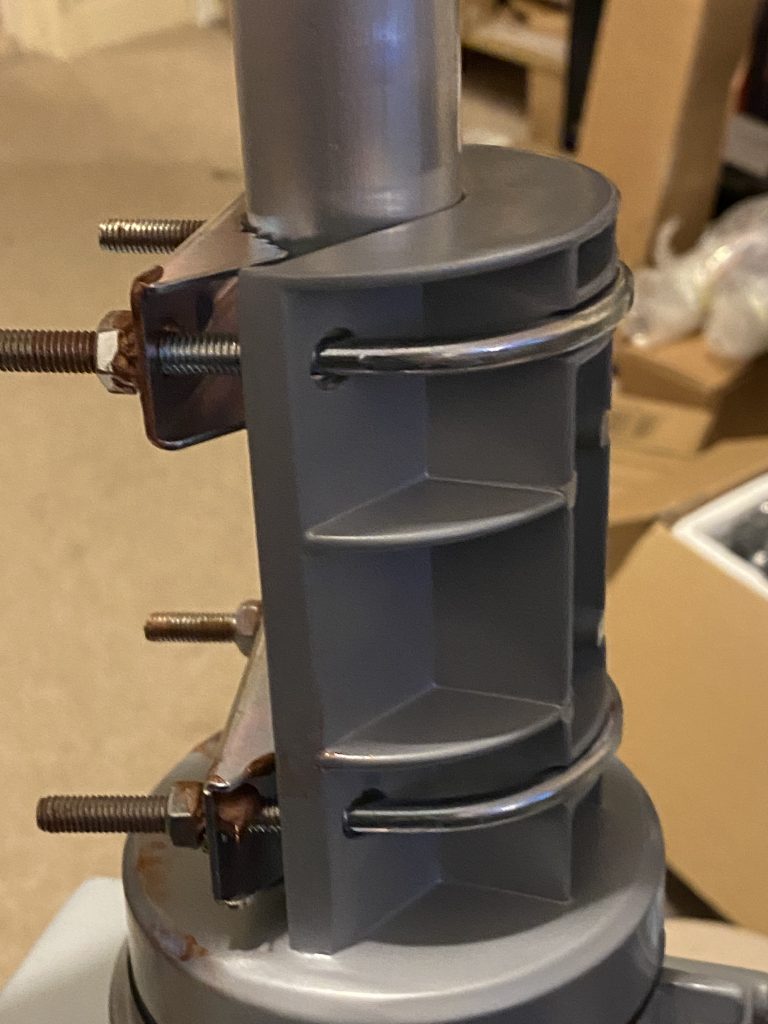
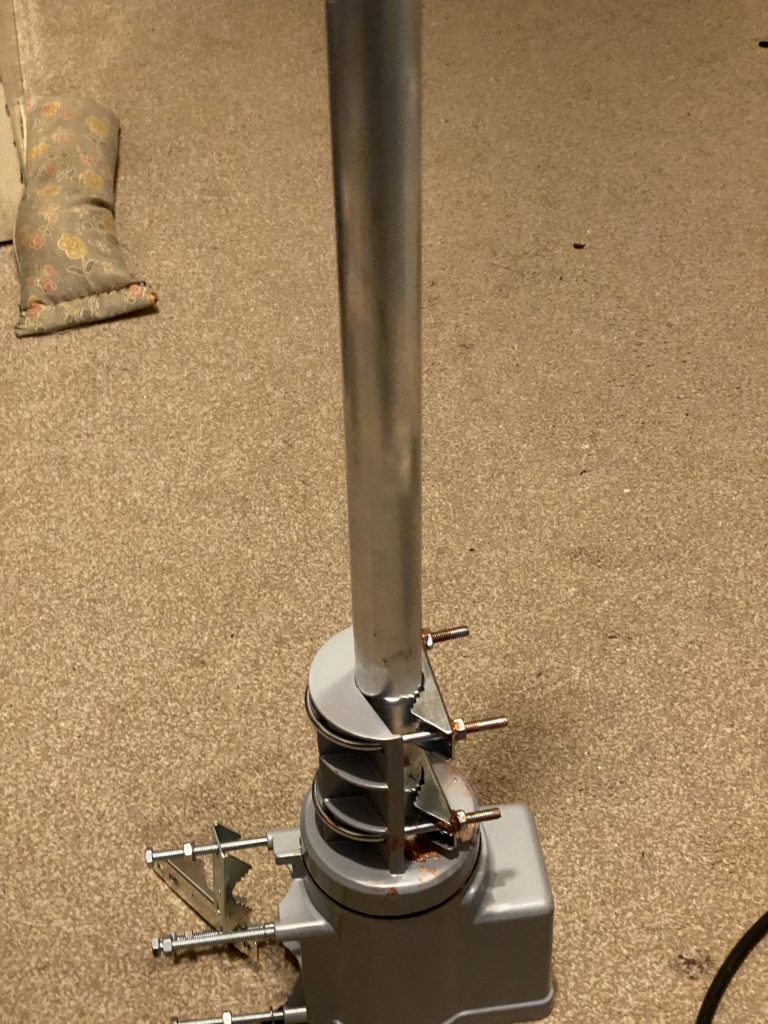
the rotator brackets
use super33
3ft of mast pole
the completed rotator
insulation and super 33
rotator construction
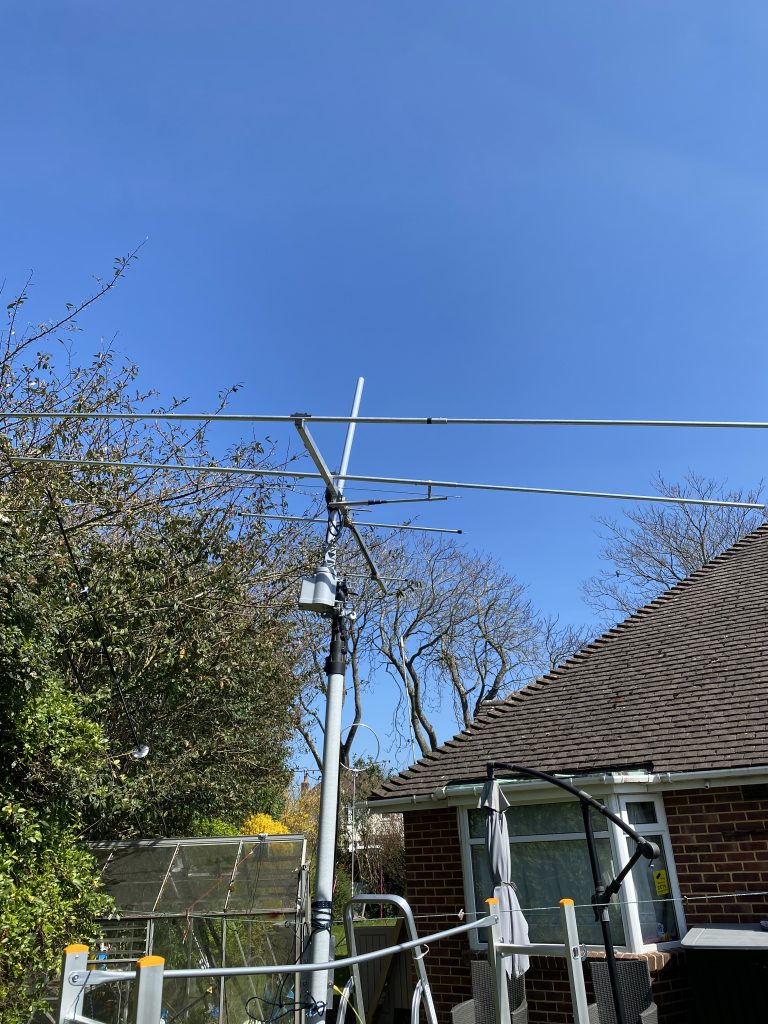
Once I Had completed the wiring and had a clear idea of how to mount the rotator mast, i set about how to mount the yagi.
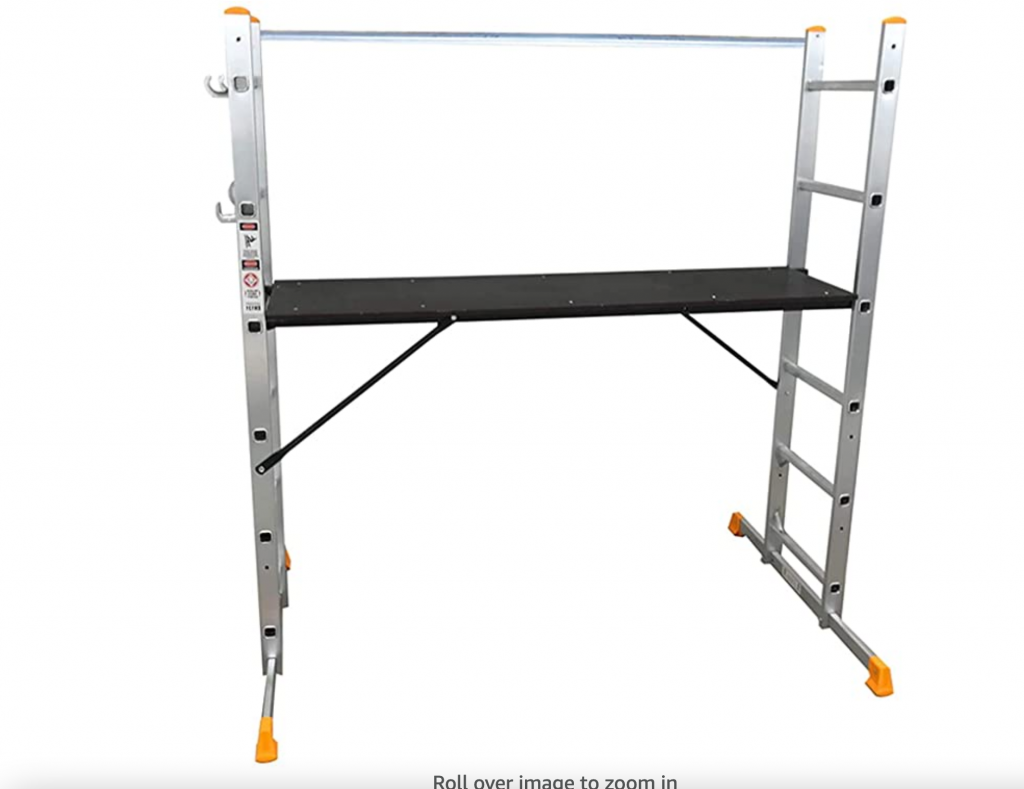
Because an extensive amount of time would be at about ground level I invested in a support so i could work at height with better saftey than just a ladder.
Abbey 5 Way Multi Purpose Platform and Scaffold Combination Ladder
At £114.99 the Abbey 5 Way Multi Purpose Platform and Scaffold Combination Ladder from Amazon would do the job, and also allow me to work on the higher parts of the Mazda Bongo that I have.
Construction was simple enough with a few bolts and rods to put in place. I’m not a ‘light’ person and getting on the first time was a challenge. I used another smaller step ladder to get on and off, which helped. Using one end to get on and off from helped with usign the strength of the frame as a support.
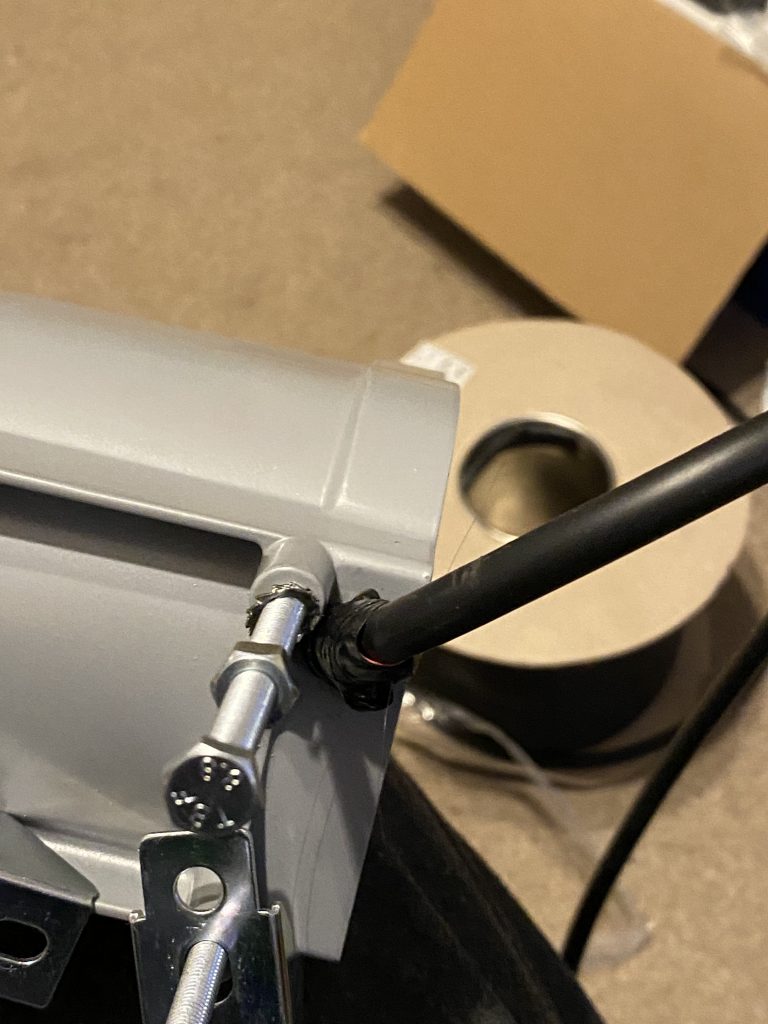
Having got the working platform up, i mounted the rotator onto the mast, this wasnt as easy as I thought as some of the clip-sections blocked the rotator, but with some fine adjustments, was able to get the rotator on.
I went back over all the nuts and bolts at ground level on the Yagi to ensure they was of good tightness, and brought the Yagi over to the mast to assess how to raise it. With help, I was first able to attach the Yagi onto the mast. I checked it from ground level and could see that some cables would get caught so with help raised the yagi slightly up the support mast by about 1 foot allowing more distance for the cables on the Yagi.
Yagi install prep
I ran the electrical feed wire back to the QTH and then noticed that the power is 110v – I’ve ordered Tacima SC5474W/BP Step Down Voltage Convertor which at a 50 Watt rating is easily over double what the rotator will draw.
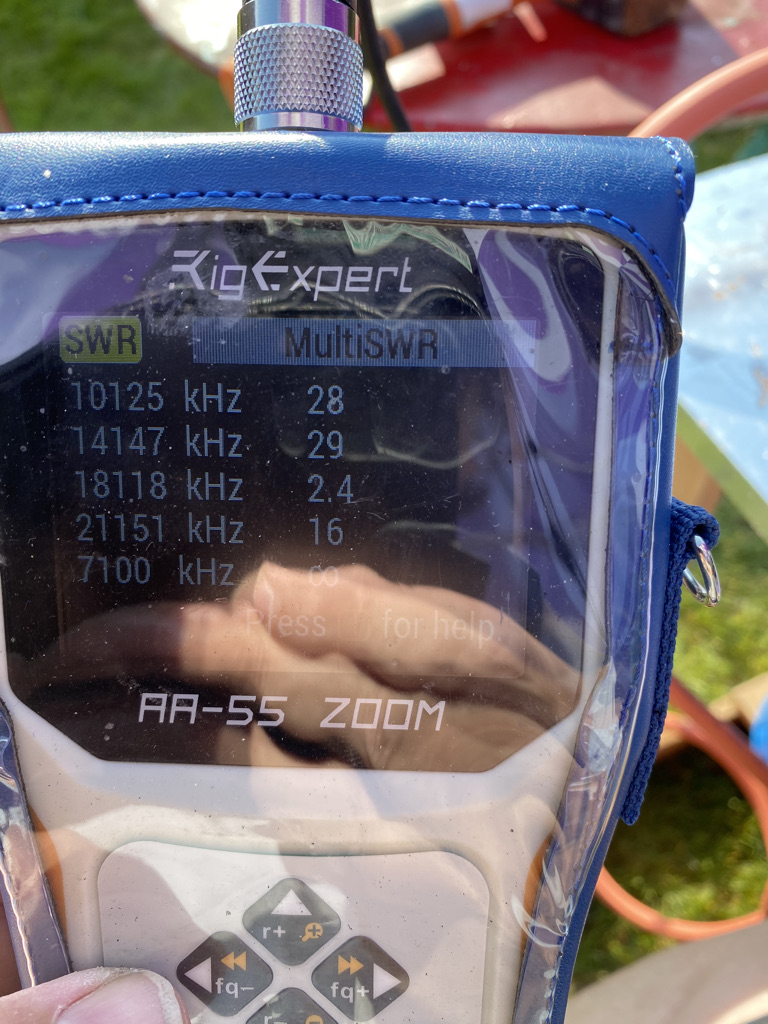
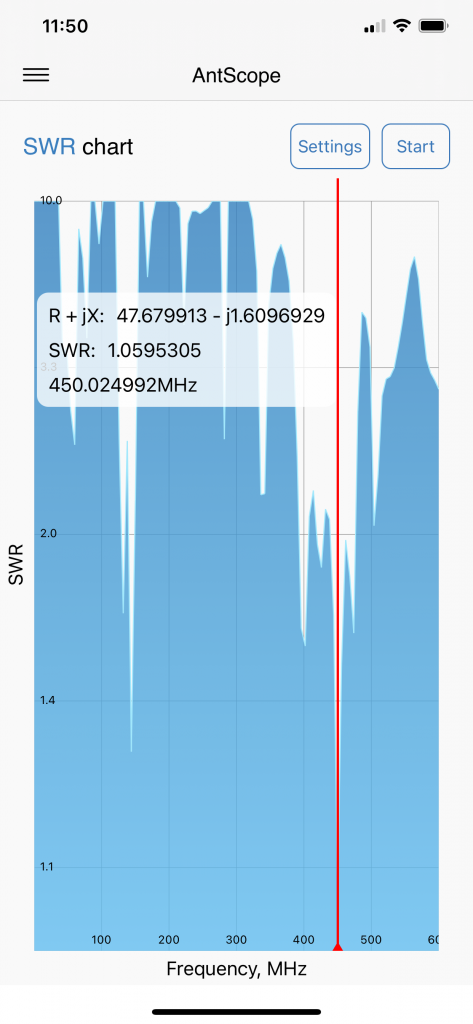
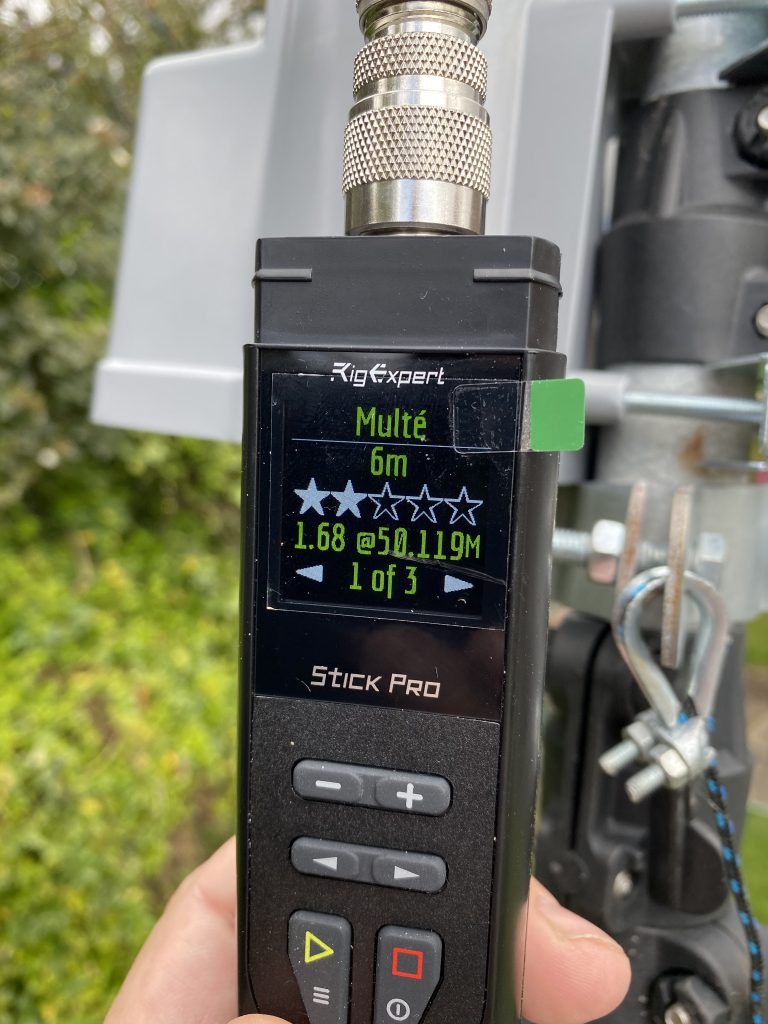
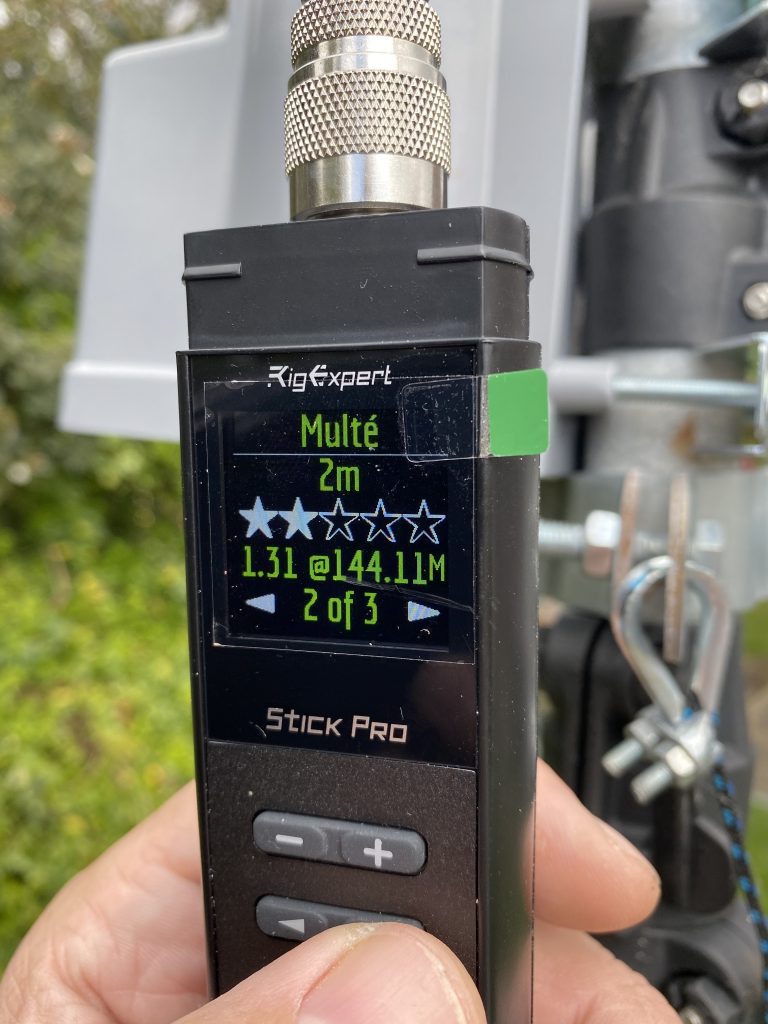
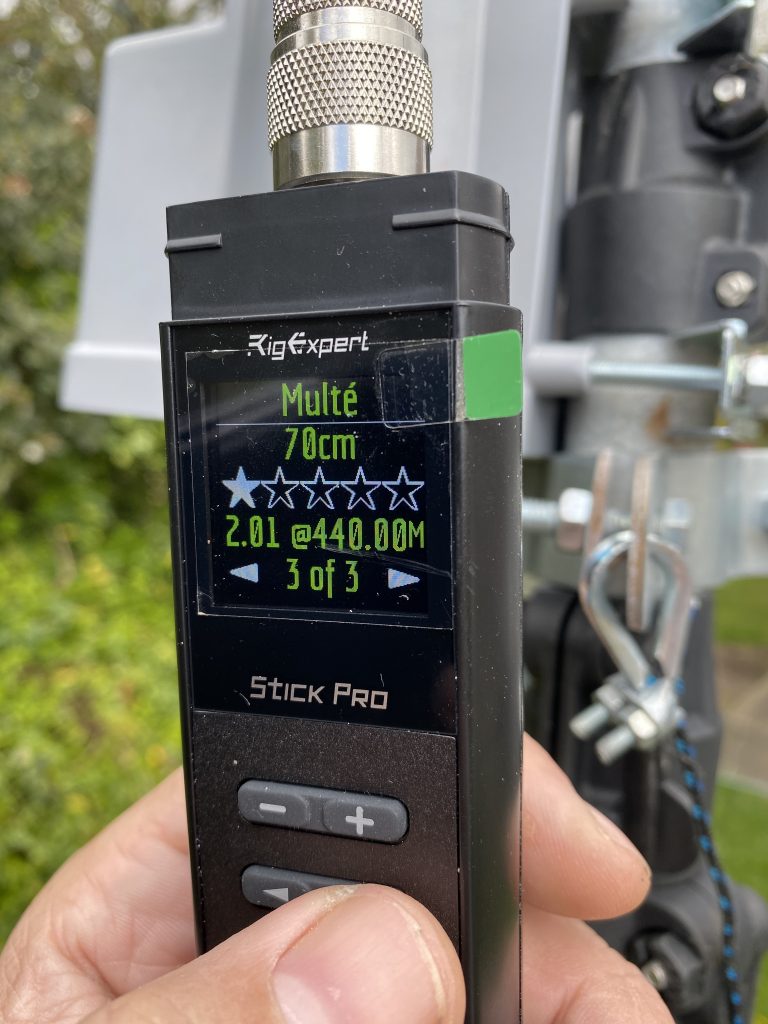
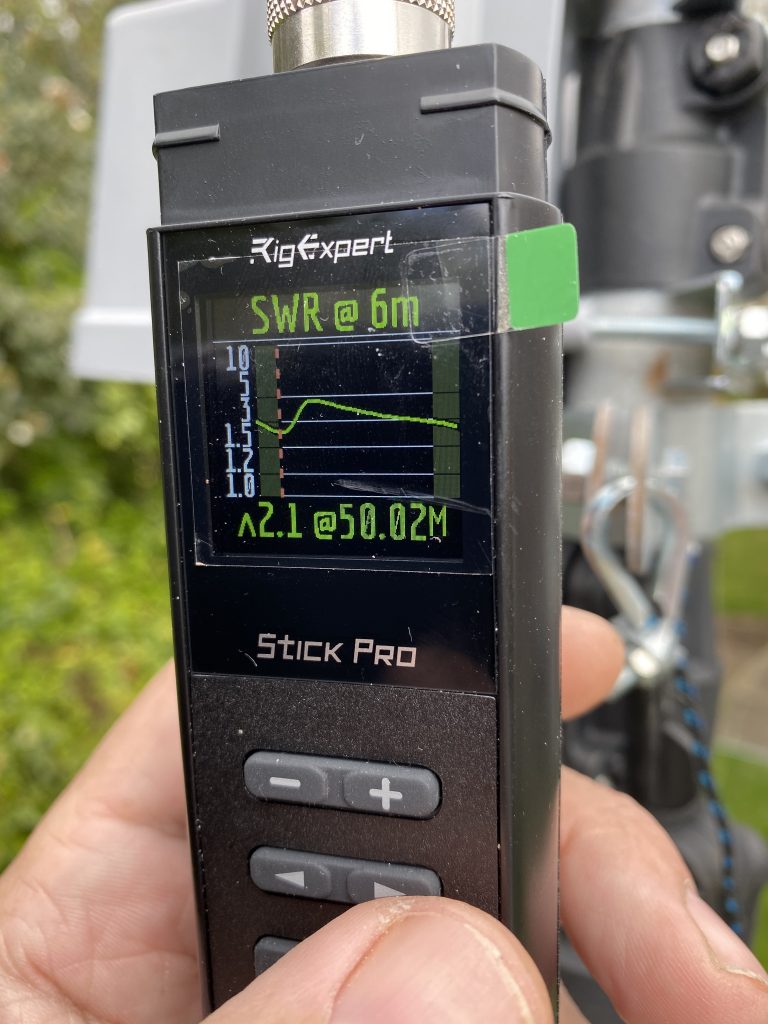
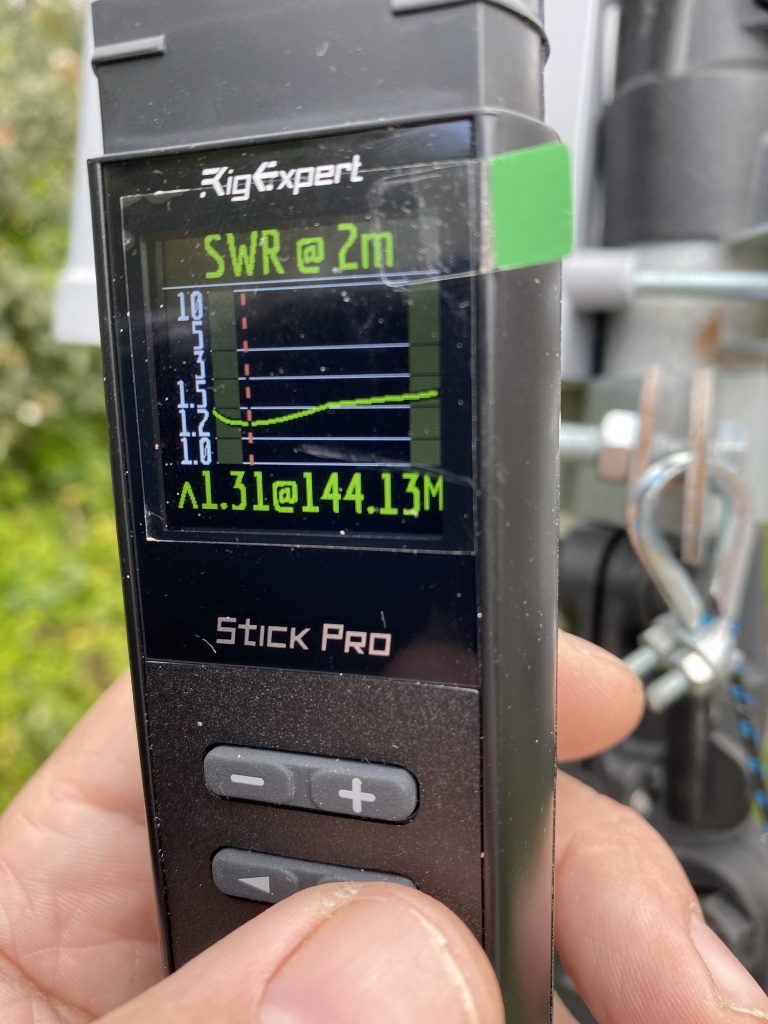
I done some preliminary SWR readings using the Rig Expert Stick Pro. I bought the Stick Pro to accompany my HF AA-55 Zoom, which doesnt have 2m or 70cm capability.
Band report
1.68 @ 6m
1.31@2m
2.01 at 70cm
SWR Chart 6m
SWR Chart 2m
initial SWR readings
For a first attempt I was happy with the SWR readings with no adjustments. I think the next step will be to connect different coaxes and measure their losses, which at VHF/UHF coax can have a real difference.
I’m looking forward to testing out the rotator and seeing how good the gain is on the antenna – with a J-Pole I was able to reach Blandford, Southampton and of course the local repeaters.
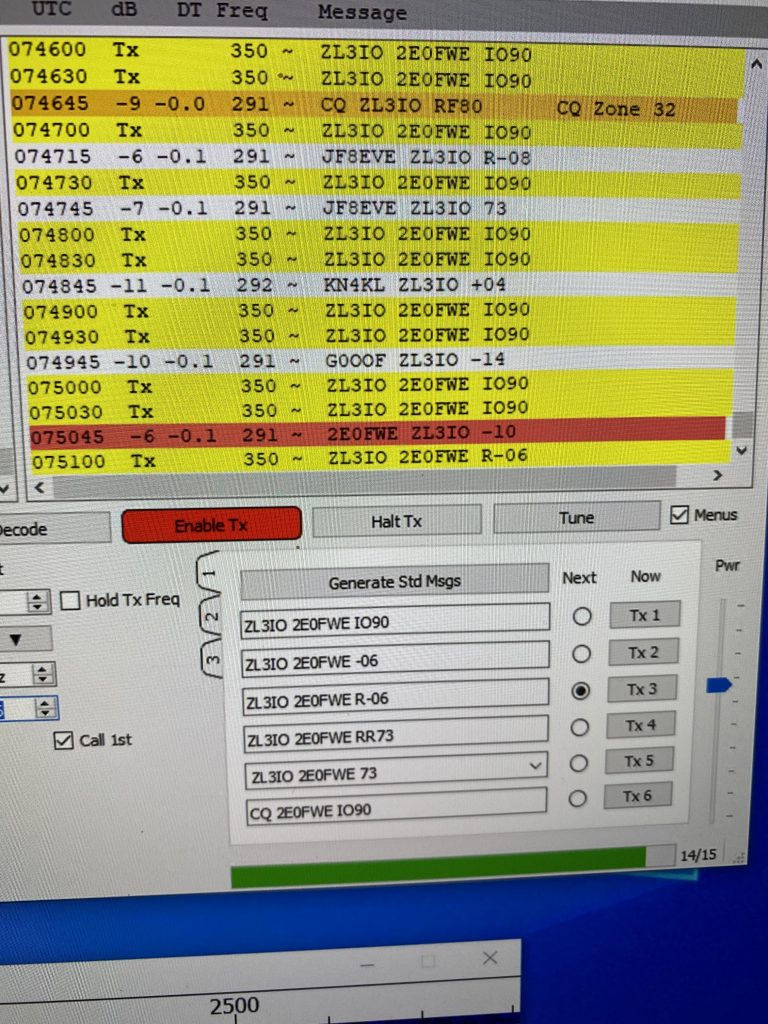
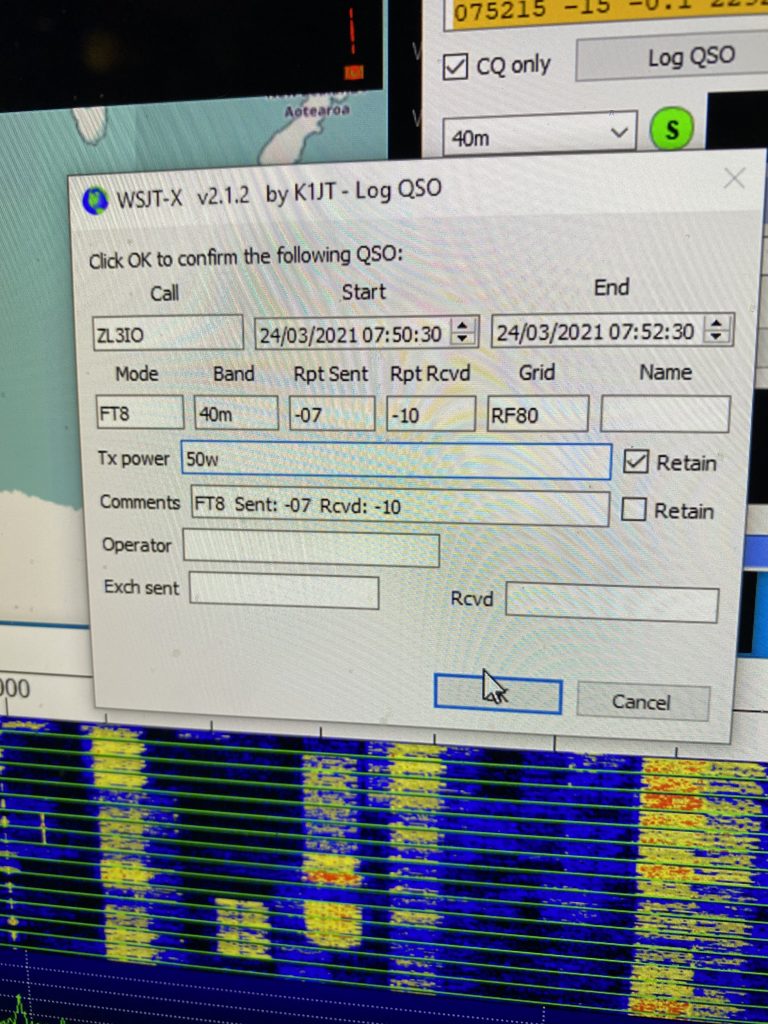
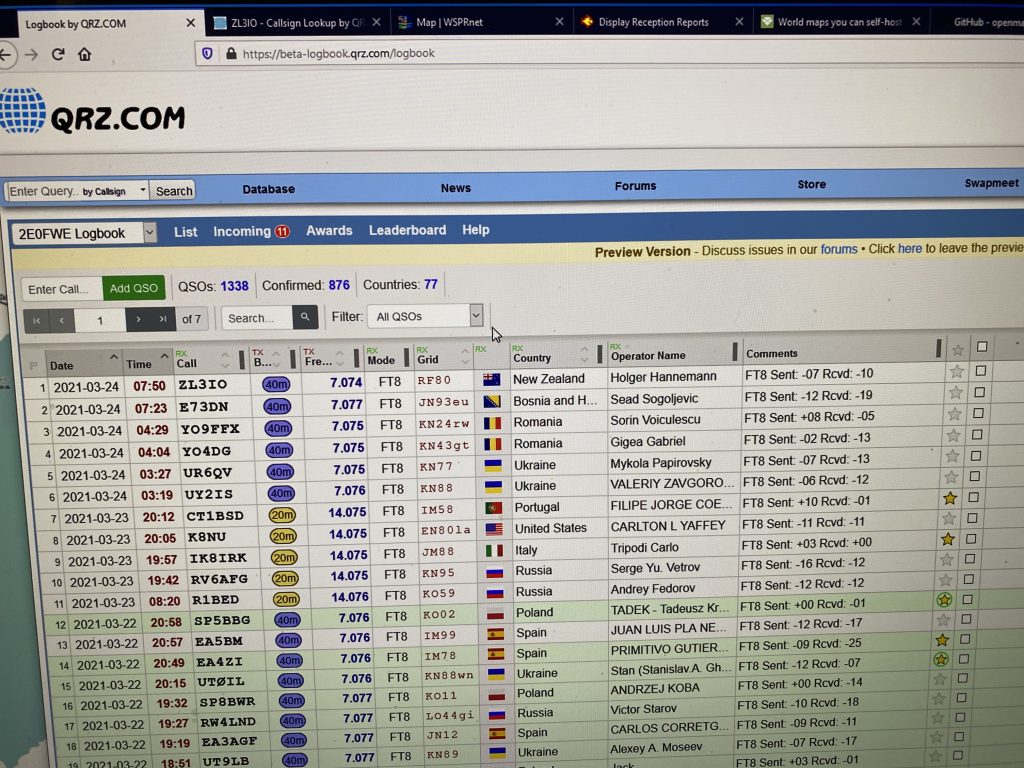
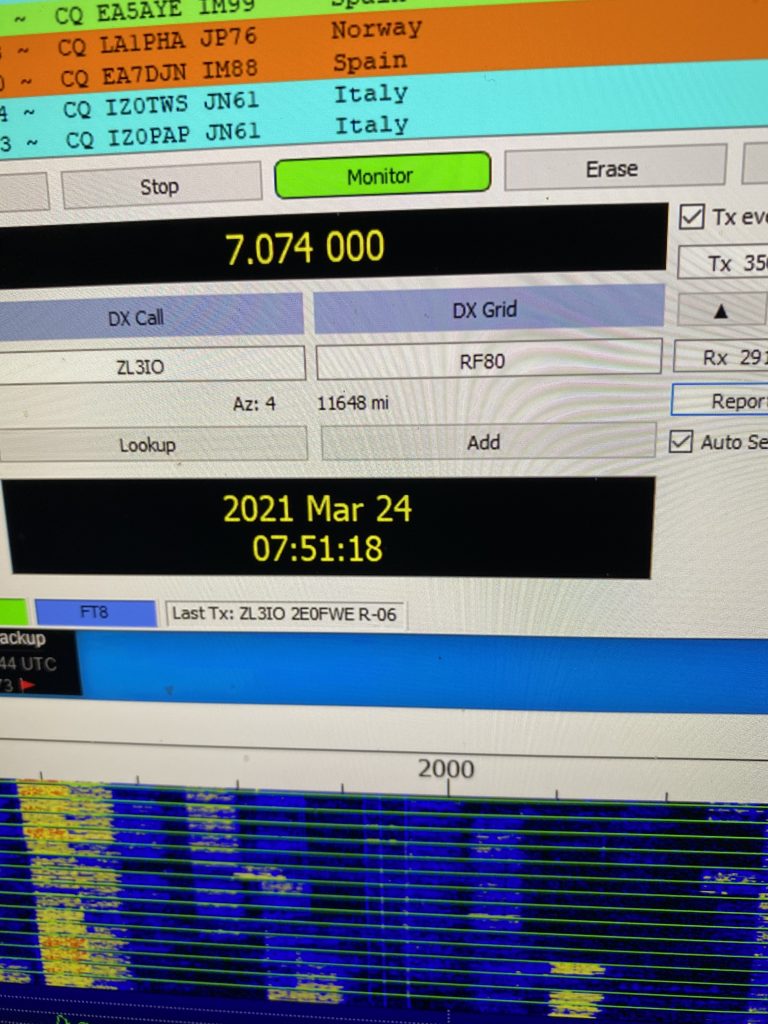
Had a great start to the day by having an FT8 QSO with ZL3IO – amazed that even without all the radials down on the Hustler, I’ve managed to reach New Zeeland.
First contact
And there we go !
Huzzah !
Now thats DX !
ZL3IO Contact
I checked to see if the QSO had been logged on QRZ, where I could see that I’m now able to use the QSO’s from my other callsign (M7ALU) which already had Australia in it ! A quick application and sure enough I have received the Contienants of World award !
now 4 awards
Huzzah 4 awards !
Fantastic start to the day and looking forward to increasing the Hustlers performance – have to say with only 3 days of activity, I’m really impressed with it.
Its been a busy weekend at the QTH, but all good !
sweety showing off
his handy paw work
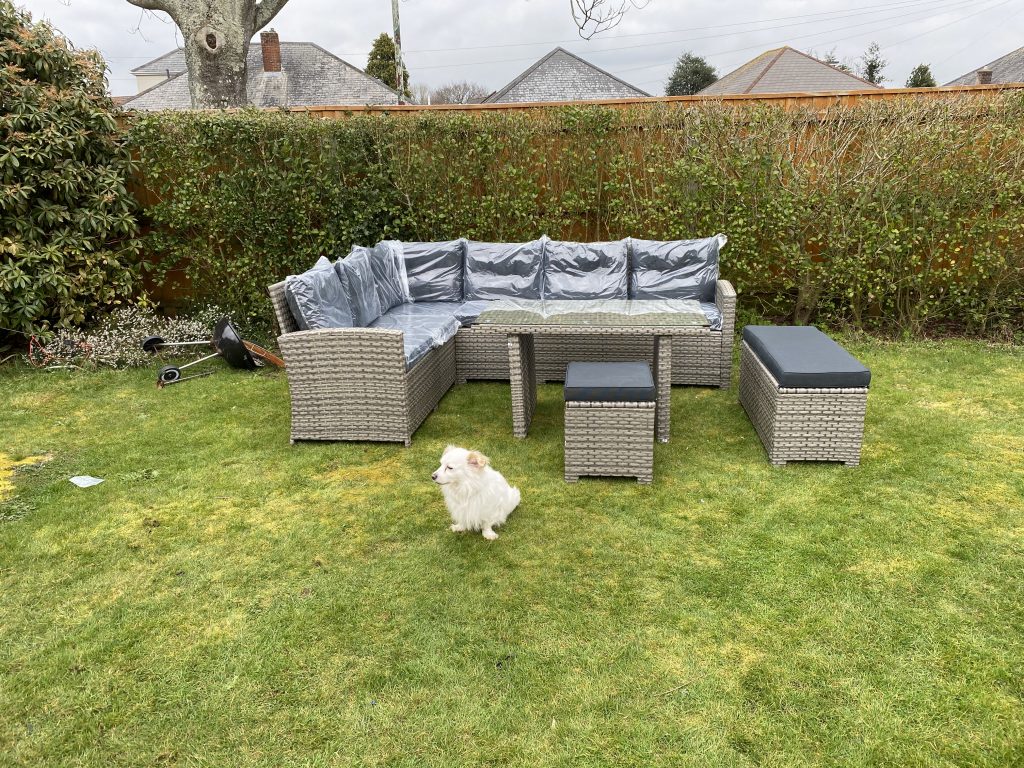
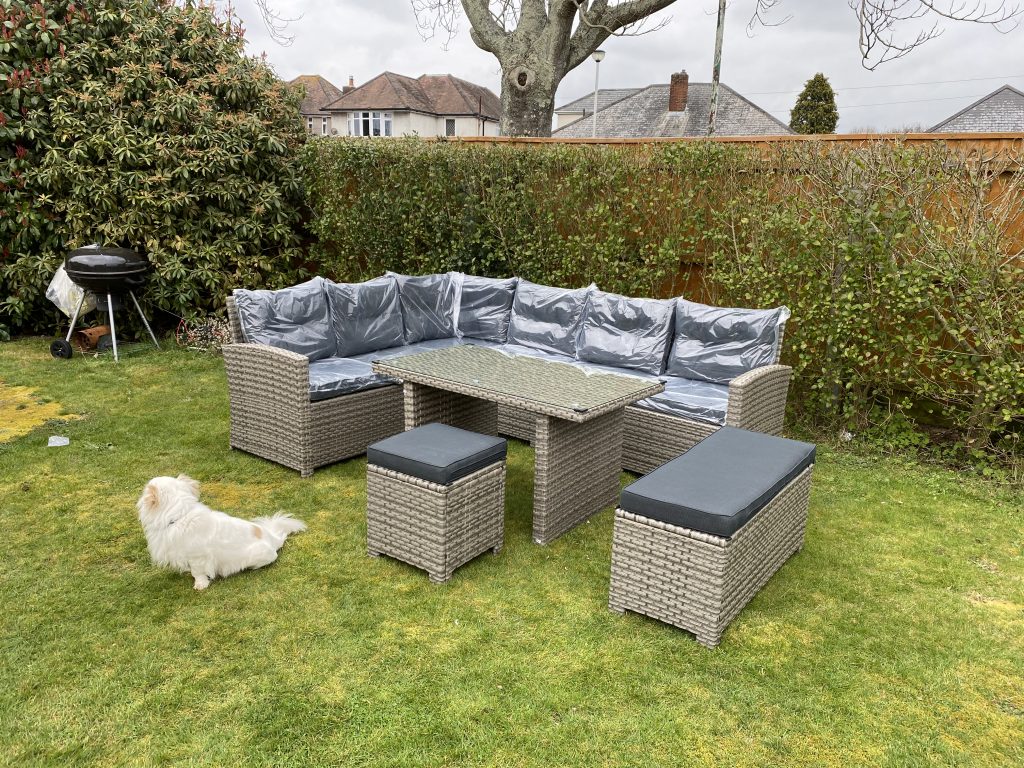
Garden Furniture ready for Easter
In hope of good weather over Easter and the lifting of groups mixing, i’ve got some comfy garden furniture. It took the best part of 6 hours to build, but am looking forward to trying it out. I might even try my IC-705 outside before heading out with it, as its not had alot of use outside the shack !
Having completed the furniture, the next day I continued my work with the Hustler 6BTV.
construction in progress
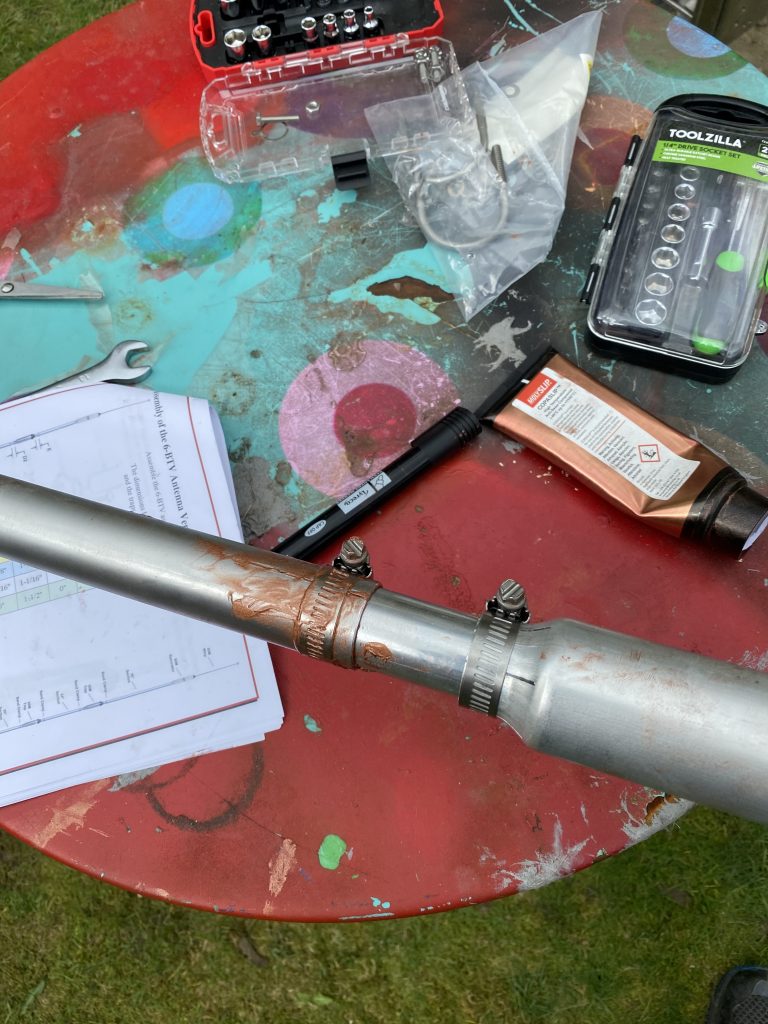
I used the DX Engineering documentation on how to build the hustler. It was really clear and easy to follow, with practical tips on construction methods. The detail and clarity on each step was really good. I got all the sections first connected together then looked at how to attach the SO-239. Whilst fiddly due to the small parts, it was easy enough to get it put on.
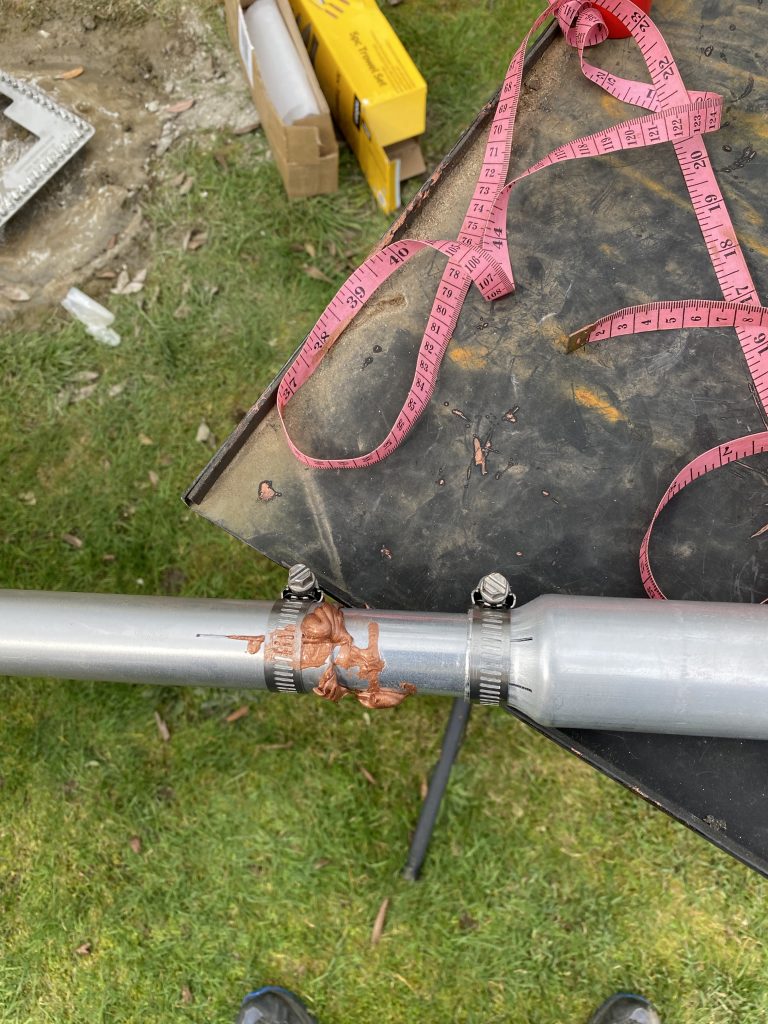
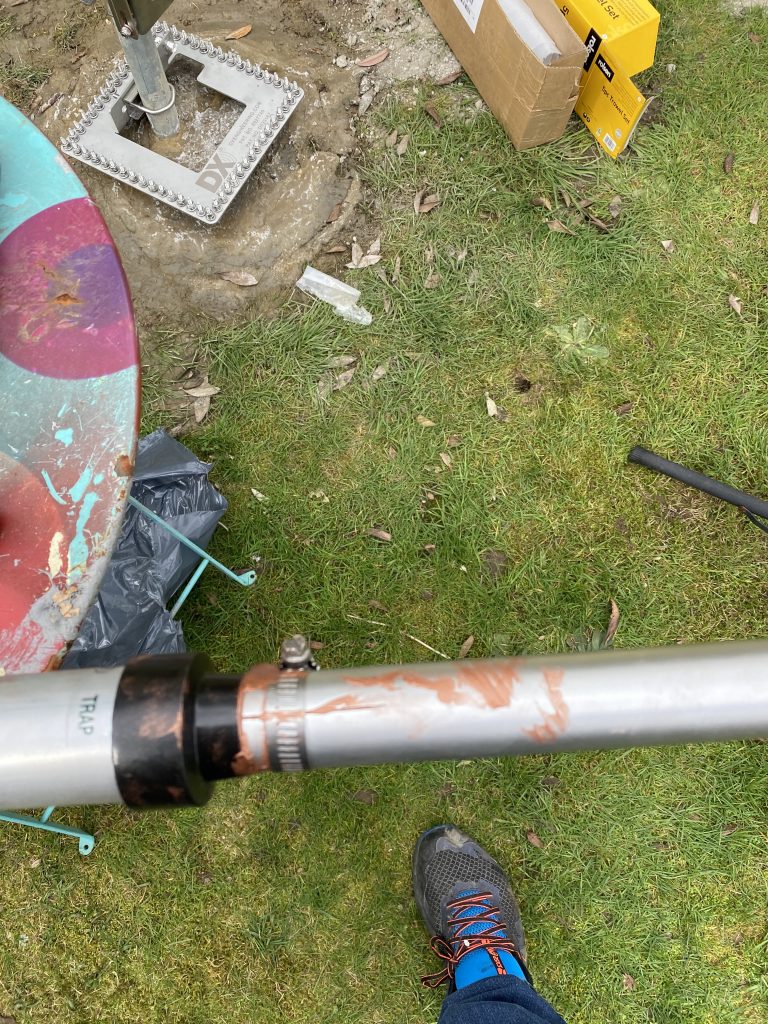
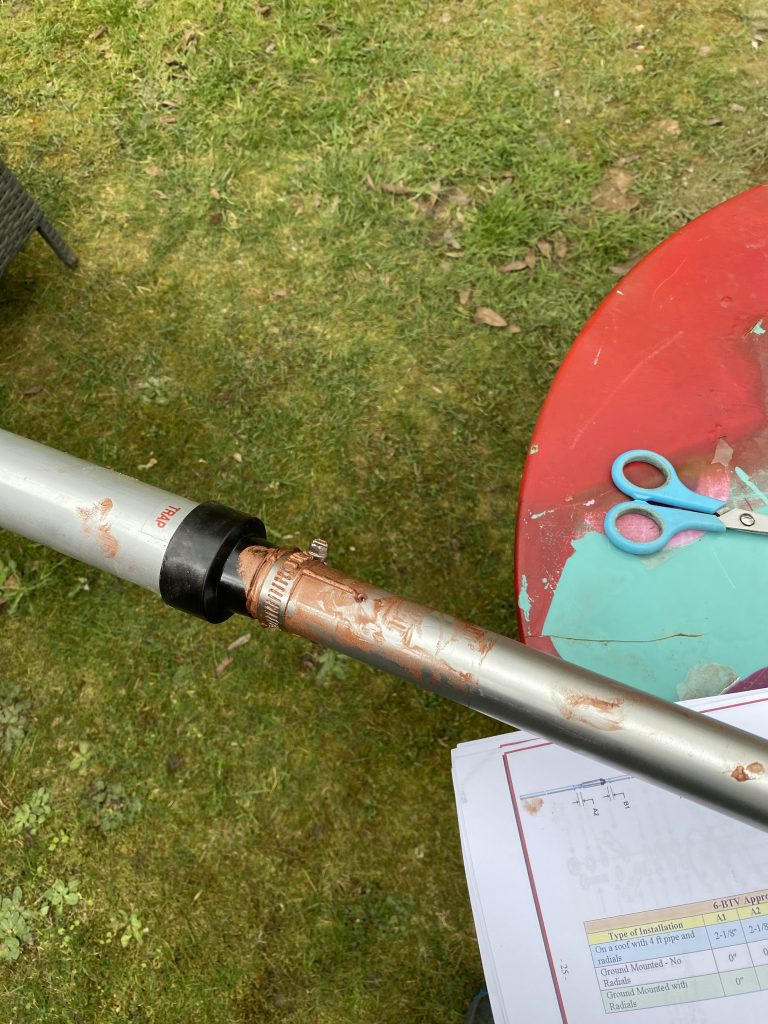
Plenty of copper grease !
The forums (eham) strongly recommended usign plenty of copper grease for making good connnections and when the antenna has to be moved. As the pictures show, i wasnt shy about how much to use and it did make moving the linear loaders and posts easier.
I followed the guide and put the distances accordingly, it was all really straightforward.
initial set of radials
not bad results
MultiSWR is awesome
good dips at the relevant bands
Radials and initial SWR readings
Having done alot of the work for the radial plate before hand, i set about reusing the radials I had from my previous antennas, just to get me started. I was not to be disapointed with the results !
Hustler initial install
Initial Installation
Having only put down roughly 20 radials to start with I was happy with the SWR Results. I’ve not got 80 tuned yet, but will spend some time for that when time allows. My first job is to get as many radials down as space/connectivity will alllow me, i can then tune the bands to the resonant frequencys I want
I’ve already made contacts on 40 and 20 meters, reaching the US and all across Europe on FT8, reception on ‘Phone’ end of the bands is equally good.
Overall this is becoming an excellent antenna, and hindsight is 20/20 vision, probably be one I would choose to start with, its construction and build quality is excellent and has the ability to tilt over in bad weather. There is still plenty of work to go, but for such few hours, it really has stood out as an excellent antenna. I’m sure as I add more radials and complete the coax installation/fine tuning will only go on to be an antenna i use for a very long time.
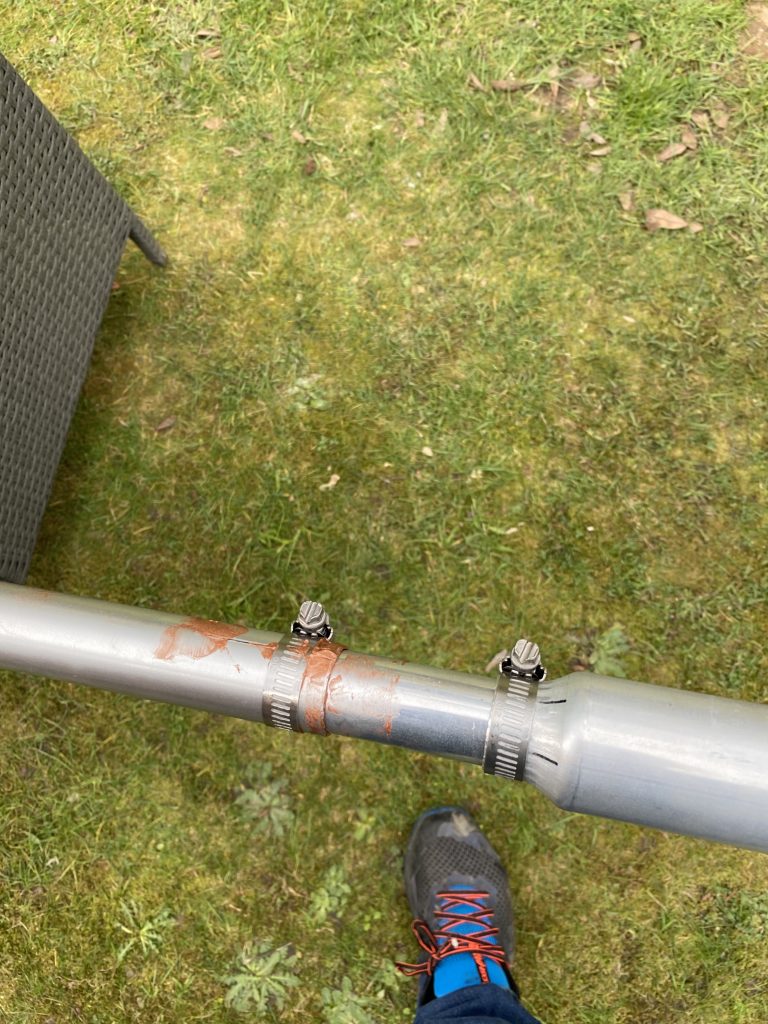
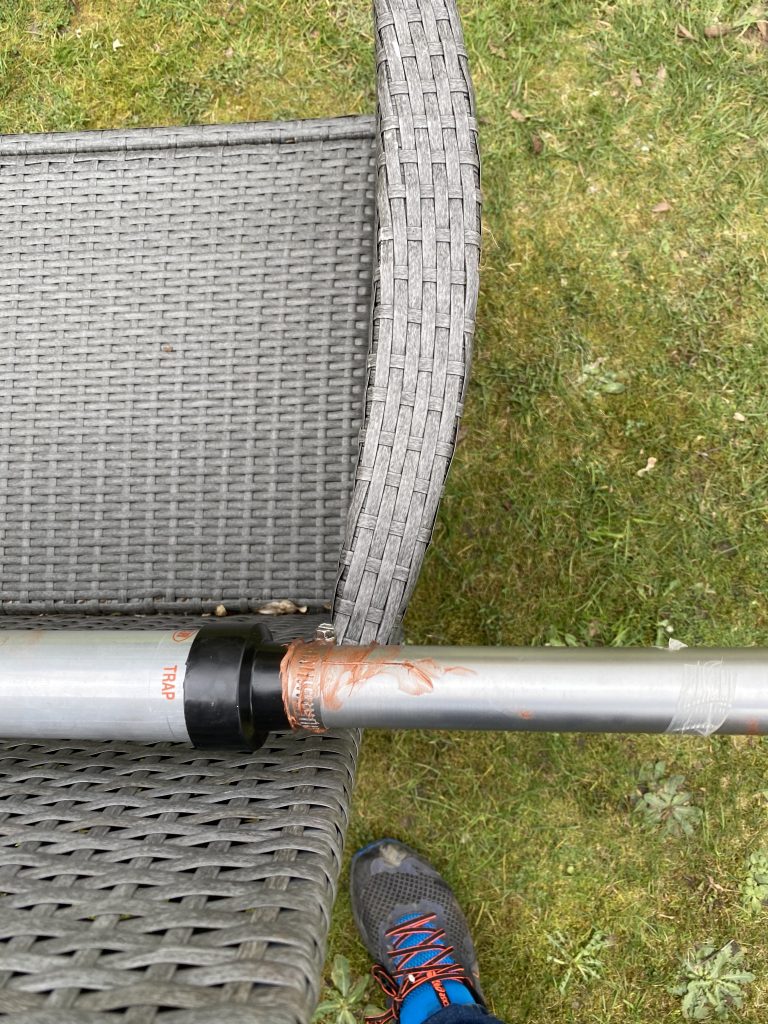
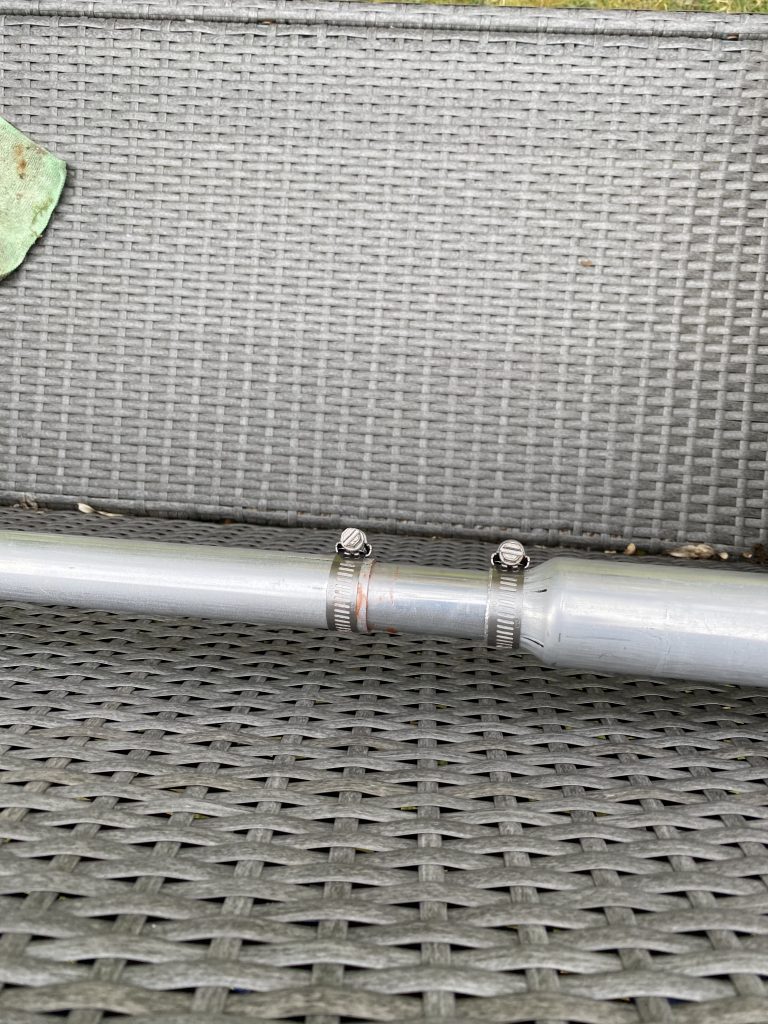
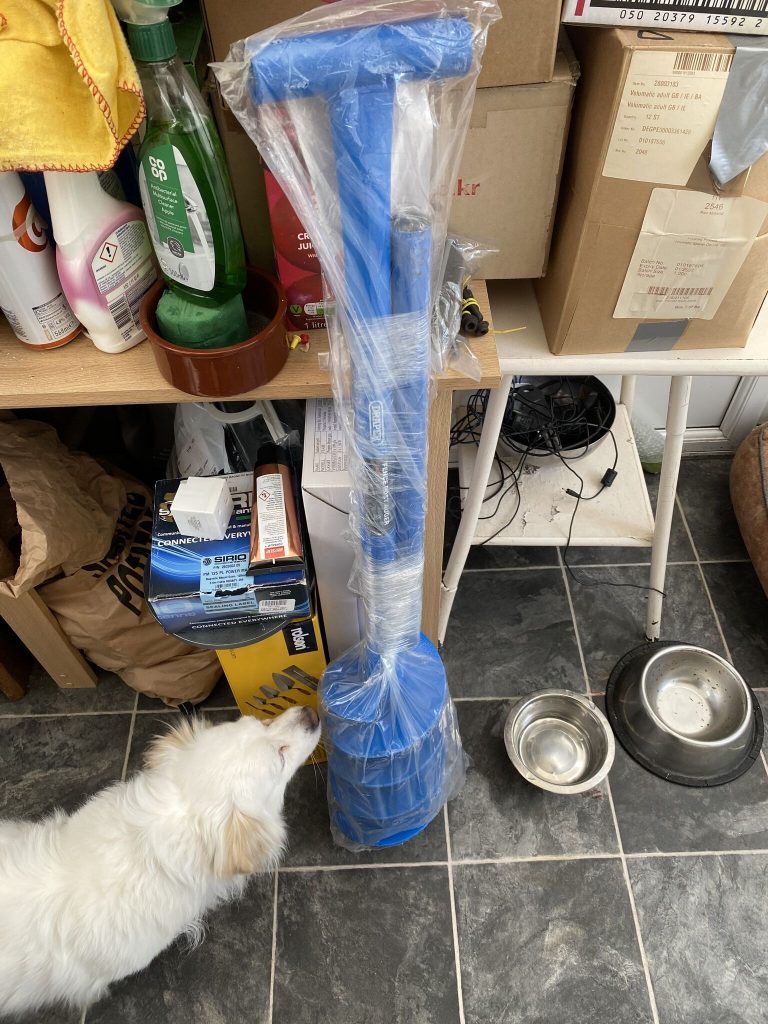
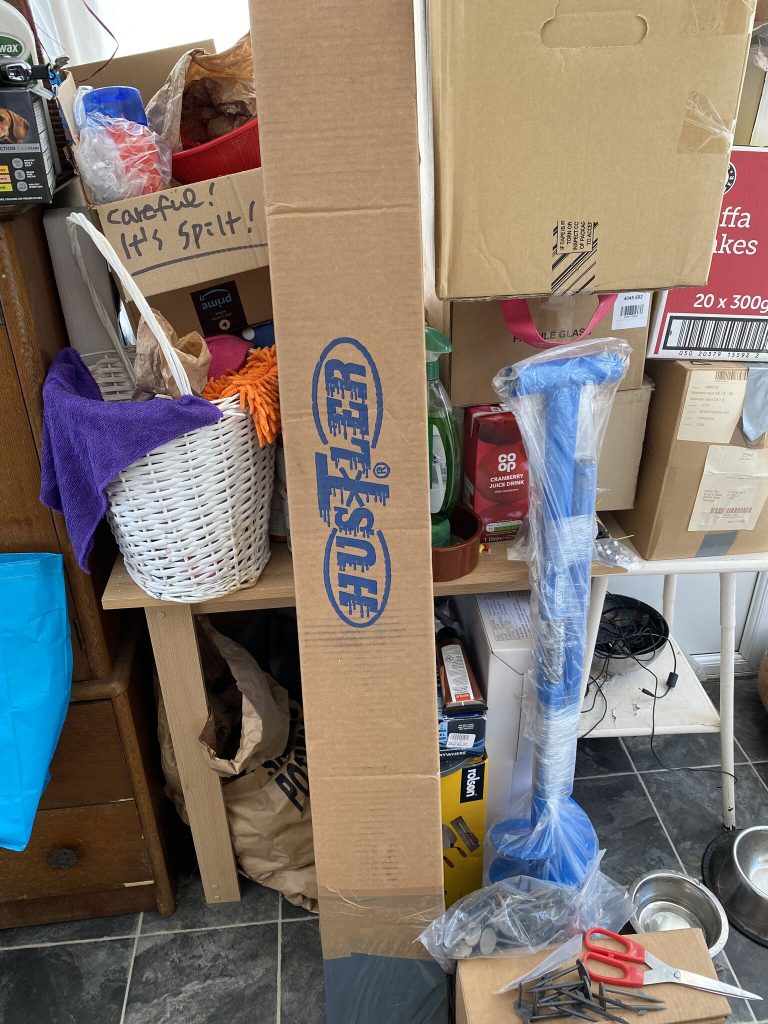
So having looked at reviews for a multi band vertical, the Hustler 6BTV looked the right model for me. The hustler came from Radio World, and the accessories from ML&S, as they didn’t stock the 6BTV at this time. Needless to say both arrived very promptly.
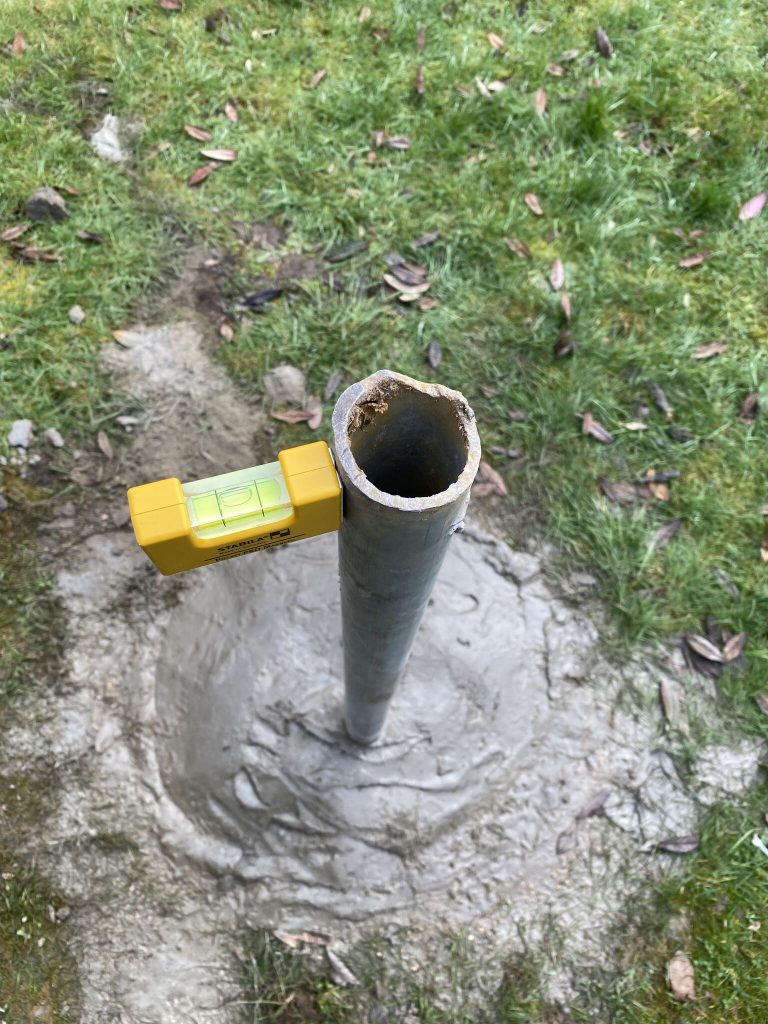
I dug a hole to recommended depths and sunk a decent bit of scaffold pole I had into it. Having never done anything like this before, i was happy with the outcome in that the pipe came out level and the concrete set well. At the moment, it looks like what it is, a post in th eground, but it will look much nicer once the installation is complete.
dig it
6tbv in the box
new toys
It should be noted the reason to try out a new antenna is that the tilt-base on the Nebula had a defect and would require a new bolt and drilling the base again. I also wanted something that was easier to take up and down as even with the tilt base the Nebula is quite a weight, and the guy ropes tended to get tangled quite frequently.
nebula tilt base – bent/twisted M10 bolt
It has set a very high standard in band coverage and reach, so it will be interesting to do a comparison on the same transceiver.
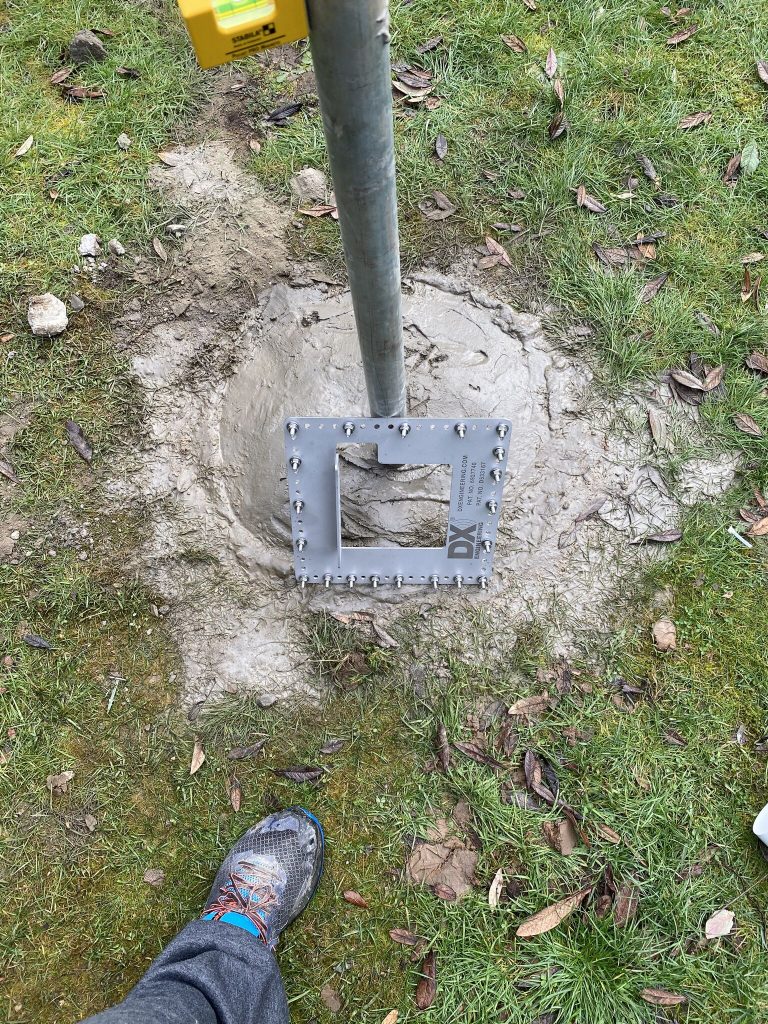
support post level
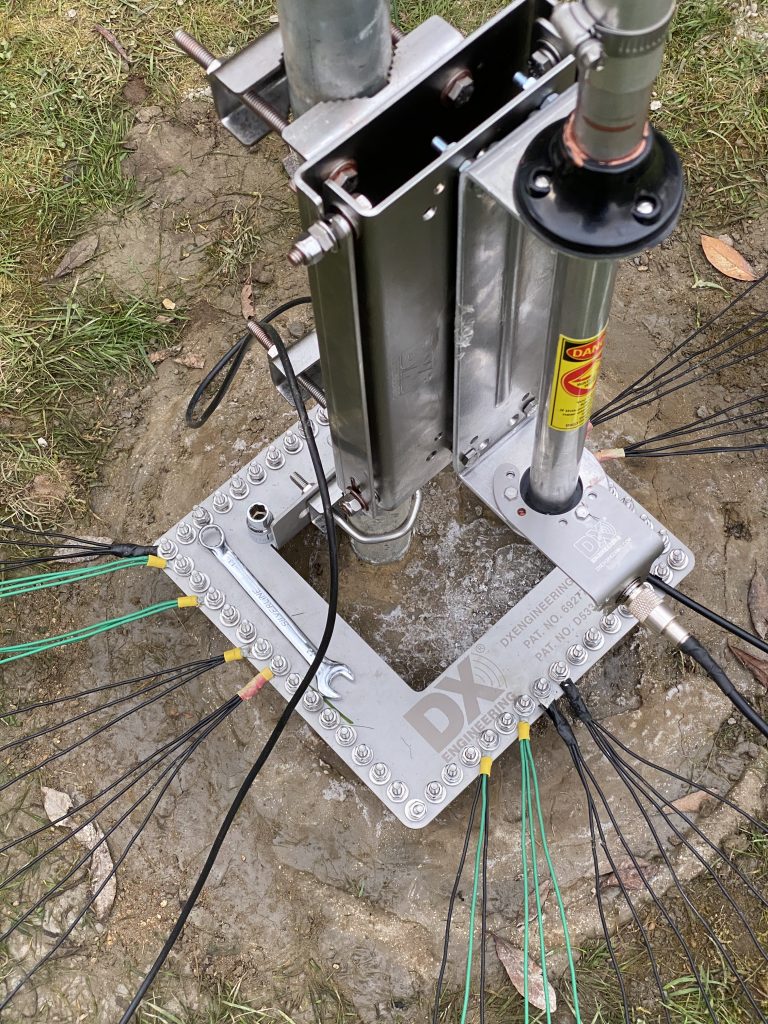
tunnel for coax
radial plate
construction so far
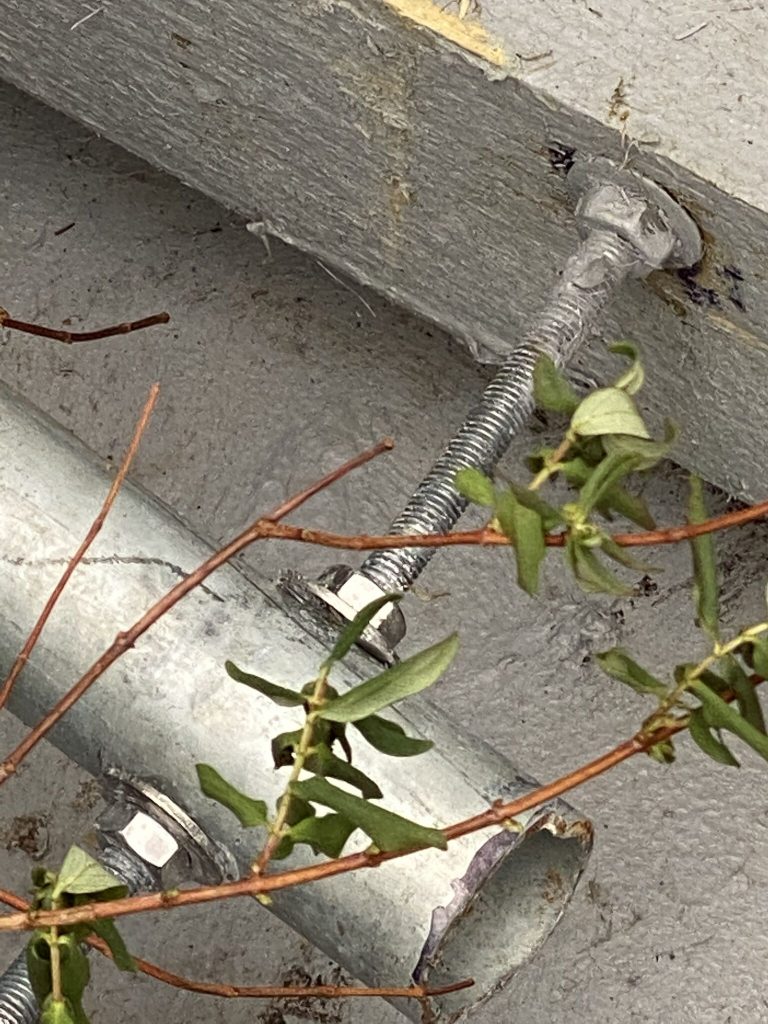
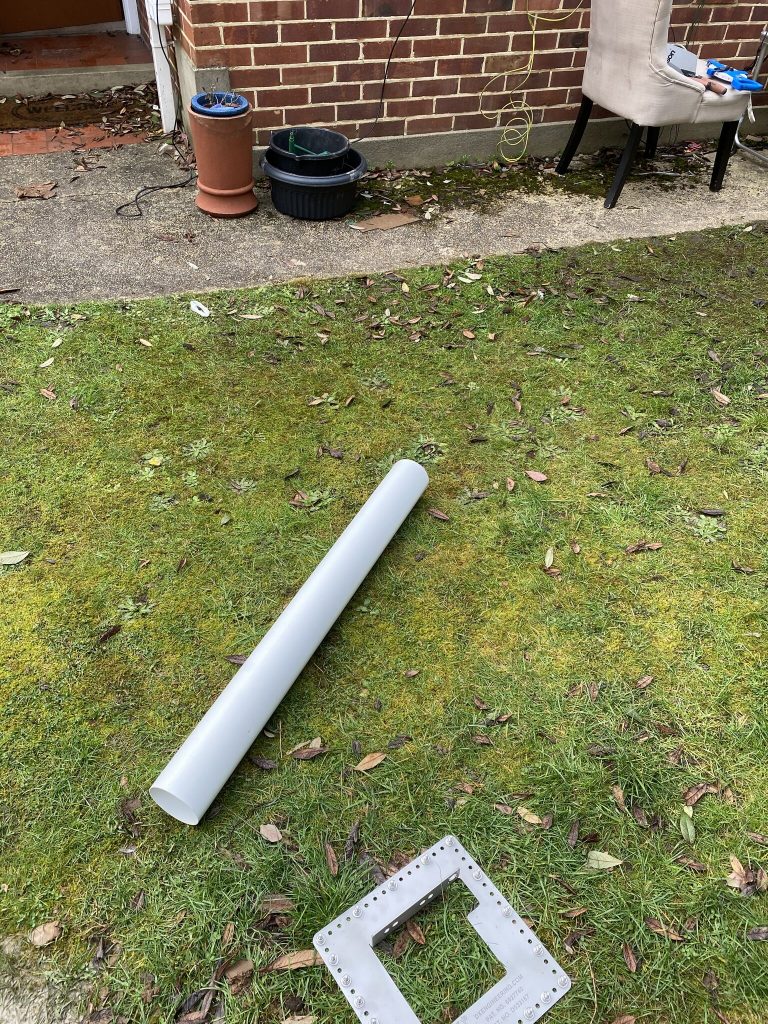
The post to attach the DX Engineering and Tilt base has gone in really well, and very level. I had one section of PVC piping already in the shed, and have ordered one more and some vent-like structures to feed the coax thru under the radials will obviously check the coax for connectivity before burying it !
I’m waiting on some more radial plate bolts, so far it has 20 on there, but i want the full 60, as I’m limited in space in some directions, I want to get as many as I can down in a very radial/spoke fashion as described in the documentation.
So far I’m really encouraged by how well the instal is going and the documentation supplied with the antenna and components is top notch, but the proof will be in the performance of the antenna, which I hope wont be too long in happening !
So with us coming out of winter into Spring (20/3) I really wanted to tidy up. And tidy up everything. My shack had become a really bad ‘mess’ and as an engineer/student/professional this is my ‘small home office’. I’ve had used these Keter Store-It Out Midi Outdoor Plastic Garden Storage Shed around my back garden for storing various things and they have proved really good, in capacity and being waterproof. With an electric screw driver i was able to put it up and thanks to a mild Friday evening, started filling it. Swiftly I had reclaimed my floor and alot of other space in the shack/office 🙂 I then turned my attention to outside the office !
With the bad weather forecast I had already lowered my Nebula, as it look pretty high wind forecasts. I’m pretty sure my mast would of been ok, but I don’t like to take a risk where its not necessary, so the best part of the week I was without HF on my main right (IC7300). The end fed antenna for receiving Weefax was still doing a grand job thou pulling in the images
I took the opportunity to inspect the Nebula and i noticed the main pivot bolt had got seriously bent out of shape, so I took the decision that i would have to rebuild the swivel base with a much larger bolt for the scaffold pole to go thru. I six hours then tidying down the Nebula and al its components. I think for now I wil keep my DX Commanders (I Now have 4) for when I can construct a full phased array with them. I know how good the Nebula is and the classic, so getting a phased array for amazing DX. What I do have now thou is a lovely clear garden, free from antennas apart from my 40m dipole for WSPR and my end fed an NVIS heights for RX.
I have a staggering amount of uni work going on as well as work-work, and I feel that i could get my shack and all my equipment really in tip-top order before mounting another antenna, be it HF, UHF or VHF. Hopefully the weather and longer evenings will mean that I’m not off the air for long (other than WSPR) and soon trying out a new and exciting antenna.
Not sure how many people read this on a regular basis, but needless to say apologies for the absence of updates in recent weeks. I’ve got loads of updates to do, with pictures and videos but my MSc has taken over my life at the moment (outside of work).
Good news one of my modules on Web Technologies i’ve embraced my course and my hobby and am using WSPR data, amongst others, as one of the components of a website I am building.